
Classification of data is always an important factor for any organization to protect their data and to make sure only the right people have the access to the right documents. Couple of years back we went through the Azure Information Protection on this blog through which we can classify the sensitivity of any organization documents and leverage them on the Microsoft 365 Applications. Previously in Microsoft 365 only had the built in retention labels through which only the classification of the documents was possible. During this time in order to apply more protection like auto classification and enforce the policy the Azure information Classic Client and Azure Information Protection was utilized.
Its very important to note at this point that the Azure Information Protection Classic client and the Label Management from the Azure Portal are deprecated from March 31 2021.
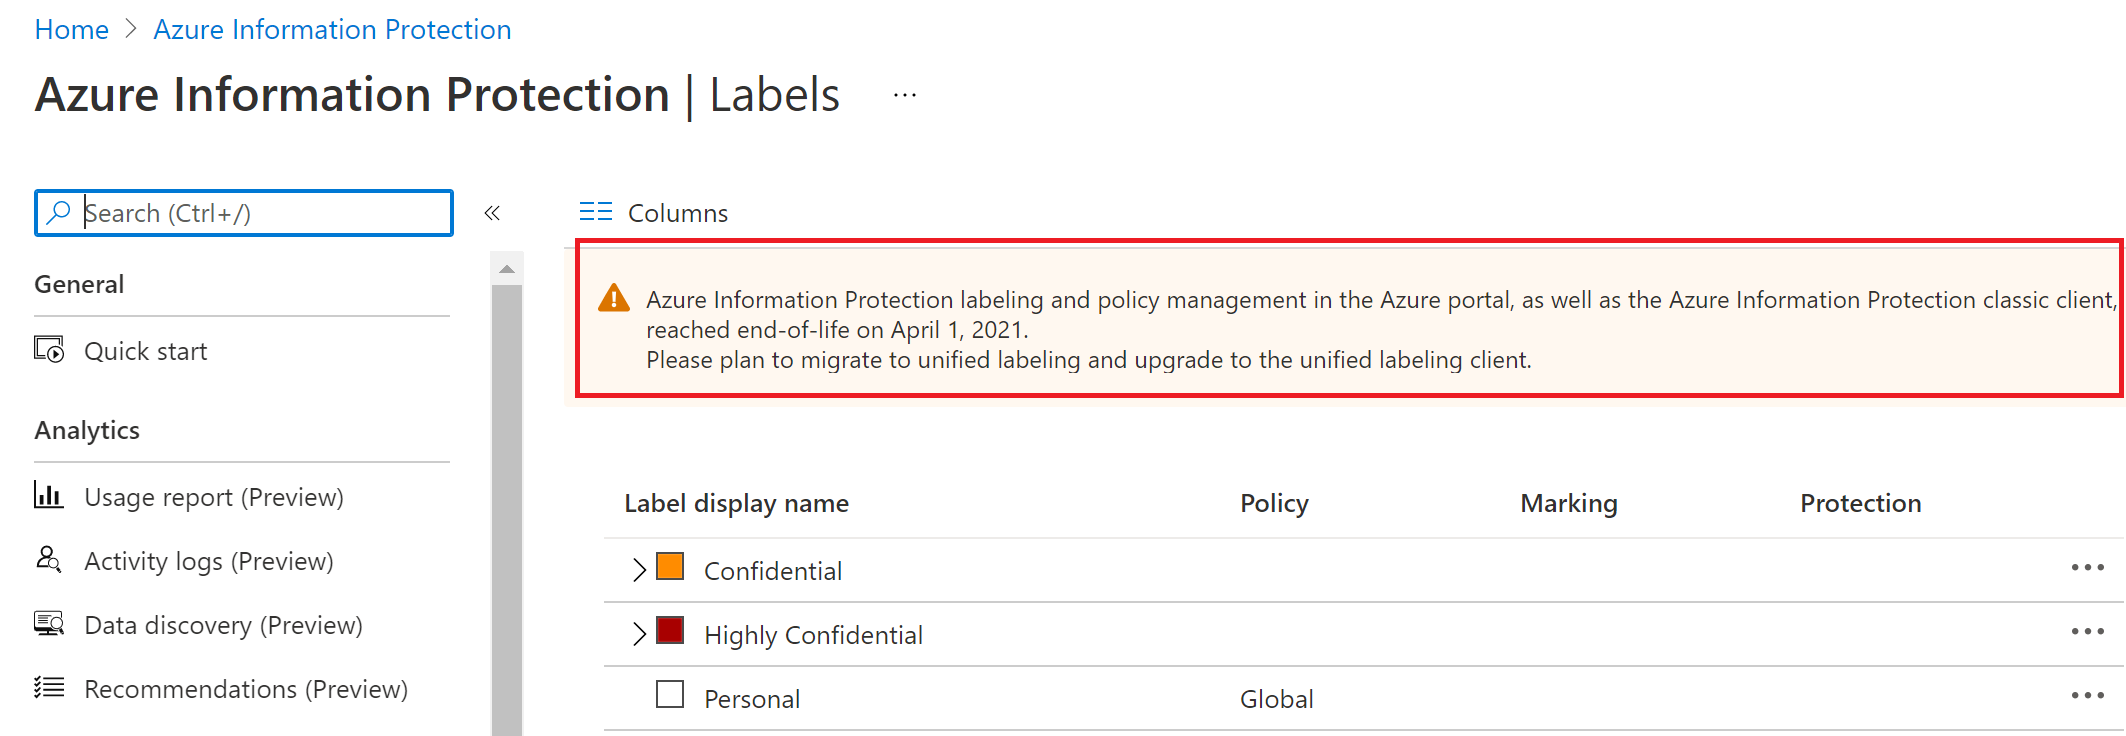
It has been a quite long time that Microsoft supports sensitivity labels in addition to retention labels, so all action can be completed from the same location from Microsoft Information protection in the Compliance Center. Microsoft recommends to utilize to new Unified labeling and upgrade the clients to new unified labeling client.
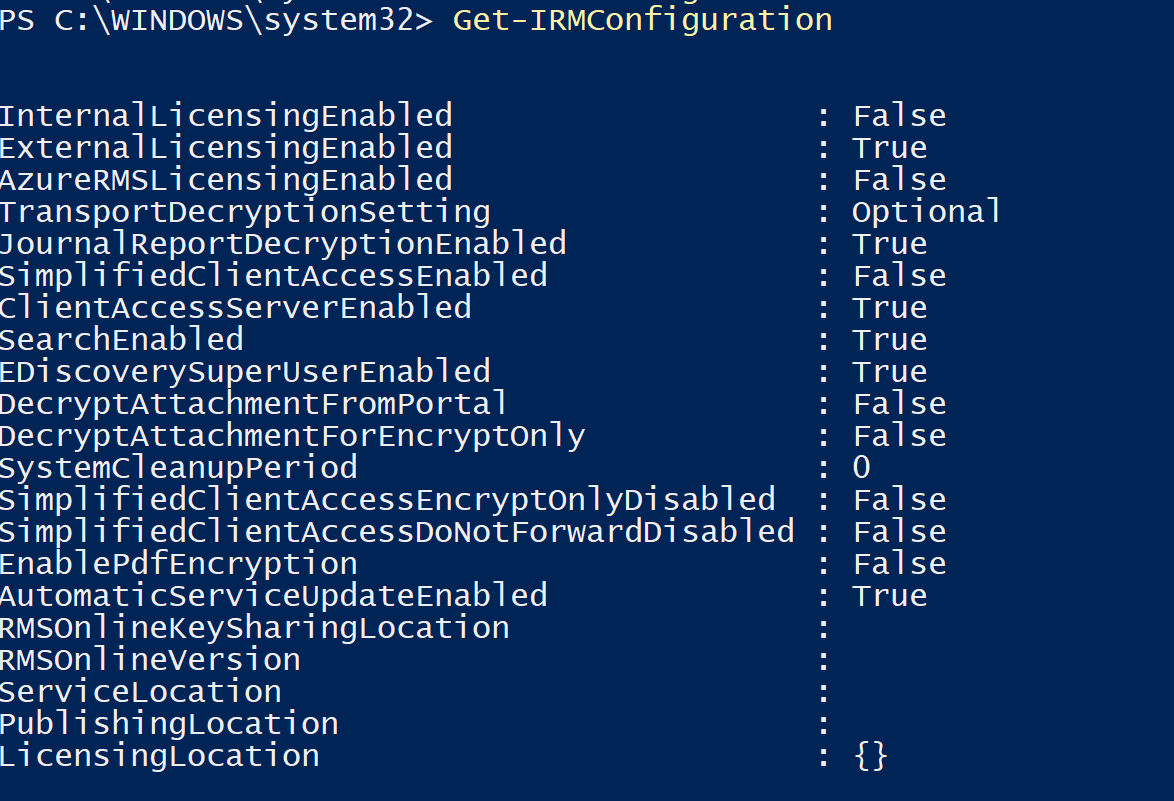
Microsoft activates the Azure Rights Management service for these subscriptions if the tenant is using Exchange Online. The service will be activated for you if AutomaticServiceUpdateEnabled is True in Get-IRMConfiguration.
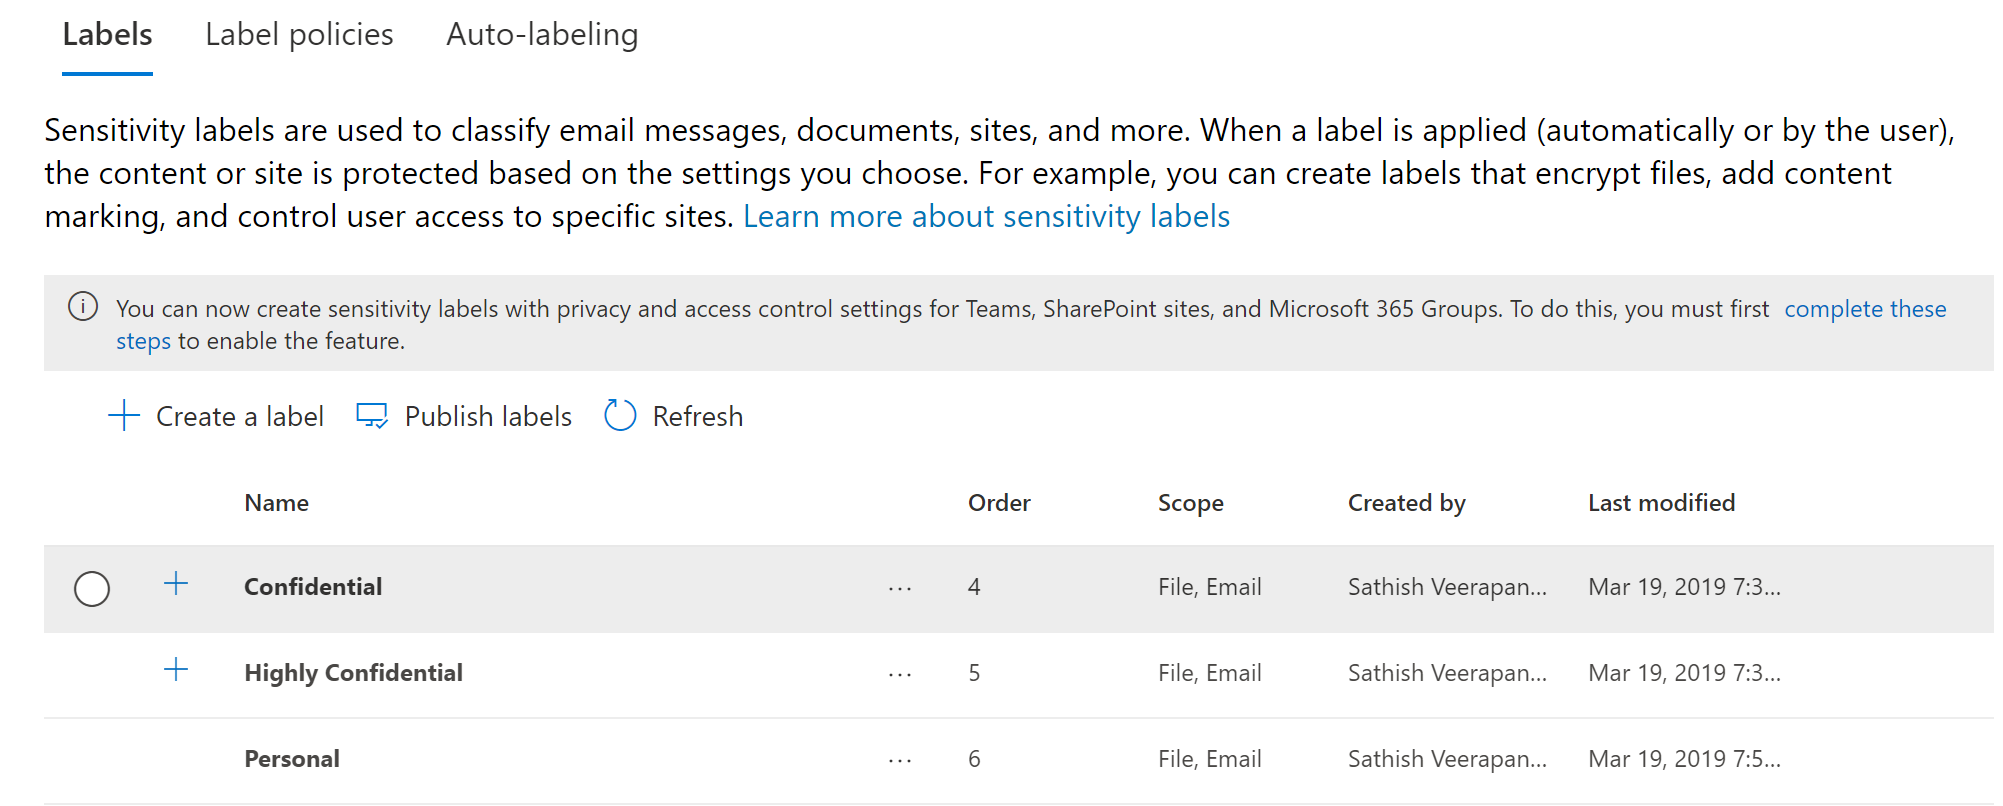
And in our case we can see all the labels that was present in Azure Information Protection is visible over here in the Compliance Center.
Now with MIP we have got the option to restrict access to the content by using the sensitivity labels.
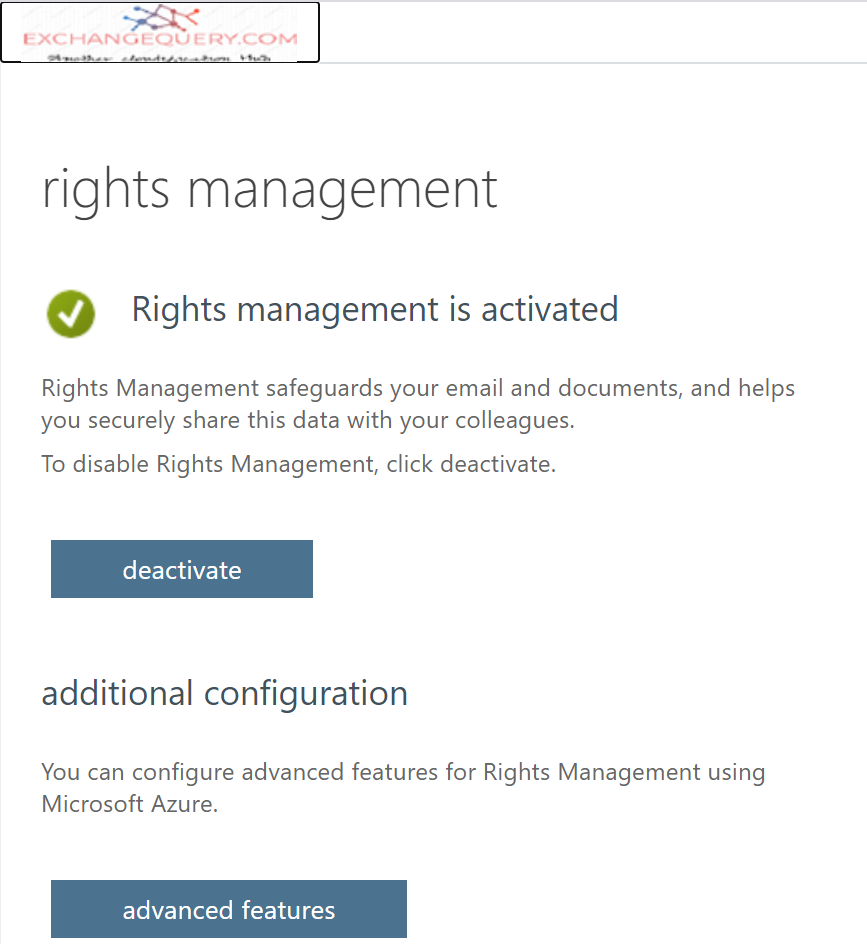
If you are new to the AIP and haven’t activated the Azure Rights Management service below steps needs to be followed as per this blog and activated based on your requirement. This is the first step to get the sensitivity labels working for Microsoft Teams.
Considerably more number of people are working from home remotely for more than a year its very important to note that the data is not present only within the office network anymore. We can utilize the Microsoft Information Protection to apply the sensitivity labels on Microsoft Teams.
We will look into on how to apply the Sensitivity labels to Microsoft Teams on this post. As well all know Office 365 Group is the core component of Microsoft Teams Channels we need to first assign the sensitivity labels to the Microsoft 365 Groups by following this Microsoft Documentation.
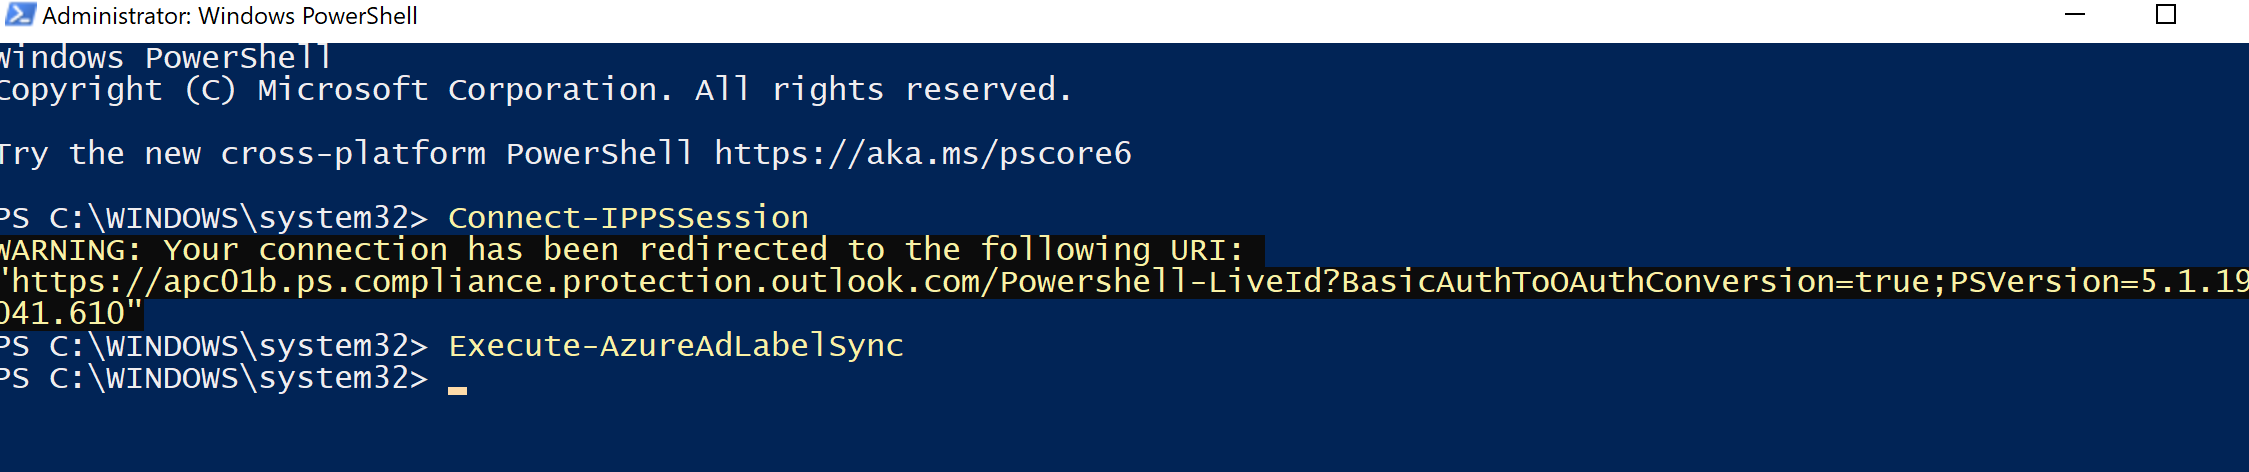
Upon a successful completion we should see EnableMIPLabels value to be set as True.

The next step is to synchronize the sensitivity labels to AzureAD with this documentation
Once the below command is completed the sensitivity labels can be used to apply for the Office 365 Groups.
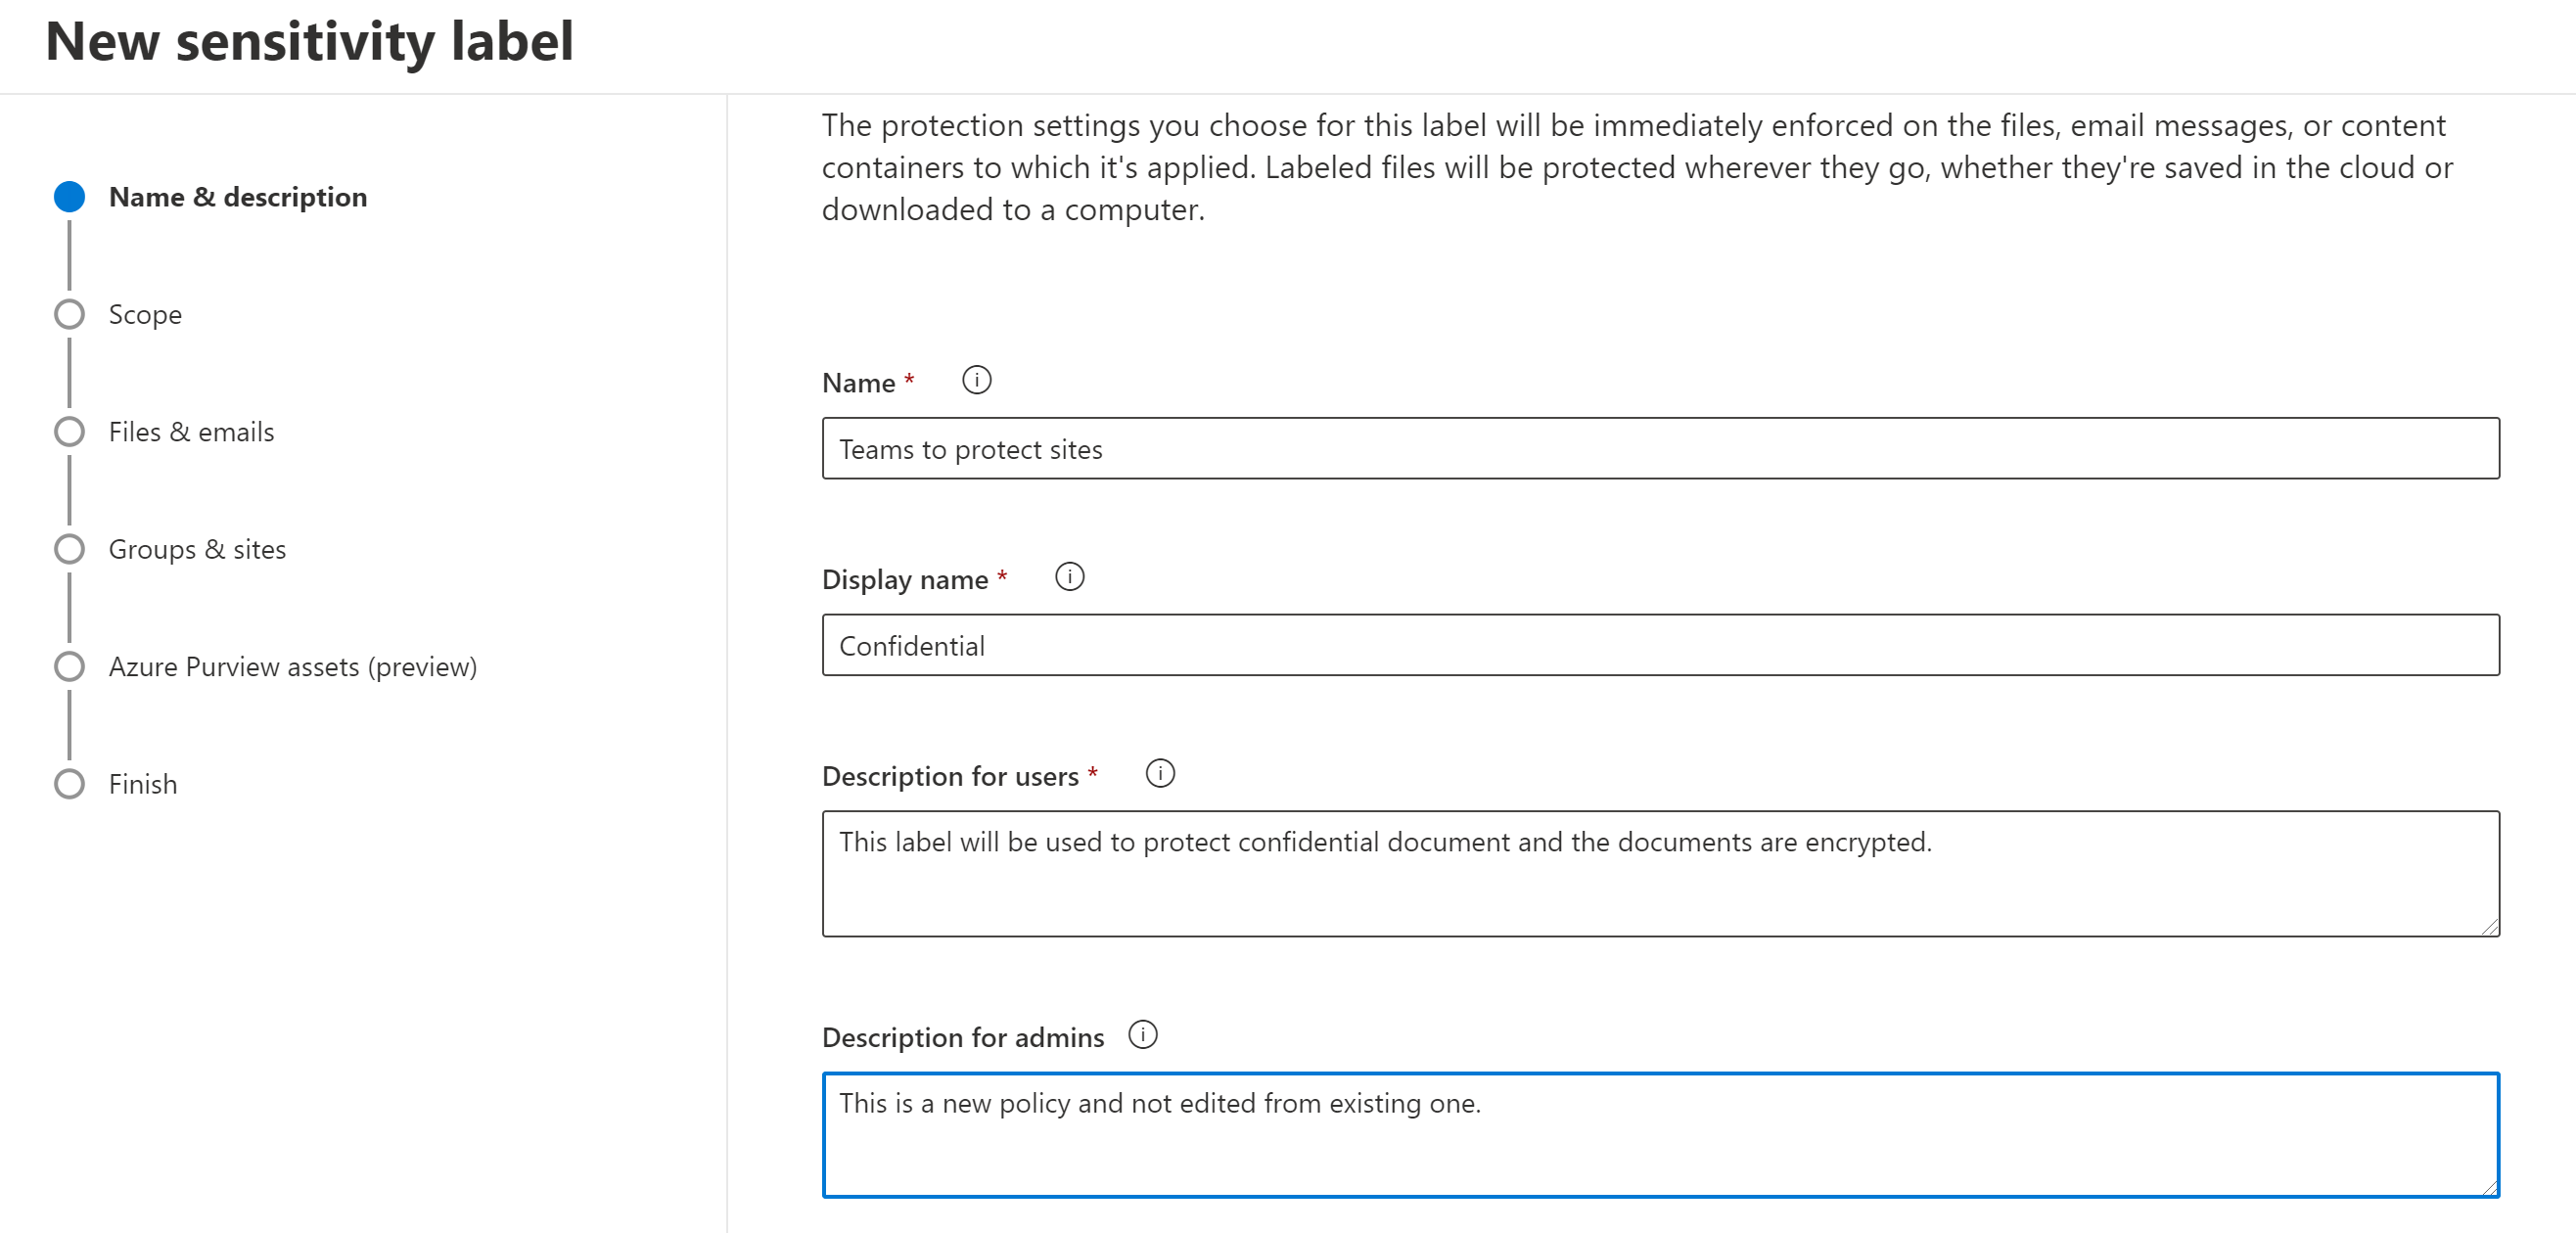
We can login to the Compliance center – In our example we are creating the new sensitivity label.
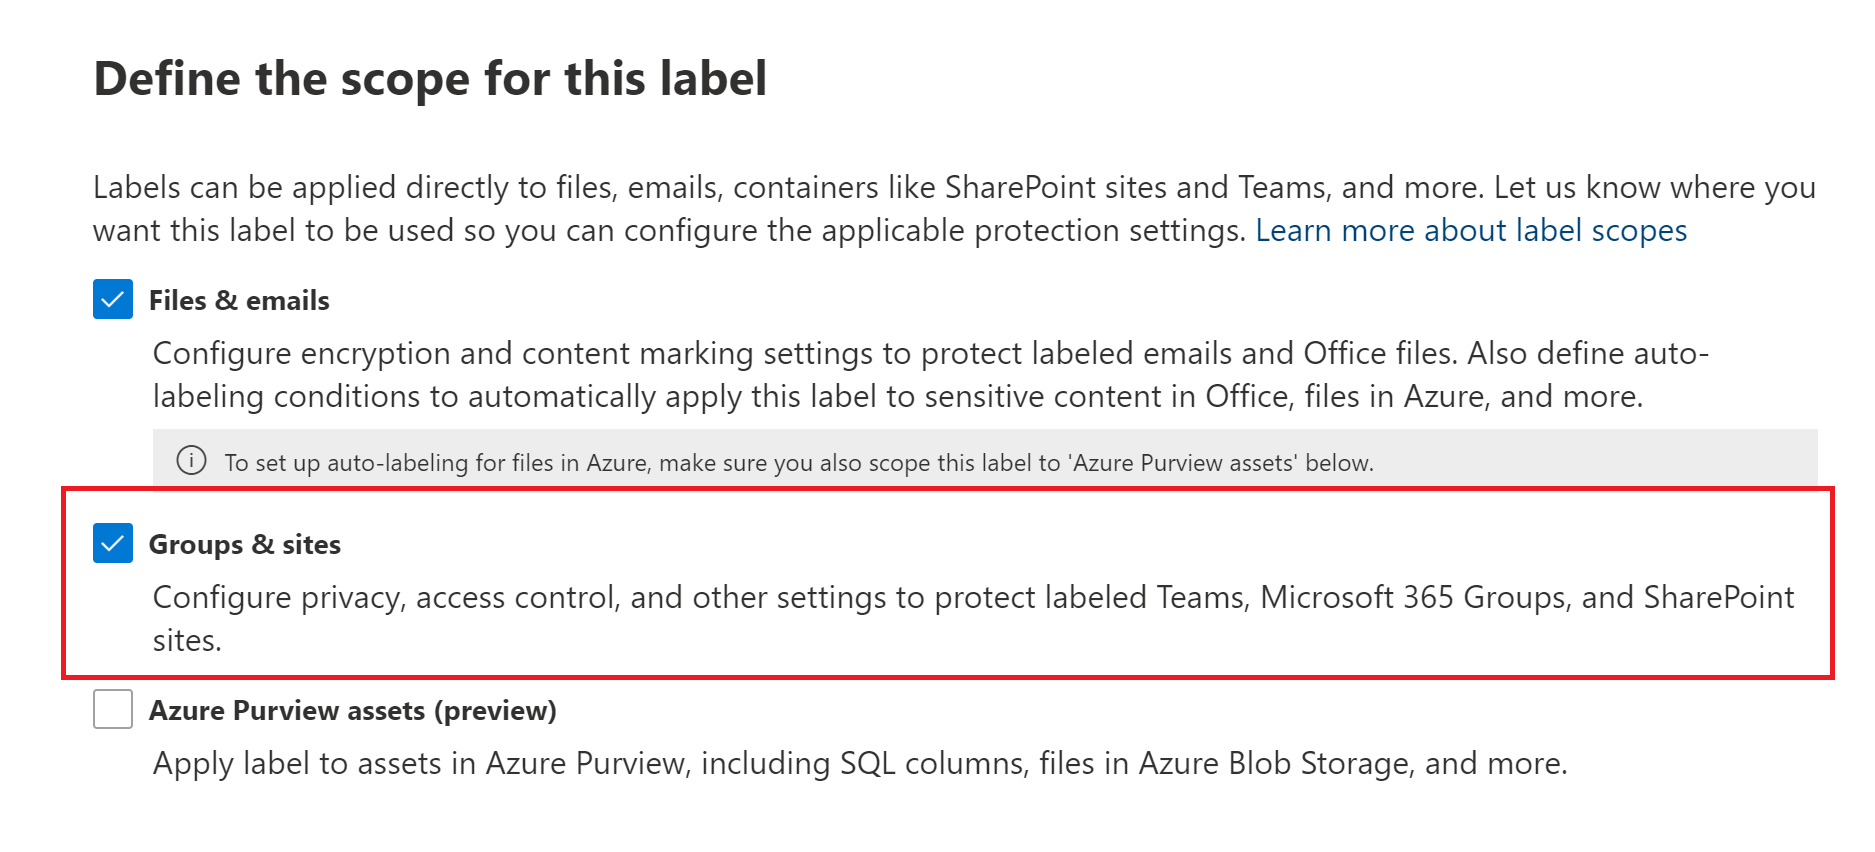
And now we can see the option to apply the sensitivity labels to Groups & Sites. We could also notice that we have option to protect the Teams.
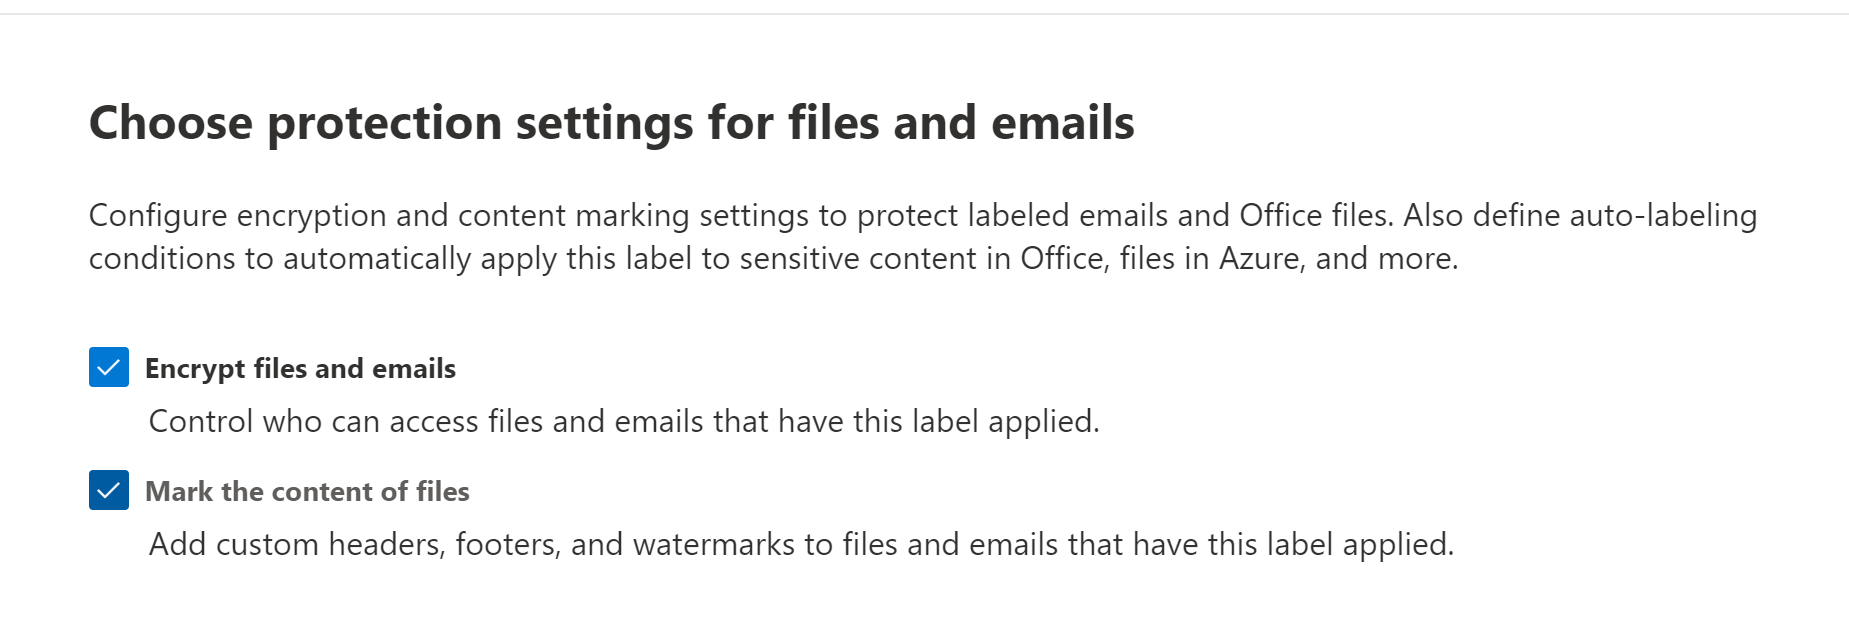
In the next screen we get this information. Its very important to note that this setting is applicable only for labels emails and office files. When we choose the option Groups & Sites these options will be greyed out at this point.
For groups and sites we have the below options. Its important to note that they are applied only on the container level and not inherited to the files stored in them.
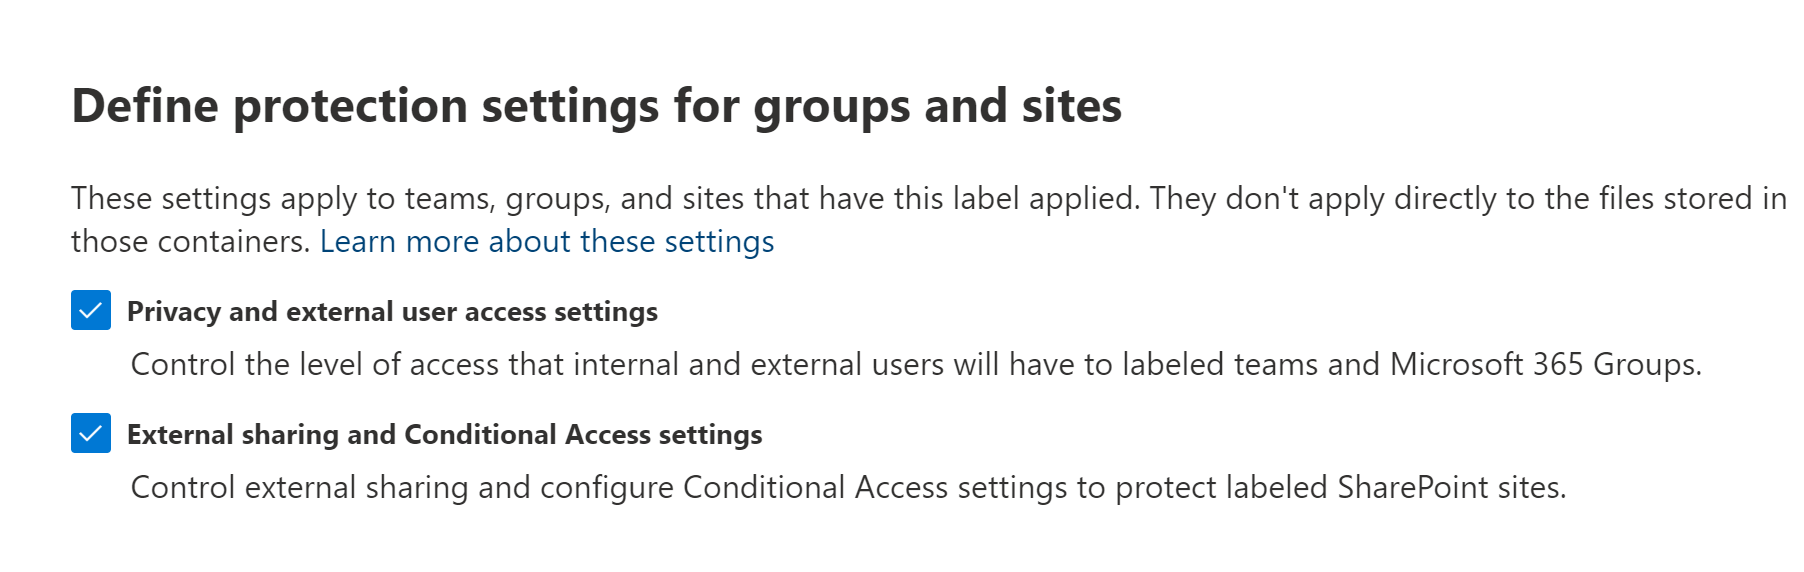
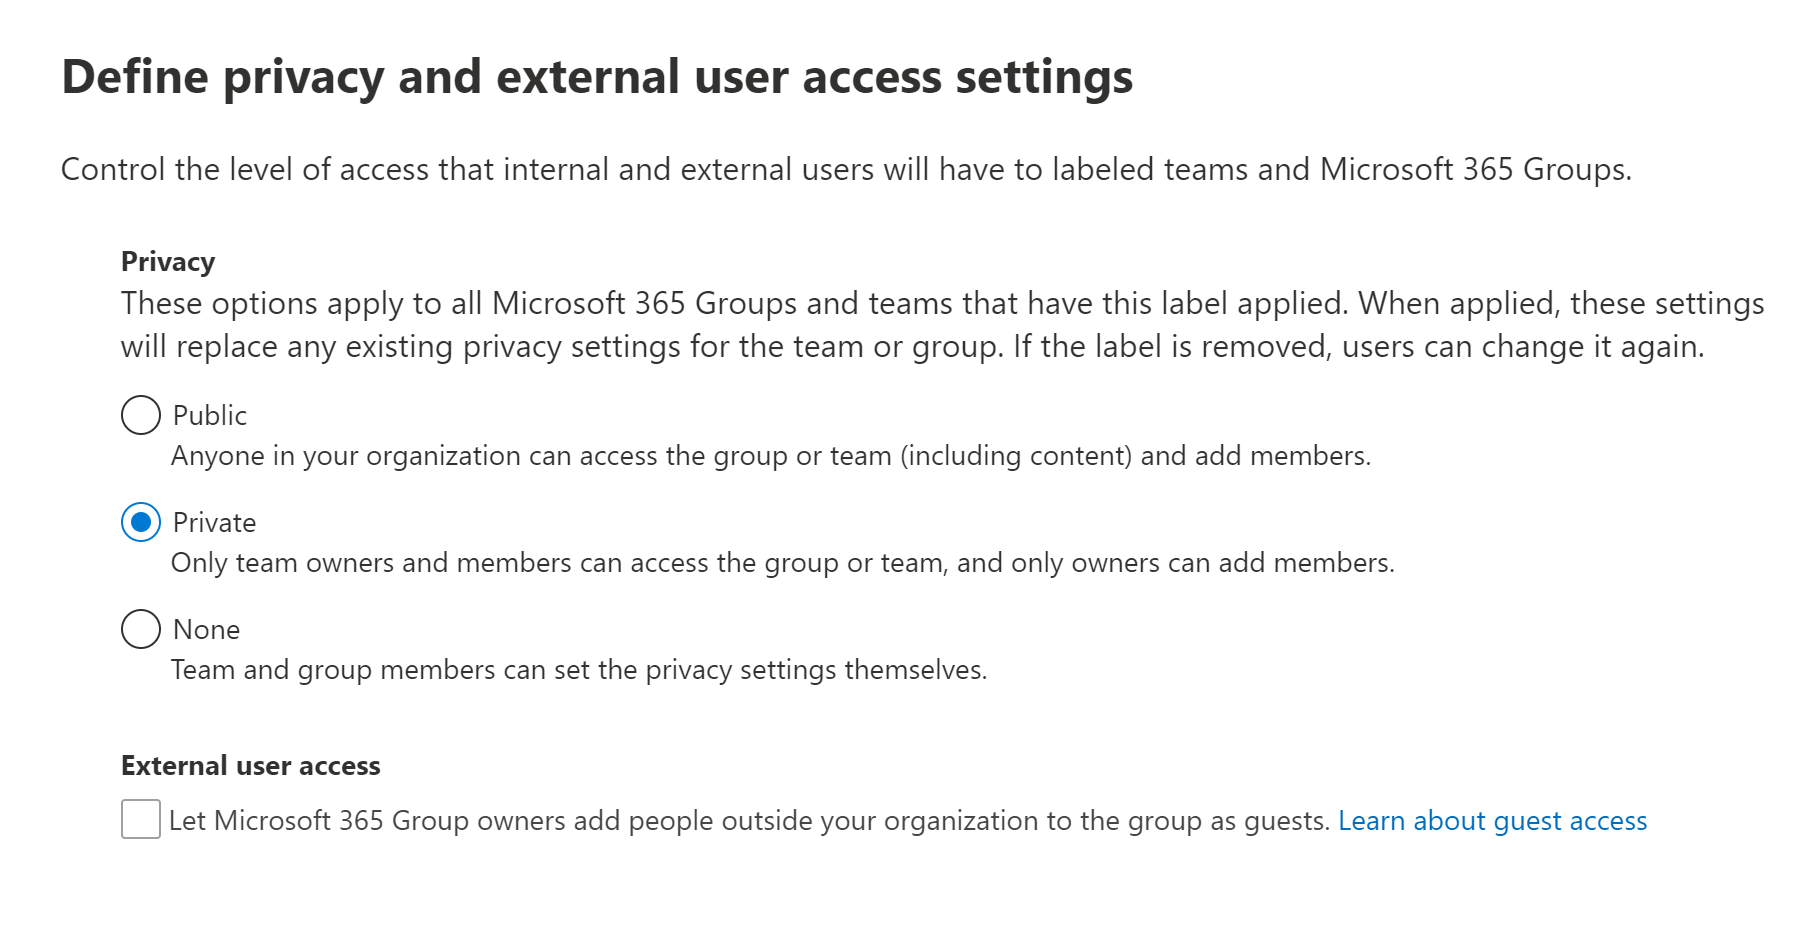
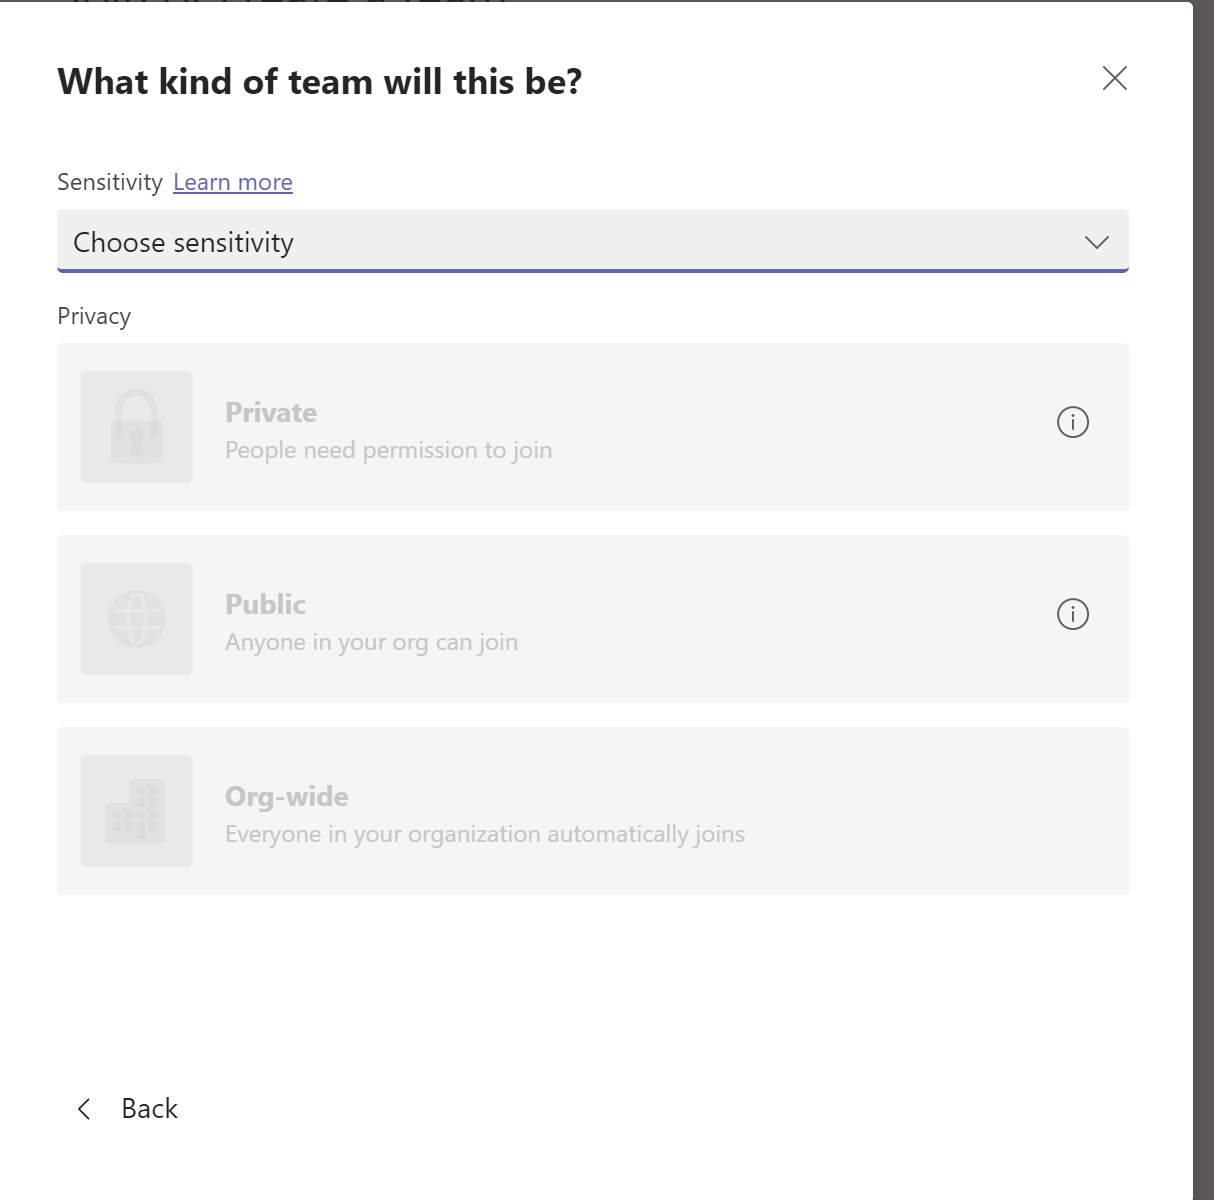
We have these options set privacy level in the labelled Teams.
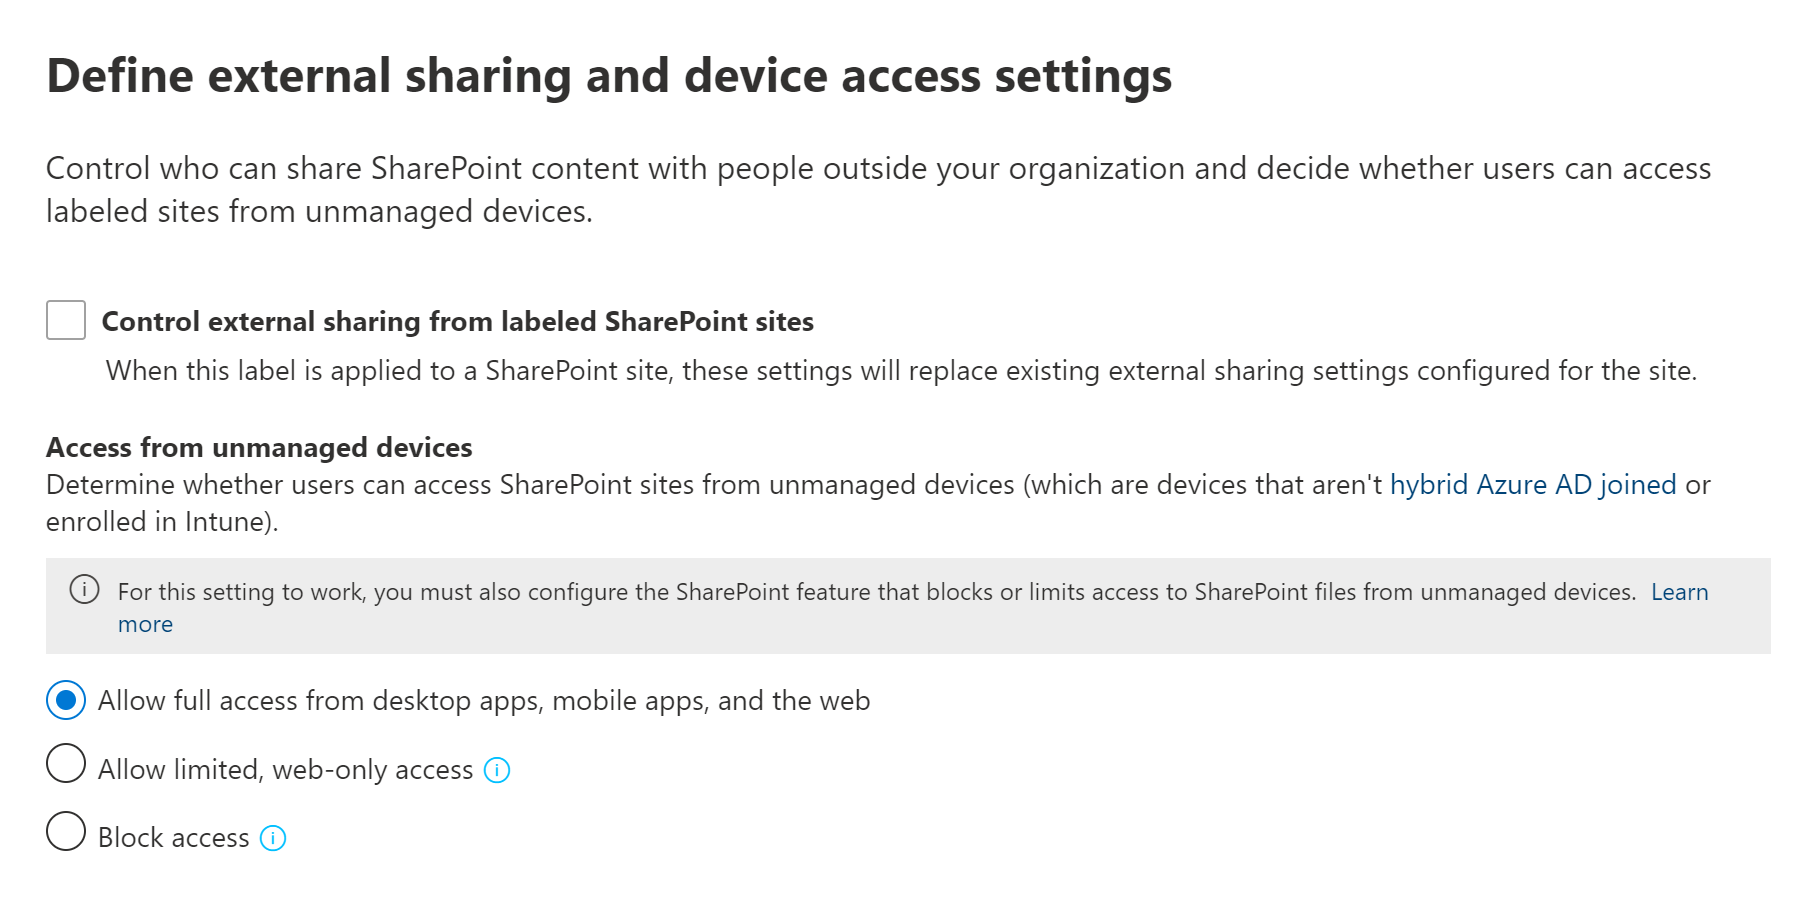
So in the next screen we have the option to define external sharing and device access settings. And for the unmanaged devices we have options like providing web-only limited access. With web-only access they can only view them with no ability to download, print or sync files.
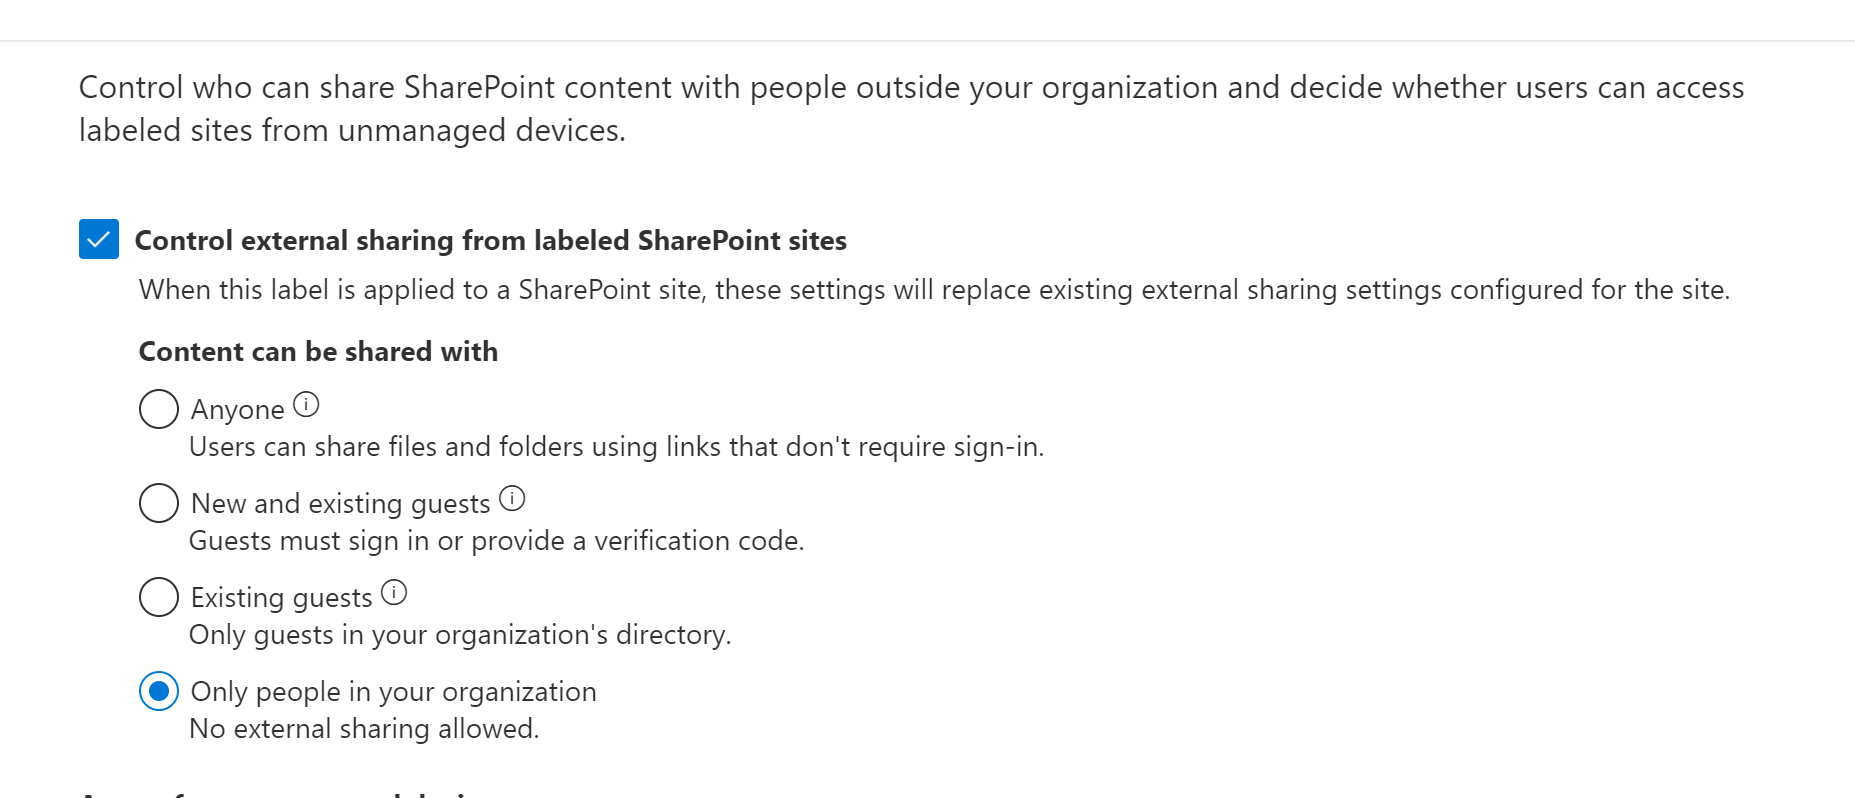
And for the external sharing we still do have the options to control them with the below configuration. Like for instance the guest users must sign in or provide a verification code is a nice feature.
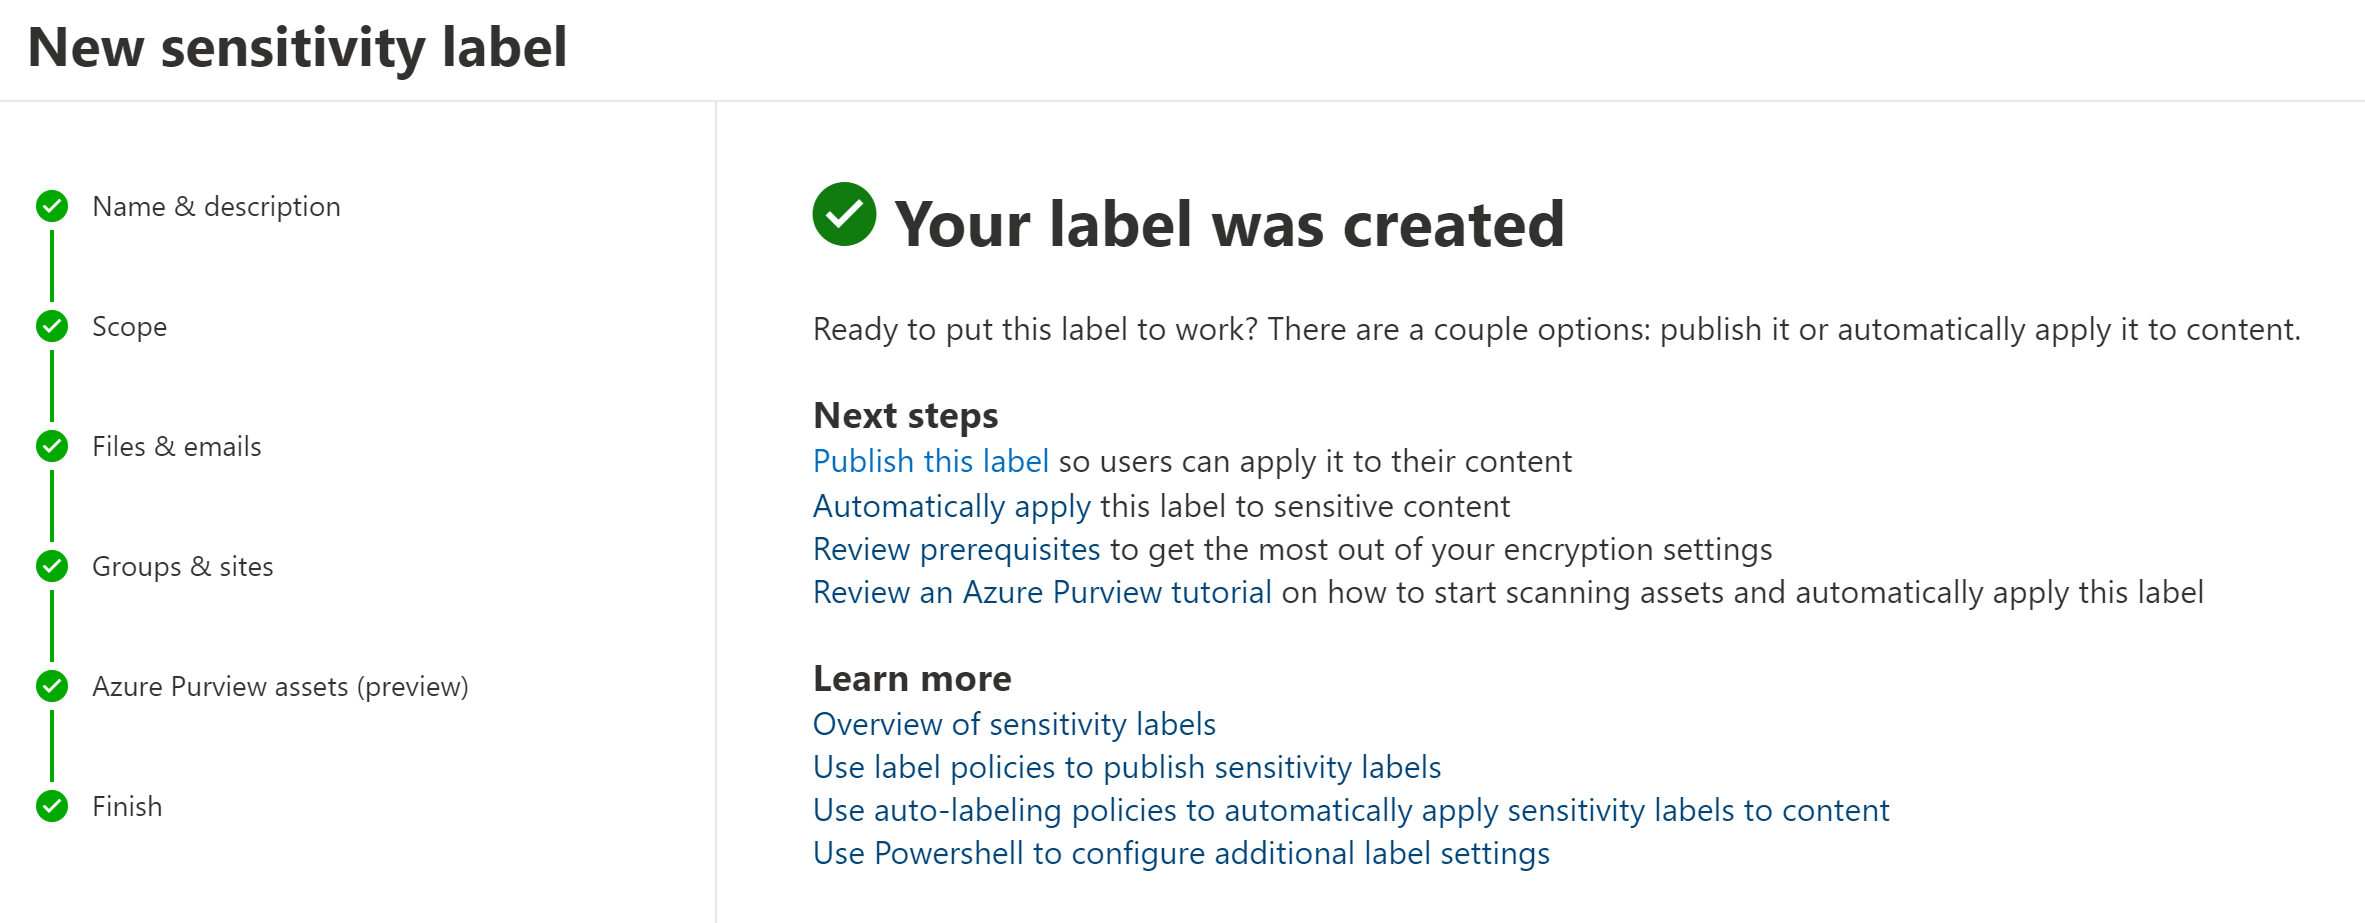
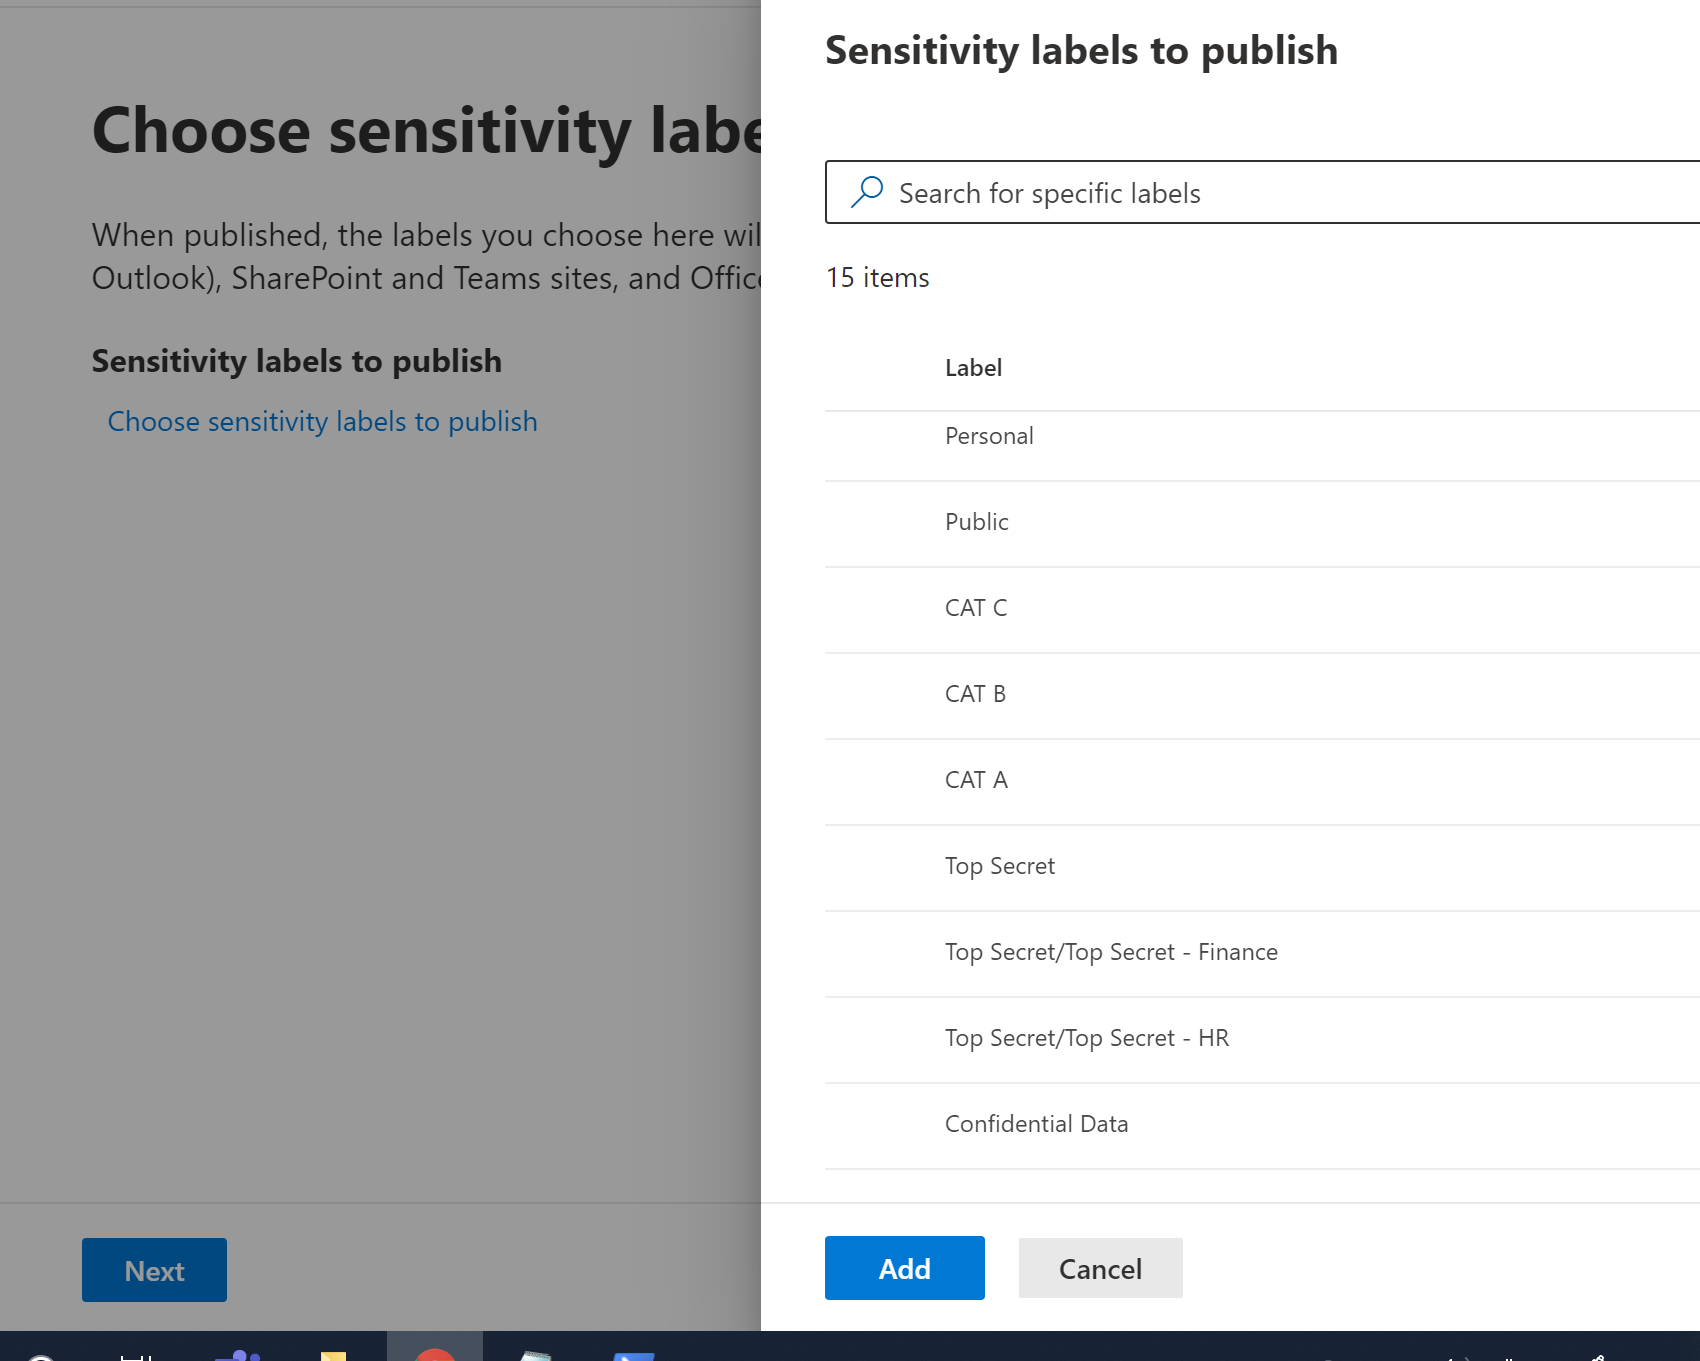
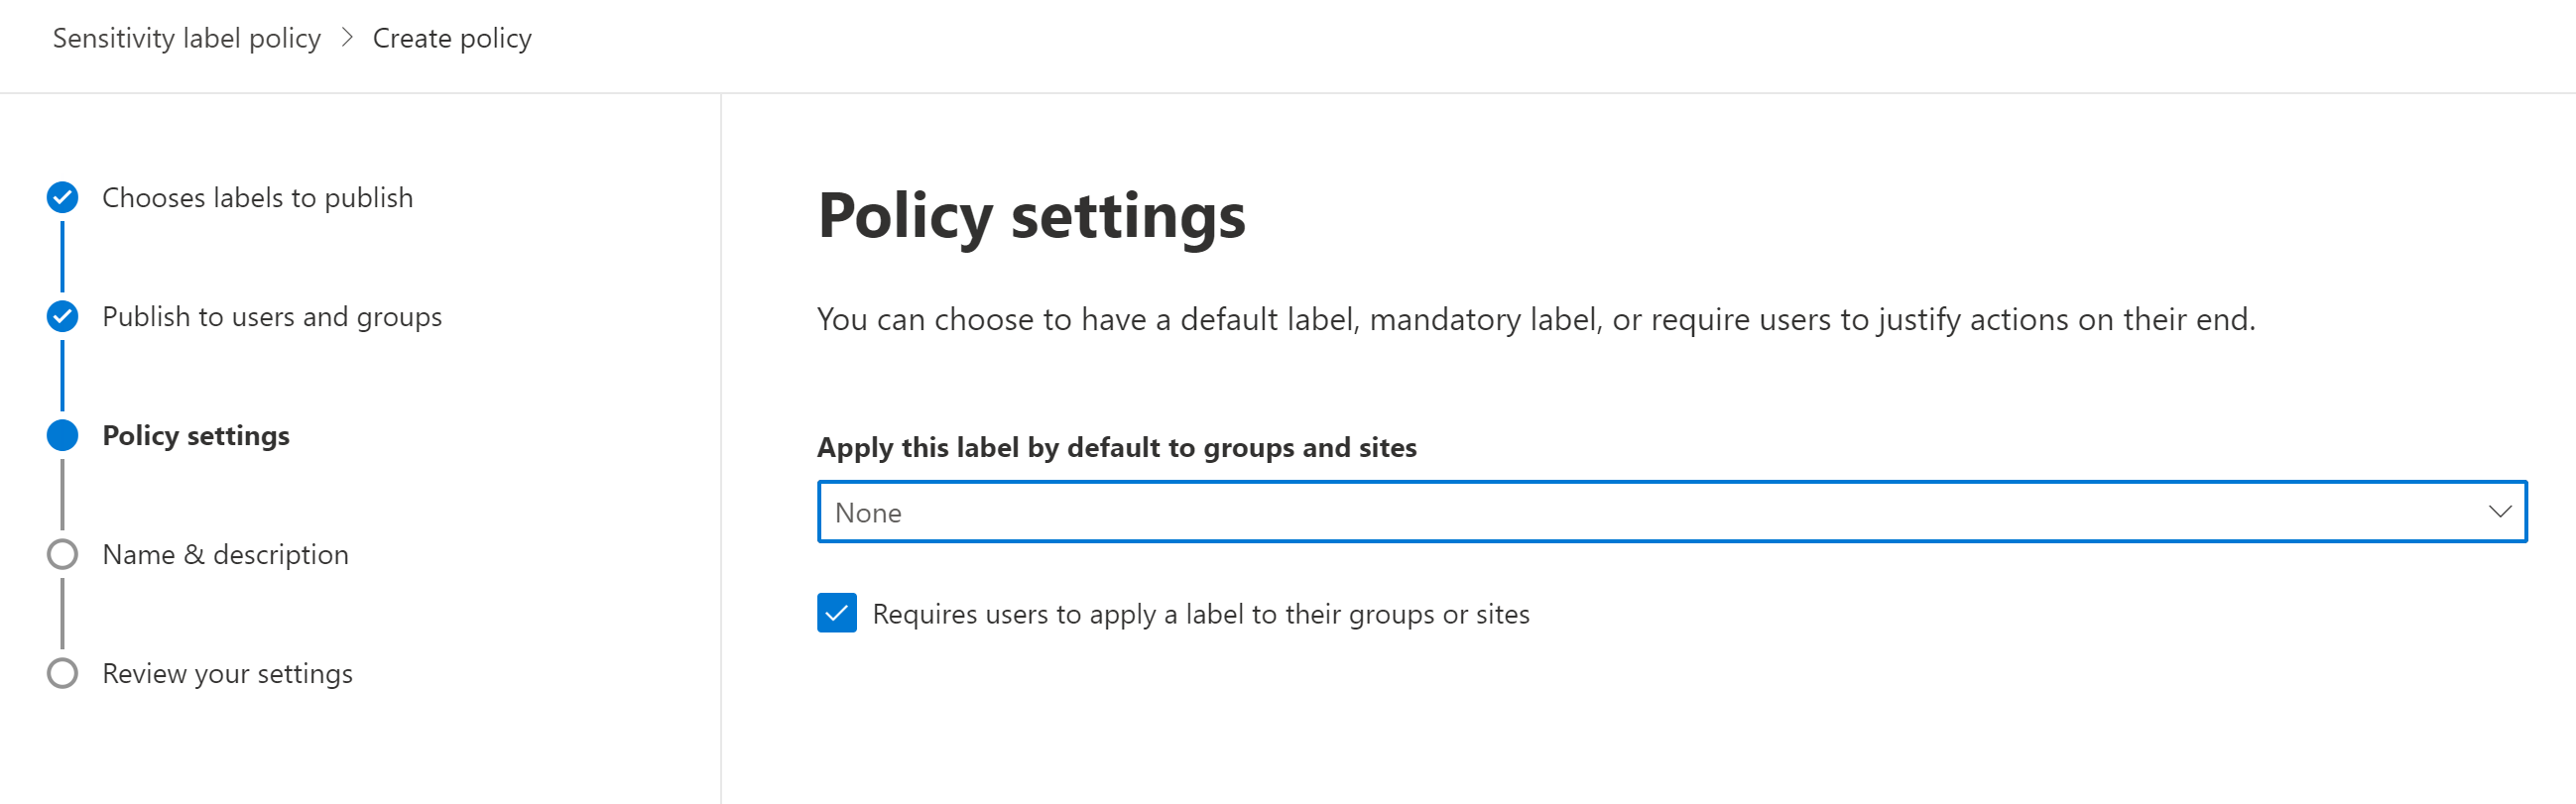
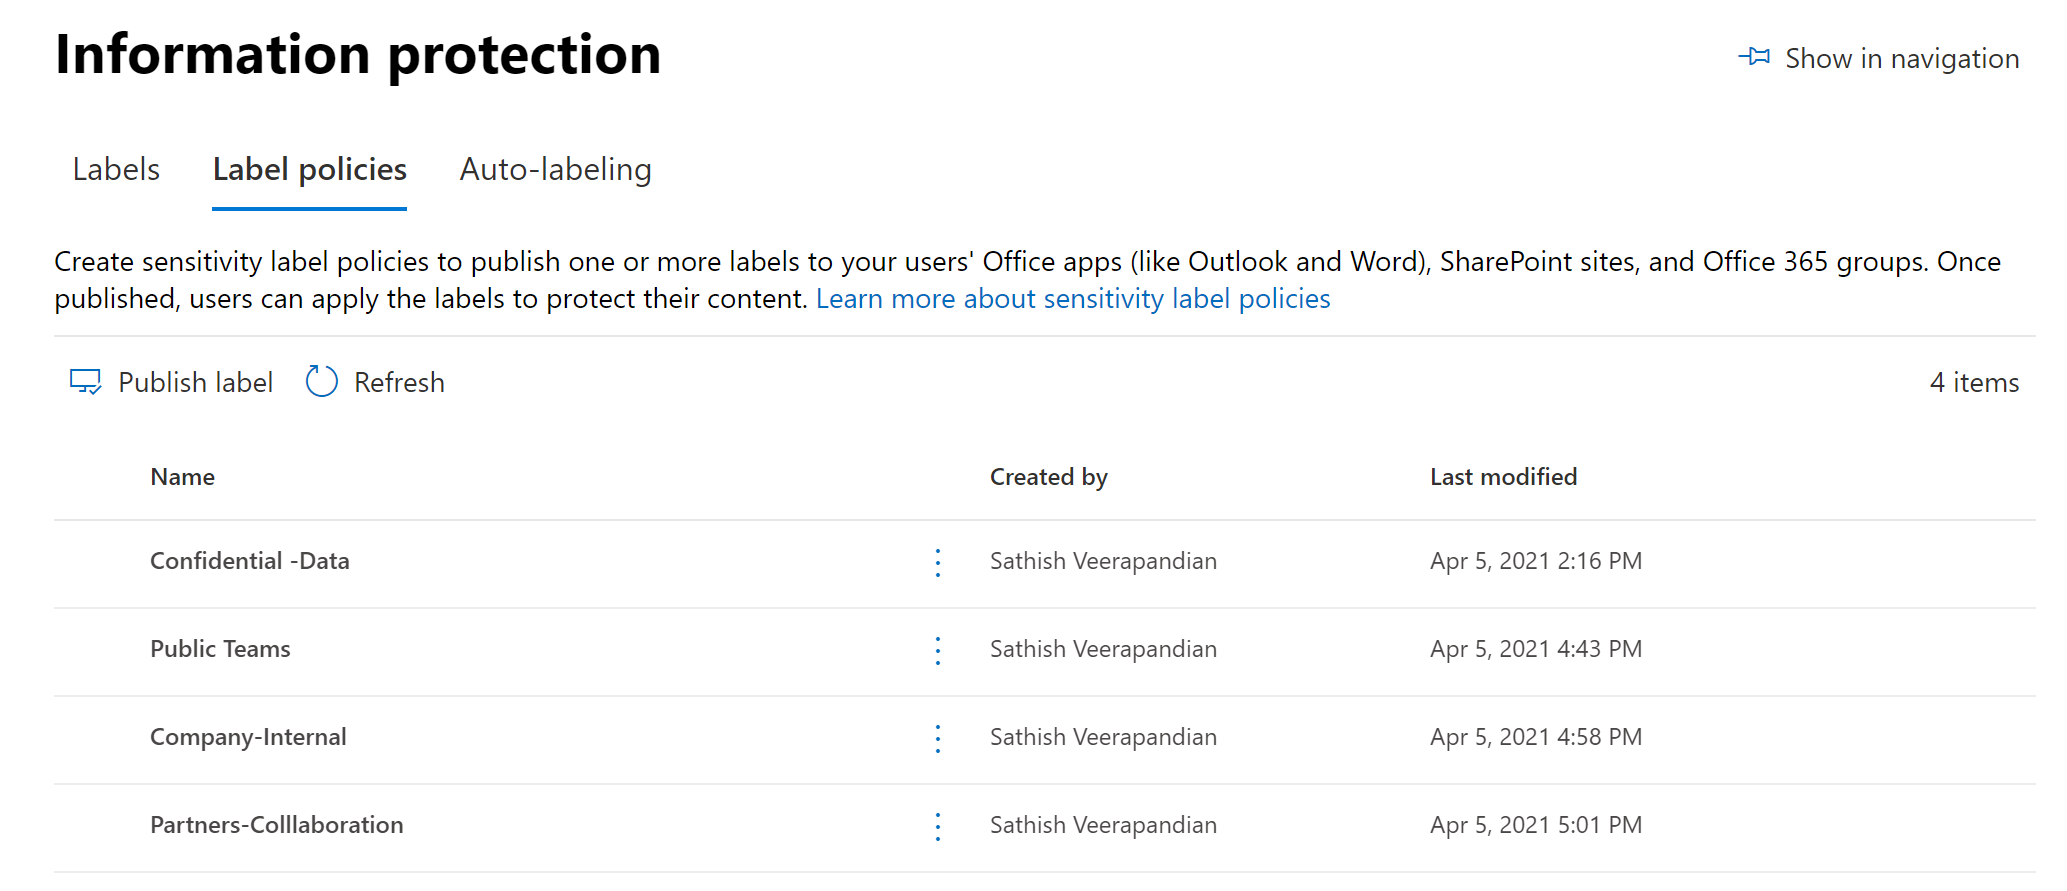
Once above options are selected we receive the below message. One important point to note over here is that once the Labels are created they are not automatically applied. We have to publish them via a Label Policy.
The next step is to publish them by choosing the appropriate one from the list. If we chose a new label that was created then it could appear in 1 hour interval. However if we choose an existing one like adding the groups and sites to the old label and try to publish them its taking more than 12 hours at this point. The Microsoft document states that publishing a modified label will take around 24 hours.
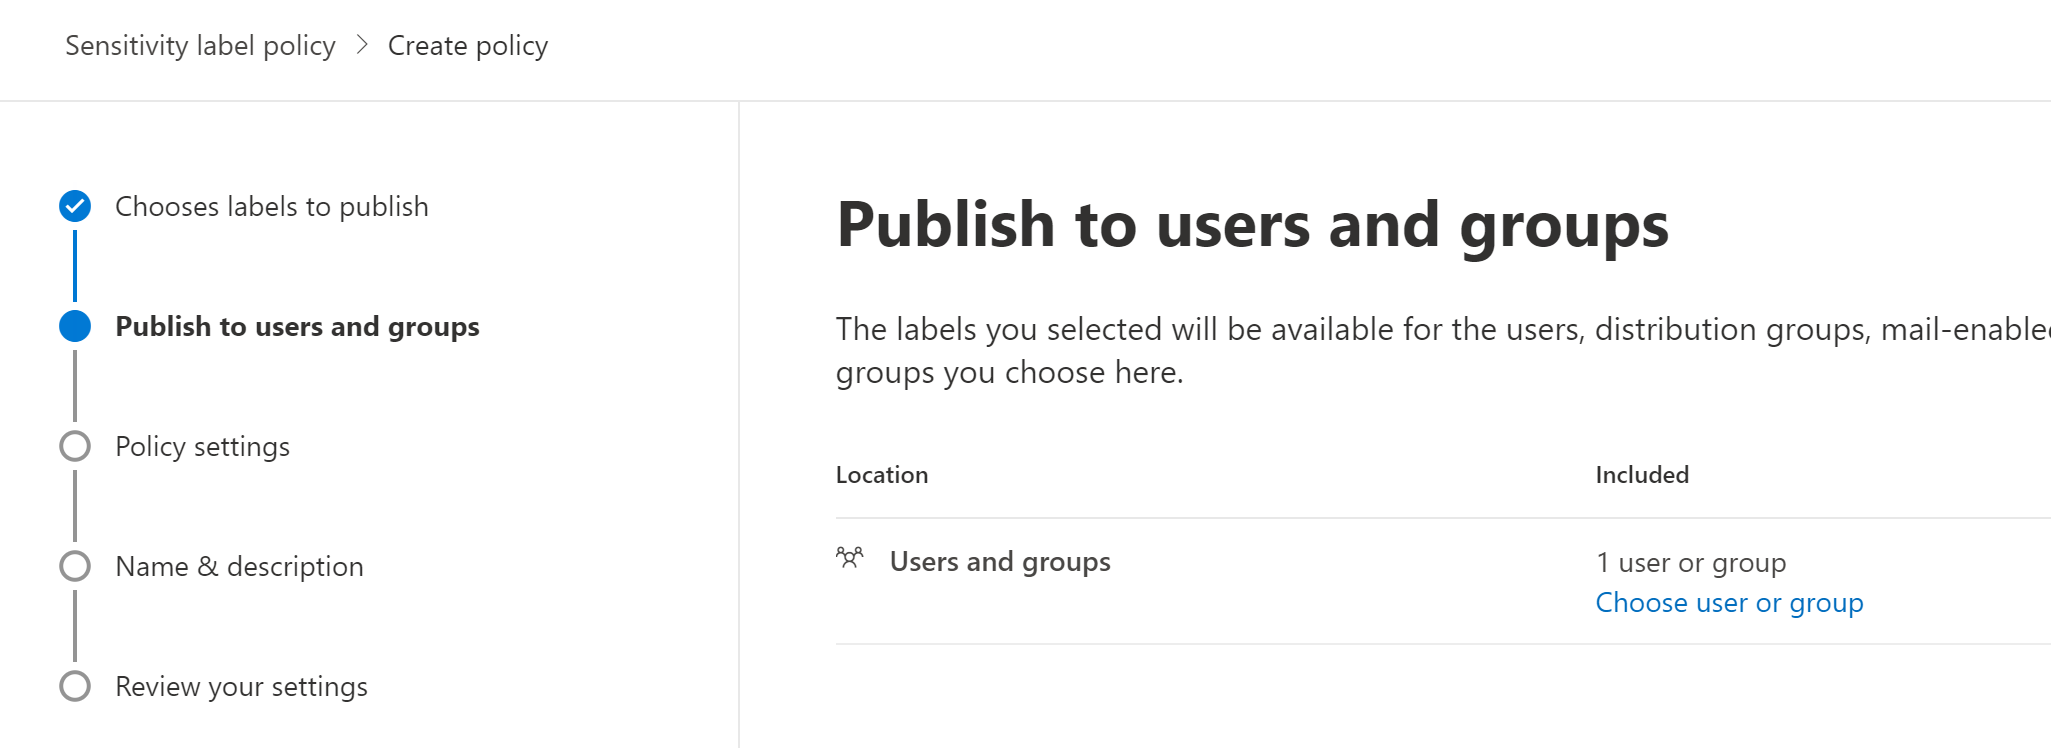
So we have option to choose and apply them to a group or a user.
Finally we can give it a name and them publish them. In our case for this demo purpose have created few more labels , policies and have published them.
Now the Teams Client Experience:
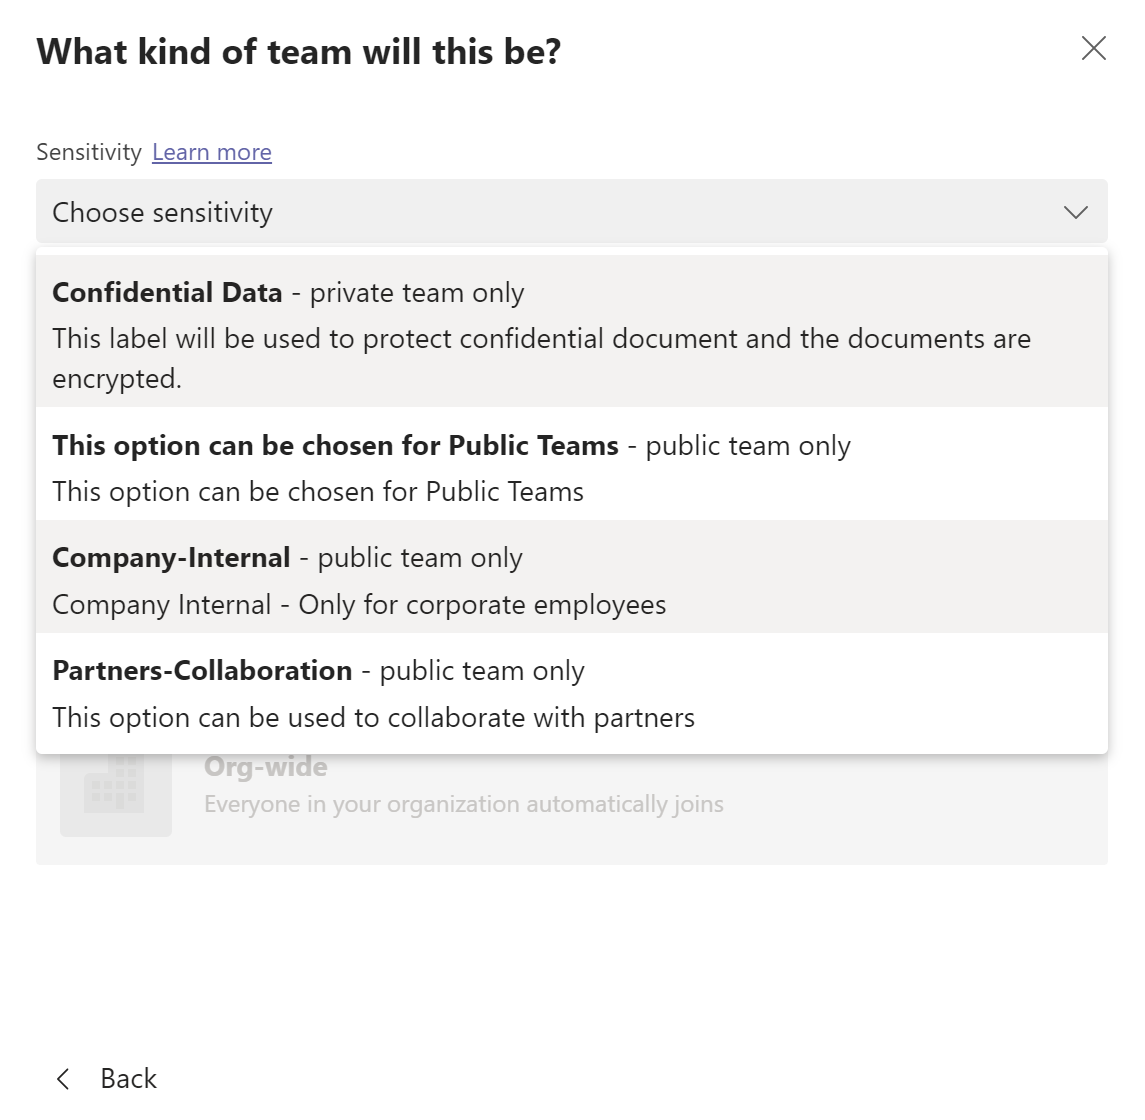
So when the user now goes and click on create a Team the client experience have changed totally. The default options are greyed out and have been replaced with sensitivity.
And when we clicked on the drop down we see all of the Labels created and published over the compliance center. This gives us a great benefit to tweak and customize our Team creation by controlling the data in a better way.
I’ve always been a fan of ADRMS solutions and it has helped us a lot especially to protect our content and that has helped many of the organizations to classify their documents which has been a great benefit in all aspects right from completing a successful Audit and protecting the data.
The way Microsoft Information protection have evolved is astonishing and with the current security for instance with encrypt files in word documents , do not forward emails , allow limited web only access is a great feature and definitely helps us a lot in streamlining things in security and compliance perspective.
Regards
Sathish Veerapandian


Leave a comment