
Dynamic emergency calling assists in routing calls and notifying security personnel during an emergency scenario based on the location of the Teams Client. Earlier this setup was working on Microsoft Calling plan and Direct Routing. Now with Operator connect being public GA setting up a emergency calling is a mandatory prerequisite before enabling the operator connect on the Teams Admin Center.
The dynamic emergency calling works completely with the help of the Location information service. The Location Information Service (LIS) delivers geodetic (latitude/longitude) or civic address location information. The LIS is used by emergency services to make location-based call routing decisions and to properly locate callers for dispatch. LIS addresses the intermediate solution for providing e911 service for users of VoIP telephony.
Microsoft Teams uses this same LIS based on the Network Topology Information. This is collected from the Teams Client location data which works based upon two information
- Network Settings
- Location Information Service Configuration
When the Teams Client is triggered it requests the network information and the Location Information settings.
This is checked periodically even when the Teams Client is running and especially when the network connection is changed.Based on this if the network settings match then the emergency policies are returned to the Teams Client.
And later it looks up for the LIS and an emergency location is provided. Finally, when an Emergency Call is made from the Teams Client the emergency location is informed via the PSTN network.
Microsoft Calling Plans and Operator Connect partners include dynamic emergency routing services for users only in the United States and Canada. For Direct Routing, we need to configure the Session Border Controller (SBC) for an Emergency Location Identification Number (ELIN) application.
In this article, we will look into the steps on how to configure the Dynamic Emergency calling. To get started, we need to complete the steps in the below order.
- Assign emergency addresses
- Configure network settings
- Configure Location Information Service
- Configure emergency policies
- Enable users and sites
Assign Emergency Address
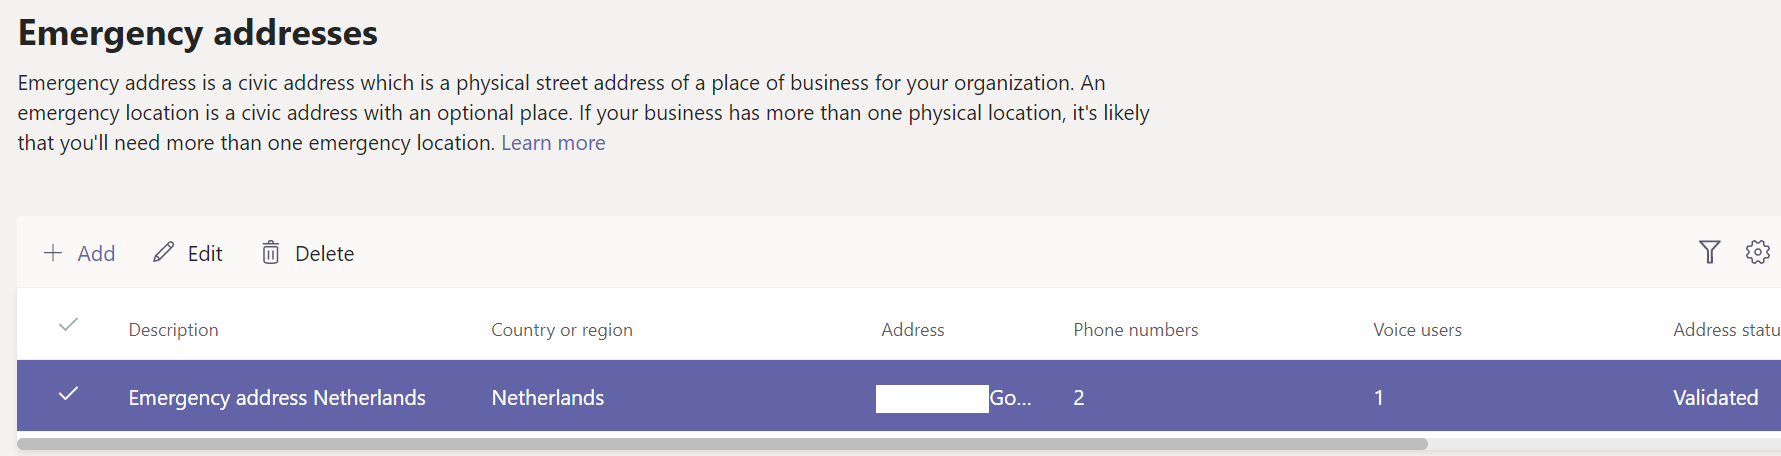
In order to assign the emergency address, it can be done in two ways either at the organizational level or at the user level from Teams Admin Center or from the PowerShell. We can create the Emergency address based on the country location. Like each country can have one unique emergency address.
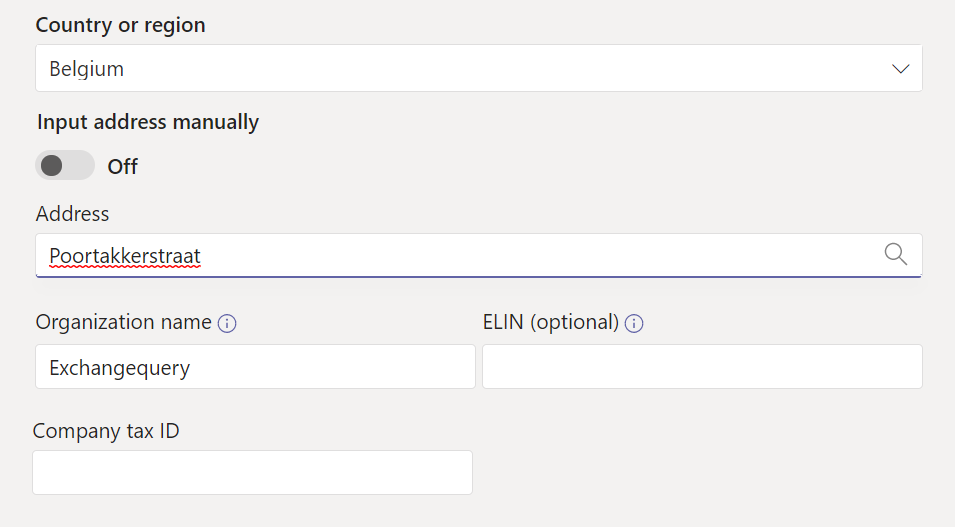
And while creation it provides us an option to enter the address manually or search them. When we use the automatic Search option Teams Admin Center uses the Azure Maps for the addresses.
For non-US countries the latitude and longitude values pick only from the PowerShell.
For Non-Us Countries we can only use PowerShell commandlet New-CsOnlineLisCivicAddress since in my example i was not able to look up for the address from the Teams Admin Center for the location Netherlands.
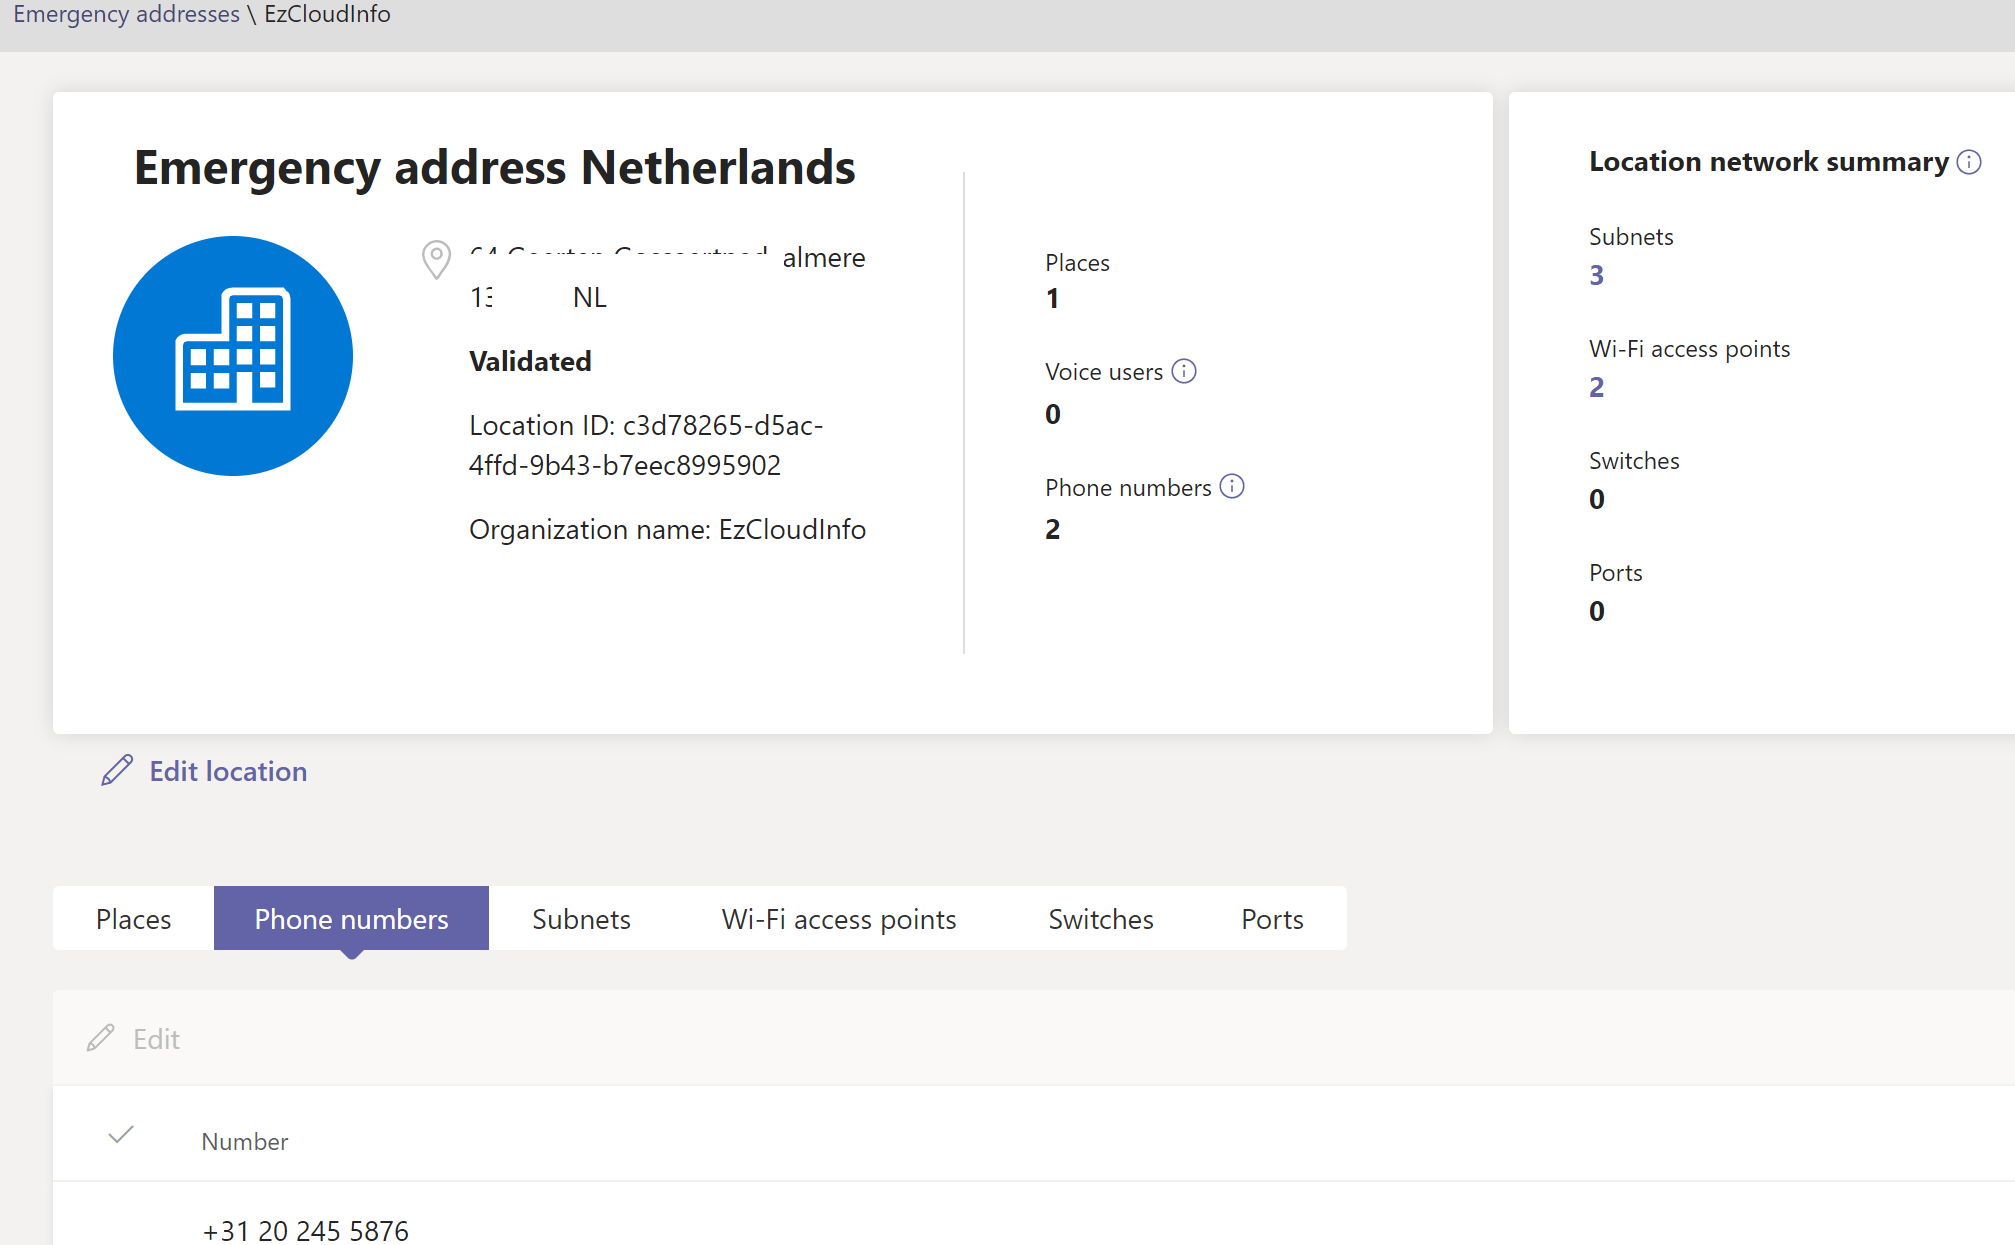
After a successful setup of the Emergency address we can see them like below example which shows the location ID as below. In a full deployment scenario we need to add the switches and ports as well.
Setting up the Network Settings
Having configured the emergency address the next step is to set up the network settings. Only with the help of the network settings the Teams Client can dynamically obtain emergency calling policies and an emergency location.
So it’s important to note that the network settings must have all the collection of subnets for effective dynamic policy assignment to users in an emergency situation even if the user roams between different locations. If we want the dynamic policy to be included for external users as well then it’s a good idea to add the known external IPs to the Trusted IP locations list in the Network Topology.
In below example we have defined the network site based on country and can add the known external Trusted IPs here that will be helpful during the emergency calling scenario.
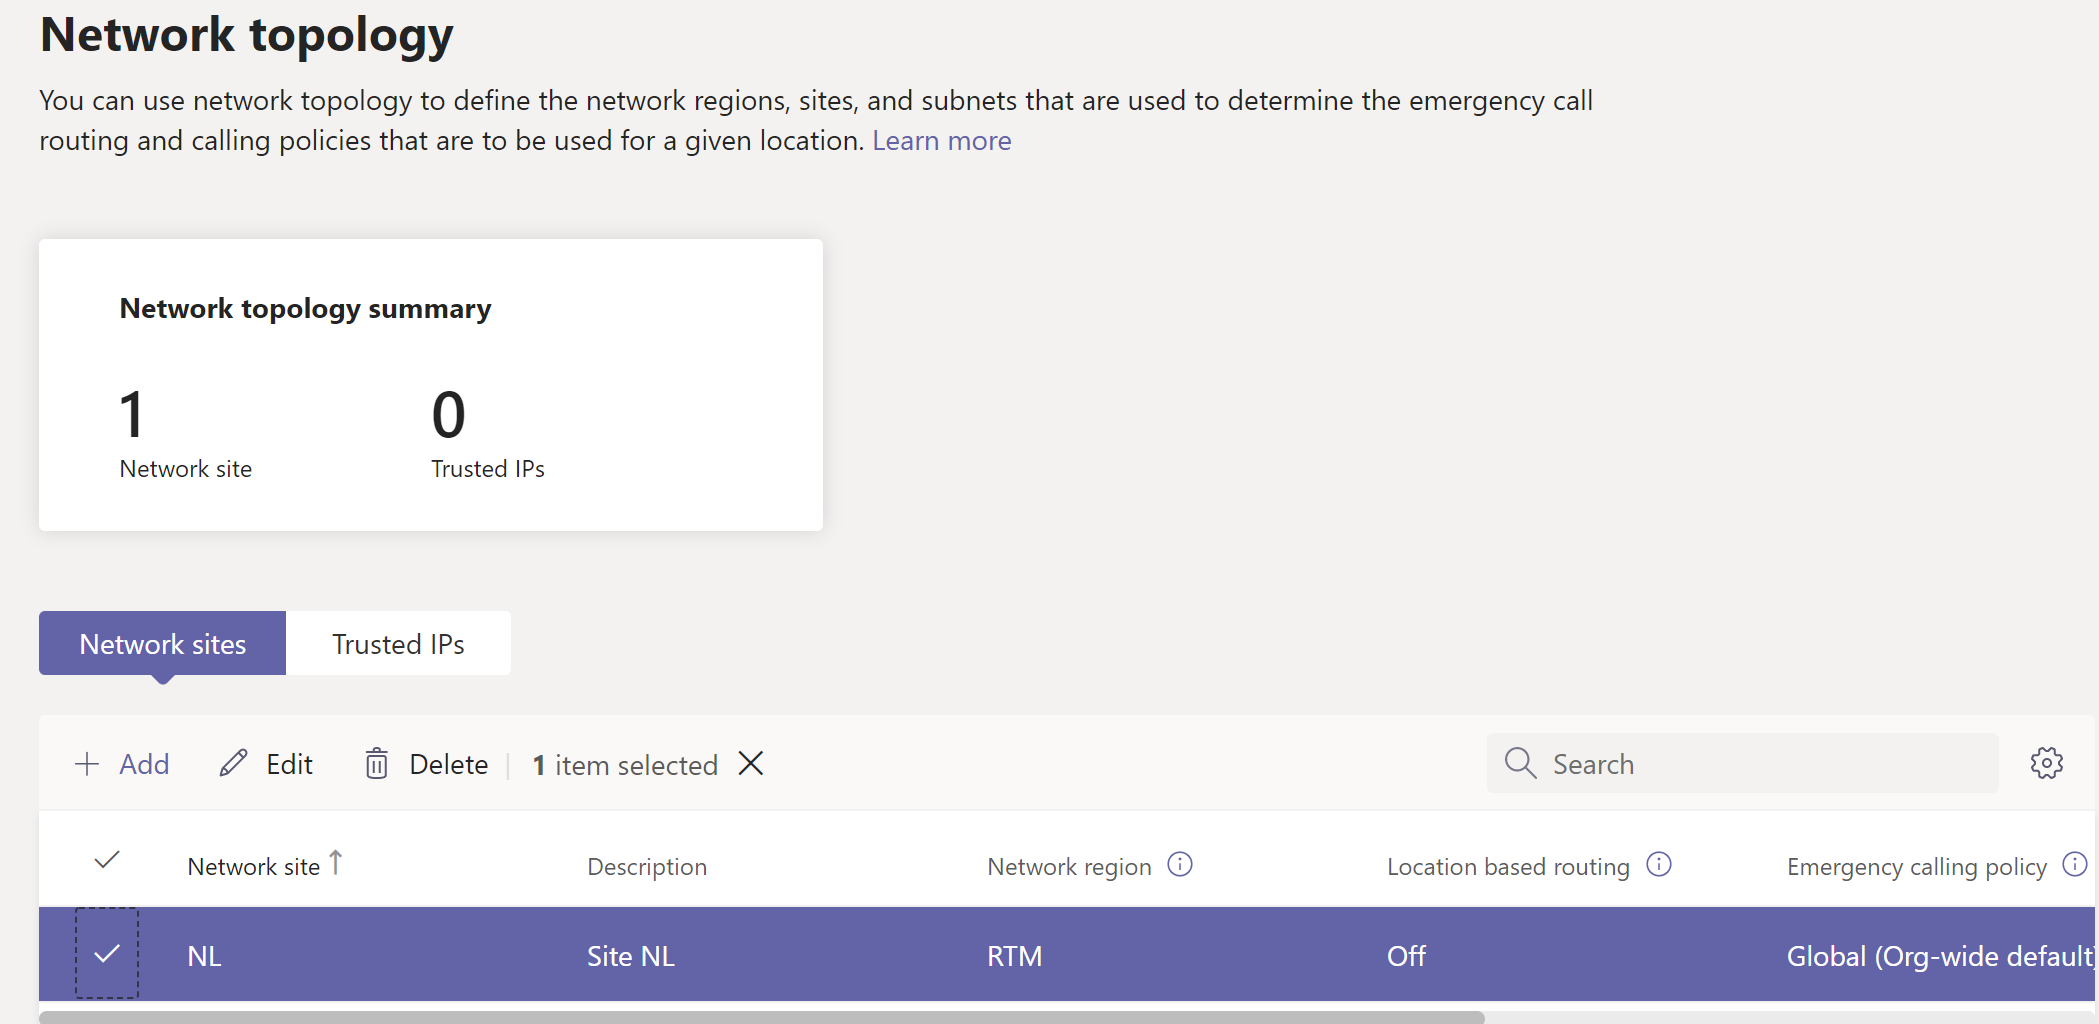
In the Network region we have the option to setup call routing policy which we will see about them in the next steps.
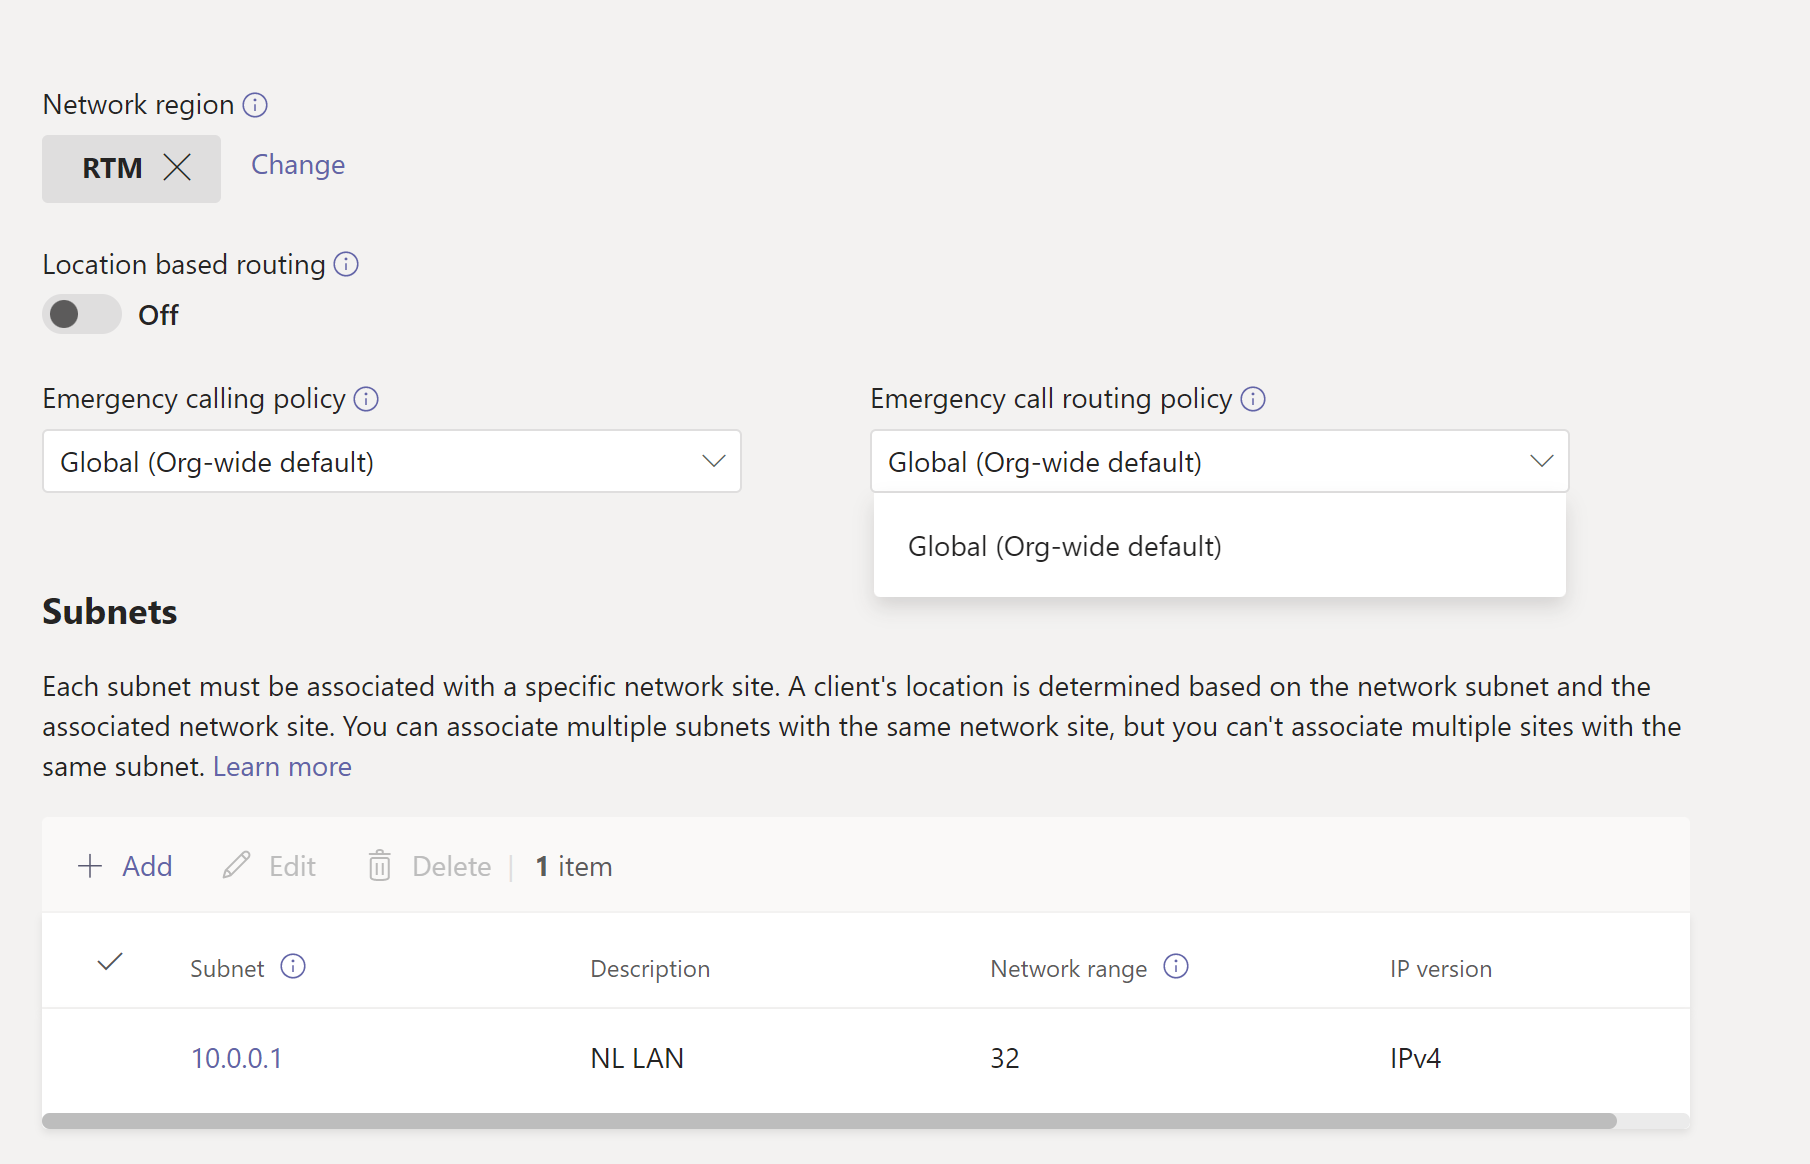
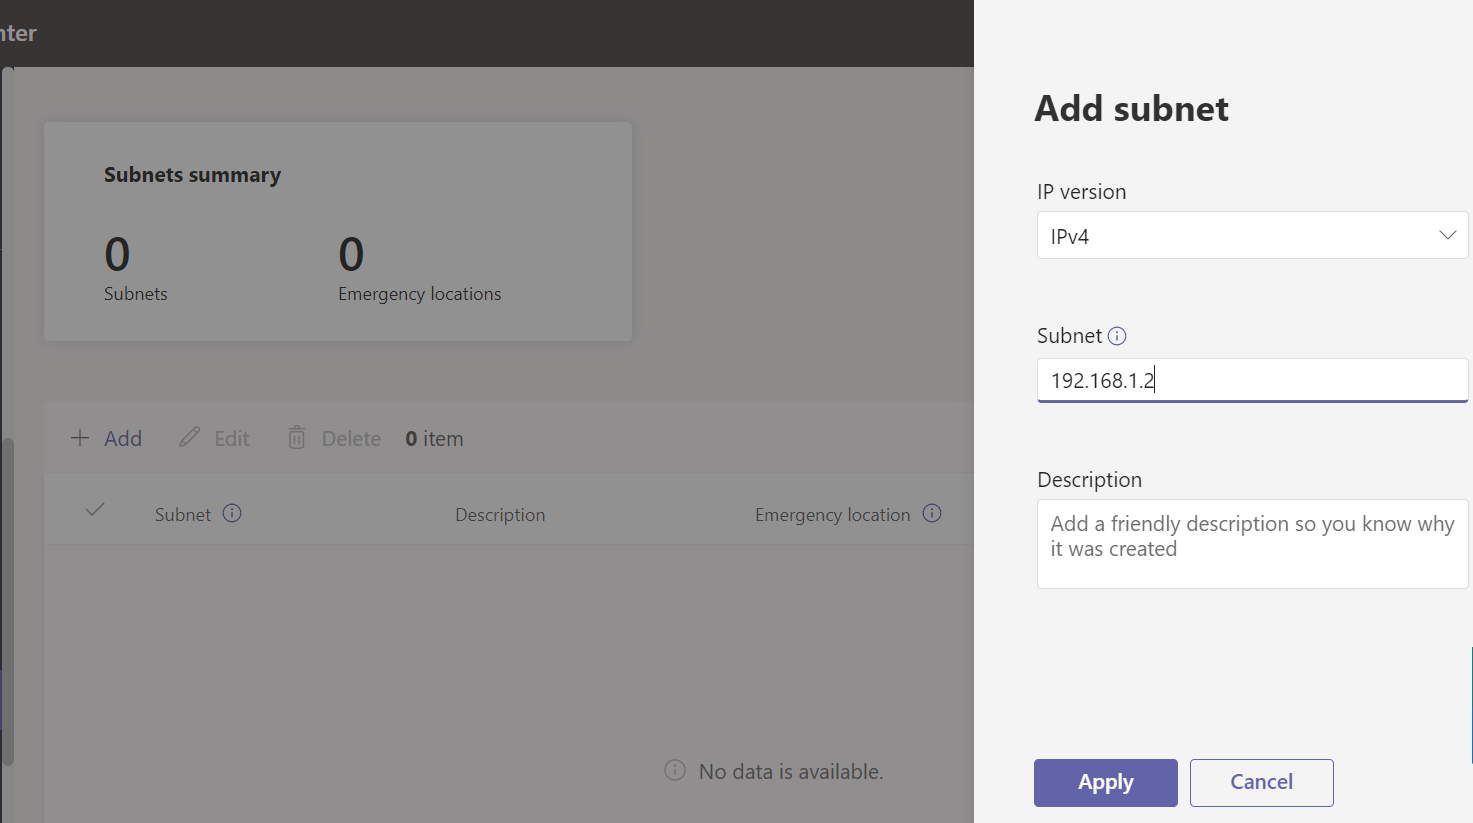
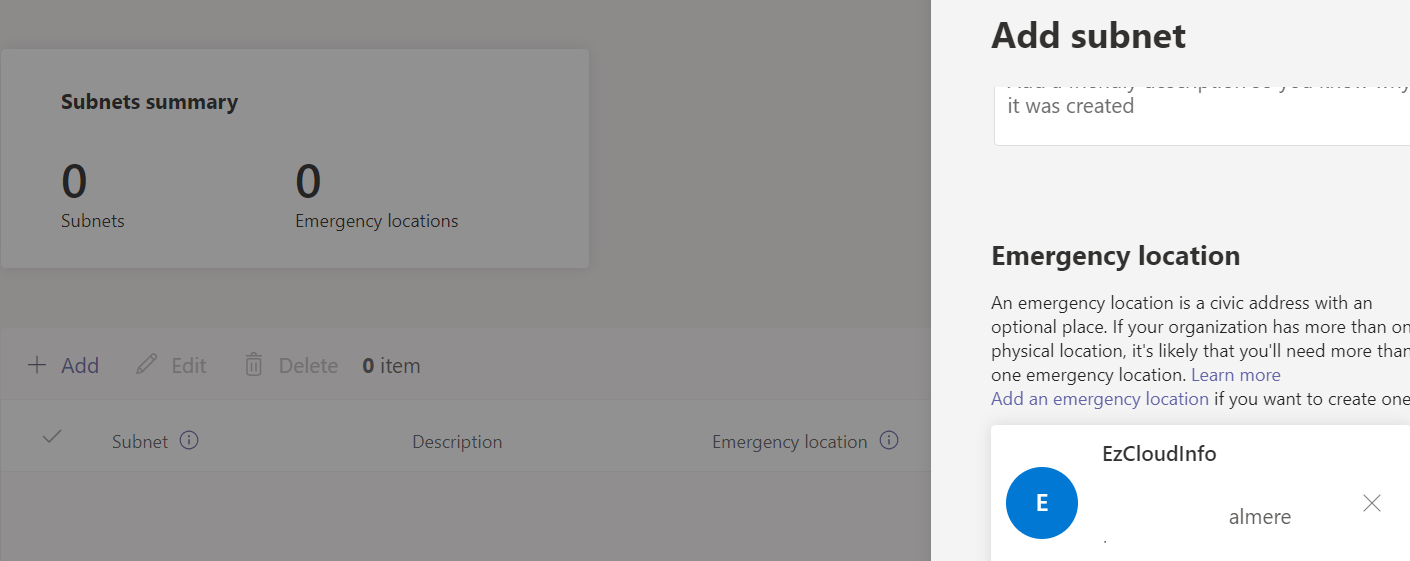
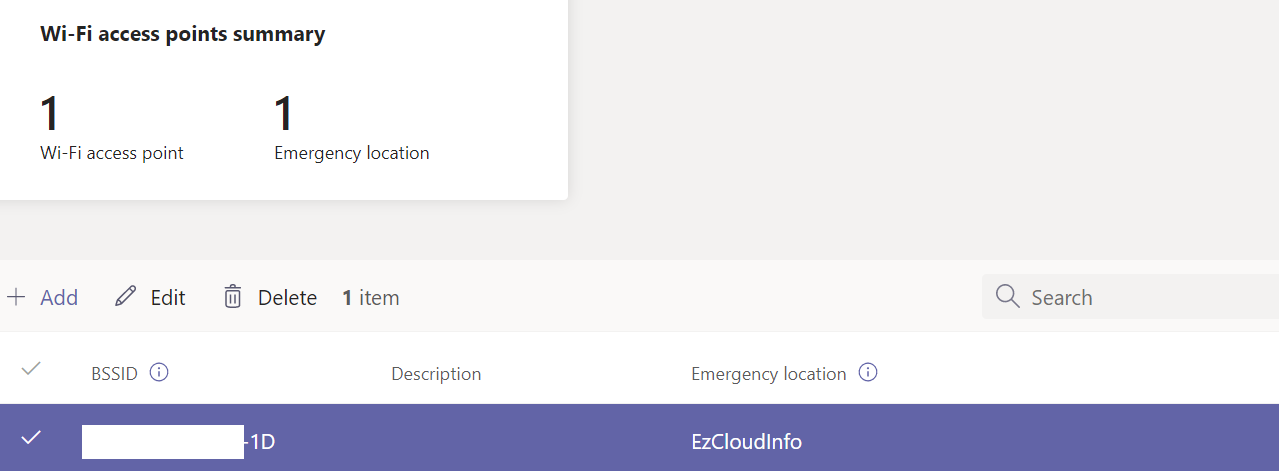
In order to start with, we can start adding the network and locations and add subnets. It is highly recommended to add all network endpoints from Wi-Fi Access points, Switches and ports as well.
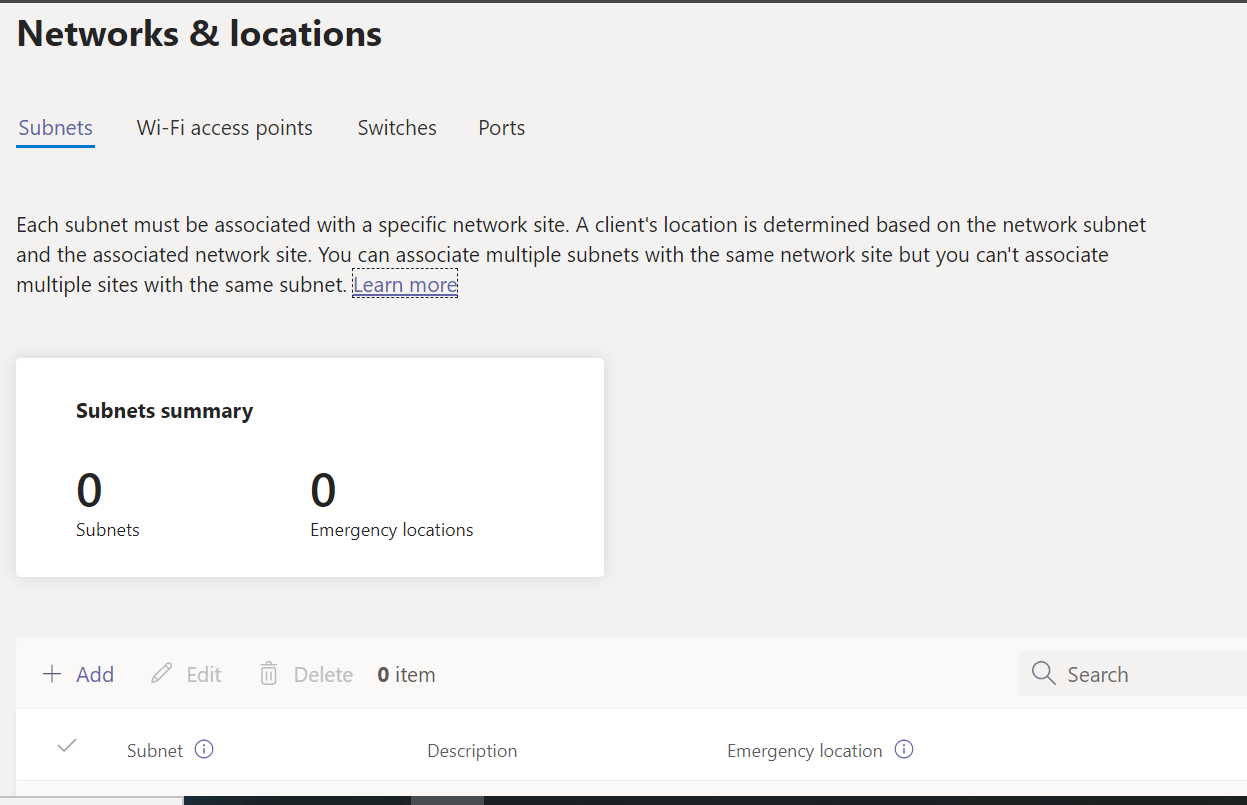
In subnet section we have option to add IP4 versions as well.
Configure Location Information Service
After adding the subnet we have the option to add the emergency location.
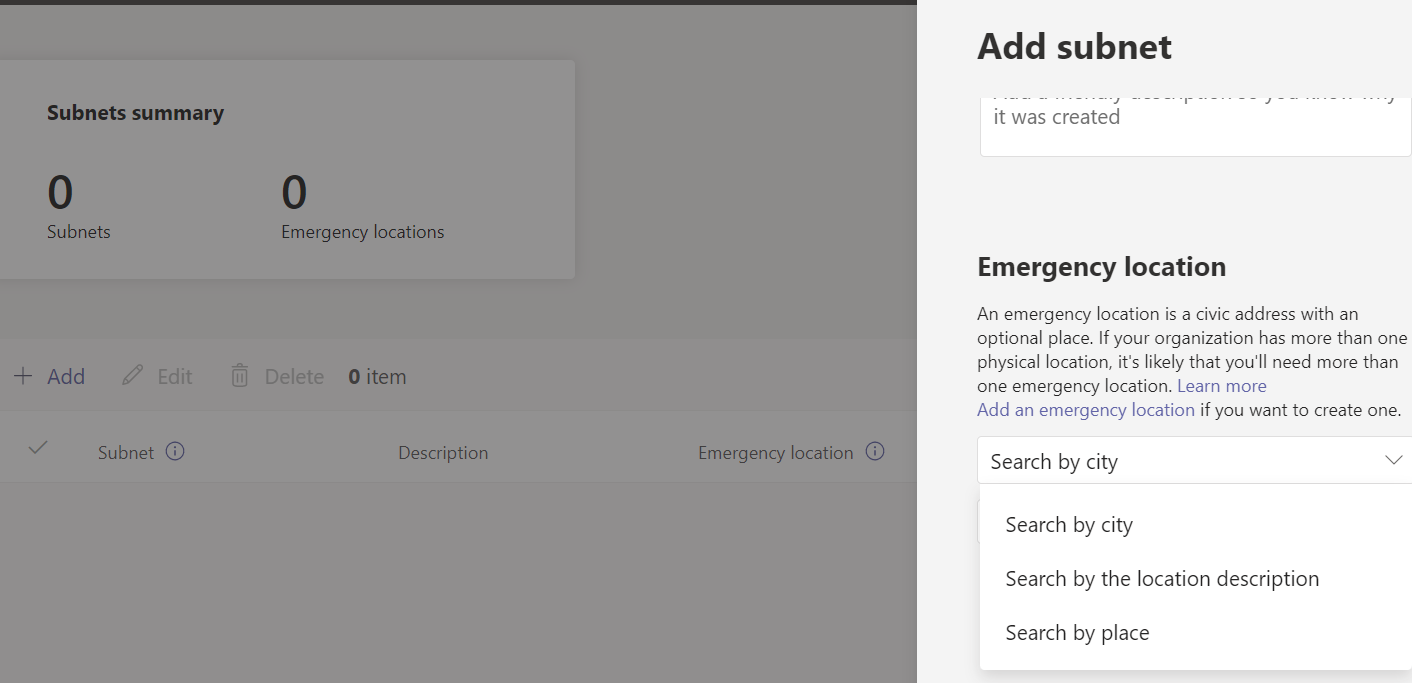
In our example we have added the emergency location which was already defined for Operator connect. It is very important to note that it will not allow to proceed further before we assign the emergency location. Only based on this information the Teams Client obtains the Emergency Address Information from the location ID that we have specified.
For a client to obtain a location, we must populate the LIS with network identifiers (subnets, WAPs, switches, ports) and emergency locations.
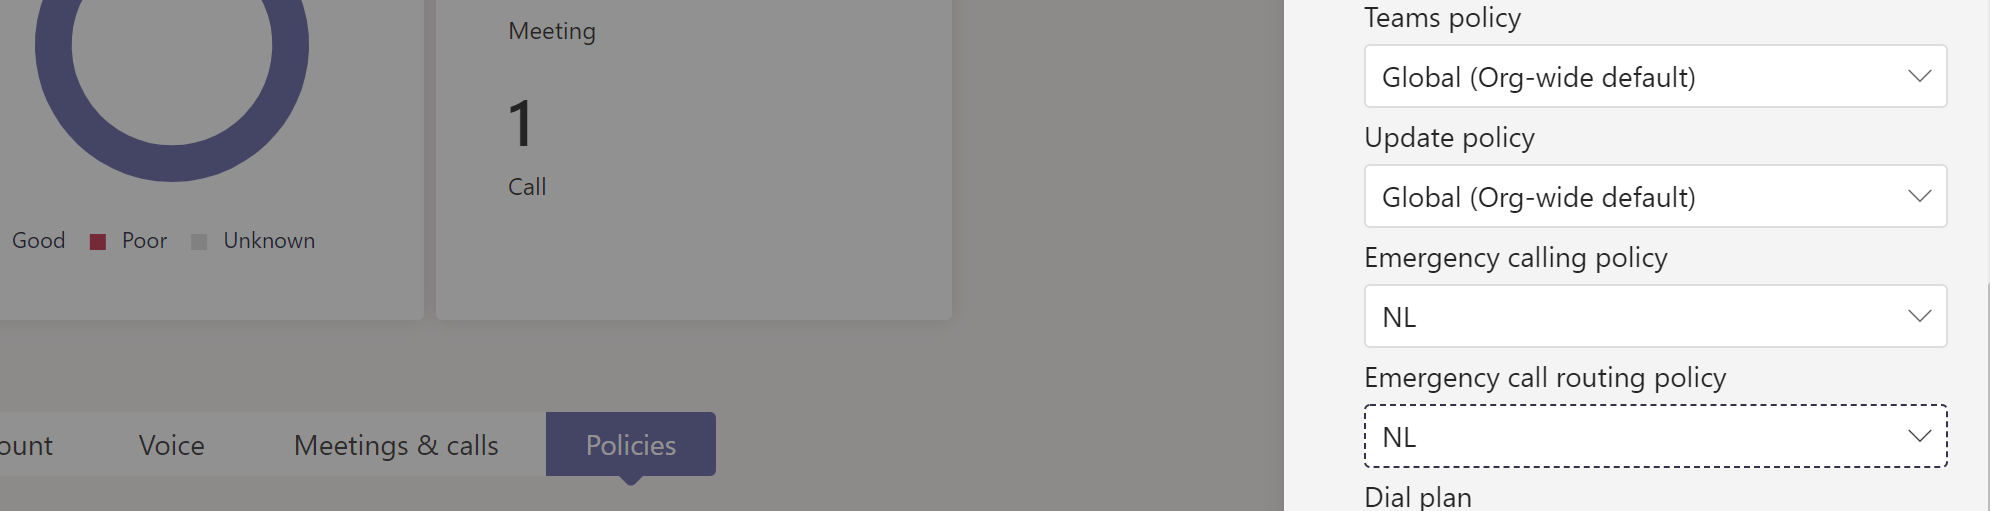
Configure Emergency Policies
The next step is to configure the emergency policies. In order to set up the emergency policy , Basically we are configuring the emergency numbers and that can be assigned to sites or to user level.
Its important to note that emergency call routing policies apply to Direct Routing only. Because for calling plan and operator connect users are automatically enabled for emergency calling and even if we assign a custom one it will not be applicable.
And for custom configuration in case of Direct Routing Setup navigate to voice – emergency policies and create the new emergency calling policy. Here we need to set the notification mode and then the groups or the users to notify during the emergency situation.
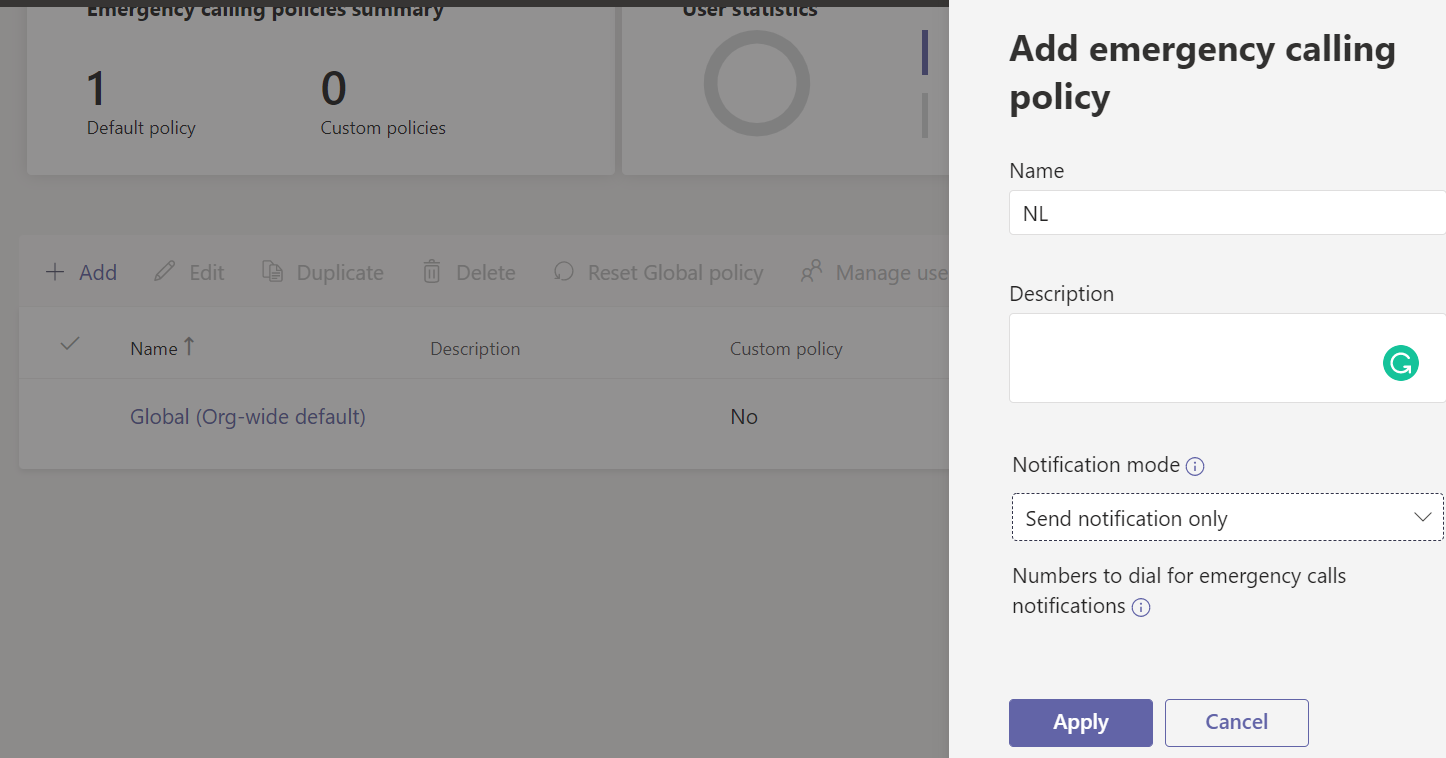
In our case for testing we have simply created the emergency call routing policy like below . Make sure to enable the dynamic emergency calling in our example.
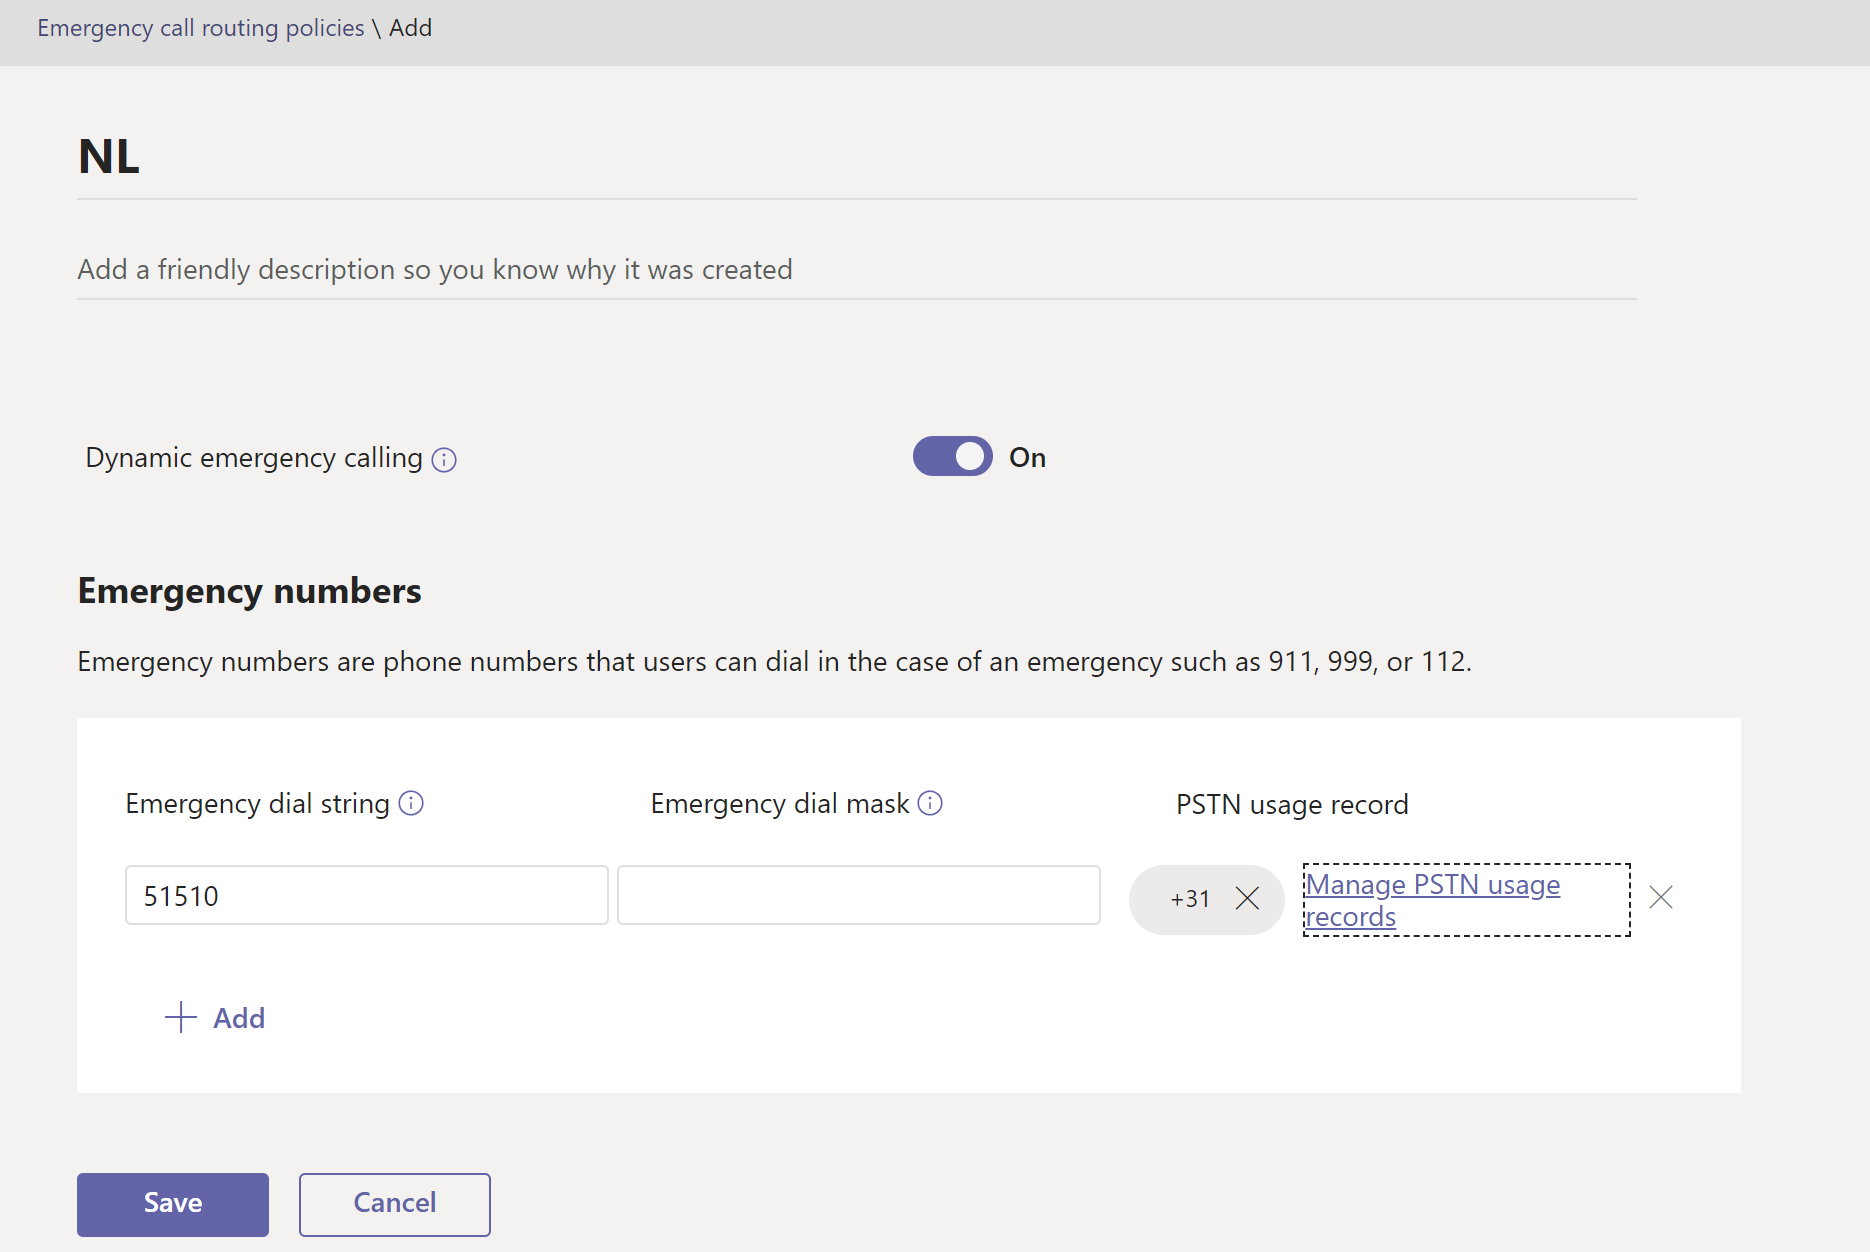
If we are using Direct Routing then we need to enable the Emergency calling on the SBC as well for the calls to route to the PSTN provider so that the affected user emergency location is identified.
Enable the policies to Users
And then we need to assign the call routing policy to the user via TAC or from the powershell. Below is an example of assigning them via TAC.
If we are using Direct Routing, then there are few additional steps that needs to be carried over as per your SBC. For example Audiocodes have outlined the steps that needs to be carried over in the SBC configuration in the document described here
There is only one additional step that is required in the Teams Admin part to enable the PDFLO for the SBC routing .Only when enabled .xml body payload is sent to the SBC with the location details of the user. So this is an important step for Tenants that uses numbers assigned from local PSTN via Direct Routing.
Set-CsOnlinePSTNGateway -identity mydomain.example.com -pidflosupported $true -verbose

Validating in the Teams Client
Finally at the end if the Teams Network Configuration is correct in the Admin center the end users where the Teams Client is running will show their emergency address based on the configuration. In our case after the configuration is completed we could see the Teams Client is showing up their emergency location. The location is mapped based on the MAC address of the default gateway of the client’s network and stored on the client.
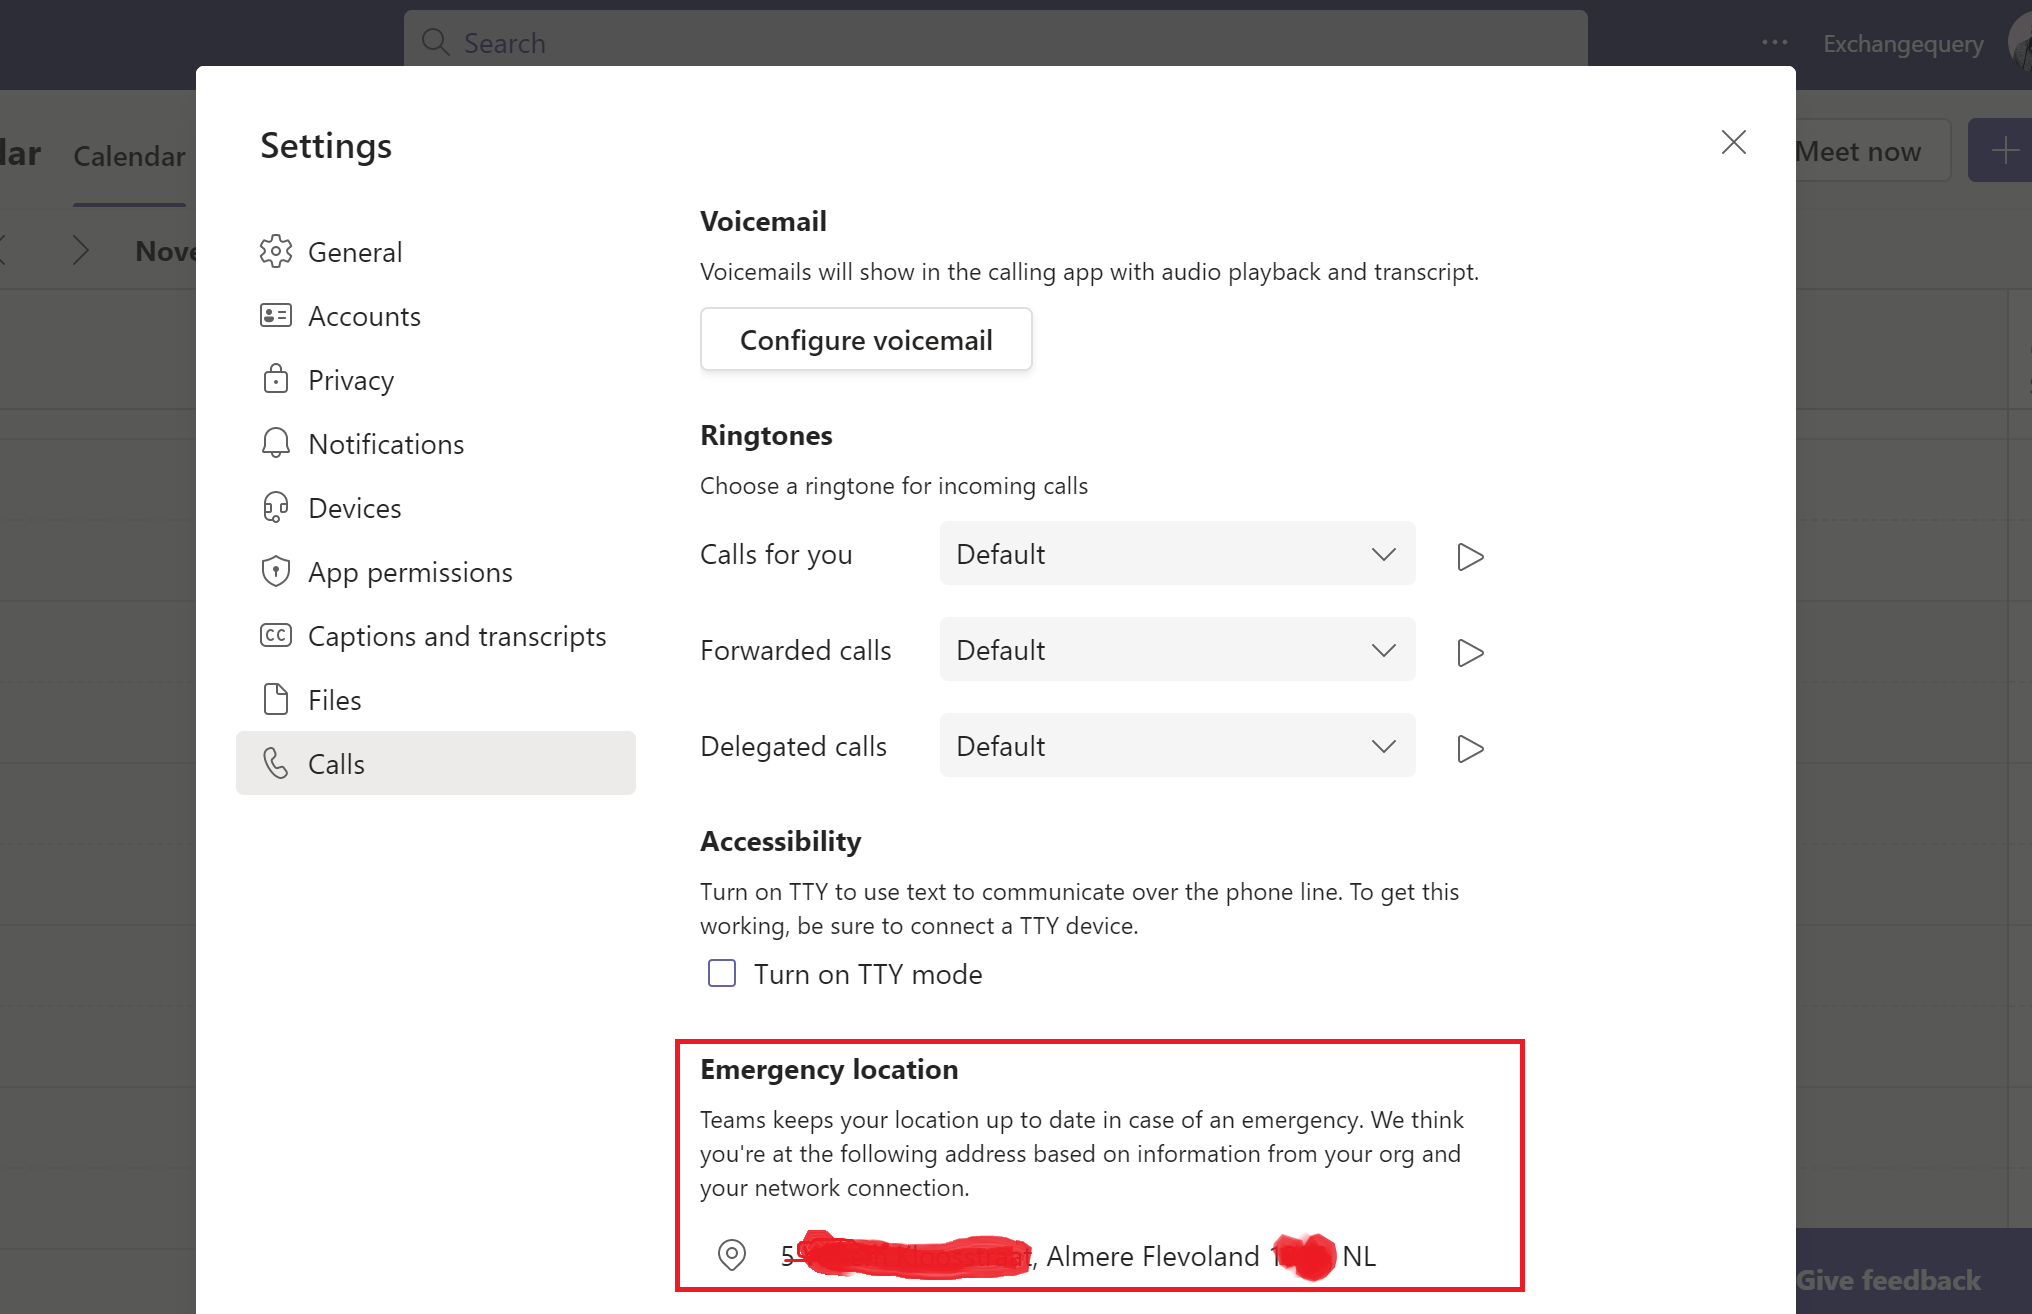
And when moving to another location and looking up at the emergency location based on the information from org and network connection it updates the location of the user automatically.
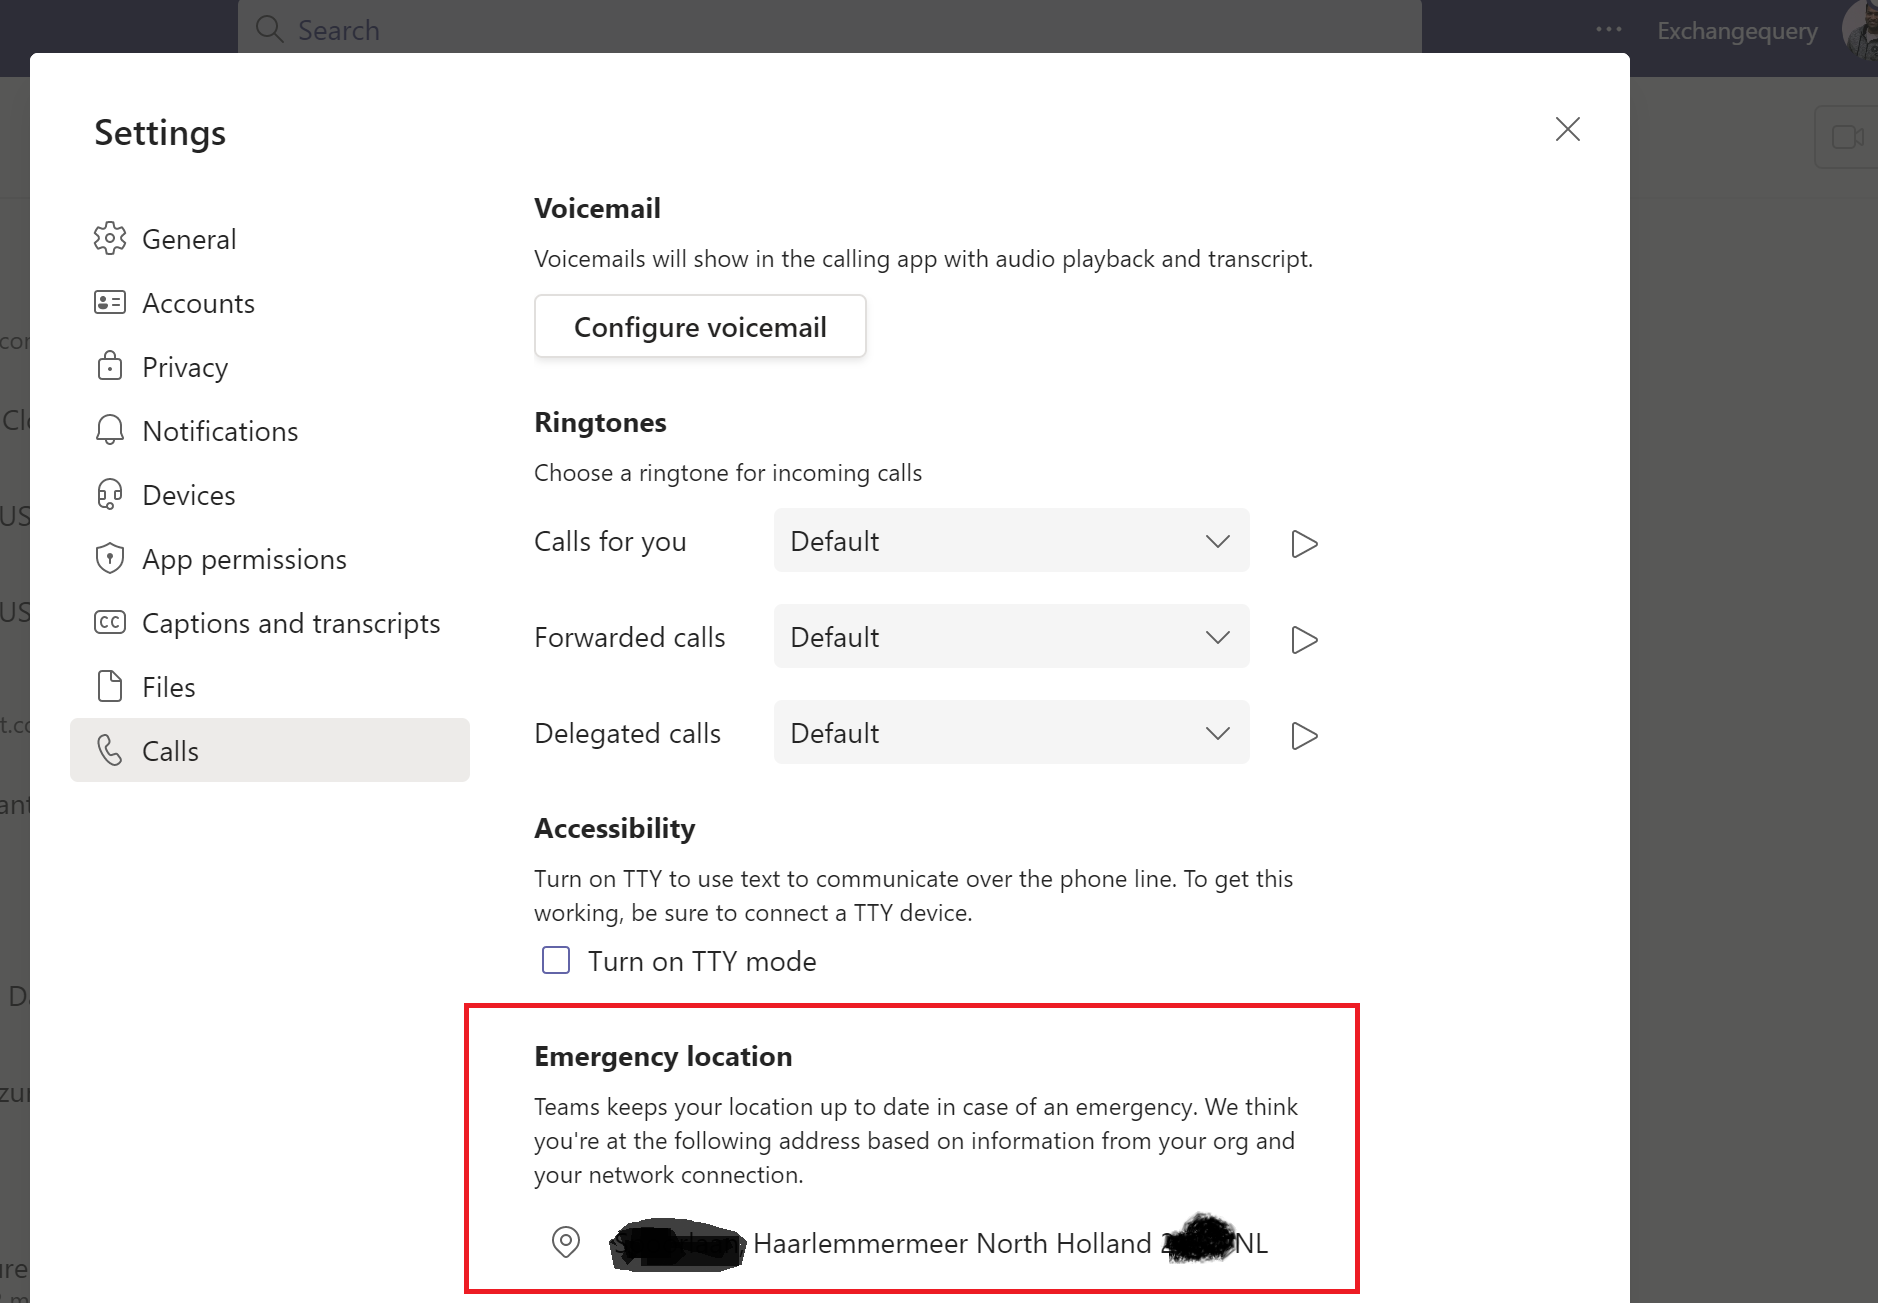
Also the current emergency location is present when we open the dial pad.

The Emergency address is derived and provided first by looking into the address that is associated with IP address that is provided in the tenant Admin. If that is not available then it looks up based on the geo codes that is defined in the admin center. Finally it also looks up from the user phone number. If all of these options are not available then it provides a null value.
Emergency Services calls does not work if the user’s Teams client is offline, or if the user’s device is unable to connect to the internet for any reason, such as a network outage or power loss.
This identification of the callers location drastically reduces the time spent on collecting this information from the emergency caller. As a result of this setting, the Teams Client can provide the user’s precise position to the emergency service provider, which can help the user send the nearest Public Safety Answering point that matches the ALI database Lookup.


Leave a comment