Steps to install Exchange 2013 in Exchange 2010 environment

In this article we will be looking at the steps to install Exchange 2013 in Exchange 2010 environment.

Following Prerequisite checks needs to be confirmed before installation
1) Ensure that you do not have any exchange 2003 servers running in the environment. If so you have to decommission them.
2) Ensure if there is any Exchange 2007 in the environment make sure they have the atleast Exchange 2007 SP3 RU10
3)IF you have Exchange 2010 running in the environment just ensure that they have atlease Exchange 2010 SP3
4) Auto discover DNS records Configure the Auto discover public DNS records for your existing SMTP domains to point to an on-premises Exchange 2013 Client Access server
5) Certificates Install and assign Exchange services to a valid digital certificate else users might face problem in accessing emails via active sync
6) Ensure the administrator who is going to perform the installation has member of the Schema Admins group and the Enterprise Admins group
7) AD Forest Level- Active Directory must be atleast Windows Server 2003 forest functionality mode or higher.
8) You can use IPV6 in Exchange 2013.If you plan to use IPV6 ensure that you have both IPV4 and IPV6 enabled.
9) DC and GC Versions – Below only versions of DC’s and GC’s should be present
Windows Server 2003 Enterprise Edition with SP2 or later (32-bit or 64-bit)
Windows Server 2003 Standard Edition with Service Pack 2 (SP2) or later (32-bit or 64-bit)
Windows server 2008 RTM or Later (applicable for both standard and enterprise)
Windows server 2012 RTM or Later (applicable for both standard and enterprise)
10) Outlook 2003 is not supported in Exchange 2013 environment. Ensure that all the clients have atleast Outlook 2007 SP3 installed.

Install the below feature for CAS & MBX role combination
Open windows power shell and run the below command
Run Import-module servermanager
Install-WindowsFeature AS-HTTP-Activation, Desktop-Experience, NET-Framework-45-Features, RPC-over-HTTP-proxy, RSAT-Clustering, RSAT-Clustering-CmdInterface, RSAT-Clustering-Mgmt, RSAT-Clustering-PowerShell, Web-Mgmt-Console, WAS-Process-Model, Web-Asp-Net45, Web-Basic-Auth, Web-Client-Auth, Web-Digest-Auth, Web-Dir-Browsing, Web-Dyn-Compression, Web-Http-Errors, Web-Http-Logging, Web-Http-Redirect, Web-Http-Tracing, Web-ISAPI-Ext, Web-ISAPI-Filter, Web-Lgcy-Mgmt-Console, Web-Metabase, Web-Mgmt-Console, Web-Mgmt-Service, Web-Net-Ext45, Web-Request-Monitor, Web-Server, Web-Stat-Compression, Web-Static-Content, Web-Windows-Auth, Web-WMI, Windows-Identity-Foundation

Install the Following softwares

Microsoft .NET Framework 4.5
Windows Management Framework 3.0
Microsoft Unified Communications Managed API 4.0, Core Runtime 64-bit
Microsoft Office 2010 Filter Pack 64 bit
Microsoft Office 2010 Filter Pack SP1 64 bit
Microsoft Knowledge Base article KB974405 (Windows Identity Foundation)
Knowledge Base article KB2619234
Knowledge Base article KB2533623

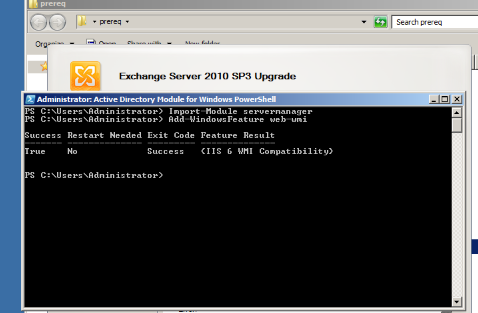
You need to install the remote tools administration pack.Run the below command in powershell
Add-WindowsFeature RSAT-ADDS

Uninstall Microsoft Visual C++ 11 Beta Redistributable (x64)

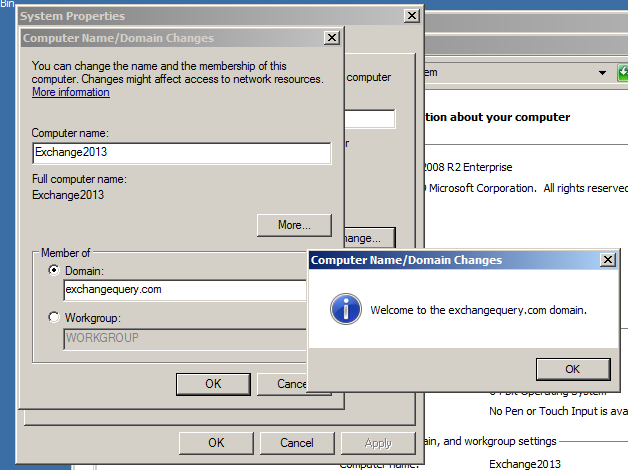
After installing the following prerequisite on the server that we are going to install exchange 2013 we need to join that server into the domain.

In our case we are installing Exchange 2013 in Windows 2008R2

paint1

Open elevated command prompt and navigate to the setup where we have the exchange server setup and run the below command

paint2

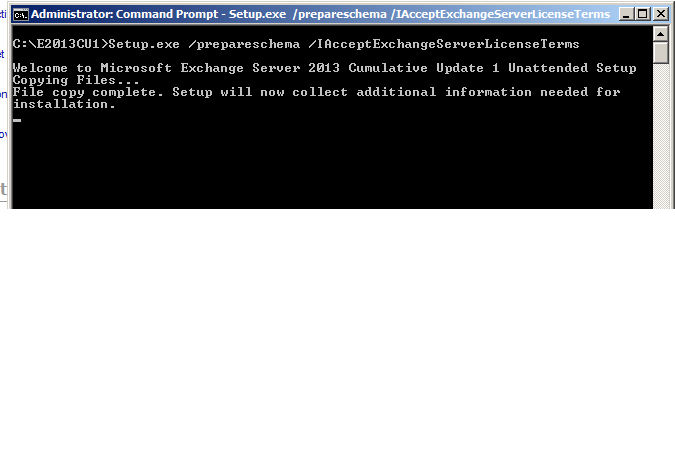
It goes through the prerequisite analysis as shown below

paint3

Next it goes through the active directory schema and completes the schema extension completely as shown below

Paint4

Once schema is completed open the setup and it shows the below screen

Paint5

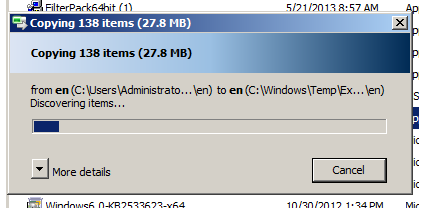
Setup starts copying files as shown below

paint6

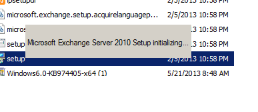
Once the copy is complete it starts initializing the setup as shown below

Paint7

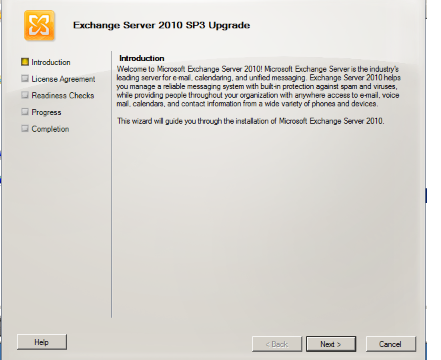
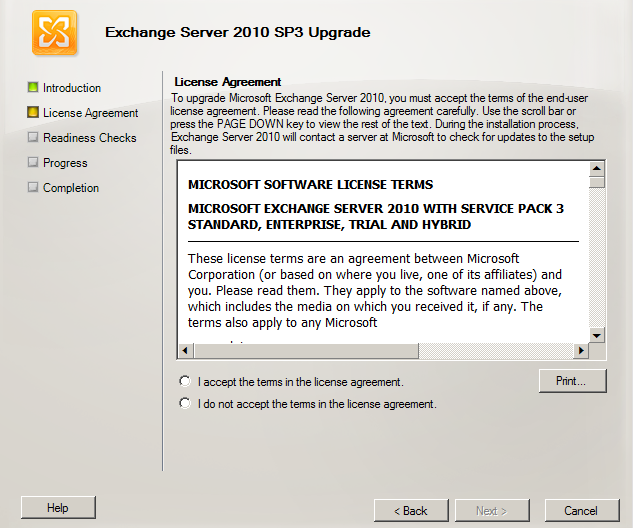
Then it brings into the introduction screen as shown below.Click next and accept the license agreement

Introduction

Then it takes to the recommended settings as shown below

Paint10

Click on next and it takes to the server role selection

Paint11

Click on next and choose the installation location

paint13

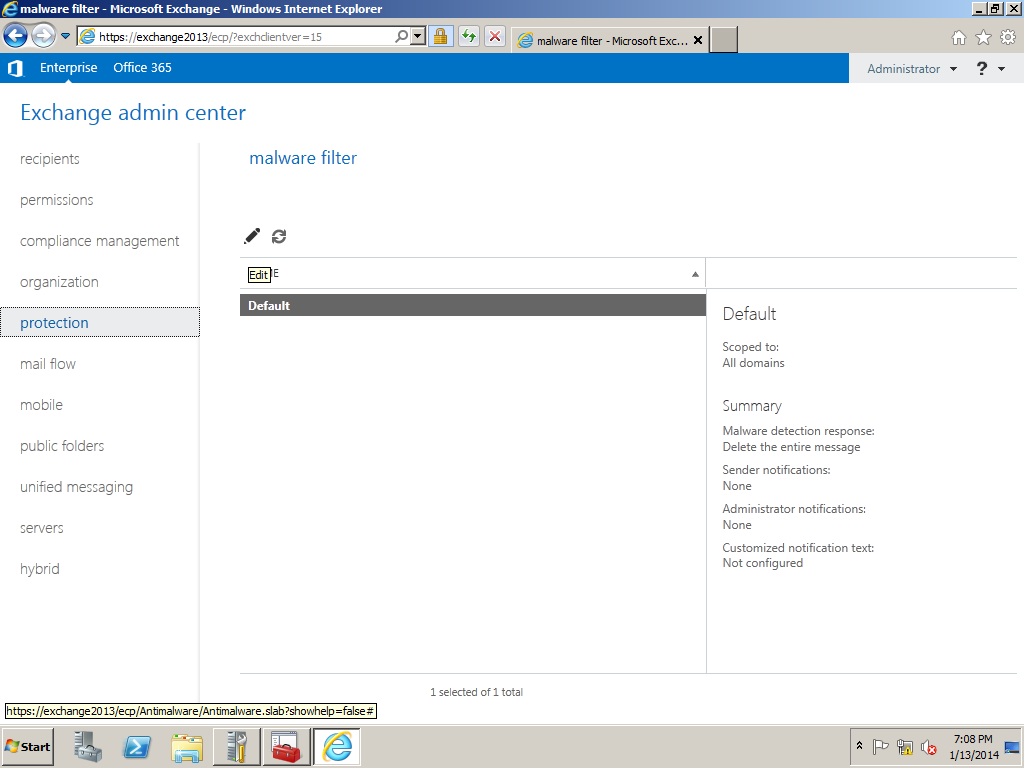
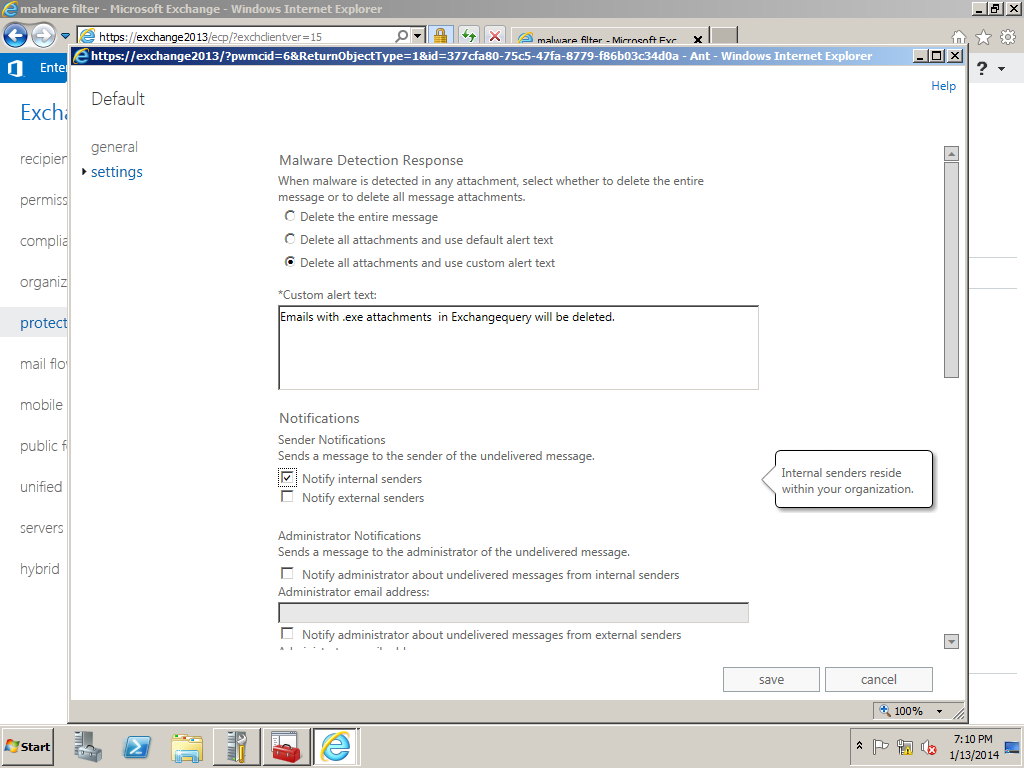
Click on next and it takes to the malware protection settings. Choose the required setup and click on next

paint14

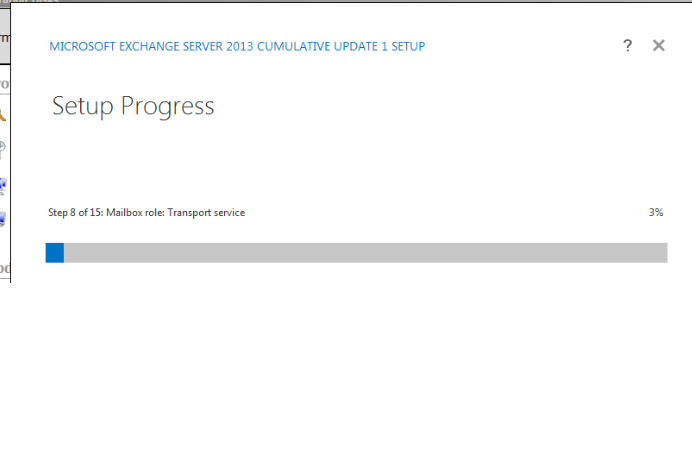
Setup goes through 1 to 15 steps and usually takes less than a hour

paint15'

Once the setup completes it shows the below screen as shown below

paint16

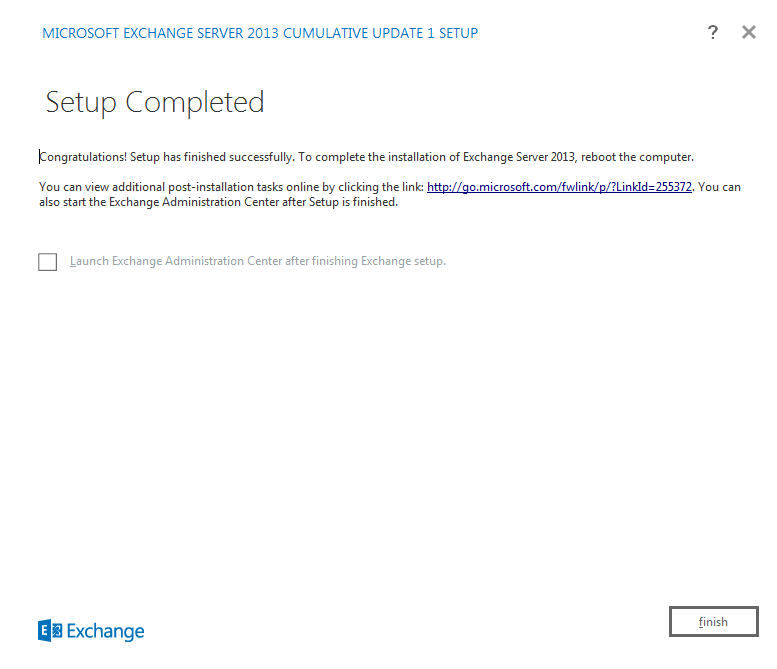
After a reboot is completed we are done with the exchange 2013 server setup.
Open Exchange Management Shell and ensure that Exchange 2013 is installed in the domain by running the below command

Paint17

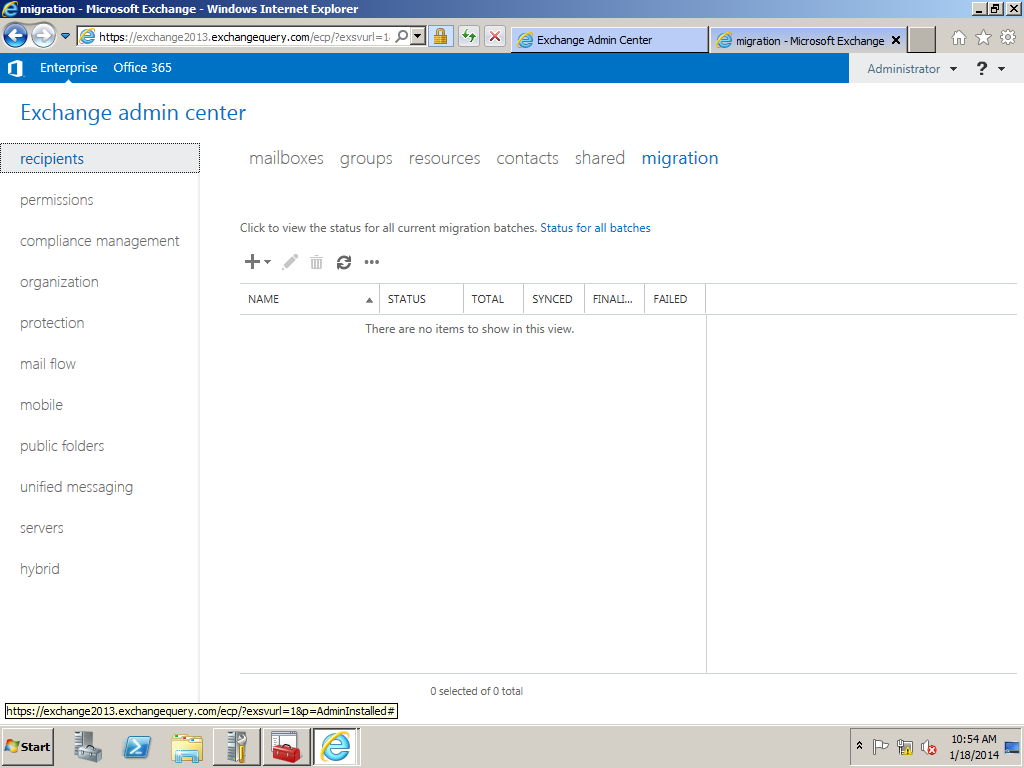
Then try opening EAC by typing https:\\www.exchange2013casfqdn\eac
Note:
Admin account should have permission to open EAC and it should be a member of domain admin,enterprise admin and schema admin else we will not be able to open EAC

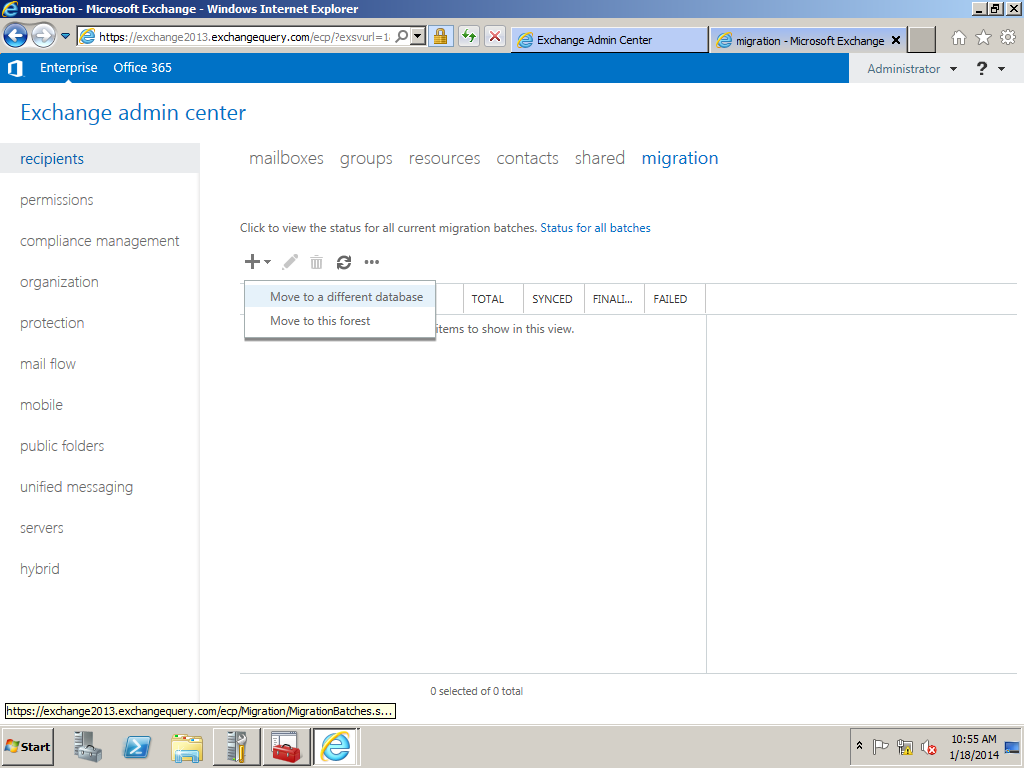
Inorder to acheive this task we can either move admin account mailbox from exchange 2010 to exchange 2013 or we can create an admin account in 2013 and grant appropriate permissions
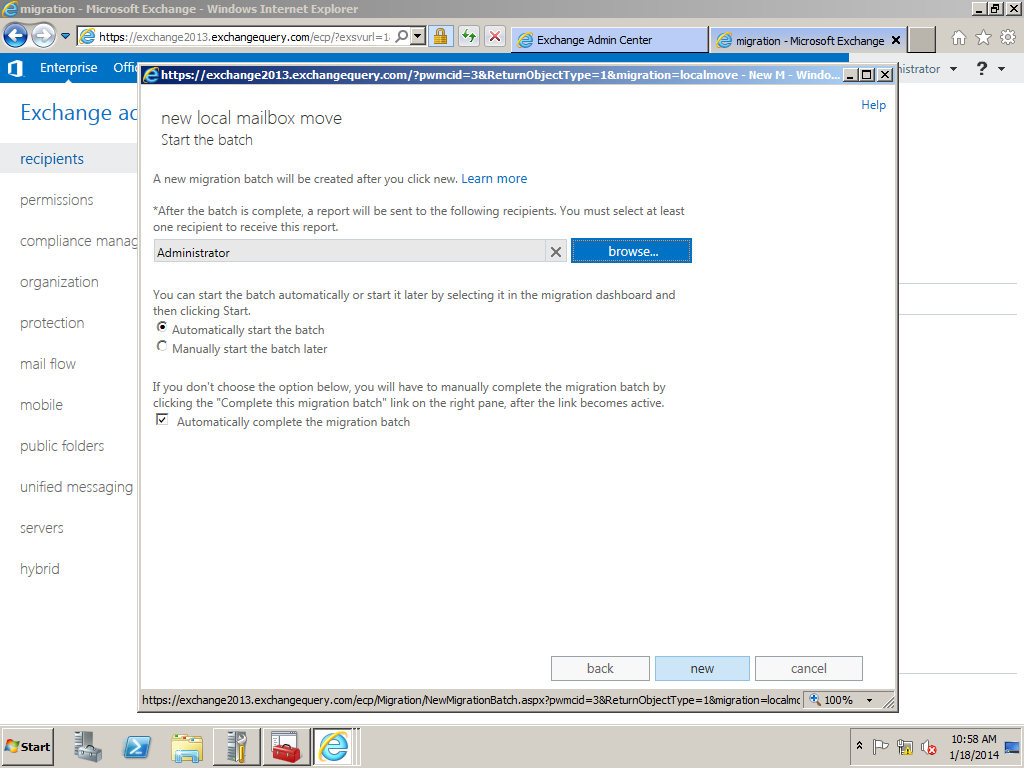
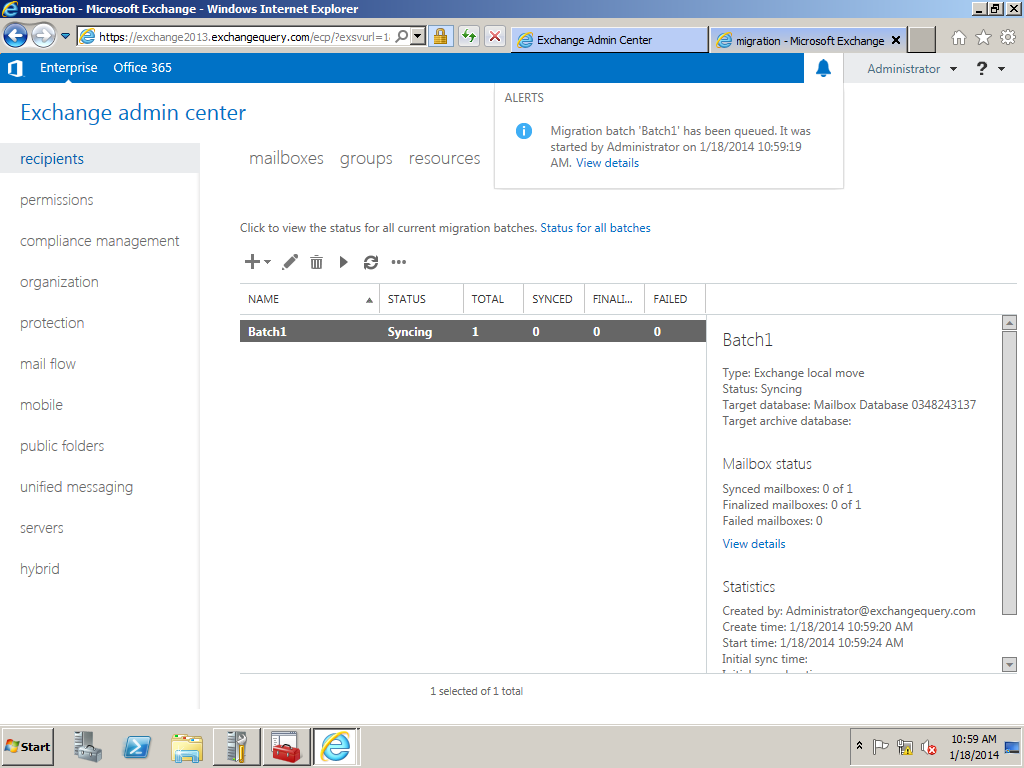
In our case we will move the admin account from ex2010 to ex2013
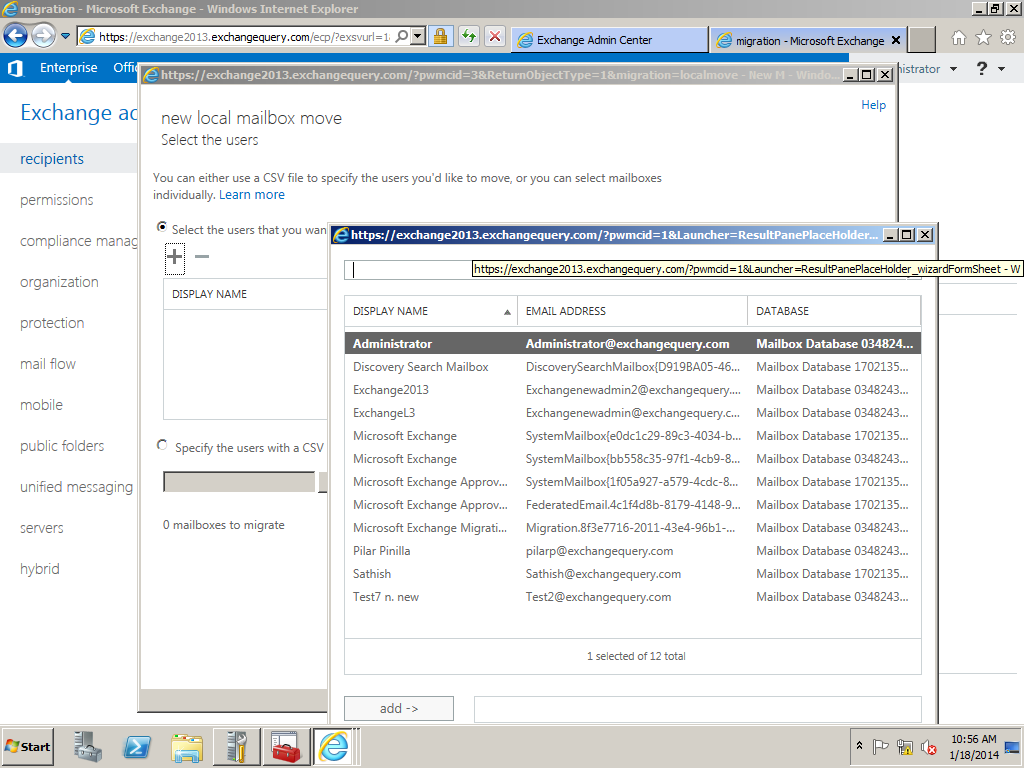
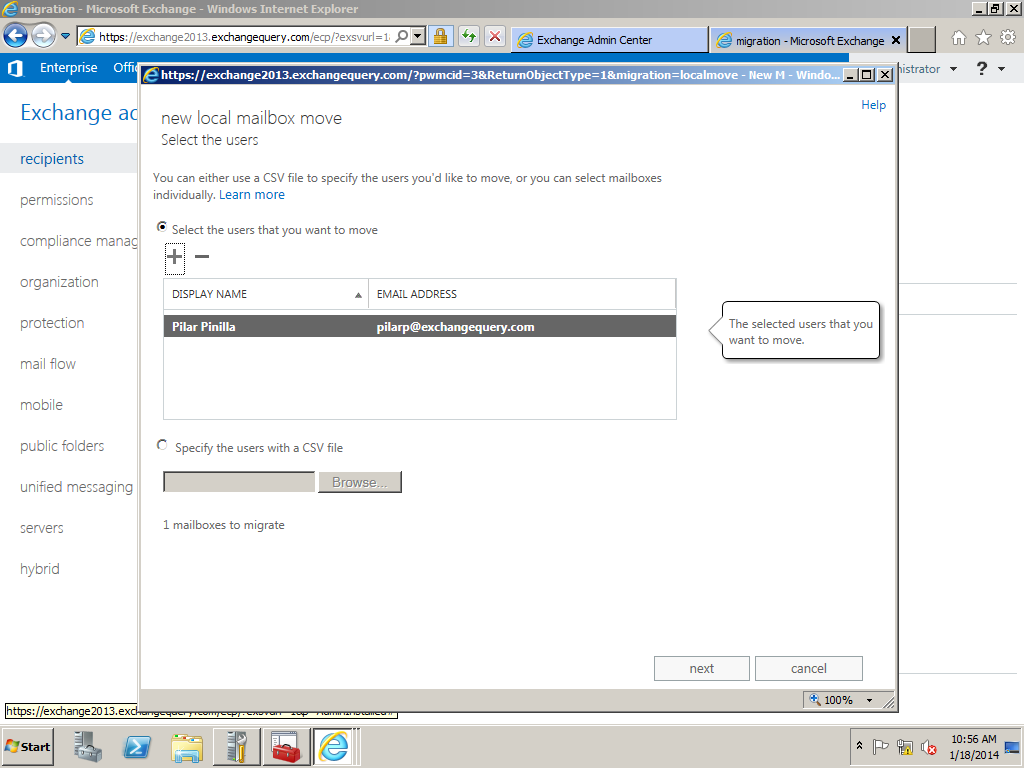
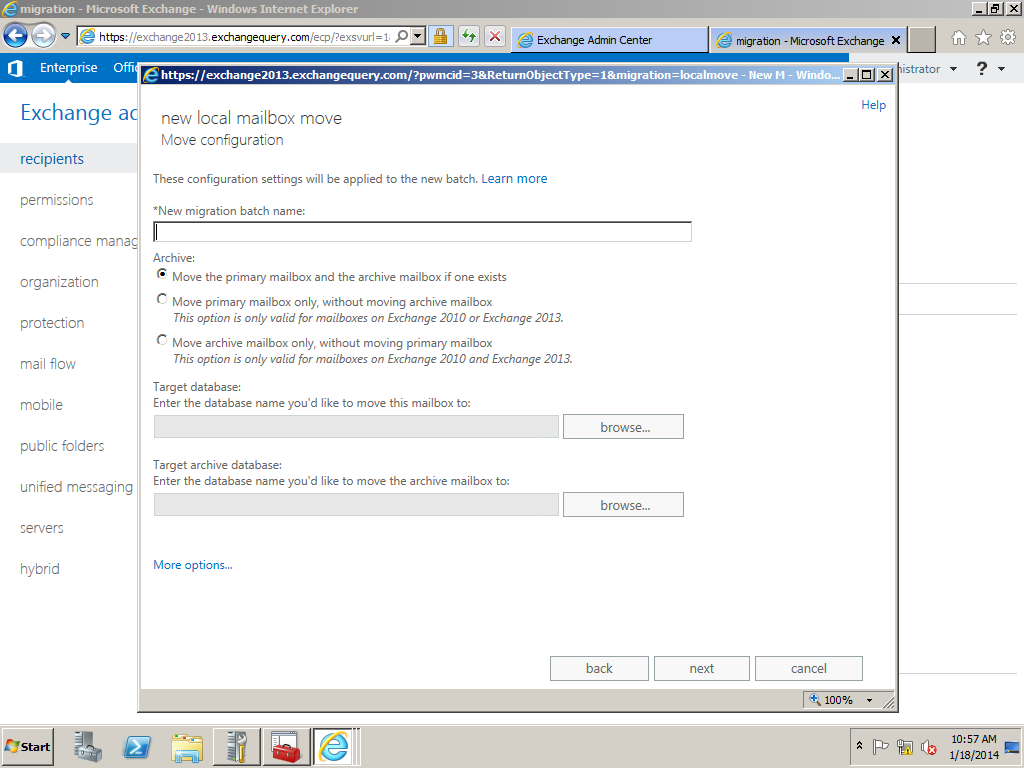
Run the below command to move admin mailbox from exchange 2010 to 2013

Before that you can run get-mailbox database to identify the mailbox DB name in Exchange 2013 and then run the below command with the exchange 2013 database as the target database

paint18

Once the move request is completed you can try logging into EAC in Exchange 2013 and you will be able to login without any issues.

Steps to upgrade Exchange 2010 SP3 in Graphical User Interface

Download the Exchange 2010 SP3 setup 

http://www.microsoft.com/en-us/download/details.aspx?id=36768

Navigate to the setup file and open setup and click on setup icon which opens the below screen.

Now click on the Install Microsoft Exchange server upgrade.

Image

Now the setup starts copying the files as shown below

Image


Now it takes us to the introduction screen where we just need to click on next

Image


Set up initializes as shown below

Image

Accept the license agreement

Image


During the readiness check you might run into this error as shown below  if you are upgrading from Exchange 2010 SP2 earlier versions to Exchange 2010 SP3.

Note: If you are upgrading from Exchange 2010 Sp2 and later rollups version  to Exchange 2010 Sp3 you will not come across the below error and you can proceed with the upgrade.

Reason why we require this feature to be installed.

Because this feature IIS 6 WMI compatibility is required for the new feature outlook web app mini introduced from Exchange 2010 SP2

What is outlook web app mini

The mini version of Outlook Web App is a lightweight browser-based client, similar to the Outlook Mobile Access client in Exchange 2003. It provides access from simple HTML-compatible browsers that support cookies and it’s designed to be used on a mobile operating system

So we just need to install IIS 6 WMI compatibility on the all CAS servers to get rid of this error

Image

Install the IIS6 WMI compatibility.

Image

Rerun the setup and  readiness check will be successful.

Image

Now click on upgrade and the setup will be successful.

Image

Once upgrade is completed you just need to click on Finish and reboot the server which completes the SP3 installation.


Steps to configure POP3 in Exchange 2013


In this article we will be looking into how to configure POP3 in Exchange 2013.

The configuration steps are similar to Exchange 2010 unlike here we have 2 pop services running up Microsoft Exchange POP3 service – Running on CAS server role

Microsoft Exchange POP3 backend service – Running on Mailbox server role

Similarly we do have Microsoft Exchange IMAP service – Running on CAS server role

Microsoft Exchange IMAP backend service – Running on Mailbox server role

Below are the steps to configure POP3

 Open EAC – Click on Servers and choose the appropriate Client access server


Image

Select POP3 in the options below

Image

Now we have options to configure the POP3 settings

Here we got to choose the logon method which should be decided according to our requirement

Also we have the message sort order which will let us to download the copy of emails from server according to the type chosen

Image

Now we need to enable the binding if we have chosen the SSL connection.

Image


We have the session idle time out settings, Connection limits which can be configured.

Also we do have the maximum connection from a single user which will help us to keep any unauthorized access from any device

Moving mailboxes in Exchange 2013

In Exchange 2013 the mailbox move have been improved. It has lot of additional features added in like it gives us the results of the status of move, synched, moved and failed.

The below article will help us in performing mailbox move in Exchange 2013 through EAC.

Open EAC select recipients and click on the migration tab

Image

Click on the + sign and select the option move mailbox to a different database. This option can  be selected while we move any mailbox from Exchange 2007,2010 to Exchange 2013.

The second option move to this forest can be performed while performing a cross forest migration.

Image

Now we can select the mailboxes that we need to migrate.

Image

Also we have an option in which we can upload the CSV file which contains the users list.

Image

Here we can specify the Migration batch name. We have 3 options where it gives us options to move the primary mailbox and the archive or only the primary according to the requirement.

This is one of the best features which make the admins to migrate both the mailbox and the archive mailbox all at one go.

We need to specify the target database of the mailbox and the archive if specified.

Image

We have an option where the mail can be triggered to admins once the batch is completed.Also we have 2 options like automatically starting the batch and manually starting them as well.

Image

This will be the final output of the result which shows the batch status. Here it gives lot of info which will be very useful while performing the migration.

Image


Configure Malware in Exchange 2013

Microsoft Exchange 2013 has the basic antimalware settings which can be enabled during the installation

By default we have a default malware policy which can be modified according to our needs.But it cannot be deleted.

We can create our our malware policy according to the company needs.

Below are the steps to configure malware in Exchange 2013

Open EAC – Click on protection and you will get the malware filter tab

Click Edit to edit the default malware policy

Image

Click on settings and you can give any desired description on our own for this policy

Image


We have malware detection options as shown below and can use any of them .

Also we have options to send messages to the internal/External senders about the NDR

Image

Also we can notify administrator about the spam messages. We can specify customized notification text message as well.

Image


Image


Apps Feature in Exchange 2013

In Exchange 2013 we can see  new feature called apps. By using this users would be able to plug in their required apps in their outlook.

Administrators can decide to enable which app to be published to the outlook client via EAC in Exchange 2013.

By default we have few apps already in Exchange 2013. In addition to that we can download apps from the office.com website for outlook which can be downloaded and pushed from exchange 2013.

Also we can use any third party apps which is compatible with outlook and can be pushed from server end.

By default we have Action Items, Bing Maps, Suggested Meetings and Everyone. This apps comes under organization under apps tab  in EAC.

You can see the description of each default apps in the below screenshots

Open EAC- Select Organization – and choose apps tab

Select Action Items and its enabled by default.

Image

We can see the default Bing maps enabled

Image

Also Suggested Meetings enabled

Image

Unsubscribe

Image

Below are the three options available like add from the office store, any internet url or any executable file.

Image

This is one of the great feature which is introduced in Exchange 2013 and extend the information and functionality of messages and calendar items.

For Example if an email contains  the stree address bing map application offers you the tab through which you can navigate and  identify the location.

Thanks

Sathish Veerapandian

MVP – Exchange Server

BlackBerry Server Migration Planning

In this article we will be looking on how to Migrate from BES 4.0 to 5.0.

Below are the few technologies which have been improved much in BES 5.0.4 compared to earlier versions.

Advanced security features enhanced

BlackBerry Enterprise Server ensures sensitive information is transmitted in a highly protected environment.

Customizable user permissions increased

With over 500 IT policies and BlackBerry Balance technology, administrators can manage user settings, control groups and wirelessly adjust security levels and capabilities.

Stable Remote device management

Track and manage smart phones remotely, without interrupting business

 Designed to meet the needs of enterprise and government, BlackBerry® Enterprise Server is for organizations that have an on premise email server and require a high level of IT control.

BlackBerry Enterprise Server can be run in environments alongside BlackBerry® Enterprise Server Express for organizations that only have a subset of users that require advanced IT management.

Includes BlackBerry® Balance™ technology to enable employees’ BlackBerry smart phones to be used for business and personal use without compromise.


 Premigration Checklist


Infrastructure Network latency: Ensure there is no network latency in the environment.

Messaging Server/Service Location: Make sure the Messaging server is located in the same AD site.

Service accounts: Ensure the service accounts going to be used for BB account has full domain admin rights

LDAP (Kerberos) : Check for any LDAP errors by running DCDIAG

Microsoft SQL Server database mirroring: Plan accordingly whether we need db mirroring or it can run with the same setup or not according to the environment.

System Requirements


Image

Supported Environments

Image

Preparing the source domain for migration process

Image

Preparing the destination domain for migration process

Image


Steps to use BET Tool for Migration.

You can use the BlackBerry® Enterprise Transporter to move one or more user accounts from one BlackBerry Domain to a different Blackberry Domain

You can use the BlackBerry Enterprise Transporter when your organization upgrades the BlackBerry® Enterprise Server and you want to create a new BlackBerry Domain, or if you need to move user accounts between BlackBerry Domain instances. For example, if you want to upgrade your organization’s BlackBerry Enterprise Server from version 4.0 SP7 to version 5.0, you can create a separate Blackberry Domain version 5.0 and use the BlackBerry Enterprise Transporter to move your organization’s user accounts to the new Blackberry Configuration Database. You can also use the BlackBerry Enterprise Transporter to move user accounts from a production Blackberry Domain to a test BlackBerry Domain and back.

When you run the BlackBerry Enterprise Transporter, users do not need to delete BlackBerry device data or reactivate their Blackberry devices, if the BlackBerry Enterprise Transporter supports the BlackBerry® Device Software version that they are using. The destination BlackBerry Enterprise Server resends service books, and the BlackBerry devices can start receiving new messages after the BlackBerry devices receive the service books. Synchronization of organizer data and calendar information over the wireless network might occur after the migration process completes.

BET works in 2 modes

Live

 BES instances in both BB Domain instances must use different SRP IDs.

Move user accounts when the BES instances in both the destination BB Domain and the source BB Domain are running.

Bulk

 During the migration process BB Enterprise Server instances in both the source and the destination domains must be turned off.

 In the destination BB Domain, BB Administration Service must be running.

 During the migration process, based on the source BB server, the BB Enterprise Transporter searches the source BB Configuration Database for all user accounts that are associated with the BB Enterprise Server, and moves them.

 Configure the destination BB Enterprise Server instances to use the same

     SRP IDs that the source BB Enterprise Server instances use.

Advantages of BET tool During Migration

Users do not need to delete BB device data or reactivate their BB.

 The destination BB Enterprise Server resends service books, and the BB devices can start receiving new messages after the BB devices receive the service books.

 Synchronization of organizer data and calendar information over the wireless network might occur after the migration process completes.

Preview user move to check for potential errors

Image

Below steps need to be done for the data that is not migrated

Image

BB Enterprise Transporter (BET) performs two validations

Global Validation

 BAS is installed in destination BB Domain.

Sends a test BB Administration Service command to verify that the BB Administration  Service is available and can respond.

User Validation

 User account is associated with a valid email address.

 Account does exist in the source BB Domain and does not exist in the destination BB Domain.

 IT Policy can be applied to the BB Smartphone.

BB device is running an unspecified version of the BB Device Software

BB device is operating on BB Device Software version 4.0.2, and less the ITPolicyKeyMapping table does not exist.

BB device is operating on BB Device Software version 4.3.0

Preparing the move user accounts with the BB Enterprise Transporter:

Create the manifest file.

1. Configure the source and destination BB Configuration Database instances.

2. Configure the default settings for user accounts in the destination BB Domain.

3. Selecting the user accounts to move to the destination BB Domain or select all user accounts associated with a source BB Enterprise Server.

4. Move the user accounts


Installing the BB Enterprise Transporter

1. Create a folder to store the BB Enterprise Transporter files.

2. In a browser, visit na.BB.com/eng/support/server_resourcekit.jsp.

3. Download the BB Enterprise Transporter installation package.

4. Extract the contents of the installation package to the folder that you created.

5. Double-click the brk-bbenterprisetransporter.msi file.

6. Complete the instructions on the screen

Image

Image

Create a Manifest file in xml


Image

Configure the source database

Image

Configure Destination database

Image

Verify the server names and database click on details to choose users for migration

Image

Click on find users choose users and done

Image

Verify the user list and click on done

Image

Click on Preview to validate the user

Image

Image

Migration Progress and completion

Image

Image

Checklist to be performed before Migration

  Backup current environment.

  Confirm pre-requisites.

  Start BB Enterprise Server setup application on a new server.

  Create new BB Configuration Database.

  Restart server & Complete configuration.

  Recreate IT Policy and Software Configurations in BES 5.0 environment.

  Shutdown services on BB Enterprise Server 4.x.

  Start the BAS service on BB Enterprise Server 5.0. Move users with BET (bulk mode)

Conclusion


BES 5.0 infrastructure can be deployed independent of already existing BES 4.X deployment.

•Separate BB configuration database created for BES 5.0 environment.

•IT Policy(s), Application Control Policy(s), and Software Configurations are created and validated in BES 5.0 environment.

•BB User(s) is migrated using the BB Enterprise Transport (BET) Tool Live mode or Bulk mode.

• We can view, but not change, the properties of previous versions of the BB MDS Integration Service, BB MDS Connection Service, and BB Collaboration Service from BAS.

  •  Before you try to move the user accounts, upgrade the source BB Enterprise Server for Microsoft Exchange to version 4.1 SP6 MR5 or later.

Steps to configure anonymous or authenticated relay in Exchange 2013

Basically there can be 2 types of relay which will be used in an organization for relaying applications.

1) Internal Relay: Which might be an application which submits emails to exchange and in turn it delivers emails to users mailbox as a daily report, faxes etc.,

2) External Relay: An application might send out fax like invoice, quotation etc., to an external vendor for daily operation purpose.In turn the vendor can also send out some automated emails like daily sales report to user’s mailbox.

In order for both the functionality to work we need to have relay configured on the exchange side

The submission of the relay can happen in 2 ways

1) Anonymous

This relay happens through anonymous connection which means any account within that subnet assigned in the relay connector is authorized to submit emails to the organization.

2) Authenticated

This relay happens only through specific authenticated account by which the emails are submitted to the exchange side from the application, fax etc.,

For the authenticated relay to happen first we need to Create/configure a service account for the applications/copier to use

In this article we will be seeing on how to configure relay permission on Exchange 2013

First open EAC and then click on Mail Flow

Select the required server and then click on + Sign

Image

Type the name of the connector and then select Custom

Image

Click next and now we need to assign the correct subnets and the ip address

Note:This is very important point since giving permission to unknown subnets will make the server to behave as an open relay which is ready to accept spam messages. Ensure that you are giving only to the known subnets which requires relay.

Image

Now add the subnets

Image

Click finish. And now we need to give permission accordingly to the type of relay that we are going to assign to this connector

1) Anonymous

2) Authenticated

First we will look on how to give anonymous permission

Double click or click on edit on the relay connector

Image

Select anonymous users which is under security and click save

Image

Now we need to give required authentication to this anonymous users account for this connector. This can be done in 2 ways

Through Exchange Management Shell

Through ADSI Edit

We will see on how to grant permission through ADSI edit.

Open adsiedit and navigate to below location

Image

Click security and select anonymous logon and click submit messages to any recipient

Note: This permission should be granted only on relay connectors and it should never be granted on default receive connector.

Image

Follow the same steps for authenticated relay except for giving permission to anonymous user account give submit messages to any recipient permission to the associated service account.

Also you can run the below command to grant permission on anonymous account for relay connector alone.
Get-ReceiveConnector “Anonymous Relay” | Add-ADPermission -User “NT AUTHORITY\ANONYMOUS LOGON” -ExtendedRights “Ms-Exch-SMTP-Accept-Any-Recipient”

Sathish Veerapandian

Setting up Retention Policy in Exchange 2013

A Retention policy is a group of retention tags that can be applied globally to all the users . This helps us in maintaining the email lifecycle globally from the server end.

This will help users and the organization in terms of not loading up the server with unwanted old emails and end users maintaining their mailbox not as a part of their daily task. Messages are expired based on settings defined in the retention tags linked to the policy. There is no difference in retention policies from exchange 2010 to 2013 apart from the configuration part.

Below are the steps to set up retention policy in Exchange 2013.

1)      Open EAC –> Select Compliance Management -> and click on retention policies


Image

2) We have 3 options as shown above and we can choose as per the option and click on the + sign


3) In the next window you get the space where you can type the retention policy name. You can type any desired name since this name will not be displayed to the end users.


Image

4) Then we need to choose the required retention tags and add them as shown in the below screenshot.

Image


Image

Then we have options to edit the created retention policy and we can add, edit and remove the retention tags any time.

Image

Then use EMS to apply retention policy to single user with the below command

Set-Mailbox “Exchangequeryadmin” -RetentionPolicy “Exchangequerytest”

We can refer the below article to apply retention policy to bulk/group users

http://technet.microsoft.com/en-us/library/dd298052(v=exchg.150).aspx


Thanks 

Sathish Veerapandian

MVP – Exchange Server 

Steps to Deploy Data Loss Prevention in Exchange 2013

Most of the organization like Financial,Banking,Production etc.,will be having lot of sensitive,confidential and secure data.These data s are stored in most of the users mailbox and communicated even through IM.

It is really a difficult part in terms of protecting these kind of company confidential data since these data can be copied by means of USB,Printing,Email Communication,IM etc.,

Microsoft have introduced a new package which comes along with exchange 2013 in terms of protecting the company sensitive data stored in the form of emails.

Data Loss Prevention is a premium feature that requires an Enterprise Client Access License (CAL).

Below are the steps to configure the DLP in Exchange 2013

Open EAC -> Click on Compliance Management -> and select Data Loss Prevention

Image


You have three options as shown
New DLP policy
Import DLP policy
New Custom DLP polic

Image


The next screen brings you the DLP policy template where you define name,description,choose template and mode of requirements as below

Image


Choose the  options as required and click on save.

We are done with DLP created and it will show an option as enforcing and we can see few other options to test the created DLP policyImage


Once the policy is enforced we can see the DLP created.When we click on the created DLP we have multiple options as shown in the screen below like including override as well.

Image


We can create a custom DLP according to our requirement as well as we can import an existing template.

This will be very helpful for any organization in terms of protecting sensitive data.

Thanks

Sathish Veerapandian 

MVP – Exchange Server