Monthly Archives: April 2014

Installing and Configuring PST Capture 2.0 in Exchange 2013 Environment

In this article we will be discussing about installing and configuring PST capture agent in Exchange 2013 environment.

Since everyone will be familiar with the enhanced features which are available from the version 2.0 I’m not going to list down the improvements. For those who would need to know the enhancements you can refer this TechNet blog http://blogs.technet.com/b/exchange/archive/2013/02/22/time-to-go-pst-hunting-with-the-new-pst-capture-2-0.aspx

Installation in Exchange 2013 is the same procedure as we do it  for Exchange 2010. But only PST Capture version 2.0 supports Exchange 2013 and not the earlier version.

Now let’s go ahead with the prerequisites of installing this tool.

  1. Microsoft .NET Framework 3.5 or 3.5 Service Pack 1 (SP1).
  2. A Central Service account for managing the PST captures central service.
  3. Outlook 2010 to be installed on a PC where we have PST capture console and we are performing the export and import.


Download the setup from the below location.

http://www.microsoft.com/en-us/download/details.aspx?id=36789

We could see there will be 2 files which will be available in the setup.

PSTCapture.msi – This is the main installation file which should be installed on a PC where we require the PST capture console. All the PST capture in the organization and import happens through central service running in this PC.

PSTCaptureAgent.msi – It should be installed on the machines (client pc’s) where we need to scan for the PST files. This particular service running after the installation on the client pc’s will be sending the requested PST files to the PST capture console when requested for an import.


Note: If we do not install this agent on the client machines then we won’t be able to detect the PST files on those particular machines.

Image

Installation is pretty simple and just navigate through the setup one by one.

Image


Now specify the host name of the Central service computer you wish to select and click next. Also you can see the default port assigned for this function which can also be altered within the specified values.

Image


Once the installation is completed on the PC you can see the PST capture icon as below in that PC.


Image

When you open the wizard it has the following options.

Image

The PST search happens in 4 steps.


1st step

Select the computers that we need to perform the PST search.

Note: If we do not install the PST capture agent on the client machines then we won’t be able to detect the PST files on those particular machines.

Image


2nd Step

We have locations to search and locations to ignore as well as shown below.

Image

3rd step

We have an option to run the schedule manually as well as to run on a scheduled date.

Image


4th step

Finally we get the summary. Just click on finish.

Image

Finally we get the below screen while PST search is running.

Image

Once the search is completed it displays the below results with the list of PST files scanned.

Image

Now we need to select the scanned PST files and then create a new Import list.

Cloud Import list – For Importing PST files to an online account.

OnPrem Import List – For Importing PST files to an on premise Exchange account.

Now select the destination mailbox to which it needs to be imported.

Image

Image

You can see the import status in percent and once the import is complete you would be able to see the emails in the imported mailbox.

Image

Note: Outlook 2010 64 bit version is required on the host computer where we are performing this action through PST capture console. If Outlook is not installed then Import will be failure.

This tool is really useful in effectively managing the end users PST files during migration as well as in transition to BPOS/O365 from an on premise  setup.

SysTools – Exchange EDB Recovery Software

I just found  this amazing  exchange  database recovery software developed by SysTools and  I would like to share the functionality of this tool.

SysTools is a company  delivers innovative software applications to enhance the lives of millions of IT Admins and computer users around the globe.

About Exchange recovery software (SysTools)

By using this software the email contents of single user ,multiple users can be extracted from a corrupted  exchange database (edb,stm) file.

The emails can be extracted  in the form of PST’s (even split pst’s), message format, eml format and also emails from damaged edb files can be directly imported into an active Exchange mailbox.

Even though if we maintain a proper exchange  backup in a healthy environment there is a lean possibility in scenarios where the Exchange admin would be  totally running out of options if the backup is not healthy,and the edb files are no longer recoverable.This software can be used in those kind of scenarios.

Also this tool can also be used in   recovering the emails from a (older  edb file/older backup ) in scenarios where their  exchange environment is  no longer existing or they have transitioned to new version of exchange.

Below is the installation and functionality of this tool

This tool can be run on environments which has Exchange 2003,2007,2010 & 2013.

Prerequisites

We just need to have .net 2.0 installed on the member server where we are going to install this tool. However even though if we do not install .net 2.0 manually  this tool automatically detects ,downloads and installs during the installation.

IMP:  We need to have Outlook 2007/2010 installed on the PC  where we are installing this tool.

And of course we need to have the  edb files from which we need to extract the PST

Below is the installation procedure

1) Download the setup from the below link.

http://www.systoolsgroup.com/exchange-recovery.html

2) Open the setup and click install

Image

3) Installation is pretty simple and just navigate through the setup  one by one.

Image

4) There is an option to create desktop icon and quick launch as well.

Image

Image

Image

Once the installation is completed launch systools Exchange Recovery software.You might get  the below error if there is any of the following prerequisites missing.As I mentioned earlier  we need to have an Outlook profile configured on the PC where we are installing this tool.

Image

Also we need to have outlook component which needs to be registered. When you click on details you have an option to register the outlook component and you will get the below message once done.

Image

Now let’s explore the functionality of this tool.

Launch Systools.

Image

It opens a window and asks for the associated edb file which needs to be opened.

Image

Open the EDB file from associated location.

Image

Once the file is selected  we get the below screen if the scan of edb is successful.

Image

Now we get below option after we click on ok.

It displays all the mailboxes with sub-folders,calendars,contacts which are present in the edb file.

Image

Also we have an option to view all the emails on the right hand  preview side.

Image

You can click on the export option and it displays the below limitation for demo version.

Image

Click on ok and then it  displays the below screen with the following options.

Image

Option 1 :  Exports the emails into PST. There is an option for split pst’s as well.

Option 2 :  Exports emails in the MSG format. We can export  individual emails as well.

Option 3 : Exports emails in the EML format.

Option 4 : Directly exports email to an active Exchange mailbox.

Note : The user account running systools should be having full access to the mailbox where we are going to export the emails if we are choosing option 4.

Choose the required method of export and once the export is completed we get the below screen.

Image

As a final result we also get a report generated.

Image

When we open the report we get the list of mailboxes exported nothing much information.

Image

Though this report gives info about the list of mailboxes exported it could be better if there is few more additional information like number of mailbox items imported successfully and number of failed items as well.

This tool is available in 2 versions as demo as well as full version. The demo version is restricted to 25 items per folder in a mailbox. The full version does  not have any restrictions in exporting the emails as well as in the size of edb files.

Overall this tool will be  really useful  for scenarios where we do not have an option to  recover an edb file due to required log files missing, in-case of backup failure  and finally in recovering emails from a database for a environment which is no longer existing.

Changes in msexchangemailboxreplication.exe.config file from Exchange 2013 SP1

I just happened to check maximum active moves per server before starting the migration batch for one of our client who is running Exchange 2013 SP1 and was excited to see the values increased from the earlier versions.

The XML file is located in the same bin directory as it was in Exchange 2013 CU3

<Exchange Installation Path>\Program Files\Microsoft\Exchange Server\V14\Bin\


1111

The interesting part is that we don’t need to increase the values of these anymore. Because they have increased the numbers to more than sufficient value while comparing from Exchange 2013 CU3 . Also I don’t think there should be any problem  if we modify this XML file.

Values till Exchange 2013 CU3.

Image

Values in Exchange 2013 SP1.

MaxActiveMovesPerTargetServer=”100″

MaxActiveMovesPerSourceServer=”100″

MaxActiveMovesPerTargetMDB=”20″

MaxActiveMovesPerSourceMDB=”20″

MaxMoveHistoryLength=”5″ RetryDelay=”00:00:30

This is really a great stuff which has been modified from Exchange 2013 SP1 which reduces the time of modifying the config file during Batch Migrations.

Steps to Disable Managed Availability in Exchange 2013 for few Health Checks

Managed availability is one of the best feature which is been introduced and it’s an excellent feature from Exchange 2013.By using this feature it’s very easy for monitoring the Exchange servers without adding any monitoring software pack like SCOM and few more.

In addition to this it also has the capability to resolve the issues by its own if it finds something wrong on any of the Exchange Functionality. Also it drops an email to the Health mailbox and specified mailbox (administrators) if in case the solution is unidentified by Managed Availability.


In a real time scenario it’s very useful in monitoring the Exchange servers in all aspects and definitely reduces the impact of the exchange servers from any disaster by its own. There can be few scenarios where there can be additional monitoring software’s installed on the servers  and in those cases we can disable the Managed Availability if at all we do not need the report to be generated twice for the same alert.


Also in case for few servers in  environment which is running on low memory this feature can  be disabled since it queries, polls hundreds of health metrics as it could consume extra memory.

It collects few logs and data by default which is present in the below location which occupies some disk space  depending upon each environment which should be considered for low hard disk space servers as well.

Below is the location.

<Exchange Install Drive>program files\Microsoft\Exchange Server\V15\Logging\Diagnostics\DailyPerformanceLogs

Image


I just explored in this part and I found there is an option to disable this monitoring totally as well as for few parameters too for which we think we don’t need the monitoring to happen.

The reason why we need to consider disabling this for few parameters can be because it can generate alerts for some known errors that we are trying to rectify in the environment and it can generate the alerts and create associated logs in the event viewer as well.We can just disable only those parameters until we find solution for them.

The core service involved in this functionality is the Microsoft Exchange health Manager. You can disable this service if at all there is any SCOM pack installed on the server and you are satisfied with those reports.

 Note: By Disabling this service will stop the whole monitoring functionality of the Managed Availability.

Image

You can also disable the scheduled tasks Exchangediagonosticsdailyperformancelog   & Exchangediagonosticsperformancelog  which is running under the Task scheduler.

Open location \Microsoft\Windows\PLA in Task Scheduler  and disable both of them

Note: By Disabling this scheduled tasks will stop the whole monitoring functionality of the Managed Availability

Image

If you need Managed Availability to be working with few exceptional like not to monitor for few parameters we can also do that by setting those values to false so that monitoring will not happen for them.

Below is an example for disabling the probe monitors for Autodiscover probe

Navigate to the below location and select client access proxytest.xml file and open them with the notepad.

Image

We just need to set the value for Autodiscoverprobeenabled value to false from true

Image

Save the ClientAccessProxyTest.xml and close it.
Restart Microsoft Exchange Health Manager and you will not receive probe alerts for the value that you have set to false.


Note:

It’s not  recommended to disable the Managed Availability until and unless there is any specific reason to be done because we will be losing this excellent monitoring feature available in Exchange 2013 at no additional cost.

Exchange Server Mailbox Statistics Report Tool

Managing the Exchange Servers in  storage capacity is little bit difficult for administrators when the server gets older and older and  when new users keeps adding in the list.

Even if there is any  daily monitoring report for mail flow, databases, disk space monitoring and everything still it’s difficult for administrators to monitor the end users having lot of old emails still in their inbox,sent items,subfolders which occupies lot of space.


It could be better if there is any kind of statistics report that can pull out the number mailbox items, oldest messages for all user so that we can ask the users to move old items to their PST archives.

There are lot of scripts which are available in the internet which  can be run on the mailbox server,DB’s to pull out these information.

I just found this excellent Tool developed  by author  Srinath Sadda and its available in the TechNet gallery for download.

http://gallery.technet.microsoft.com/office/Exchange-Server-Mailbox-7dd53529


The interesting part about this tool is that it doesn’t need power shell or EMS.Its a GUI based tool which can be run manually whenever required.

Note: This  tool can be run for a single mailbox, particular database as well as for  all mailboxes in a server.

 I just tested in my lab and its working fine and below are the results.

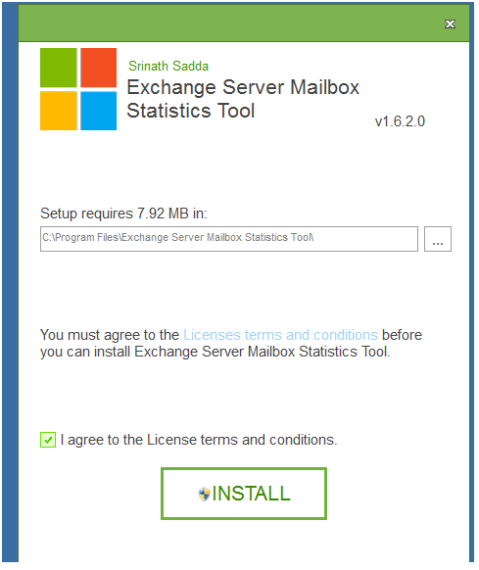
Downloaded the tool from the TechNet gallery (source file link above ) and installed.


Image

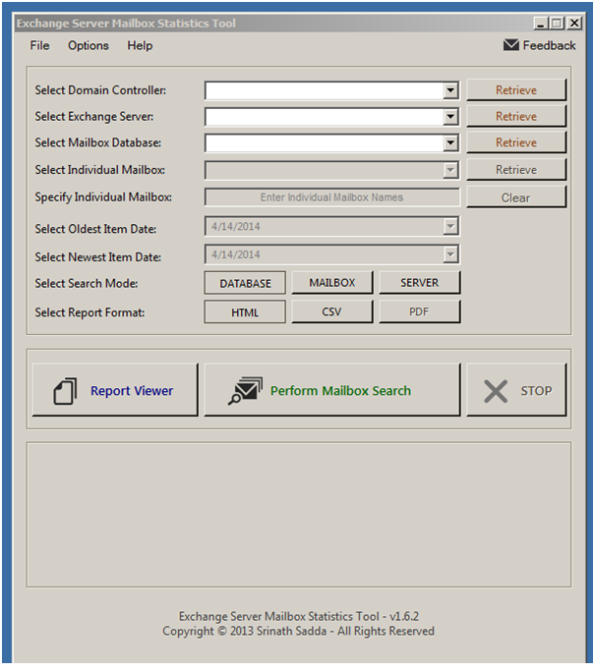
Once the installation is completed open the tool and you will get the below screen.

Image

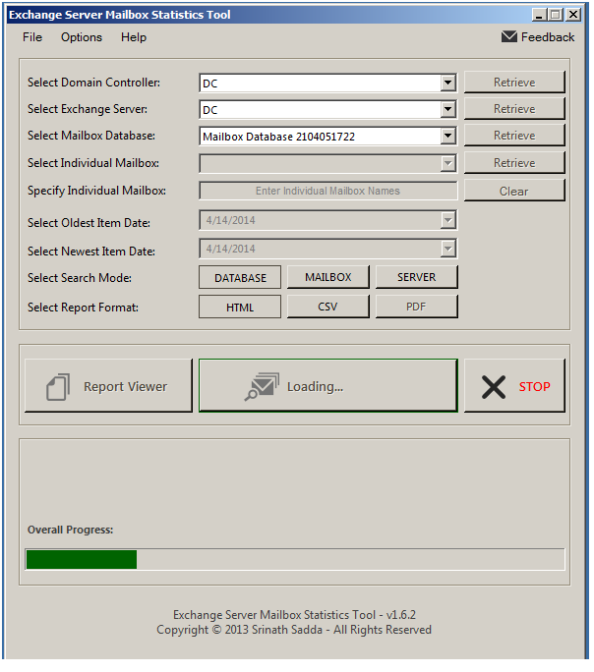
Now we need to specify the DC,Exchange server and DB’s .If we select retrieve it fetches  the above information automatically. Select the oldest and newest items accordingly and click on perform mailbox search.

Image

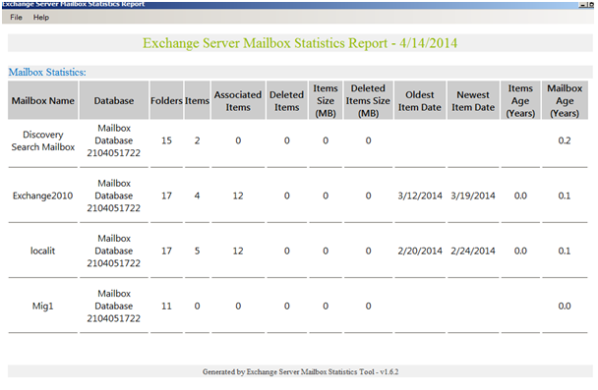
Finally once the report is completed you can click on the report viewer.

Below is the final report status.

Image

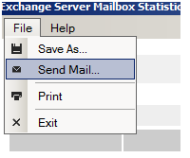
We have option to send this report through  email as well.

Image

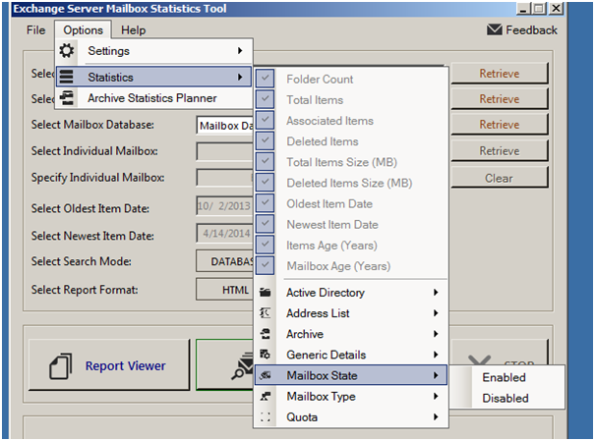
Apart from this we have multiple options like searching for mailbox globally that are hidden from GAL, Number of Disabled mailboxes ,Mailbox Type few more options.

Image

This tool is very useful in terms of monitoring the Mailbox statistics for individual users as well as all users.

Good for Enterprise Overview and Introduction

Good for Enterprise™, is a Good Technology product offered from AT&T.

Provides wireless synchronization  of corporate emails  outside the network.

Compatible with  Android, IOS , Windows phone and palm mobiles.

Users can access and send  their emails on the go through encrypted security without any data leakage.

Good works with integration of Exchange server through an service account authenticated.

Good for Enterprise further integrates with Good-secured apps such as Good Share™ and Good Connect™ to extend desk-based collaboration to mobile devices, increasing user efficiency and productivity outside of the office through ssl.

Good for Enterprise is built on Good’s next-gen containerization, which enables secure data sharing between Good-secured apps as well as app-level encryption independent of the device used In the event a device is lost or stolen, business data can be wiped or locked without impacting personal data

For example, IT can prevent employees from opening files in unsecured apps, backing up business data to personal cloud-based services, or copying and pasting business content into consumer apps or personal email.


Data transmitted over the air, and at rest on devices is secured with industry-leading FIPS-validated AES encryption. There is no need to change firewall settings or set up new inbound connections—all Good servers are deployed behind the firewall with a secure outbound connection using standard port 443. More importantly, Good’s Network Operations Center verifies device compliance before devices are allowed to connect to Good’s inside-the-firewall server.


Below table explains the complete feature of the Good  compatible with the various versions of Devices.

Image

Good Enterprise Administration

Good for Enterprise helps accelerate mobility adoption by including integrated device and application management capabilities, giving you complete control over your mobile deployment.

From a central, web-based console, you have full visibility of your entire device fleet. You can provision new devices; enforce security policies, and remote wipe enterprise data or the entire device from a single location.


Good Architecture

Image


Good for Enterprise provides automatic synchronization of email, calendar, and contacts, notes the user’s Microsoft Exchange Server account and iOS, Android, Windows Mobile, Palm, or Nokia handheld.

Good Mobile Messaging Server software monitors the user’s Exchange account and forwards all account activity to the user’s handheld via the Network Operations Center and your wireless network.


Image

Similarly, changes made at the handheld travel over the wireless network, and are returned from the Network Operations Center to Exchange via Good Mobile Messaging Server. The email arrives at both the user’s desktop and handheld, available to be read, forwarded, and replied to from either location.

A user can have his/her Outlook account synchronized to multiple handhelds


In a simple way lets have a look at the below example

There are 2 users User A and User B

User A has mobile account configured with Good

When user A sends email to User B mailbox below is the transaction result

Scenario 1:

User A sends email from mobile -> mail goes through wireless N\w -> Mail reaches Good operations Center -> Reaches our corporate firewall -> updates Good Messaging server -> Reaches MIcrosoft Exchange -> Finally reaches users outlook

Scenario 2:

When User B sends email from his outlook to User A

User B sends email from OUtlook -> Mail goes to Microsoft Exchange -> Reaches Onpremise Good Messaging Server -> Goes through internet -> Updates the Good Operations centre

More Similar it uses the same concept of RIM  in BlackBerry Enterprise Servers.

Multiple Exchange and Good Mobile Messaging Servers

Image


Good Mobile Messaging Server can maintain user accounts on multiple Exchange servers.

Good Mobile Control Server uses the Exchange Global Address List (GAL) to list, monitor, and manage handheld users across sites. The console is used to assign handhelds to users and to monitor and manage Good Mobile Messaging Servers.

If you have thousands of handheld users, you may need to install additional Good Mobile Messaging Servers to handle the synchronization tasks. Each new Good Mobile Messaging Server will need to be installed on a separate machine

When configuring Good Mobile Messaging Server to connect with an Exchange Server, the speed of the network connection must be a sustained minimum rate of at least 100Mb/s

In the next coming mobility  blog i will further discuss about the installation of the GOOD Enterprise Servers in the Exchange 2010/2013 Environment.