Category Archives: Exchange2013

Apps Feature in Exchange 2013

In Exchange 2013 we can see  new feature called apps. By using this users would be able to plug in their required apps in their outlook.

Administrators can decide to enable which app to be published to the outlook client via EAC in Exchange 2013.

By default we have few apps already in Exchange 2013. In addition to that we can download apps from the office.com website for outlook which can be downloaded and pushed from exchange 2013.

Also we can use any third party apps which is compatible with outlook and can be pushed from server end.

By default we have Action Items, Bing Maps, Suggested Meetings and Everyone. This apps comes under organization under apps tab  in EAC.

You can see the description of each default apps in the below screenshots

Open EAC- Select Organization – and choose apps tab

Select Action Items and its enabled by default.

Image

We can see the default Bing maps enabled

Image

Also Suggested Meetings enabled

Image

Unsubscribe

Image

Below are the three options available like add from the office store, any internet url or any executable file.

Image

This is one of the great feature which is introduced in Exchange 2013 and extend the information and functionality of messages and calendar items.

For Example if an email contains  the stree address bing map application offers you the tab through which you can navigate and  identify the location.

Thanks

Sathish Veerapandian

MVP – Exchange Server

Steps to configure anonymous or authenticated relay in Exchange 2013

Basically there can be 2 types of relay which will be used in an organization for relaying applications.

1) Internal Relay: Which might be an application which submits emails to exchange and in turn it delivers emails to users mailbox as a daily report, faxes etc.,

2) External Relay: An application might send out fax like invoice, quotation etc., to an external vendor for daily operation purpose.In turn the vendor can also send out some automated emails like daily sales report to user’s mailbox.

In order for both the functionality to work we need to have relay configured on the exchange side

The submission of the relay can happen in 2 ways

1) Anonymous

This relay happens through anonymous connection which means any account within that subnet assigned in the relay connector is authorized to submit emails to the organization.

2) Authenticated

This relay happens only through specific authenticated account by which the emails are submitted to the exchange side from the application, fax etc.,

For the authenticated relay to happen first we need to Create/configure a service account for the applications/copier to use

In this article we will be seeing on how to configure relay permission on Exchange 2013

First open EAC and then click on Mail Flow

Select the required server and then click on + Sign

Image

Type the name of the connector and then select Custom

Image

Click next and now we need to assign the correct subnets and the ip address

Note:This is very important point since giving permission to unknown subnets will make the server to behave as an open relay which is ready to accept spam messages. Ensure that you are giving only to the known subnets which requires relay.

Image

Now add the subnets

Image

Click finish. And now we need to give permission accordingly to the type of relay that we are going to assign to this connector

1) Anonymous

2) Authenticated

First we will look on how to give anonymous permission

Double click or click on edit on the relay connector

Image

Select anonymous users which is under security and click save

Image

Now we need to give required authentication to this anonymous users account for this connector. This can be done in 2 ways

Through Exchange Management Shell

Through ADSI Edit

We will see on how to grant permission through ADSI edit.

Open adsiedit and navigate to below location

Image

Click security and select anonymous logon and click submit messages to any recipient

Note: This permission should be granted only on relay connectors and it should never be granted on default receive connector.

Image

Follow the same steps for authenticated relay except for giving permission to anonymous user account give submit messages to any recipient permission to the associated service account.

Also you can run the below command to grant permission on anonymous account for relay connector alone.
Get-ReceiveConnector “Anonymous Relay” | Add-ADPermission -User “NT AUTHORITY\ANONYMOUS LOGON” -ExtendedRights “Ms-Exch-SMTP-Accept-Any-Recipient”

Sathish Veerapandian

Setting up Retention Policy in Exchange 2013

A Retention policy is a group of retention tags that can be applied globally to all the users . This helps us in maintaining the email lifecycle globally from the server end.

This will help users and the organization in terms of not loading up the server with unwanted old emails and end users maintaining their mailbox not as a part of their daily task. Messages are expired based on settings defined in the retention tags linked to the policy. There is no difference in retention policies from exchange 2010 to 2013 apart from the configuration part.

Below are the steps to set up retention policy in Exchange 2013.

1)      Open EAC –> Select Compliance Management -> and click on retention policies


Image

2) We have 3 options as shown above and we can choose as per the option and click on the + sign


3) In the next window you get the space where you can type the retention policy name. You can type any desired name since this name will not be displayed to the end users.


Image

4) Then we need to choose the required retention tags and add them as shown in the below screenshot.

Image


Image

Then we have options to edit the created retention policy and we can add, edit and remove the retention tags any time.

Image

Then use EMS to apply retention policy to single user with the below command

Set-Mailbox “Exchangequeryadmin” -RetentionPolicy “Exchangequerytest”

We can refer the below article to apply retention policy to bulk/group users

http://technet.microsoft.com/en-us/library/dd298052(v=exchg.150).aspx


Thanks 

Sathish Veerapandian

MVP – Exchange Server 

Steps to Deploy Data Loss Prevention in Exchange 2013

Most of the organization like Financial,Banking,Production etc.,will be having lot of sensitive,confidential and secure data.These data s are stored in most of the users mailbox and communicated even through IM.

It is really a difficult part in terms of protecting these kind of company confidential data since these data can be copied by means of USB,Printing,Email Communication,IM etc.,

Microsoft have introduced a new package which comes along with exchange 2013 in terms of protecting the company sensitive data stored in the form of emails.

Data Loss Prevention is a premium feature that requires an Enterprise Client Access License (CAL).

Below are the steps to configure the DLP in Exchange 2013

Open EAC -> Click on Compliance Management -> and select Data Loss Prevention

Image


You have three options as shown
New DLP policy
Import DLP policy
New Custom DLP polic

Image


The next screen brings you the DLP policy template where you define name,description,choose template and mode of requirements as below

Image


Choose the  options as required and click on save.

We are done with DLP created and it will show an option as enforcing and we can see few other options to test the created DLP policyImage


Once the policy is enforced we can see the DLP created.When we click on the created DLP we have multiple options as shown in the screen below like including override as well.

Image


We can create a custom DLP according to our requirement as well as we can import an existing template.

This will be very helpful for any organization in terms of protecting sensitive data.

Thanks

Sathish Veerapandian 

MVP – Exchange Server 

Exchange 2013 Key Improvements and Enhancements

1)      Managed Availability in Exchange 2013

In Exchange 2013, native, built-in monitoring and recovery actions are included in a feature called Managed Availability.

Managed Availability is the integration of built-in, active monitoring and recovering any issues of its own without any admin help and the Exchange 2013 high availability platform,allowing Exchange to make a determination on when to fail over a database based on service health.

To view the health of a server, you use the cmdlets Get-ServerHealth to retrieve the raw health data and Get-HealthReport that operates on the raw health data and provides a snapshot of the health

2)      Managed Store in Exchange 2013

This is a replacement for Information store in  earlier versions

Microsoft Exchange 2013 Managed Store is a mechanism used in Exchange Server 2013 to isolate failures at the database level.

The Managed Store in Exchange 2013 replaces the Exchange Information Store of past versions. The primary benefit of the

Exchange 2013 Managed Store is that if a single database process encounters any sort of error, only that database is affected. That said, the Managed Store also presents numerous enhancements over the Information Store, including:


•Improved integration with the Exchange Replication service,

•Better performance and resilience,

•Improved integration with Microsoft FAST search.

The Exchange 2013 Managed Store also reduces the number of potentially mounted databases per mailbox server from 100 (Exchange 2010) to 50 (Exchange 2013). This change should aid companies that rely on database availability groups (DAGs) as part of their general Exchange Server infrastructure.

3)      Safety net in Exchange 2013

Transport Dumpster  is replaced with Safety Net in Exchange 2013 unlike the earlier versions.

It prevents data loss by maintaining a queue of successfully delivered messages. Unlike the earlier version of transport dumpster It also holds emails of mailbox not a member of DAG and also public folders.
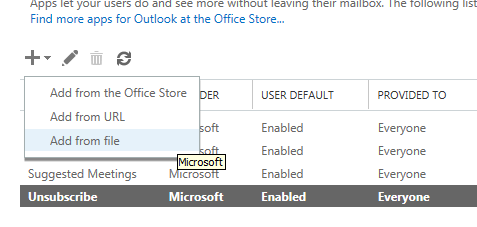
4)      Public Folders

There is no more public folders in exchange 2013.Instead the public folders are created  and associated to a parent public folder mailbox. There is no separate public folder DB in exchange 2013.Discussions can be stored, indexed, and searched

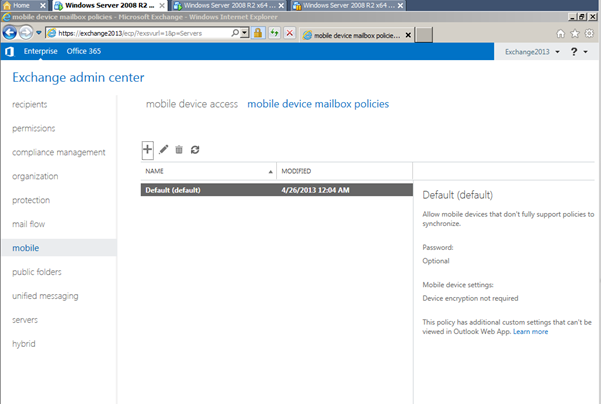
5)      Exchange Administration Center

The GUI-based EMC (Exchange Management Console) and the Web-based ECP (Exchange Control Panel) are being replaced by a single Web-based UI.No GUI and it’s an web based application.


6)      Exchange architecture revisions:

Exchange 2007 and 2010 are broken into five server roles, mainly to address performance issues like CPU performance, which would suffer if Exchange were running as one monolithic application. But Microsoft has made progress on the performance side, so Exchange 2013 has just two roles: Client Access server role and Mailbox server role. The Mailbox server role includes all the typical server components (including unified messaging), and the Client Access server role handles all the authentication, redirection, and proxy services. You can deploy Exchange 2013 with an Exchange 2010 Edge Transport server role but a 2013 Edge role is planned post-RTM.

7)      Storage Architecture

The sizing recommendations for Exchange 2010 and 2013 are the same, maximum of 2TB per database.

In 2013, the number of databases you can mount have changed, 5 in Std, but only 50 in Enterprise Exchange 2013. It is 100 in 2010 Enterprise.


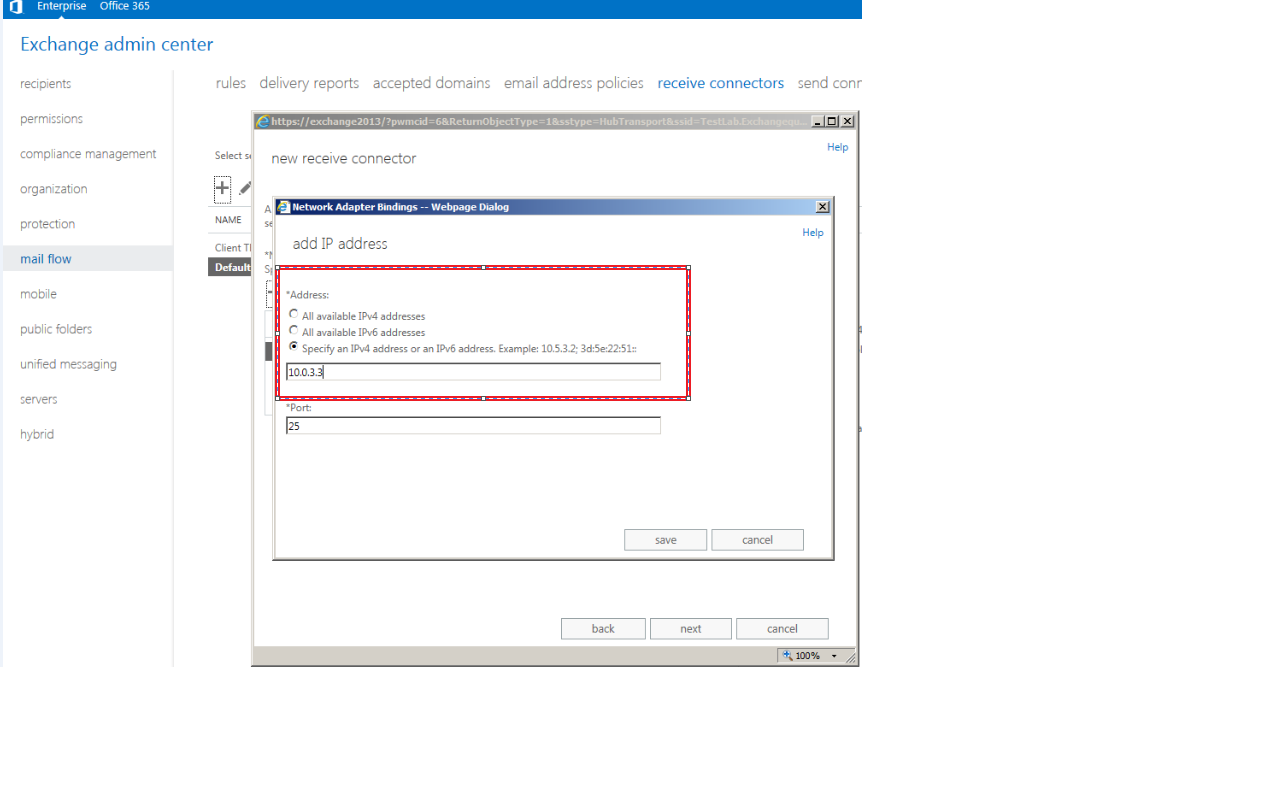
8)      Transport Architecture

Divided into three Front End Transport service, Transport service, Mailbox Transport Service

Front End Transport service :  This service runs on all Client Access servers and acts as a stateless proxy for all inbound and outbound external SMTP traffic for the Exchange 2013 organization. The Front End Transport service doesn’t inspect message content, only communicates with the Transport service on a Mailbox server, and doesn’t queue any messages locally.


Transport service   This service runs on all Mailbox servers and is virtually identical to the Hub Transport server role in previous versions of Exchange. The Transport service handles all SMTP mail flow for the organization, performs message categorization, and performs message content inspection. Unlike previous versions of Exchange, the Transport service nevercommunicates directly with mailbox databases.


Mailbox Transport service   This service runs on all Mailbox servers and consists of two separate services: the Mailbox

Transport Submission service and Mailbox Transport Delivery service. The Mailbox Transport Delivery service receives SMTPmessages from the Transport service on the local Mailbox server or on other Mailbox servers, and connects to the localmailbox database using an Exchange remote procedure call (RPC) to deliver the message.


9)      Client Access Server Change

Outlook Connectivity:

CAS supports only RPC/HTTP (aka Outlook Anywhere). This architecture change is primarily to drive a

stable and reliable connectivity model.

The Exchange 2013 Client Access Server role simplifies the network layer. Session affinity at the load balancer is no longer required as CAS2013 handles the affinity aspects. CAS2013 introduces more deployment flexibility by allowing you to simplify your namespace architecture, potentially consolidating to a single world-wide or regional namespace for your Internet protocols. The new architecture also simplifies the upgrade and inter-operability story as CAS2013 can proxy or redirect to multiple versions of Exchange, whether they are a higher or lower version, allowing you to upgrade your Mailbox servers at your own pace.


10)   Changes in Active Sync

New Exchange ActiveSync provides more additional  following features:

•Support for HTML messages

•Support for follow-up flags

•Conversation grouping of email messages

•Ability to synchronize or not synchronize an entire conversation

•Synchronization of Short Message Service (SMS) messages with a user’s Exchange mailbox

•Support for viewing message reply status

•Support for fast message retrieval

•Meeting attendee information

•Enhanced Exchange Search

•PIN reset

•Enhanced device security through password policies

•Auto discover for over-the-air provisioning

•Support for setting automatic replies when users are away, on vacation, or out of the office

•Support for task synchronization

•Direct Push

•Support for availability information for contacts


11)   Outlook Web Access Replaced with outlook web app

Outlook Web App, or OWA, is completely revamped, with a new look and the ability to access it offline as a real mail client. Outlook is the rich desktop client; OWA is also a client but runs over the Web. The new OWA is also designed to be more suitable for touch interfaces, which makes it more appealing for smartphones and tablet devices.

12)   Retired Tools

Mail flow, performance troubleshooters and Exchange Best Practices Analyzer have been retired and no longer

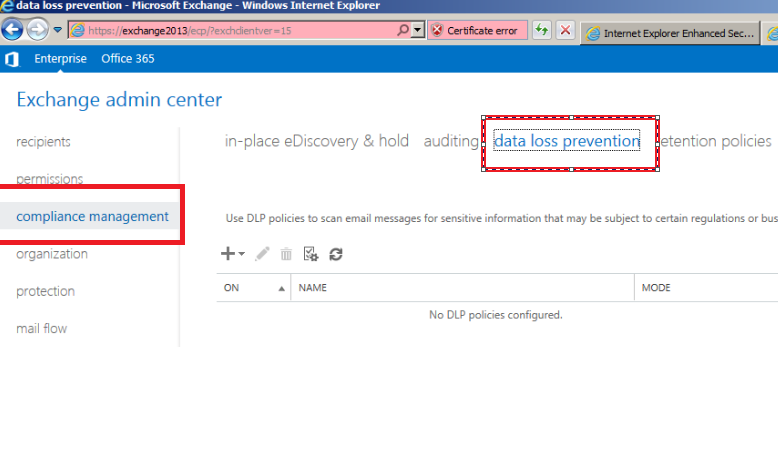
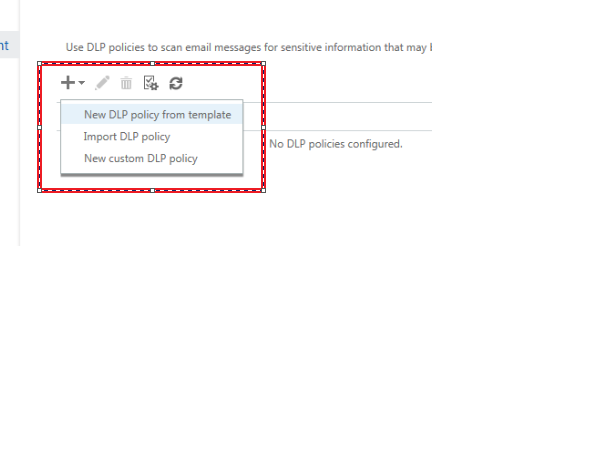
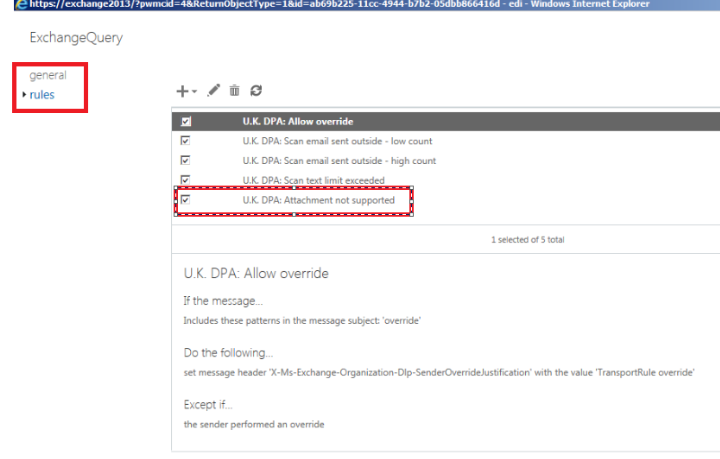
13)   Data loss protection (DLP) in Exchange 2013

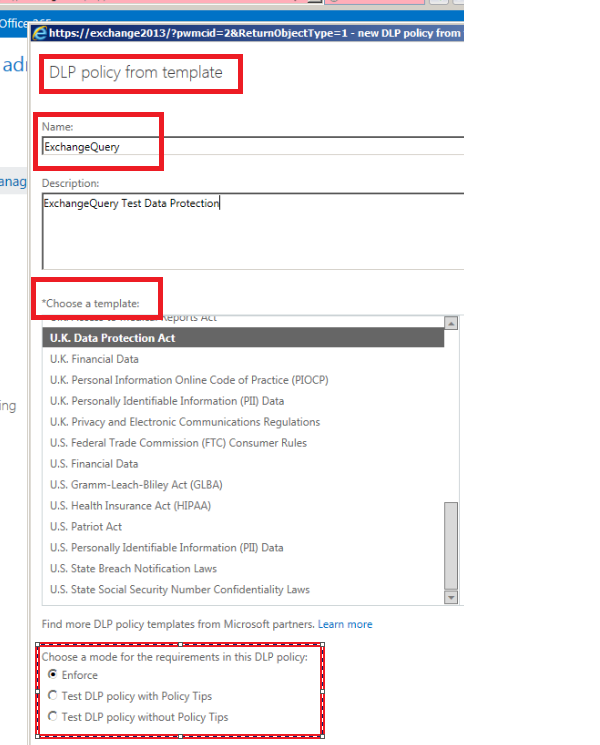
Data loss protection (DLP) is a feature that is built into the Exchange platform. A powerful tool to reduce the amount of sensitive data that leaks outside of the boundaries of the organization is written directly into the new transport rules.

This allows you to set up policies that do one or more of the following:

Enforce boundaries by preventing or limiting transmissions between groups of users, including between groups internal to a company

Apply different treatment to messages sent inside a company from messages sent outside of a company

Stop inappropriate content from coming into a company or leaving it.

Strip out confidential or otherwise sensitive data from transmissions

Archive or journal messages that are sent to or received from users or a group of users

Catch inbound and outbound messages and route them to a manager or administrator for inspection and approval prior to final delivery.

Add disclaimers to messages as they enter or leave the mail flow


14)   CDO/MAPI download for Exchange 2013


There is no support for BlackBerry Enterprise Server (BES) to communicate with Exchange Server 2013. The CDO/MAPI download is not yet available for Exchange 2013 and is “likely the primary reason” BES support is not yet available.Mobile devices can be supported Unless you are using a third-party solution that rides on top of ActiveSync.

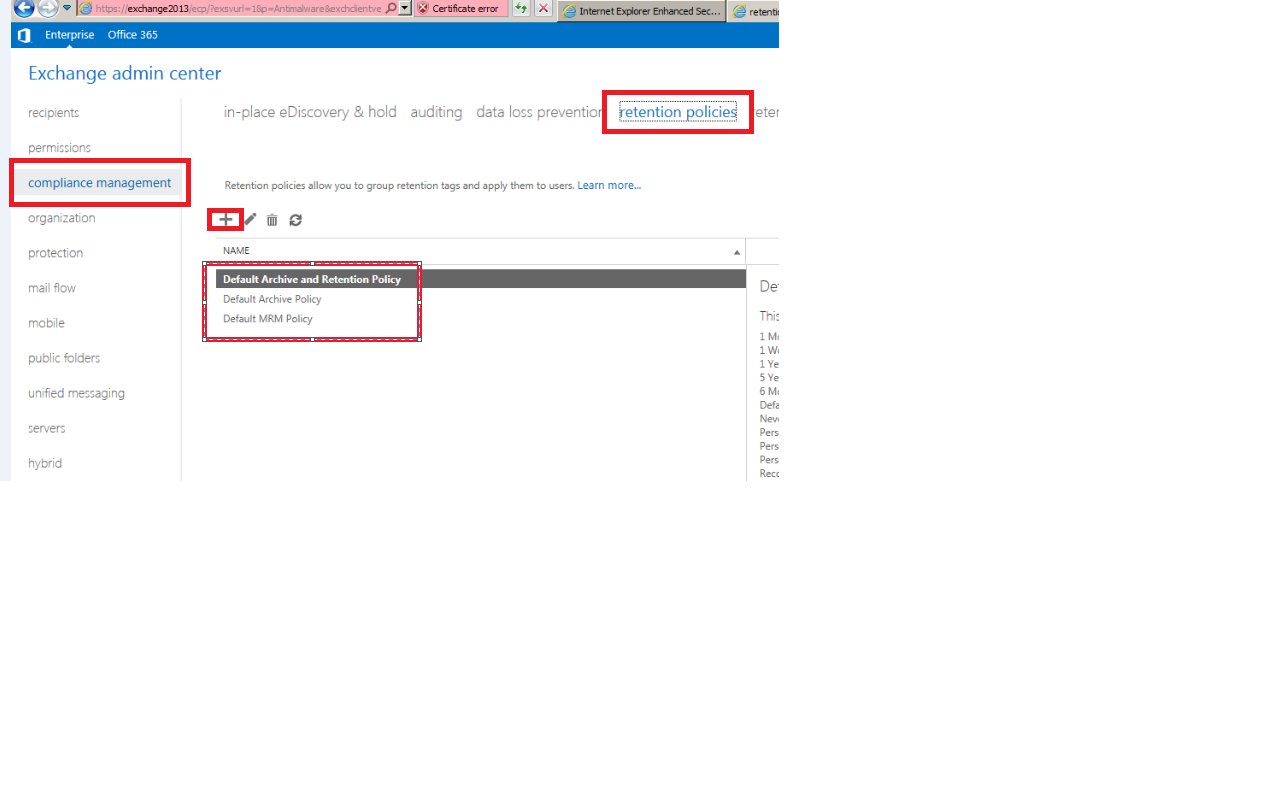
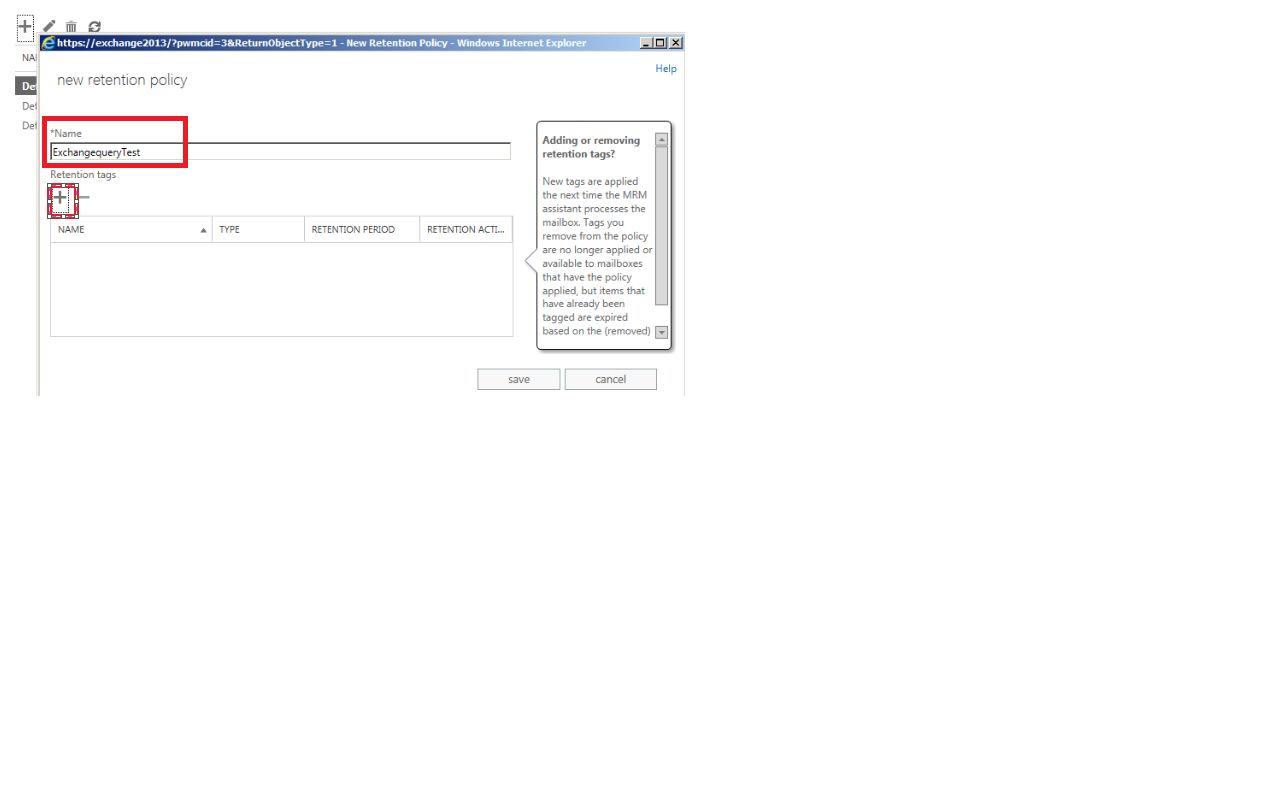
15)   New in In-Place eDiscovery & Hold in Exchange 2013

Multi-Mailbox Search is known as In-Place eDiscovery.In Exchange Server 2010 and Office 365, Litigation Hold makes it possible to preserve mailbox items. When a user or a process attempts to delete an item permanently, it is removed from the user’s view to an inaccessible location in the mailbox. Additionally, when a user or a process modifies an item, a Copy-on-write (COW) is performed and a copy of the original item is saved right before the changed version is committed, preserving original content. The process is repeated for every change, preserving a copy of all subsequent versions.

The ability to give end users a tool to perform eDiscovery searches without the need for IT is great. Please refer the below blog.

References: http://blogs.technet.com/b/exchange/archive/2012/09/26/in-place-e-discovery-and-in-place-hold-in-the-new-exchange.aspx

Steps to perform a restore in Exchange 2010/2013 from a lag copy in DAG

In real time scenarios we will come across several issues where users will be requesting for an restore from the backup.

Restore can be in 2 scenarios

1) User might request for a recent data within 2 weeks of time.

2) User might request for a very old data a months back.

From Exchange 2010 we had the concept of LAG copy from which we will be able to perform restore of mailboxes according to the replay lag time set.

We can alter this value from 0 to 14 days . The LAG copies are not full backup solution but they can help us during DR scenarios as well as restoring mailbox contents for user only for shorter period of date i.e, within 14 days maximum.

We can perform a restore from a lag copy in exchange 2010/2013 and below are the steps

1)  Find the user requirement for restore. (Folder level restore or Mails missing restore)

2)   If its mails missing restore try to recover them by using MFCMAPI by following the below technet article

http://support.microsoft.com/kb/2750293

3) If it’s a folder level restore then we need to go ahead with our standard restore procedure since the folder can’t be recovered by using mfcmapi.


4) First we need to check the user is in which database by running the below command

Get-mailbox   <username> | fl database


5) After finding the database of that user find the lag copy of that associated database

get-mailboxdatabase  <DBname> -status | fl mountedonserver,replaylagtimes


6) Suspend the lag copy server and start copying the logs and database folder into separate folders. Resume the replication once copied.


7)      Take copy of the original database copied from the lag server in a separate folder.

8)    Check the database state by running the below command.

Navigate to drive where DB located:eseutil /mh “DB Location”


09) Copy the required logs till date for which the user requested for restore  to a different location in log sequence. Run the below cmd for checking any damaged log files.

eseutil /ml eXX


a) Navigate to the location where you have copied the required logs which we saw on the previous step while running eseutil /MH. Copy the  required logs in log sequence and then run the command.(usually soft recovery gets completed  with /a if it initially fails with required logs)

b) While running eseutil /ml e00 we need to specify the number accordingly to the sequence of the log generated. EX  in our case the log sequence starts with E06 so we  have mentioned eseutil / e06.If the log sequence is going to be E03 then we need to mention eseutil / E03

c) All the required logs should show ok.Else the restore will not be successful.


10) Perform soft recovery to bring the database to the clean shutdown by running the below command.

eseutil /r /a exx  /d “DB location” /l “log file location”


Modify the location accordingly and run the above command and you will get the below output

Restore1


11)You will get the below output once the soft recovery is complete


Restore2


12) Now when you check the database health it should show in clean shutdown as below

Restore3


13)      Create a new recovery database with the below command

New-MailboxDatabase -Name RECOVERYDB  -Recovery -LogFolderPath “path location” -EdbFilePath ” path location” -Server  Recovery server name

Note:  If the below steps are not followed you will get error and the DB will not mount.

Do not mount the RDB which you have created.We need to rename the database which we repaired according to the RDB name .In our case we need to rename the EDB file as RECOVERYDB.edb


14) Check if the mailbox is present in Recovery database by running the below command. We are taking it as an output for our reference.

 [PS] C:>Get-MailboxDatabase RECOVERYDB| Get-MailboxStatistics   > D:output.txt


15)  Export to data to test mailbox folder or restore mailbox account from which we can extract the user data later.

 [PS] C:>New-MailboxRestoreRequest -SourceDatabase RECOVERYDB -SourceStoreMailbox “john”  -TargetMailbox recoverymbx -TargetRootFolder “testrecover”–AllowLegacyDNMismatch


16) Run the below command to check the mailbox restore status.


[PS] C:>Get-MailboxRestoreRequest   -Status Queued

Wait for 10 minutes and run the below command and the restore will be completed.

Get-MailboxRestoreRequest   -Status Completed

After restore gets completed extract the PST from the restored mailbox and hand it over to the user.

Thanks

Sathish Veerapandian

Steps to setup a new mobile device mailbox policy in exchange 2013

Exchange 2013 has introduced Mobile device mailbox policy which is more useful interms of managing active sync enabled users for managing passwords,specifying the minimum passwords length globally,mandatory special characters to be included and  setting up a device wipeout  after few number of failed password attempts.


The exchange active sync mailbox policies can be created via exchange administration center (EAC) or Exchange management shell (EMS).

Its better  and easier to create active sync mailbox policy via EAC and then add few more features extra by using EMS.


Below are the screenshots for creating device mailbox policy via EAC

1)Open Exchange Admin Center and click on the mobile option

Image


2)You can see the default mailbox policy which is configured automatically during  the installation

3)Click on the add button to configure a new mailbox policy which opens up  the below screenshot

Image


4)You can set the required parameters such as password length,number of sign-in failures which will be effected according to the policy you set globally or for few specific groups


Image


5) Also you have few additional parameters added like password relogin after idle time out,password recycle count in as shown in the below screenshot

Image


Once  we click on save activesync policy will be created.

After this creation to manage the active sync policy its better to use Exchange Management Shell since it has few more parameters which would be helpful and more efficient by using Set-ActiveSyncMailboxPolicy parameters

References : http://technet.microsoft.com/en-us/library/bb123756(v=exchg.150).aspx