Exclaimer cloud signatures for office 365

As we all know exclaimer have been in the auto self signed signature market for a long period of time.

I have been working on the on premise version of this product for a quite period of time.

When we talk about the on premise solution based on my experience i would say its definitely a WOW factor. It is loaded with bundles of options by which you can customize the signature per department basis. Even you can give  granularity till each and every user .

If you are an HTML expert then you can play around with the signatures on your own  and make more customization. It gives you the flexibility to modify each and every signature from the source code which is amazing.

I thought to explore the cloud signature for office 365 .In this article we will have a detailed review of the installation and configuration of exclaimer for office 365 environment.

Prerequisites:

Office 365 subscription with Microsoft.

Admin account in the office 365

Ex-claimer  for office 365 subscription

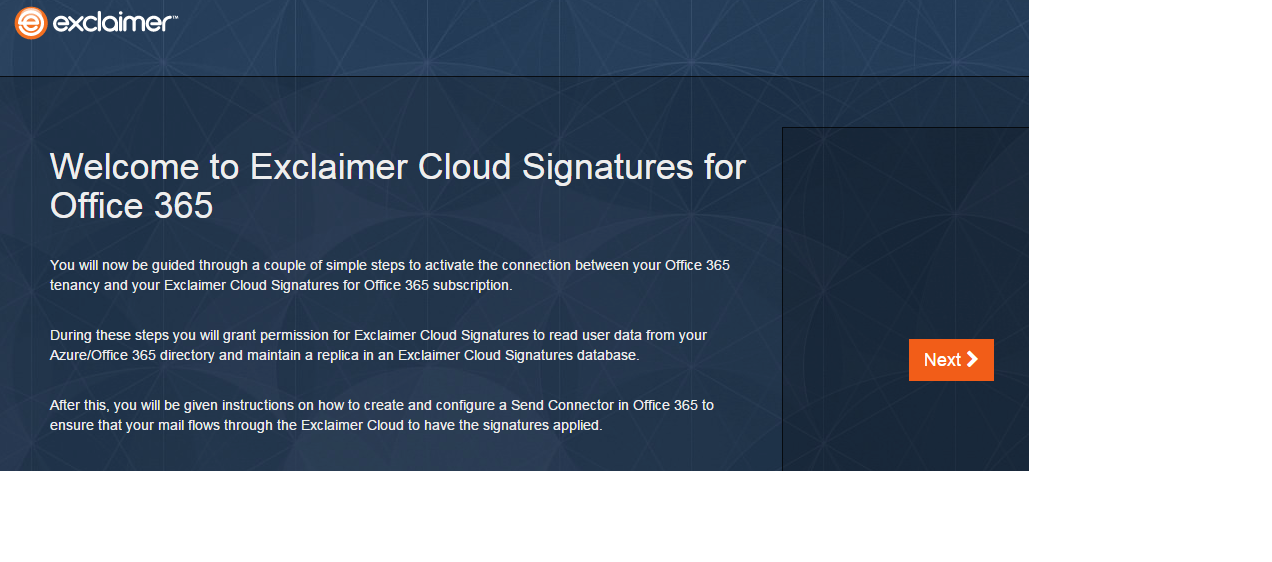
After you are subscribed for office 365 for exclaimer you will get the below information

Ex1

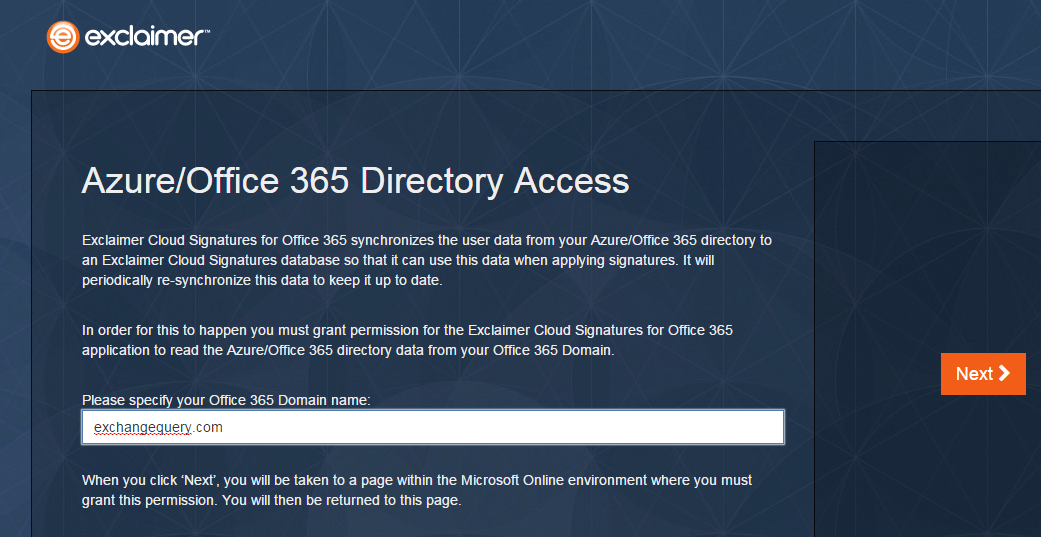
Specify the domain name

Ex3

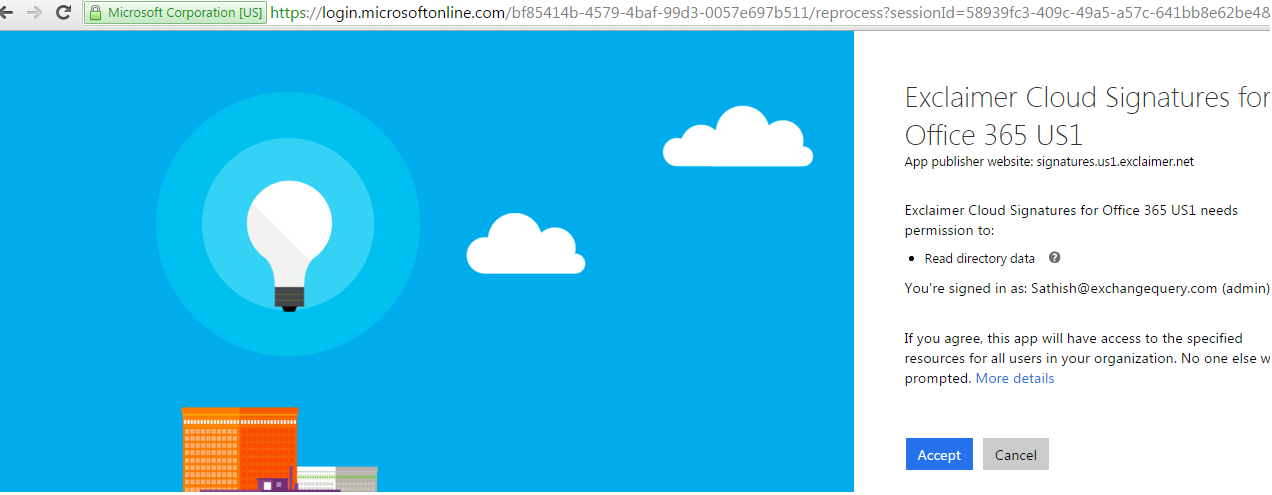
Then login with your office 365 admin account

Ex4


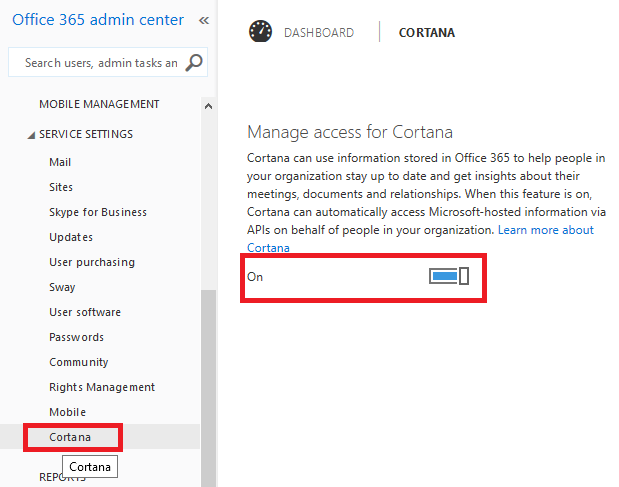
Then you will be prompted to read the directory data

eX5

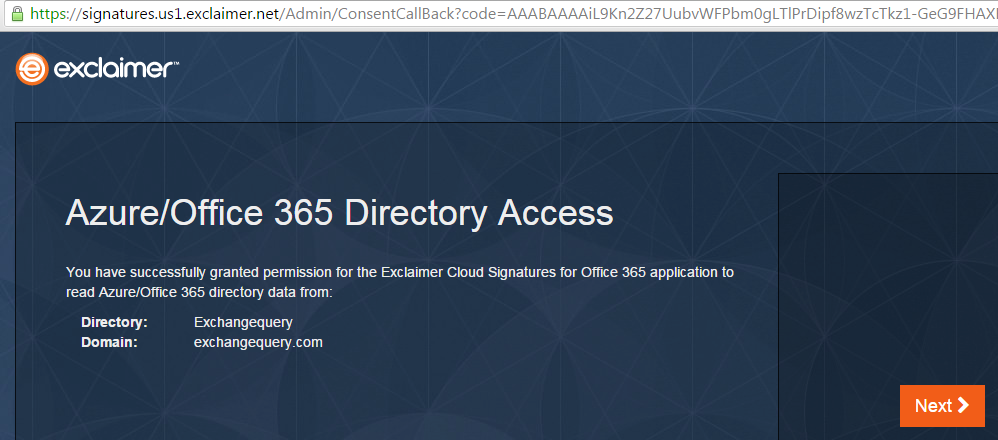
Once granted it establishes a connection with the Azure directory

eX6

On a successful sync you will get the below information

eX7

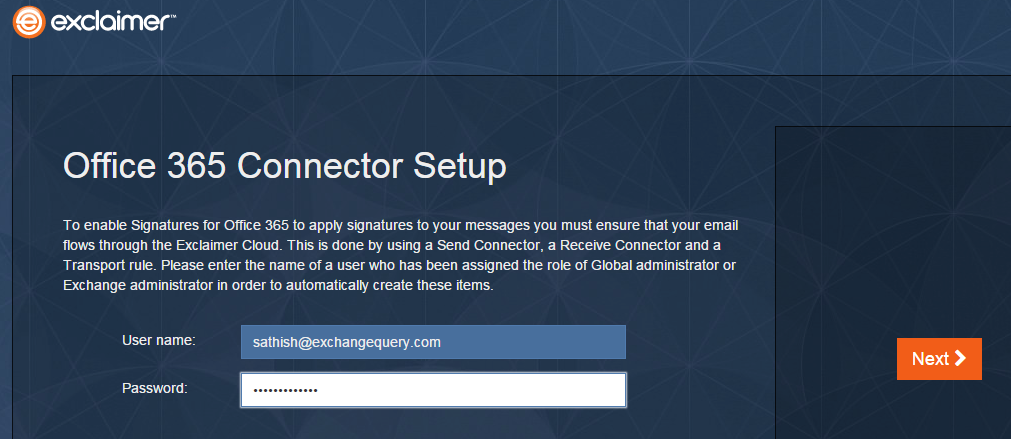
After establishing synchronization ,now we need to set up a connector inorder to route the emails to exclaimer cloud so that they can apply email signatures to outgoing email.

In-order to achieve this we need to establish connectivity between office 365 and exclaimer cloud.

Inorder to set this up first login with your username and password

Ex8

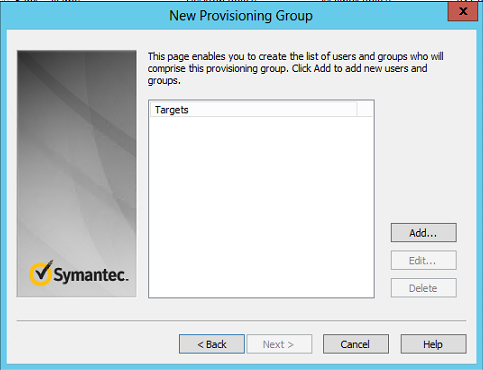
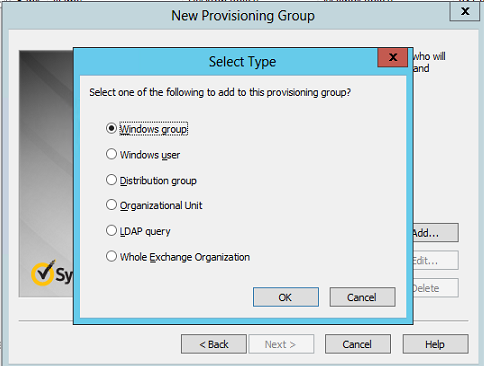
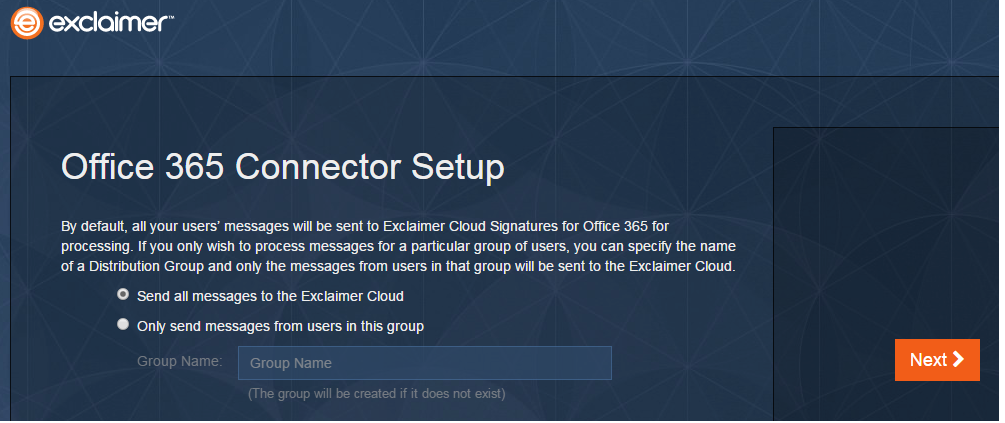
Now we have an option to set up signatures for all users in your organization or only for specific users.

If you want to set signatures only for few users then create a group and add all those users in office 365. Since the azure directory is already synced when you type the group name it would be able to pick it up.

Ex9

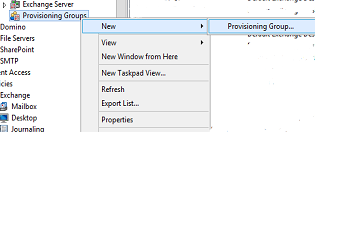
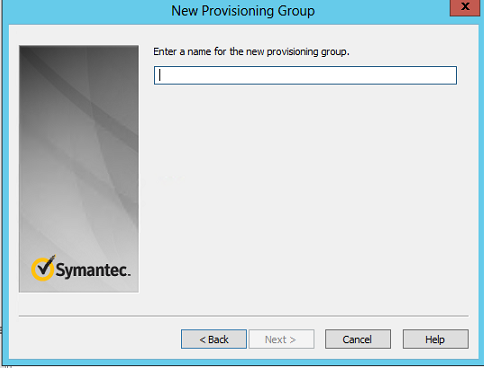
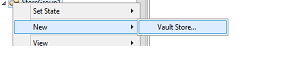
Now we need to perform the below actions:

Create Send connector – from your office 365 to Exclaimer cloud

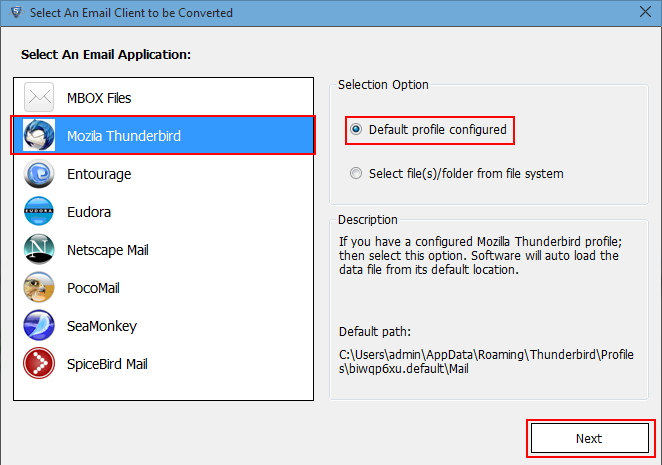
For doing that login with admin privilege on your office 365 portal – Go to mail flow – click connector and create new connector

o2

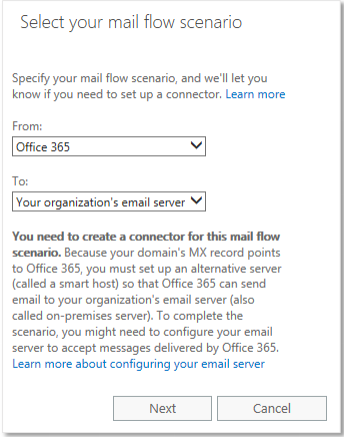
Make sure to  select only the first option else  your outbound emails will be affected.

O3

Proceed to the next step and smart host it to the below  exclaimer smtp server

smtp.us1.exclaimer.net 


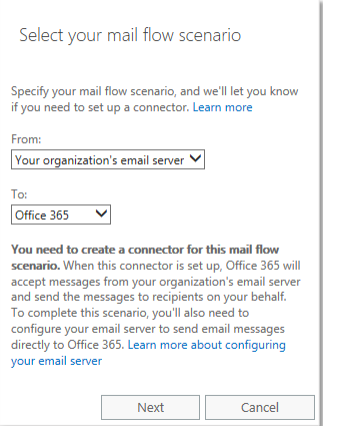
In the similar way we need to create  a receive connector

o4

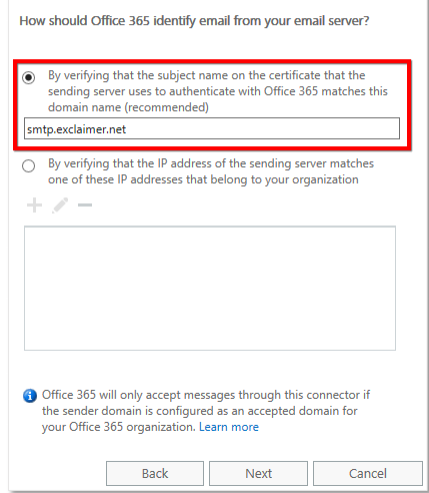
Now we need to enter ,By verifying that the subject name on the certificate that the sending server uses to authenticate with
Office 365 matches this domain name (recommended)’. In the field below, enter smtp.exclaimer.net then click ‘Next’:

O5

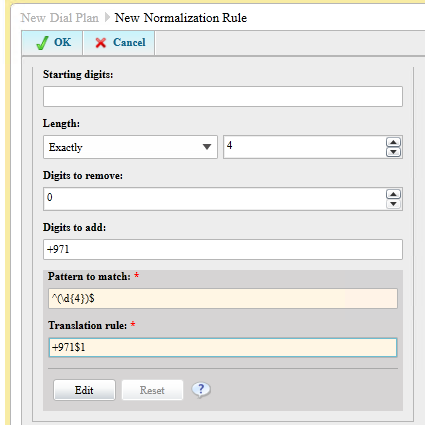
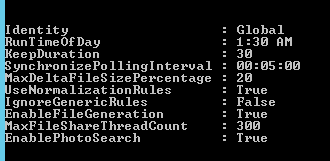
Now we need to create a rule exactly as below with same values

Ex55

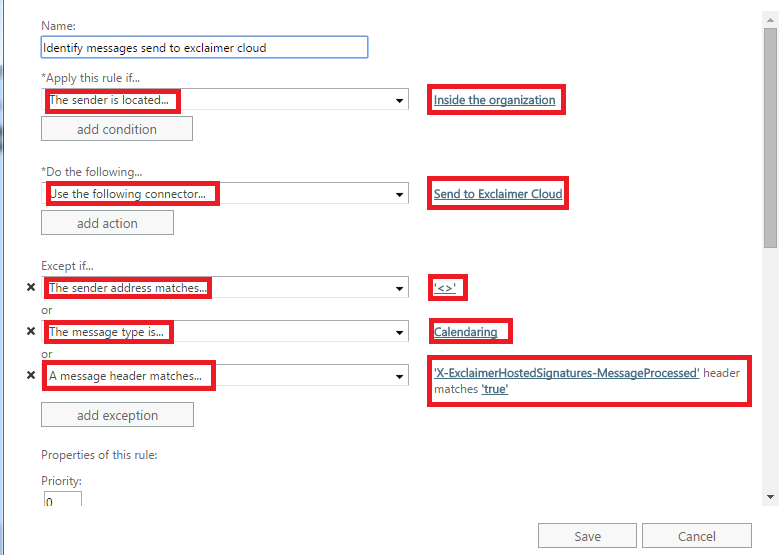
As we can see the idea behind creating this rule is to forward only genuine emails to the exclaimer cloud and this is very mandatory. The rule is pretty simple and going through the rule will give a clear idea behind them.

On a successful configuration of the above things you can login successfully to your exclaimer for cloud

https://portal.exclaimer.com/

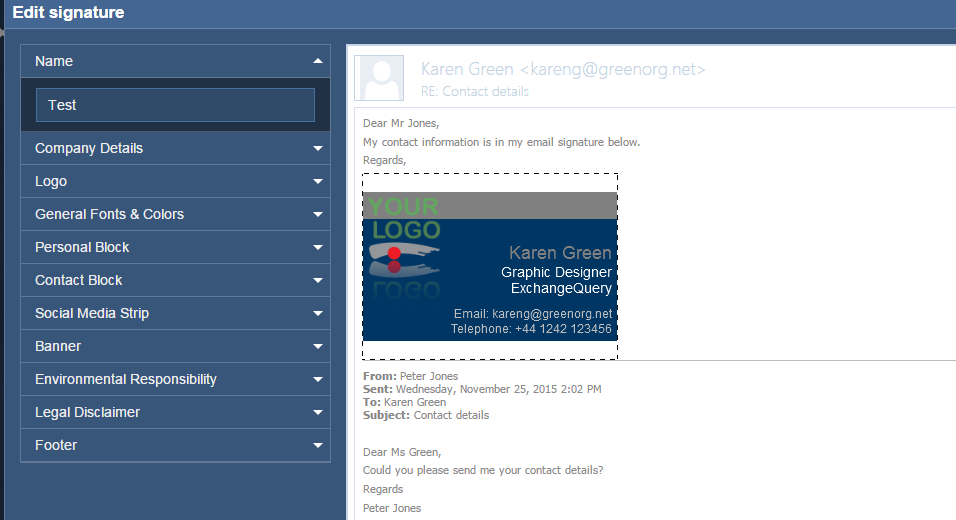
This is the place where we can create a new signature, Import a signature template designed by your development team or use the existing template which is very good.

ex33

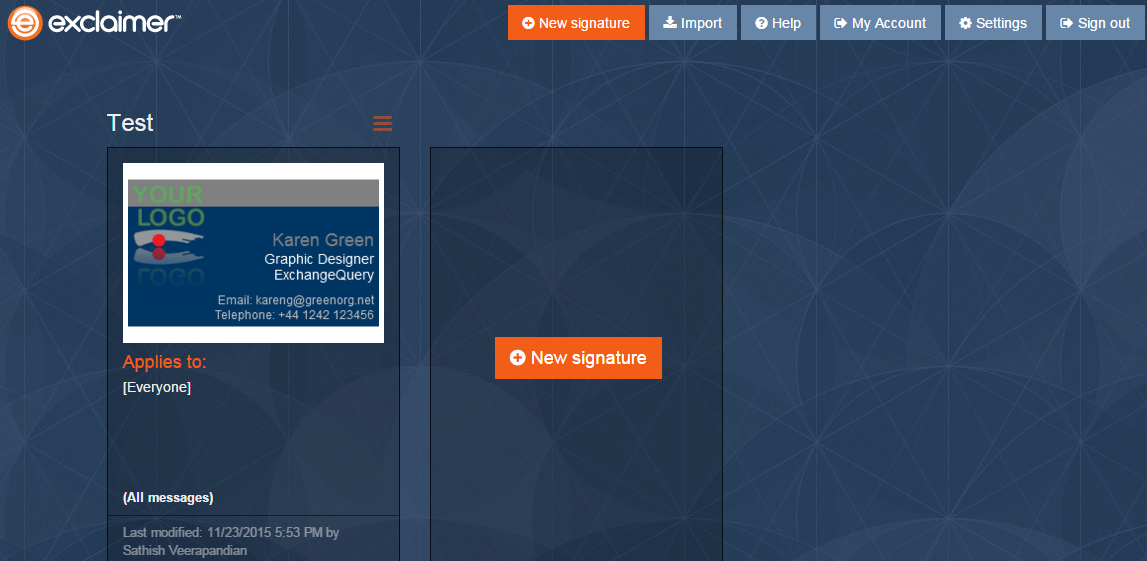
Below are the available fields in the signature template provided . It has good default templates which is very good. It pulls all the information from the value eg: Telephone, organization, address on every users mailbox. So we need to make sure that the newly created mailboxes is populated with the values that are required in the template you have chosen.

Ex44

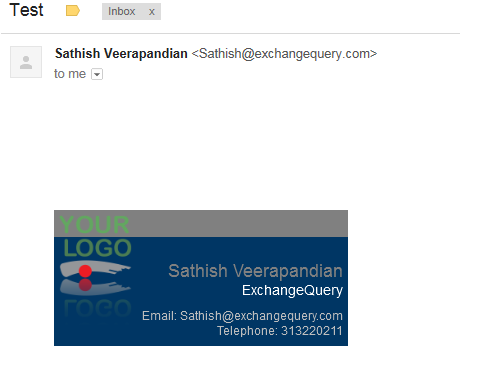
Below is the sample of signature applied from the exclaimer cloud.

EEEE


I’m always positive and will definitely recommend Exclaimer for any one based on my personal experience with the on premise version. If Microsoft releases any new version of Exchange i’m sure there will be a supported version of this product without any delay.

The Exclaimer cloud version is too  awesome and also it simplifies more by having the setup in the cloud and you just need to create the signature which is amazing. And the exclaimer support is always instantaneous without any delay based on my real time experience.

Thanks 

Sathish Veerapandian

MVP – Exchange Server


Configure New Store, storage , provisioning groups in Enterprise Vault in Exchange Environment

In this article we will have a look at the steps to provision the Enterprise Vault in the Storage, Policy and Group level.

If we talk about Enterprise Vault its again a big topic considering all the functionalities ,configuration , features , HA etc..,

So here we will focus only on how to provision archive only for end users in a new deployment

We will need to look at the steps to consider in creating a storage, Backup , creating policy based on the retention that end users are expecting.

So below things needs to be planned properly before the configuration:

a) Archive policy based on mailbox quota and number of months. eg: If the quota exceeds 80 percent and emails  greater than 5 months should be archived.

b) Archive retention period for end users. How long the archived emails will stay eg: like 5 years, 7 years etc

c) Retention of the shortcuts archived items in the mailbox after the archive.

Once planning on the above is done we need to configure Provisioning group, Archive policy and create a store group and a store for the archive process to happen.

Below things needs to be created :

a) Create a provisioning group to target the users who require the archive feature to be enabled.

b) Create a dedicated policy for this group based on the requirement.

c) Create a dedicated store-group and store to place all the archive .

d) Configure the backup for these stores.


We will look into the steps to create provisioning group first

Log in to the Vault Administration console and navigate to provisioning groups and select new provisioning group


PR

Give a name

Part15

Associate the targets for this group

Part16

Targets can be OU’s, Whole domain, Distribution Group. The best practice is to always target a Distribution group and add users who require EV since the OU’s will contain service accounts, vendor mailboxes which will unnecessarily consume licenses.

Part17

Then later you need to select the policy that you would need to apply for this group of users based on your requirement.

Part18

Set the retention category

Part19

Select the associated store and enable the option automatically provision the mailboxes for people who comes under this group

Part21


Now we will look in creating the Policy

It is better to have multiple policies since its always better to segregate users based on their quota, nature of job and the amount of emails they receive on daily basis.

To create a New Policy Open Vault Admin Console – Navigate to policies and create a new mailbox policy.


POlicy1


These are the default values once its created. Based on your requirement you can modify these values.

Part22


There is nothing much complexity involved in creating the policy but yes if the users retention is not understood properly then later you would be in trouble. So its better to set the clear expectations to the end users before setting the policy.


Now we should look in creating a store for the archived mailboxes.

Its better to create a store group first

SG1


Then create a Store under the Store group

SG2


You will get the below window

Part1

Give it a name and select the option whether open or closed. If you keep  this partition open then partition rollover can happen if any of the other partition are full. If you keep it closed then rollover to this partition will not happen.

Part2

Select the storage type by default it is NTFS

Part3

Then you need to specify the drives and drive path and finally you have to perform the run test which will indicate a success or failure of your config

Part6

This is the partition rollover which i was taking in earlier screenshots which is an amazing feature

You have an option to set the volume and time

Part7

Here you go for setting the backup for this partition. The beauty of the archive is when you create the store by specifying the SQL instance location the DB’s are automatically created.

So now these values needs to be chosen according to the type of backup you are using.

If you have a snap shot EV unaware backup then you need to select the option check for a trigger file.

If you have a EV aware backup most likely backup exec from Symantec then you can use the first option.

Note: Its very important that you need to keep in mind that these backups will never help you in restoring brick level for end users. These are meant only for system recovery scenarios.

So when a user permanently deletes an archive from EV its gone forever.

Part9

Then you need to use the file collection software if you are using the second option

Part11

And enter the time at which you need to place this file collection software.

Part12

After this once you click on finish the archive is configured to take place.So based on your Archiving Mailbox server Task schedule the archiving job would start happening.

There are few more backup configurations that needs to be done if you choose the 2nd option. We will look  that seperately in another write up since adding those information will definitely confuse and increase the length of reading this blog.

Thanks 

Sathish Veerapandian

MVP – Exchange Server

Configure Mapi/Http in Exchange 2016/2010 Coexistence

In this article we will have a look at the steps to configure MAPI/HTTP for all users in Exchange 2016 server.

We need to understand this point very clearly.

Since the MAPI/HTTP protocol is supported only from the Exchange 2013 with exchange 2016 & Exchange 2010 coexistence the behavior will be :

  1. Exchange 2010 users will be getting the RPC/HTTP connections on their outlook.
  2. Exchange 2016 users will be getting only MAPI/HTTP connections on their outlook.

Reason :

From Exchange 2013 we had an option to choose either RPC/HTTP or MAPI/HTTP .But from Exchange 2016 Microsoft has totally retired the legacy RPC protocol and wrapped them via MAPI/HTTP through which all the connections will be only via mapi/http.

In-order to accomplish this task you need to make few changes in exchange, firewall as well as DNS side.

So basically the connections will go like the below


For Exchange 2010 Users: 

From internet (RPC/HTTP) – Firewall receives/RPC requests – The request is forwarded to Exchange 2016 CAS services – Connections are proxied back to Exchange 2010 CAS server

For Exchange 2016 Users:

From Internet (MAPI/HTTP) – Firewall received /MAPI requests – The request is forwarded to Exchange 2016 CAS services – Connections are directed to Exchange 2016 Mailbox server.


Now lets see the steps that we need to do to accomplish this task:

On Exchange

  1. Run the Command Set-MapiVirtualDirectory and set the external URL of MAPI virtual directory

Example:

Set-MapiVirtualDirectory -Identity “mapi (Default Web Site)” -InternalUrl https://contoso.com/mapi -IISAuthenticationMethods Negotiate,NTLM,OAuth

Better to keep the authentication negotiate for the legacy clients till the migration gets completed from Exchange 2010

If we could recollect for Exchange 2013 users we need to run this command to enable MAPIHTTP for end users

Set-OrganizationConfig -MapiHttpEnabled $true

Since from exchange 2016 the default connections are mapi/http this command has been depreciated and hence can skip this step.

So all the outlook clients who are connecting via MAPI post autodiscover request exchange 2016 server accepts them and understands that its is coming from MAPI/HTTP
later it gives the required way to connect for the MAPI clients

2. Point your autodiscover DNS records to the Exchange 2016 server. So for the Exchange 2010 users the connections will be proxied to the Exchange 2010 CAS by the Exchange 2016 CAS service.

3. On your firewall allow connections for both /RPC and /MAPI for Exchange 2010 and 2016 connections. Once the Migration is completed you can remove the /RPC rules from the firewall since all the connections are going to be through MAPI/HTTP .


Few more important Tips:

Outlook 2013 and later all the connections will be established MAPI/HTTP by default and so the connections will be fast.

If the end users are using Outlook 2010 and would need to connect to Exchange 2016 mailboxes they need to have the latest Outlook service Packs installed on their PC.

If you have Outlook 2013 user and wants to connect to the legacy mailbox which resides on the exchange 2010 you can use the below registry key to disable the mapi/http attempt on their PC

HKEYCURRENTUSER- Software – MicrosoftExchange – create a new DWORD  “MapiHttpDisabled” with value 1.


Hope this helps

Thanks 

Sathish Veerapandian

MVP – Exchange

Installing Monitoring server role in Lync 2013/SFB in SQL remote instance

In this article we will have a look at configuring the monitoring server role for enterprise deployment  in a remote instance for Lync server 2013 and SFB.

If you want to monitor Lync server 2013/SFB  and Lync client 2013 you need deploy Lync Monitoring server role.

As an overview deploying the monitoring role into an Existing Lync enterprise deployment would look easier. Un proper planning according to your environment and  installation will result you in Empty reports.

But when we look into the real time practical scenarios the situation changes on each and every environment basis according to your SQL setup.

So we cannot follow the installation  as such  unless and until we are clear on the SQL configuration.

In this article based out of my real time experience i will post few points and tips  :

1) Before installing the monitoring server role ,You need to deploy the monitoring server and then you need to deploy the monitoring reporting service.

2) For that your Lync Admin user account should have SYSADMIN on the SQL server (assigned through SQL Server Management Studio > Security > Logins).


3) Lync only supports Windows Authentication.  So the remote SQL Server instance  you have chosen to install the monitoring role  will need Windows Authentication enabled, similarly user who launches topology builder needs to have permissions to create/edit databases and access the SRS you have configured.

Lync Security

Make sure the use windows credentials is selected.

lync20133

4) You need to have  lcsqoeq and lcsCDRQ on the public queues of Message Queuing accessible from the Lync Server so that it can pull the data and show you the reports.

For example you can try accessing the reporting services instance you configured from the Lync Monitoring server and the configured SRSS should show as below.

Lync20132


5) The lync monitor server name (NETBIOS) should not be more than 15 characters
If this is the case MSMQ will not able to deliver the messages

Basically the approach should be the below:

a) First you need to configure the SRS instance on your remote SQL.
b) Install the SQL reporting services.You’ll have to run the SQL report server setup wizard to define the report server URL. usually sql.domain.com/reportserver_lync
c) Define the monitoring server in the topology.
d) Publish the topology.
e) And then install the reports from the installation wizard.

f) Make sure the lync server monitoring services is started, and the connectivity is good with sql server

g) Make sure that your SSRS instance SQL version (version and SP level) match the SQL version of your database instance that has the monitoring databases.

h) You should verify that the LcsCDR database was created in the SQL Server instance that you specified for Monitoring Server.

i) You need to run the dbo.RtcRecreateSummaryTable once the databases are created from the management studio.

Very IMP : You need to make sure that you are allowing the required ports for the srs url

Example if you have multiple srs configured on a SQL enterprise farm like one for Archive solution use a different port rather than 80 since the other application will be using this port.

Make sure that you are able to access the webpage of the report service URL from the Monitoring  server you are trying the installation

Usually the url would be your SQL server the port you defined and then the reports

Example :- http://SQL:8888/reports

If you have multiple applications using the SRS then you need to create the URL for the lync and make them to listen on different ports. Also you can see the other instances created under this location.

5678

If its not accessible then you are having an issue with the permission with the account you have logged in on the SQL server.


Finally a healthy report should look like below

Lync20133


Hope this helps

Thanks

Sathish Veerapandian

MVP – Exchange Server

Quick Tip for Bringing up an Exchange 2016 in an Exchange 2013 Environment

There is something called Up-version proxy by which your Exchange 2013 CAS can handle all the connections for Exchange 2016 mailbox servers.

By having this you have a flexibility to introduce Exchange 2016 servers configure DAG on them , Move the mailboxes and do not worry about the CAS URL’s , since exchange 2013 have the capability to route the connections to exchange 2016 mailboxes.

Later you can introduce the CAS services into your LB’s , point your CAS URL’s to Exchange 2016 services.Exchange 2013 can proxy requests to Exchange 2016 and Exchange 2013 and one more good thing is that  Exchange 2016 can exist in the same load balanced CAS array.


So the best approach would be:

1.Prepare your AD
2.Make sure that you install CU10 on your Exchange 2013 servers
3.Bring Exchange 2016 servers
4.Configure the URL’s
5.Configure the certificates
6.Move few pilot users and test the coexistence
7.Configure DAG
8.Start staged migration by moving sets of mailboxes
9.Point all your CAS URL’s to point to your exchange 2016 services
10.Install certificates on the Exchange 2016 CAS servers
This might help you for the certificates
http://social.technet.microsoft.com/wiki/contents/articles/31783.configure-ssl-certificate-in-exchange-server-2016.aspx

Also there is Exchange 2016 sizing calculator is out. Please use them to configure according to your environment.

http://blogs.technet.com/b/exchange/archive/2015/10/15/ask-the-perf-guy-sizing-exchange-2016-deployments.aspx

http://blogs.technet.com/b/exchange/archive/2015/10/15/exchange-server-role-requirements-calculator-update.aspx

Note : Exchange 2007 and earlier won’t be supported for coexistence, So make sure you do not have any legacy versions running on your environment.

It will be much easier for you if you have Exchange 2013 in your environment since the CAS services can still remain in exchange 2013 until your migration is completed.

But if you have only  Exchange 2010 in your setup then you will need to move all of your external URL’s to exchange 2016 and place your SSL certificates into the Exchange 2016 servers and then start the migration.

Thanks 

Sathish Veerapandian

MVP – Exchange Server

Normalization Rules in Lync 2013 and Skype for Business

Normalization rules are Created to translate phone numbers in different format so that lync/SFB  can understand and transfer them to a correct location, User.

It is created to translate dial strings to E.164 format for the purpose of performing reverse number lookup.

This reverse lookup  is applied and reverse number lookup is performed, the called number is translated to  appropriate format so that the Lync/SFB mediation or the PBX receives the number in their understandable format so that they can perform the routing.

Its better to Classify  Normalization rules in the below scope :

User Dial plan –  Per User basis

Pool Dial plan –  Applicable to PSTN or registrar

Site dial plan –  Applies to Entire site

Global Dial plan – For all users

Its always better to create normalization rules rather than leaving the global as such . It will be easier to assign valid number patterns for each site according to the country and their area codes.

You need to keep these things in mind while creating a Normalization Rule

Dial plan – Per user, Per site , Pool or Global.
Country code – Choose the correct country codes according to your area.
Area code – Choose the right area code.
Length of extension – Make sure choose the correct length of extension that your PBX supports.

Below is the sample  format

^(\d{4})$

A regular expression should start with a ^ – This is a beginning of the string
Should end with $ – which should be at the end.

So any number within the brackets is counted as variable : $1

Test111

Similarly add the digit line URI format that your PBX supports for the SIP Trunk integration. So you need to input the right pattern and the correct  digits which combines and creates a right translation rule.

These Translation rules modify the number before it leaves your Lync server so that your integrated PBX setup can understand the routing correctly.

Basically the normalization rules input is provided by the address book service.So the rules are triggered once the number is received from the Address Book Service.The Address Book Service is designed in a way that it removes all the non-mandatory characters before the rule triggers. So you wouldn’t need to worry about these non-mandatory characters.

So you need to make sure the phone numbers are correctly populated in the Active Directory so that they can be fetched and used for the Lync.

If you already have provided the numbers in E.164 format then your job would be pretty much easy.

Now we will see how to populate these values in Lync 2013 and Skype for Business

If its Lync server 2013 you need to use Company_Phone_Number_Normalization_Rules.txt file located in your Lync File Store location. Open the topology builder and see your file store location in the below folder

Webservices\ABfiles\Company_Phone_Number_Normalization_Rules.txt

In the above example we need to open the text file and add below and save it

(\d{4})
+971$1

Once the above is done you need to run the below command

Get-CsAddressBookConfiguration

Make sure that use normalizationrules is set to true

444

Also there will be a notepad named Invalid_AD_Phone_Numbers created inside ABS files folder

Those numbers you get them in the txt are not acceptable number formats and you need to change them form the AD.

You can also test the normalization rule by running ABServer.exe file in the below path

C:\Program Files\Microsoft Lync Server 2013\Server\Core\ABServer.exe -testPhoneNorm “1234565”

From Skype for Business this job has been made simpler. There is no such files we need to modify them for this functionality.

The only thing you need to make sure is that you have entered the phone numbering format in the correct pattern E.164

If that is the case you can run the below commands from which we need to modify the new set of default roles according to your region and country , area codes

These can be defined in the Organizational  Level by the below commands

New-CsAddressBookNormalizationConfiguration

Set-CsAddressBookNormalizationConfiguration

In-turn we need to create rules for translations and conversions.

New-CsAddressBookNormalizationRule

Set-CsAddressBookNormalizationRule

Thanks & Regards

Sathish Veerapandian

MVP – Exchange server

Effective MBOX to PST Converter Tool Review

MBOX to PST Converter Tool Review – Advantage & Drawbacks

Are you planning to migrate from Mozilla thunderbird to MS Outlook? Of course you need to convert your MBOX emails to PST, in order to access emails in Outlook. MBOX converter tool will enable you to convert emails from MBOX format to PST, so that these emails can be accessed in Outlook also. MBOX converter is smart tool capable to export MBOX files to PST/MSG/EML. This tool is capable to handle MBOX files from multiple mail clients including Mozilla thunderbird, Eudora, etc. It is an excellent tool capable to handle all variants of MBOX family in windows platform. Let’s see the application in detailed.

Things That You Should Cognize about MBOX to PST Converter at First!

Supported Platforms

MBOX files from various mail clients can be exported to PST using the MBOX converter tool. I used this software for migrating Thunderbird folders (.mbox) to MS Outlook 2013. But the software also supports a few more mail clients including Eudora, Entourage, Apple Mail, Netscape, Pocomail, etc.

The tool is compatible with all versions of Windows Operating System – 2000, 2003, 2008, XP, Vista, or Windows 7/8/8.1. The output PST files is compatible with all versions Outlook including 2000, 2003, 2007, 2010, 2013.

Note: I used this tool to migrate Thunderbird emails to MS Outlook 2013 in Windows 8.1. To evaluate in other editions you may try free edition of the software.

Pre-Requirements:

MBOX to PST converter is a standalone tool which does not require any supporting applications as I used recently for my own business. None of the mail clients are required to carry out the conversion process. The only requirement is that the user should possess an MBOX file in order to carry out the conversion process.

Performance:

Every product is valued based on in its performance. Same is with the MBOX converter tool performance values more. The tool is fast and accurate in its actions. The tool converts MBOX to PST without any data loss or file corruption. Emails along with all attributes are exported to PST without any time lag.  The number of MBOX files does not limit the performance of MBOX converter. The designed and development converter tool is done carefully in order to meet all the user requirements.

User Interface & Design:

The design and implementation of user interface of MBOX converter is very effective for all type of users. The internal design of the converter is done with optimized algorithms so that the tool works perfectly and accurately. Browsing of MBOX emails and saving the output PST are made user interactive with the GUI. All type of users can use this tool without any prior experience in file conversion.

1

Prominent Features of the Software and its Working Process


  • Support for Multiple MBOX files

The tool is capable to export multiple MBOX files to PST in batches. Moreover the tool can process all variants of MBOX files from various mail clients. The supported mail clients include Entourage, thunderbird, Apple Mail, etc.
2

  • Selective Exporting Feature

The selective exporting of files/ folders/emails is possible with the tool. The preview of the scanned emails helps the users to view and analyze the emails before exporting to PST.
33

  • Retains All Properties of Emails

The converter tool maintains all the Meta properties of the emails while exporting to PST files. The attachments, date, time, from, to, subjects and all other attributes are retained with email message while converting to PST.

  • Managing of PST Files

The managing of PST files is made easy using the converter tool. The output PST files can be split to manage size of large PST files. The output PST files can be saved in desired location with specified names.
55
Pros:

  1. Multiple MBOX files can be converted into PST files at once.
  2. Several email previews helps me to analyze emails in depth.
  3. Multiple Export choices is an additional benefits to use emails in other email programs.
  4. User face of the software is so simple so everyone can use the tool.

Cons:

  1. Demo version tool has a limit of 25 emails to be exported in PST file
  2. No facility to convert corrupted Thunderbird MBOX files data.
  3. Attached media files of emails can be viewed only after they are exported.


Price of Various Versions

The tool comes in two versions: free version and paid version. Free version is with limited capabilities. It does not allow users to name the files while saving the PST files. And only 25 items per folder can be exported with this free version. MBOX converter Software is available at three level licensing: personal/ Enterprise / Business level. This is worthy tool for just few dollars.

The Verdict:

While analyzing performance, accuracy, features, cost and various other factors of MBOX to PST converter into account I couldn’t find any serious faults in this tool. The outstanding features of MBOX converter makes it to stand different from other converter tools. So I would like to rate 9.5 out of 10 to MBOX to PST converter application. The tool possesses a simple user interface so that anyone can use it without any difficulty.

Thanks & Regards

Zora Stalin

Technology Evangelist

Integrating Lync server 2013/ SFB with Cisco Unified Call Manager

Integrating the existing Lync setup with PBX or SBC’s is always a complicated one. When we look as a overview things looks smaller and easy. We need to choose the right PSTN gateways, SBC’s that are compatible with Lync and SFB.

When the real time scenario of implementation kicks in there are several things , components and factors which needs to be configured  properly.

If no proper planing and study on the existing setup is done ,then we will definitely run into multiple issues. Because we need to configure multiple things in PSTN gateways to create a proper channel route between these two medias.

If you aren’t voice expert its better to discuss this with VOIP  engineer dealing with these PBX gateways or associated vendors so we will get  best integration  advice according to the setup.

In this article i’m going to explain few methods that we can follow to integrate Lync 2013 / SFB with Cisco Unified Call Manager in already existing Lync/SFB  setup.

Speaking from my experience so  far below are the possible ways of implementing this.

1. Cisco unified communication integration for lync (CUCI – Lync) :

You can follow this if you want to utilize the existing Cisco CUCM PSTN enterprise plan for all the end users without investing any other components.

Keep Lync/SFB  only for IM & Presence and not having enterprise voice .

End users will get a Cisco Soft Phone agents  in their desktops for making the calls.

End users have the option whether to use the soft phone or to use their desk-phone.

It is basically like Cisco integrating their PBX with Lync for IM and Presence without the need of Cisco IM and Presence server.

By reading through so many blogs and forums i can see this integration is more complicated.

End users might get confused to understand in how they need to make the call.


But the best thing is you can use your existing CUCM setup and the Lync does not require Lync Plus CAL for the voice functionality.

Less configuration on the Lync side . You can plan for this if you  have a dedicated VOIP handling Cisco Team in your setup.

2. Remote Call Control or Call Via Work:

RCC enables users only  to control their desk  phones by using Lync on their desktop computers.

When a user signs in to the Microsoft Lync client, the Lync server sends instructions, through the IM and

Presence server of Cisco  and then  to the Cisco Unified Communications Manager maintains call features based on the end user action.

By enabling this it gives the end users to use the Lync 2013 user interface (UI) to control calls on their Cisco phones.

  • Make an outgoing call
  • Answer an incoming call
  • Answer an incoming call with an instant message
  • Transfer a call
  • Forward an incoming call

Very IMP note: The Cisco Unified communications manager PBX should have the existing PSTN plan as such.

The  Lync 2013 RCC feature  only sends call control commands to PBX and the  PBX will handle  the call process . No mediation server is required in this scenario.

Unfortunately if you are implementing RCC in Lync 2010/2013 then end users will not be able to make enterprise voice calls when they are remotely connected.

Reason: It is not possible for a user to have both enterprise voice and RCC together in Lync. This is almost a legacy dying technology which we should not think for any new implementation. RCC is depreciated technology and not recommended by Microsoft as well.

It can be a good solution only during the transition period from CUCM to Lync or vice versa.

Call Via Work (SFB 2015) :

People might think Microsoft has replaced CWV in SFB 2015  and why we need to implement this thinking the negative impacts from RCC.

This is an amazing hybrid type of  solution from Microsoft. The end user can set their ring back number in their SFB client.

The function of call via work is, the SFB mediation server will make a call to the configured phone number by end user and a second call to the destination number and connect both calls. The destination number calls will be handled by your PBX gateway. The connectivity from the mediation server to the PBX will be direct SIP. In turn this  will have a configuration of Dialplan, Voicepolicy, Pstnusage,and a Route to a sip trunk or gateway users.

This is very useful when you are in a poor internet connectivity on your trip and you can set your mobile number as callback in your SFB client  and we will have a great calling experience.

The prerequisite for CVW is similar to RCC but we require mediation server in additional.

Advantage :

No need to buy additional hard IP phones for end users if the voice plan stays with your PBX. SFB client perfectly routes and call to the destination with CWV feature.

SIP Trunk:

This type is very good in leveraging and using  the existing Cisco’s CUCM PSTN plans for end users.
This enables enterprise voice features for the end users without having the head ache of deploying additional components SBC’s etc..,

We need to have a direct SIP trunk configured between the both systems CUCM and your mediation server. We need to have mediation server configured in this case. A dedicated mediation server without collocated is recommended for this setup by Microsoft.

This can be used during transitions as well as a permanent solution.

You need to create a SIP trunk and a route pattern between Mediation server and CUCM.

There is an excellent document from Cisco for the same .

Click to access uc-manager.pdf

If you want to plan for the rest  of the above as well there are documents from Cisco as well as Microsoft .

Note : It is very important to have a detailed study and discussion on your existing PBX setup , PSTN plan , Network layout and Lync Setup with all the required teams and vendors before planning for integration.

Thanks & Regards

Sathish Veerapandian

MVP – Exchange Server 


Quick Tip – Integrate Cortona with Office 365 for end users

Now office 365 customers have the option of integrating Office 365 and Cortona in Windows 10 for the end users.

By having this option enabled this will help users to be informed through cortona about their future meetings.
To use Cortana, people must be signed in to their windows 10 PC with their work account inorder to authorize Cortana to access Office 365 on their behalf.

Cortana can also access email and calendar data from users through various client apps running on Windows 10.

By default this is turned on in office 365 . To turn this off perform the following

Go to the Office 365 admin center.

Expand Service Settings, and select Cortana.

Click Cortana to toggle Cortana off.

Cortona

IMP:

Currently the support for Cortona with Outlook is planned for future release. So inorder to use with office 365 we need to setup the Windows 10 Outlook Universal Mail and Calendar apps with Office 365.

Cortona will work only on devices running on Windows 10 and available only few languages as of now.

Thanks

Sathish Veerapandian

Best practices to be followed to configure Backup in Exchange 2010/2013

Backing up the exchange server is very important thing to protect the data loss . If you aren’t running the Exchange Server Backups  then your Transaction logs will eventually fill up their storage volume

In this article we will  look at few steps that we need to look in configuring the backup in Exchange 2010/2013.

Backups are very much necessary during the case of a whole disaster, retention of datas for a period of time , performing a granular restore for the end users as well.

Choosing the Backup Media

Disk or Tape ?

Over the period of years Tape backup has been doing a great job. Cost wise also they are little bit lesser compared to the SATA storage and disk arrays which needs to be extended as users and our applications increases.
So, tape still has an advantage, particularly for larger backup volumes.
But when comparing the performance factor the disks backups wins the game.
Also Disk-based solutions will usually be better for faster recovery.

More realistically, a disk-based solution will involve copying data between two storage systems over a WAN from one site to another. If you are ready to pay for this expensive WAN links and replication then it should be fine with the disk backup.

Its always better to keep the daily and weekly backups in the disks (virtual tape library) which will help in disaster and daily restore scenarios and larger backups monthly,quarterly and annual in Tapes. Because there is no point to keep all these large data in expensive storage on data-centers  for the purpose of retention since the tapes will do the same job.

Plan for the Retention period

Planning for the retention of the data is very important. This plays a vital role in restoring the data as well as for any old data that is required for any legal cases.

Its very mandate retention needs to be followed for the following backups

Daily Backups

This decides on the single point of restoration for the end users on a specific day. Its better to have daily backup retention at-least to a period of 3 months so that granular restore for a specific date can be done.

Weekly Backups

This decides on the single point of restoration for the end users on a specific week. Its better to have this monthly backups to a retention of at-least 6 months which will help to recover emails if the first case fails.

Monthly Backups

This decides on the single point of restoration for the end users on a specific month. Its better to keep this retention atleast for a period of 1 year.

Quarterly Backups

Quarterly backups are very much important in restoring the data in case of dealing any cases , restoring emails from resigned staffs. So its better to keep this retention for 3 years.

Annual Backups

Annual Backups also does the same job of retention data for dealing with any cases . Its better to have the Annual Backups for a period of 5 Years.

Quarterly and Annual Backups can be taken in a Tape Drive and kept since they will not be used mostly and also will not involve in the disaster cases.

Setting end user Recovery Standards

Setting the scope of possible restores from the backup to the end users is very much important since they need to be aware of the possible restores.

So you need to carefully go through your backup retention periods and inform the users about the possible monthly restores. At any point of time if the users are missing out data within a month then its always advisable from the help-desk to restore them from the dumpster.

So its better you can prepare and create end user Recovery Standard scope document and hand it over to the help desk team so that they are aware of the possible restores.

Check  Mailbox server performance during the backup

This point is very much important and we need to check the performance of the mailbox servers during the backup period. Though the backup will be running on off-production hours but there are cases where your CEO   might be accessing an important  email  after working hours.

ESEUTIL will be running during backup process to verify integrity of the databases  which increases disk I\O intensive.Usually if the storage configuration is not proper then the normal disk read/write operations will increase.  There are chances if the storage is having bottleneck issues then the normal RPC read/write operations will get delayed due to which all the end users will severely experience connectivity issues.

When the backup is triggered you can go to the event viewer on the mailbox servers and look for any RPC , ESE , VSS writers, storage errors etc..,

Create a test account on any of the backup databases login to outlook,owa and activesync and measure the  performance.

If you have DAG configured in your setup and have Active/Passive combined distributed type check your active copies as well .Check if  the I/O operations are increasing on the active copies during the backup.Also you can check the event logs to see if you get anything related to them.

If you don’t see anything on them then the backup should be fine.

Note: The above steps are applicable only when you configure the backup solution for the first time on your mailbox servers.

Later you can prepare a daily check list on your backup status on all the mailbox servers to ensure the backups are completed.Daily checking of the backups is very important since the backup will truncate your old logs which will maintain space on your storage. There are many scripts written by experts on the Technet Gallery which you can schedule them and make them run through task scheduler.

Test the Backup

Testing the backup is very mandatory. As the backups has been configured its not that we are in safe side. Testing the backup is very much necessary.

There are several scenarios we can test and i have listed few of them

Check if the backup is supporting any other languages restore. For Example if i have an  end user who has French Mailbox with all emails in French and backup has been taken for him. When a restore is done for this mailbox it should be successful with all the emails both body and subject visible in French.

Take 2 users with the same UPN different SAM and see if the backup for them is restoring their contents,

Restore the Weekly backup and see the results.

Restore the monthly backup as well and see the results.

Thanks

Sathish Veerapandian

MVP – Exchange Server