
This article outlines the technical steps that is required to move an on premise skype for business account to Teams only mode. There are lot of other factors that needs to be considered before making this change and this step can only be a final stage almost in any environment.
If there is any PSTN integration with Skype for Business on-premise environment then these factors needs to be planned and executed in stages before phasing out Skype for Business On-premise and moving users to Teams Only Mode. These features and functionalities needs to be transferred completely to Microsoft Teams.
If you are moving from a Skype for Business 2015 environment, ensure that the supported CU version admin tools is Skype for Business Server 2015 with CU8.
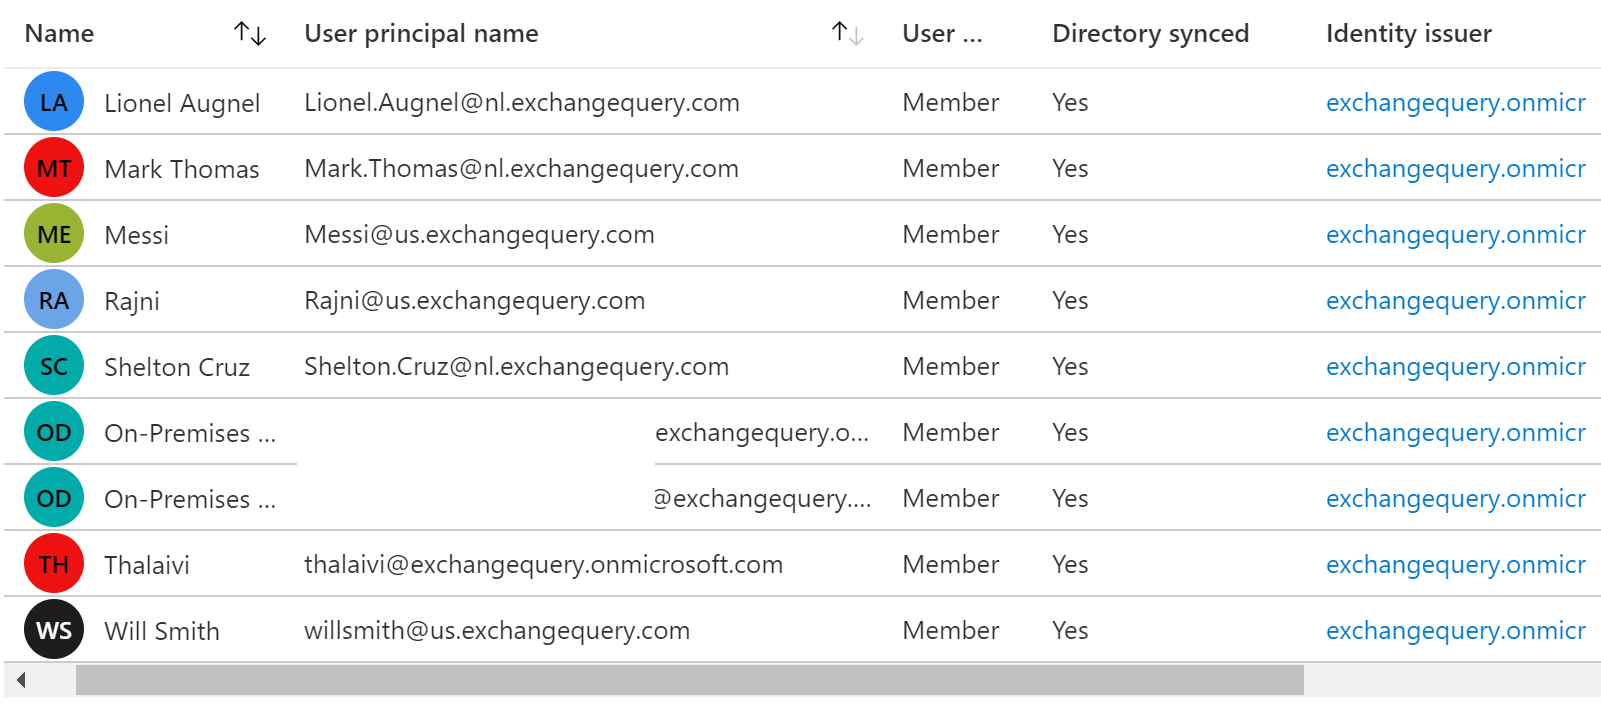
In this example I have built a lab on my environment which has my local Directory identities below test accounts synched to the Azure AD.
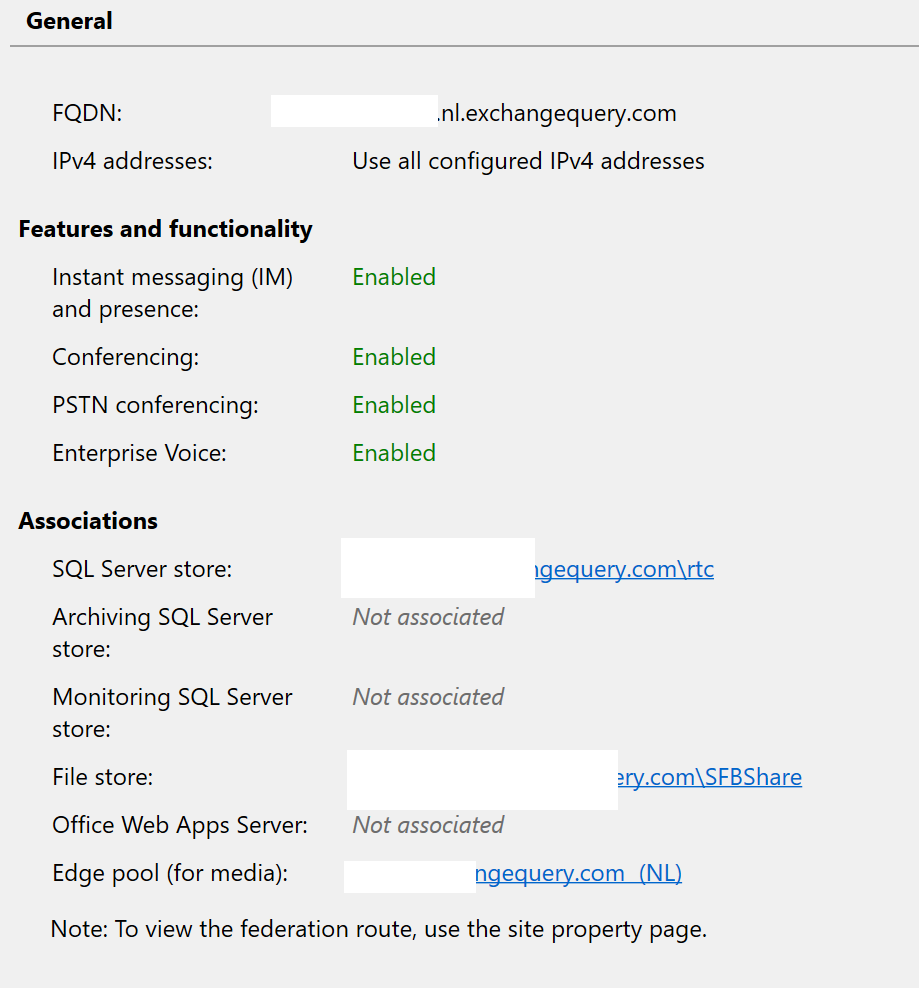
And I have a standard Skype for Business 2015 environment running in the local active directory environment.
The next step is to configure the skype for business hybrid to the office 365 tenant where we are going to perform the move operation.
There are three simple steps involved in this procedure first part is to configure federation with the below command from the Skype for business server management shell.
Set-CSAccessEdgeConfiguration -AllowOutsideUsers $True -AllowFederatedUsers $True -EnablePartnerDiscovery $True -UseDnsSrvRouting

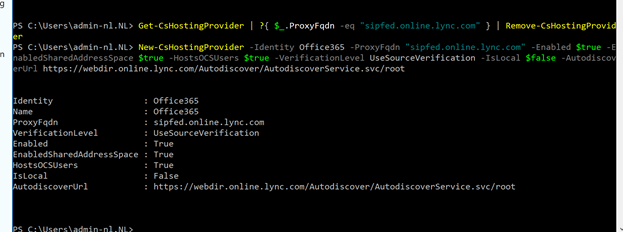
Next step is to configure shared sip address space with Office 365 tenant. In order to do that the first step is to check if there is already hosting provider enabled and just in case if its present can we must remove them with the below command.
Get-CsHostingProvider | ?{ $_.ProxyFqdn -eq “sipfed.online.lync.com” } | Remove-CsHostingProvider
And the next step is to enable the hosting provider with the below command.
New-CsHostingProvider -Identity Office365 -ProxyFqdn “sipfed.online.lync.com” -Enabled $true -EnabledSharedAddressSpace $true -HostsOCSUsers $true -VerificationLevel UseSourceVerification -IsLocal $false -AutodiscoverUrl https://webdir.online.lync.com/Autodiscover/AutodiscoverService.svc/root
As we can see executing both the commands were successful in my case.
Now we’ve made the required change on the on-premise Skype for Business environment we need to make the same change on the Office 365 tenant by enabling the shared sip address space with the below command.
Set-CsTenantFederationConfiguration -SharedSipAddressSpace $true
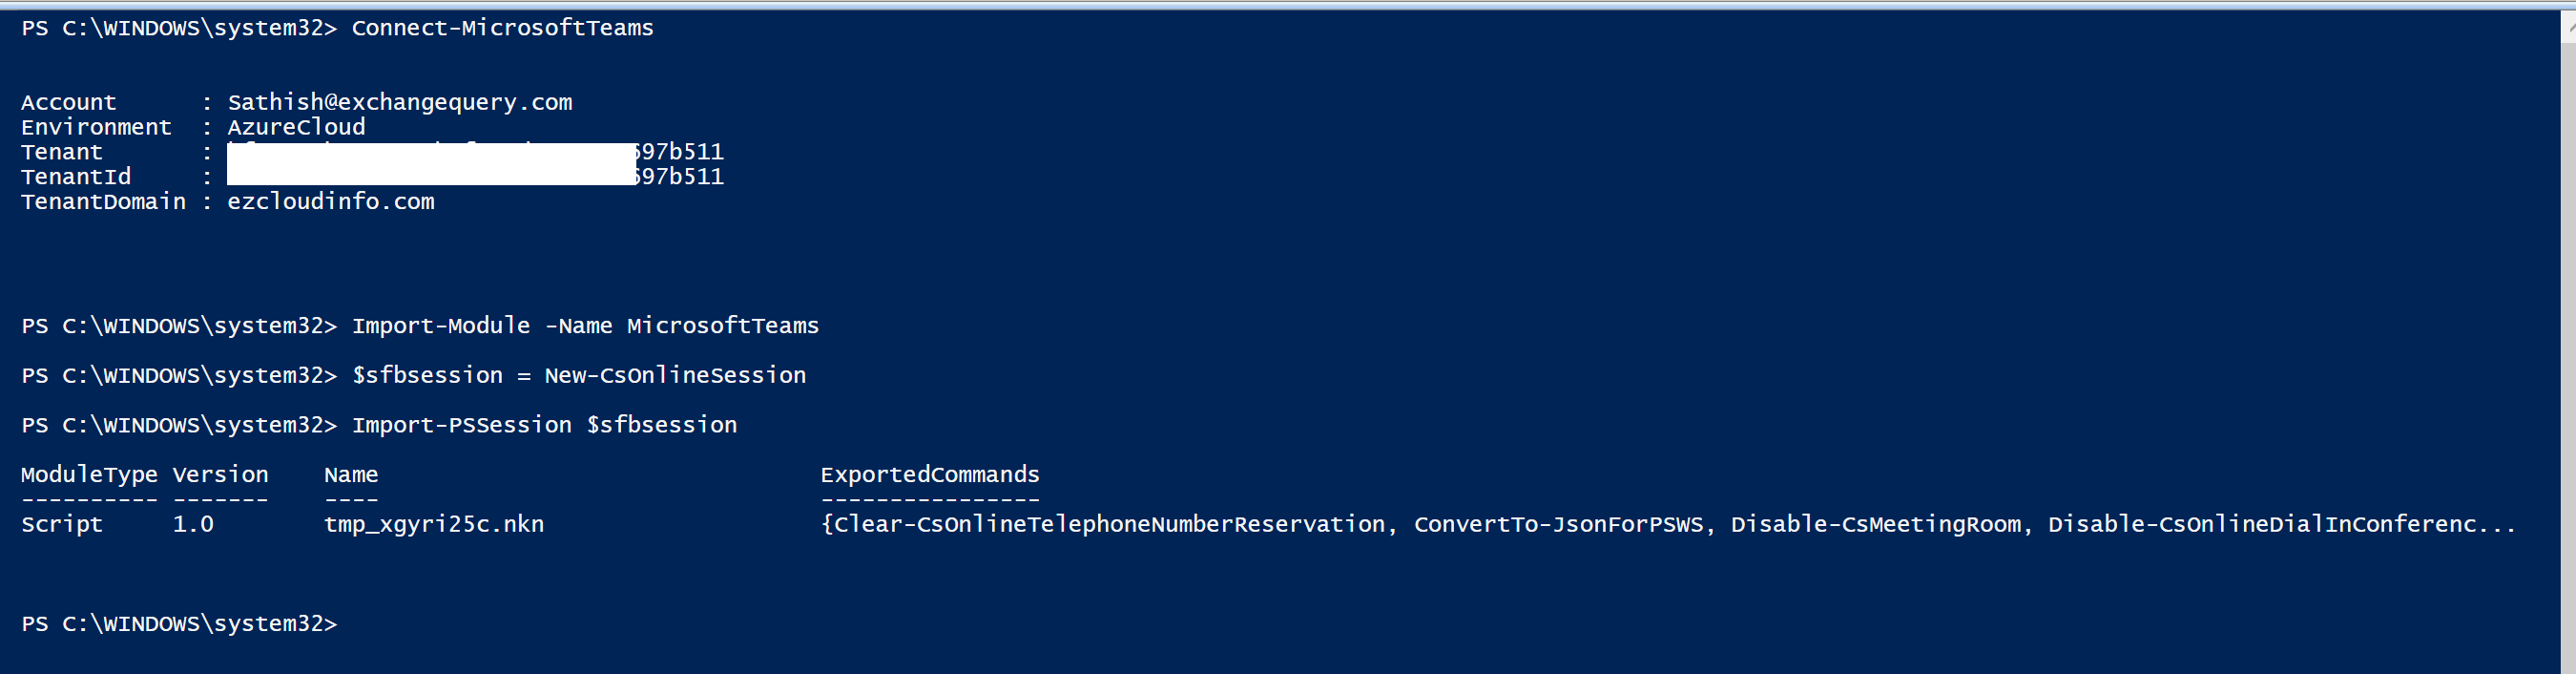
In the below example I have connected to Teams powershell session and have performed this task.

Once we have performed the server and tenant configuration now its very important that we need to allow requested URLs that will be resolved from the Management server where we are performing the operation.
The tenant URL for your subscription needs to be identified as per this Article . And this URL needs to be whitelisted on the outbound connection.
Get-CsTenant|ft identity

So in my tenant as per the article the hostedmigrationoverrideurl is adminof.online.lync.com
Permission:
Now need the required permissions to make this operation. The Skype On premise admin account will require a minimum of csserver administrator role. For Online permission we must have Skype for business Admin and user administrator role. In my case i attempted with Global Admin Credentials so not exactly sure about the behavior when we move directly to Teams only mode with granular permissions. It works with the split permission accounts OnPrem\Cloud with sessions established to SFBOnPrem and SFBO modules from the same PowerShell.
One more important thing to notify here is that the user that we are performing the move operation must have the appropriate license on the Office 365 so that the account gets enrolled on the Teams service.
Establishing the session:
Launch the PowerShell on the management server where you have the SFB admin tools installed and have connectivity to SFB on prem FE and required tenant to establish the PowerShell session to the new Teams Module. Make sure you install the Teams Module on the management server this as per this information.
Online:
OnPrem
Import the SFB powershell module on the same session. Since I have opened this session from a local SFB admin account I did not store the on prem credentials in this session.

Performing the move
We can perform the move with the below command. One important point to note here is that post CU8 the move operation will succeed only with the modern authentication by using the switch -UseOauth
$url=https://adminof.online.lync.com/HostedMigration/hostedmigrationService.svc
Move-CsUser -Identity Lionel.Augnel@nl.exchangequery.com -MovetoTeams -Target sipfed.online.lync.com -Credential $cred -HostedMigrationOverrideUrl $url -UseOAuth –BypassAudioConferencingCheck
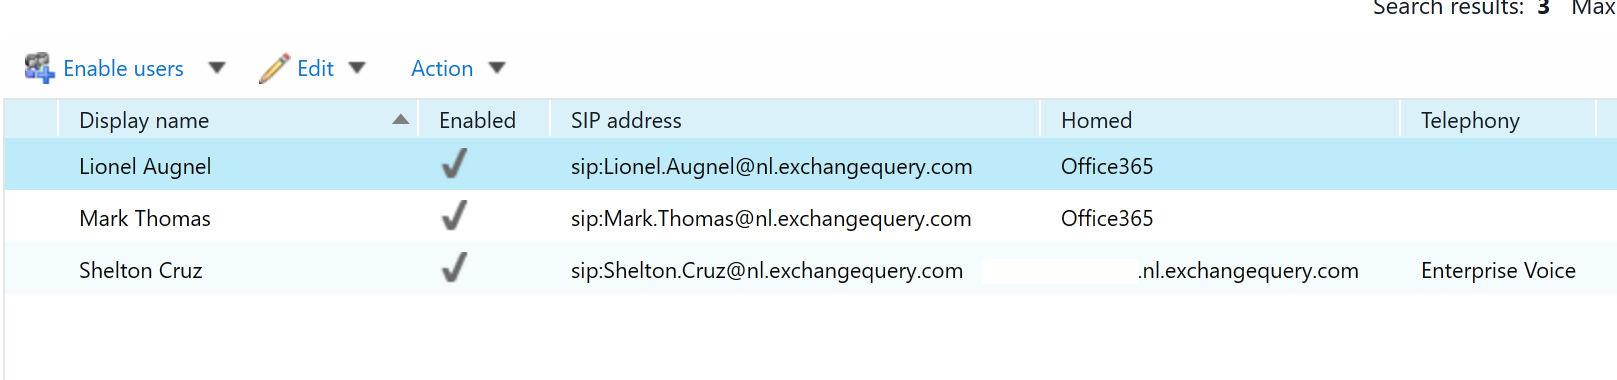
In the below case we can see that the move operation is successful.

In the move results log as well we get few useful information which provides us the time taken for move user preparation, start time and few more information that might be helpful.

On validation we can see that the moved users are showing as homed in office365 and no longer present in SFB on premise environment.
And in the Teams we can see that the user has been migrated successfully to Teams mode directly.

Now the initial setup is completed script can be created to move the accounts in batches.


Thank you for this, question. if i do the following steps will this stop the Skype server from working? right now we have some users on sfb and some on teams. but every time i try to migrate users it says that we do not have an edge server available even though it is present. our hosting provider still says skype for business online.
LikeLike
Can you try with ProxyPool Parameter. Although its depreciated i have used this in the past for environment with Edge errors like above.
LikeLike
HI,
I have users with TeamsUpgradeEffectiveMode = TeamsOnly but if I try and manually set a phone number in the Teams Admin Centre I get
The user is hosted in an on-premises deployment of Skype for Business Server. This user’s number must be changed in the on-premises environment and then synchronized to the cloud.
Any clues on hoe to fix this please?
LikeLike
Hi
If we have onprem SFB hybrid enabled, then we need to manage the SIP attributes and the Line URI from the On premise Skype server. Please change these settings from the On prem SFB Powershell which is also connected to Teams Powershell module.
LikeLike
Hi, Thanks for your response how would I do this please? Can I just use the Teams powershell module itself as we dont have any on prem SFB servers left. Do you have any examples of the command to run please?
LikeLike
Oh that’s bad and i guess in that case the decommission of the SFB hybrid did not happen gracefully. There is instance of the SFB hybrid left in the OnPrem Schema which is synched to the Office 365 Tenant.
For new users – If the users aren’t in SFB, but the AD accounts are sync’d I think we can just Teams enable them.
These attributes, in particular sip address (msRTCSIP-PrimaryUserAddress) and phone number (msRTCSIP-Line), continue to sync into Azure AD only for the old users it will be a challenge.
For new created and licensed accounts , we are able to manage the LineURI , Set the EV value completely from the Teams PowerShell Online.
For existing ones you can give it a try by modifying the LIneURI attribute from the local AD user object for that user and see the results.
LikeLike
I am able to setup through the instructions above, but whenever I move a user over to Teams only that user can’t communicate to our SfB on prem users via Teams.
LikeLike
Thanks for reaching me out and i have been into the same scenario 2 years back. (The root cause was our tenant setting were set to island mode)
To ensure proper routing of chats and calls between users who are TeamsOnly and users who are still using Skype for Business on premises, on-premises users must have an effective value of TeamsUpgradePolicy with one of the Skype for Business modes, rather than Islands (which is the default).
What i have seen is
Teams only – SFB only – Communication will be successful
Teams only – Islands mode – Communication to Skype will not be successful
You can give this option a try and see the results
LikeLike