Category Archives: Exchange 2016

Checking Exchange 2016 Office 365 best practice Analyzer

Like the same in Exchange 2013 SP1 and later versions we have the same Office 365 best practice analyzer tool available in Exchange 2016 as well.

Because prior to Exchange 2013 SP1 we used to login to the office 365 admin tenant ID and download this from the Tools tab which wasn’t that much easier

O365


Now they made it easier for admins to be available from the tools tab at the bottom of the EAC. Its the same in Exchange 2016 as well.

In-order to access the tool just navigate to the tools option and you can see the prerequisites as well which you can go through

E168


But you can see it says exchange 2013 but still it works fine with collecting the required details and checking the readiness. This one will show as Exchange 2016 once the RTM is out.

32


Also its not mandatory to have all these ready since this system will navigate through and install all the missing components as and when required.

When you select the best practice analyzer it takes us to the below option and downloads the tool at the first time only.

213


Just accept the license agreement.All steps are the same as it was in Exchange 2013 SP1 and later


E162


You get the welcome page as below

E163


Click to start the scan


E164


You will be prompted to enter your office 365 Admin Tenant ID,.

In this you have 2 options

If you want to run the prerequisite check to be done only on the  on-premise then click cancel

If you want to run the prerequisite check to be done on both on-premise and Office365 then click ok


E165


Once the scan is completed you will be getting the summary results as below.


E166


This makes the jobs of many admins easier by having this option in the EAC in on premise when doing a hybrid integration with Office 365.

Make sure that you have internet connectivity from the server where you are running this tool in-order to authenticate with Office 365 credentials if you want to check the hybrid readiness on your office 365 as well as on-premise.

The Office 365 Best Practices Analyzer Tool can be used for organizations with:

Exchange Server 2013 SP1 and later on-premises only.
Exchange Server 2013 SP1 and later hybrid configuration.

Thanks

Sathish Veerapandian

Configure SSL certificate in Exchange server 2016

In this article we will have a look at the steps to configure SSL certificates in Exchange 2016 post installation.

If you have exchange 2016 in exchange 2013 coexistence you wouldn’t need to worry about this part. Because the already configured Exchange 2013 CAS server will have the capability to up proxy the requests to Exchange 2016 servers and you can stay relaxed for a while until the you decide to remove the exchange 2013 .

But if you have them in Exchange 2010 coexistence then you will need to move all of your external URL’s and place your SSL certificates into the Exchange 2016 servers.

Now we will have a look at how to place an  SSL certificate request in Exchange 2016 and complete them using a third party CA.

The configuration is the same as exchange 2013 and the only change  is the for internet facing CAS server will be now  internet facing mailbox server.

In-order to perform this action open EAC – click servers – and select certificates

C1

Give it a friendly name as below

Tets

Enter the domain name

If you are going to use wild card you can select the wild card certificate option.

Using wild card will cover your root domain and additional it covers one subdomain .

In my case i’m using wild card since its a lab and i’m using a complimentary subscription provided by digicert through MVP program.so in my case it would cover mail.exchangequery.com, Autodiscover.exchangequery.com, owa.exchangequery.com etc.,

C3

After this completes just click on next and choose one internet facing mailbox server in Exchange 2016

C4

Fill the required information as below

C5

place a location to save the private key as below

33

You can see the cert request generated as below in the location you mentioned

C6

After the above task is completed  you can see the certificate request in pending state in the certificates tab as below

Now we can submit this request to a third party CA and get a new SSL certificate for your domain.

There are so many good providers but i recommend digicert as i have seen their support to be very prompt and all together provide a competitive pricing

C7

Now copy paste the CSR request we generated in Exchange 2016 as below .Now you can select the server software as exchange 2013 and with that it would be working until they add exchange 2016.

s3

Once you get the SSL certificate from the certificate provider now we need to complete this request by importing them into the Exchange 2016 internet facing  server.

You can see the certificate that we requested in pending state as below

Final

So click on complete and you will get a pop up window to import the SSL certificate.

Just import the certificate that you got from the certificate provider and then complete the request.

Now we have successfully completed the SSL certificate request in Exchange 2016

Thanks 

Sathish Veerapandian 

MVP – Exchange Server 

Configure Exchange 2016 with exchange 2010 coexistence

In this article we are going to look into few things that we need to consider for coexistence of Exchange server 2016 with Exchange 2010.

Below are the things that we need to think for Outlook Anywhere, OWA, Active Sync , EWS , ECP

For Outlook Anywhere Coexistence

In Exchange 2010 – 

Enable Outlook Any-where on exchange 2010 servers

Set the IIS authentication to BASIC + NTLM in Exchange 2010

In Exchange 2016 –

If you are doing SSL offload then perform the below

Direct the connections to the exchange 2016 from your firewall.

Note: If you are having exchange 2013 then don’t need to make any changes since exchange 2016 supports up-version of proxy with exchange 2013 . i.e exchange 2016 can accept the connections from exchange 2013 CAS server. Unfortunately we don’t have this functionality  with exchange 2010 coexistence.

Perform the below settings in exchange 2016

Open EAC – select outlook anywhere


432


Select Basic Authentication

876

If you don’t select basic then you will get  the below  warning message with NTLM . You don’t need to worry if you are doing this in exchange 2013 coexistence,but for exchange 2010 it should be only basic.

36


Uncheck require SSL in all of the virtual directories if  you are doing SSL offload for all of the services

369


789

Exchange 2016  Active Sync  virtual directories  can proxy to 2010 end point without any issues.


Its similar for OAB , OWA and other virutal directories.


All the above settings is for one site with exchange 2010 coexistence.

If its the same site it does proxy the 2010 users requests straight to 2010 CAS server.

If you have a different site then 2 scenarios comes into picture according to your setup

If its is a non internet facing site with the same URL’s then it does a proxy to CAS server for all the requests of that site.

If it is a internet facing external site with external url then it does a redirect to that URL.

I have the same setup in my lab setup with single AD site  and so far all setting seems to be working fine.

More to explore on the configuration , features and coexistence. Will keep you posted !!

Thanks

Sathish Veerapandian

MVP – Exchange Server

Install Exchange 2016 in Exchange 2010 Coexistence

In this article lets have a look at installing exchange 2016 in exchange 2010 coexistence.

Before proceeding with the installation i would like to give a small summary and features of exchange 2016 not a detailed one  since there are good articles on the new features of exchange 2016 written by senior MVP’s.

Below are new features of the product :- 

One Mailbox role with all the functionality

The mailbox server in exchange 2016 hosts all the components – Client Access protocols, Transport service, Mailbox databases, and Unified Messaging.

The main reason of this design is to simplify the architecture, reducing the hardware dependency by running on a healthy CPU power which is less expensive, and easier way to isolate any issues if we come across.

Edge transport role is coming with RTM

Considering the legacy RPC technology all Outlook connections will be MAPI over HTTP.

Note:
By default this is not enabled if you are installing on Exchange 2010/2013 coexistence and you can enabled them.
But if you have this already enabled in Exchange 2013 then it will be enabled.
If you are installing only exchange 2016 then its enabled mapi over http as a default

For further information on the architecture you can go through the below excellent  series from MVP Prabhat and tech-net

Exchange Server 2016: All You Need Part 1

Exchange Server 2016: All You Need to know Part 2

Exchange Server 2016: All You Need to know Part 3

http://blogs.technet.com/b/exchange/archive/2015/07/22/announcing-exchange-server-2016-preview.aspx

Now lets go through the installation part

Readiness to be prepared for Exchange 2016 in Exchange 2010 environment :-

. Exchange 2010 SP3 with RU9 should be updated  ,  for all Exchange 2010 servers.

· At least one Windows Server 2008 or higher Global Catalog in each AD site with Exchange installed

· At least one writable Domain Controller in each AD site with Exchange Servers installed (It can be a GC.)

· AD Forest must be Windows Server 2008 Forest Functional Level or higher

· Coexists with Exchange 2010 SP3 RU9 and Exchange 2013 CU7 *may be increased by RTM*

· Outlook for Windows – 2010 or later

· Outlook for Mac – 2011 or later

If you wish to enable mapi/http then you must have atleast outlook 2013 SP1 or later.


Operating System Prerequisites:

· Windows Server 2012 R2 64-bit Standard or Datacenter editions

· .NET framework 4.5.2.

· Windows Management Framework 4.0 .

· Unified Communications Managed API (UCMA) 4.0

 (DNS) namespaces:

Following types are supported

Contiguous

Noncontiguous

Single label domains

Disjoint
IPv6 support:

In Exchange 2016, IPv6 is supported only when IPv4 is also installed and enabled. In the n\w if IPV6 enabled then it will take IPv6 addresses.

Hardware Requirements :

Processor : x64 architecture-based computer with Intel processor that supports Intel 64 architecture
Memory :
For Mailbox – 8 GB Minimum recommended

Page File – minimum and maximum must be set to physical RAM plus 10 MB

Disk Space – Better to have 50 GB on the drive on which we install the exchange binaries.


Install the prerequisites on the  Exchange 2016 server : ( Applies for Windows server 2012R2)

.NET Framework 4.5.2

Click here to download http://www.microsoft.com/en-us/download/details.aspx?id=42642

Microsoft Unified Communications Managed API 4.0, Core Runtime 64-bit.

Click here to download http://go.microsoft.com/fwlink/p/?linkId=258269

install the below features

Install-WindowsFeature RSAT-ADDS

Install-WindowsFeature AS-HTTP-Activation, Desktop-Experience, NET-Framework-45-Features, RPC-over-HTTP-proxy, RSAT-Clustering, RSAT-Clustering-CmdInterface, RSAT-Clustering-Mgmt, RSAT-Clustering-PowerShell, Web-Mgmt-Console, WAS-Process-Model, Web-Asp-Net45, Web-Basic-Auth, Web-Client-Auth, Web-Digest-Auth, Web-Dir-Browsing, Web-Dyn-Compression, Web-Http-Errors, Web-Http-Logging, Web-Http-Redirect, Web-Http-Tracing, Web-ISAPI-Ext, Web-ISAPI-Filter, Web-Lgcy-Mgmt-Console, Web-Metabase, Web-Mgmt-Console, Web-Mgmt-Service, Web-Net-Ext45, Web-Request-Monitor, Web-Server, Web-Stat-Compression, Web-Static-Content, Web-Windows-Auth, Web-WMI, Windows-Identity-Foundation


Download the Setup - 

http://www.microsoft.com/en-us/download/details.aspx?id=48210 

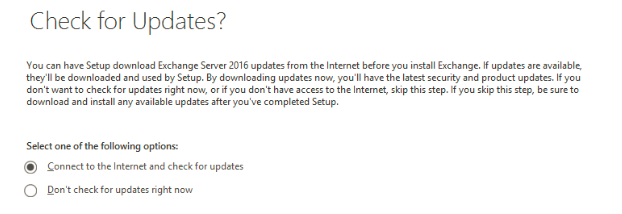
Once the setup is downloaded just open the setup.exe file which will bring you to below screen


M1


M2


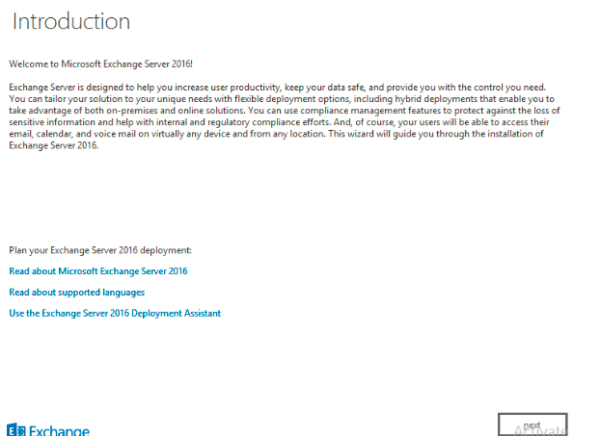
Installation is pretty much straight forward and it remains the same as exchange 2013

M3

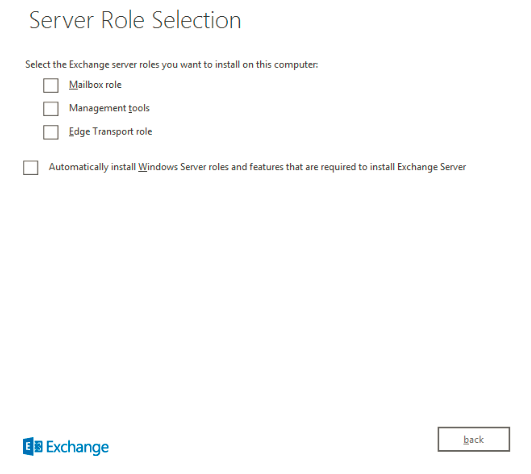
The only change we see here is the role selection part without the CAS role 
Select mailbox role and proceed next

M4

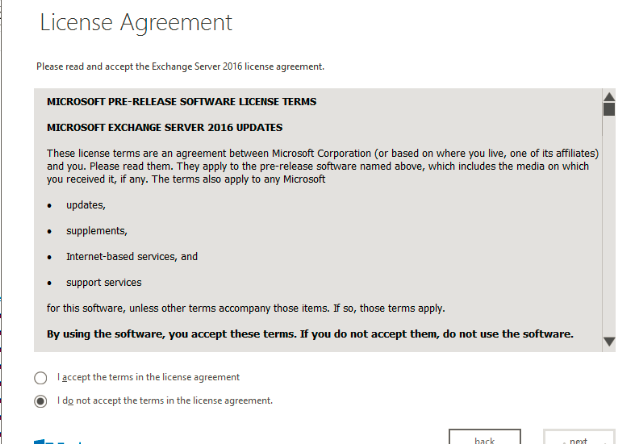
We have the same option as we had in Exchange 2013

M5

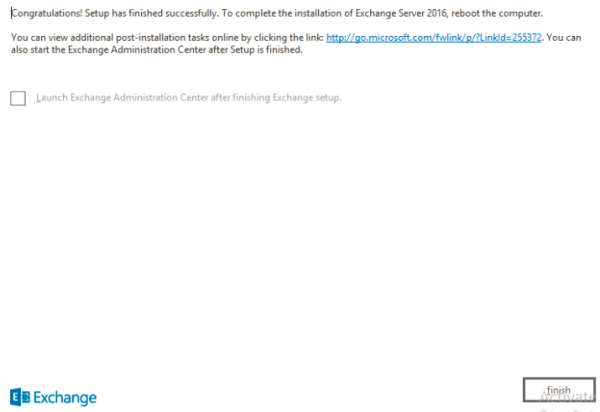
It goes through the readiness checks and 15 setup progress one by one same as Exchange 2013 and the setup will finish with the below screen

3211


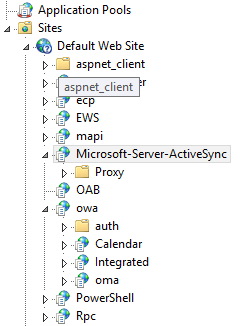
Once the setup completes you get the EAC console like below

Test11

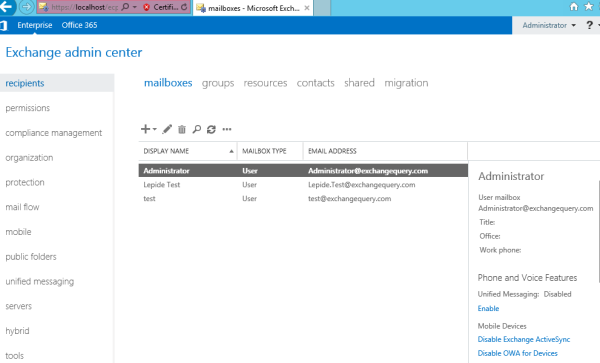
You can check the coexistence 
Exchange 2010 and Exchange 2016 version 15.1

432

And we are done with installing Exchange 2016 in Exchange 2010 coexistence.
In future as we get more updates from Microsoft on Exchange 2016 we will explore more on this product.

Thanks
Sathish Veerapandian
MVP - Exchange Server