
All of the Load balancer’s require an SSL certificate since they use HTTPS as a front end listener for all of the services that are handled by them.
So basically a certificate is very much mandatory here to terminate the incoming connections and then decrypt the requests from the clients and sending them to the appropriate instances.
In order to install the SSL certificate on your load balancer , you must create a certificate request , submit them to a CA , get them signed by your internal CA or a third party trusted CA and then installing them on your load balancers.
Before creating a CSR, the applicant first generates a key pair, keeping the private key secret.
The CSR has the public key chosen by the requester. So in most of the cases these CSR gets generated from a web application and the private key is not shared and is stored in the application itself.
In most of the cases SSL certificate for these load balancers can be either a self-signed certificate or a trusted Certificate Authority (CA) certificate.
A self-signed SSL certificate is a certificate that has been signed by its own private key
A trusted CA is an SSL certificate that is signed by a CA’s private key
Though there is an option to create a self signed certificate,most of the load balancers recommends using only a trusted CA certificates since it is more secure than using self-signed certificates.
In this article we will have a look at generating a certificate through CA for a load balancer.
First in order to create the CSR request we need to login to the certificate authority (certsrv) and submit the CSR request with your internal IP of the load balancer
usually it is https://yourinternalCAserver/certsrv

Now select the 2nd option in the next page as below

Now select the 1st option as shown below

Next comes the main page where we need to provide the ip address of the load balancer as the common name for which it will generate the CSR from the CA server and submit to the CA.
In the name section we need to make sure that the IP address is specified
We need to make sure that we are selecting the option mark keys as exportable which will allow us to export the private and the public key (for giving the key pair) to the load balancer.
Also we need to make sure that we select the format as PKCS10

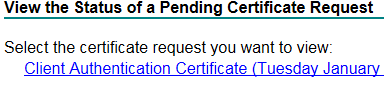
once the request is submitted you need to go to the home and click on view request status

You will get the status of the pending requests as below
Once you click on this you can see this certificate will be issued to the CA for verification.
On a successful submission of this CSR this request will go to the CA in the pending queue and will show in the pending requests.
Then we need to go ahead and issue this certificate from the pending requests
Once the certificate is issued successfully you can go to the issued certificates and there we can see this certificate. When we double click on that certificate and in the general tab we will see an information that says you have a private key that corresponds to this certificate.

So this ideally means that the private key as well as the public for the load balancer is generated from the certificate authority in my example. And it was my CA who generated the private key and the CSR request.
Now we need to export this certificate in the pfx format with the keypair (private & public) and then import them on the load balancer.
So now while exporting this certificate i need to export the certificate with the below option

Once exported we can install this certificate on the load balancer.
Disclaimer:
We need to be very careful while working with certificates .In the above method key-pair will be generated and this key pair should not be shared to any of the external parties. Sharing this key-pair to any of the third parties will easily compromise your whole network since they are load balancer certificates. Proper planning and understanding of the scenario according to your environment needs to be done before performing such kind of tasks.
Hope this helps !!
Thanks
Sathish Veerapandian
MVP – Exchange Server


Leave a comment