
The concept of throttling policy is first introduced in Exchange 2007, by which admin can impose some policies that prevents user application from sending number of Remote Procedure Call per second.
Throttling policies are meant for enhancing the Exchange performance in the organization. It keeps a track of consumption of resources by the end-user and also imposes the bandwidth limits. Continue reading
Monthly Archives: August 2016
Configure Throttling Policy In Exchange Server 2016/13/10
Disable external access to EAC in Exchange 2016
Right from Exchange 2013 Exchange Administrative Center is integrated with Exchange Control Panel (ECP) and is available practically from every location in network (LAN, Internet) Unless and until we disable them.
Right after the new Exchange deployment in any environment it is very important to disable the external ECP access on the servers .
Below are the options available to disable the EAC :
1) We can install one more server for internal ECP access only and do not add them in the LB, Which will consume another server just for this functionality alone.
2) Install a second website with ECP and OWA virtual directories on the internet-faced CAS. We need to assign a second IP address to our server on the second network adapter installed in a CAS server.This is painful to maintain after the every CU updates.
3) Use IIS IP and domain restrictions in Windows server 2012 to limit access only to /ecp on internal IP’s.By doing this we can allow Only hosts in the required subnet range to access the ecp.
But in Exchange 2013 restricting ECP will stop the users to access the ecp features in owa ( OWA options) like they have manage out of office, delivery reports, manage mobile devices etc.., . All these end users OWA ecp features will be blocked.
If access is turned off in Exchange 2013,we will receive this below message
404 – website not found error
But from Exchange 2016 Disabling the EAC on the Exchange server 2016 will not disable the ECP end user level functionality completely. All the end user mailbox level OWA ECP functionality still remains available.
so which means the end user ECP design functionality has been changed from Exchange 2016 which is good for us :).
Having all the options above to restrict EAC from external network my colleague came up with one good option which was nice and thought of sharing it in this post.
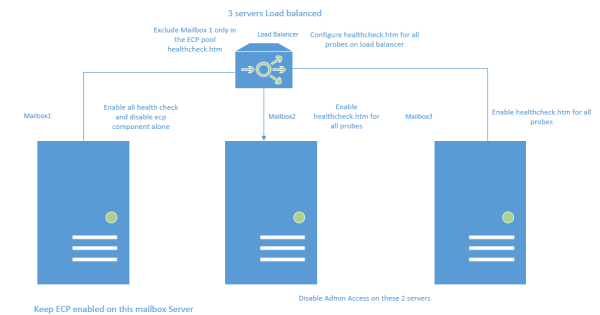
Lets take an example scenario where i have 3 Mailbox Exchange 2016 servers load balanced to accept all the external client connections.
Below is the diagram on which we can configure the probes for ECP access only on 2 servers to accept the ecp connections and the remaining one we keep them disabled.
Benefits of doing this :
1) External end user owa ecp requests will reach mailbox 2 and mailbox3 and will serve the owa ecp options along with all other client requests for the users.
We need to run this command on Mailbox 2 and Mailbox 3 so that the Admin EAC is disabled on them.
Set-ECPVirtualDirectory -Identity “mailbox2\ecp (default web site)” -AdminEnabled $false
Set-ECPVirtualDirectory -Identity “mailbox3\ecp (default web site)” -AdminEnabled $false
After running this command the load balancer will send only the owa ecp ( OWA options) requests to the mailbox2 and mailbox3. Mailbox1 will not participate in serving the owa ecp ( OWA options) requests for the clients while it will serve all other requests like activesync,mapi, autodiscover,oab etc..,
2) We are actually utilizing all the resources of the Exchange 2016 Mailbox 1 servers to accept all client connections except for ecp requests.
So on Mailbox 1 What we are doing is having the EAC admin access always enabled. But we are not including the ECP component participation in the load balancer in serving the clients.
So we are disabling the ecp healthcheck alone on the mailbox1 server in my example
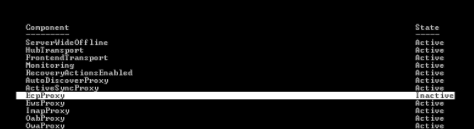
This component we are disabling because the load balancer should send all the other requests to this server to serve the clients while it will not send any ecp requests to this server.
Thanks & Regards
Sathish Veerapandian
MVP – Office Servers & Services
Remove Exchange Server 2010 From a DAG
If you are interested in removing existing Exchange Server 2010 from a Database Availability Group then this article completely belongs to you. Continue reading
Disable RC4 and SSLV3 encryption for applications
Once any web application is deployed its always recommended to perform a thorough security testing to identify if there are any security risks.
In this article im just sharing my experience to disable RC4 and SSLV3 for applications hosted on Windows Servers.
We can use the below URL site to test the server configuration for HTTPS protocol
https://www.ssllabs.com/ – that will test your server’s configuration for the HTTPS protocol
Why RC4 needs to be disabled ?
RC4 should not be used, due to crypto-analytical attacks.
It’s been more than 25 years since Ron Rivest invented his RC4 stream cipher but still being used by legacy clients and browsers.
How RC4 Encryption Works:
A ciphersuite consists of a key exchange algorithm, an encryption method and an integrity protection method.
RC4 is a stream cipher, so it encrypts plaintext by mixing it with a series of random bytes used to encrypt it. But, the bytes used to encrypt the plaintext aren’t really as random as they should be, at least at the beginning of the process.
That makes it possible for an attacker to figure out the plaintext of an encrypted message with access to enough TLS requests. The problem is that there are biases in the keystream, making life easier for an attacker.
Why its not Disabled by default on Windows Server 2008 R2, 2012 R2 ?
Unfortunately, servers default configuration tends to support backward compatibility as well over security.
They are enabled by default only for supporting older versions of browsers and operating systems.
Basically we need to disable this on apps running Windows Server 2008 R2 , 2012 R2 and IIS.
Preventive Measures for RC4 Attack:
As a security its always recommend to use TLS 1.2 or above. So its better to disable them and support only the latest type of encryption.
Disable Ciphers by adding the below registry entries on the server hosting the application.
[HKEY_LOCAL_MACHINE\SYSTEM\CurrentControlSet\Control\SecurityProviders\SCHANNEL\Ciphers]
[HKEY_LOCAL_MACHINE\SYSTEM\CurrentControlSet\Control\SecurityProviders\SCHANNEL\Ciphers\RC4 128/128]
“Enabled”=dword:00000000
[HKEY_LOCAL_MACHINE\SYSTEM\CurrentControlSet\Control\SecurityProviders\SCHANNEL\Ciphers\RC4 40/128]
“Enabled”=dword:00000000
[HKEY_LOCAL_MACHINE\SYSTEM\CurrentControlSet\Control\SecurityProviders\SCHANNEL\Ciphers\RC4 56/128]
“Enabled”=dword:00000000
Disable SSLv3:
A Small history on SSL
SSLv1 was never publicly released.
SSLv2 was quickly found to be insecure.
SSLv3 was created, and, together with the newer TLSv1/1.1/1.2, it is still currently being used to secure the transport layer of the Internet.
Weakness of SSL V3:
Last year Google Engineers found the major loophole in SSLV3 with an exploitation technique known as POODLE Attack.
This is a plaintext recovery attack that focuses on HTTP headers and exploits a weakness in the SSLv3 protocol when used with block ciphers.
Its a protocol vulnerability attack.
So now its recommended to disable the SSLV3 on server side.
Preventive Measures for SSLV3 Attack:
Disable SSL V3 by adding the below registry entries on the server hosting the application.
[HKEY_LOCAL_MACHINE\SYSTEM\CurrentControlSet\Control\SecurityProviders\SCHANNEL\Protocols\SSL 3.0]
[HKEY_LOCAL_MACHINE\SYSTEM\CurrentControlSet\Control\SecurityProviders\SCHANNEL\Protocols\SSL 3.0\Client]
“DisabledByDefault”=dword:00000001
[HKEY_LOCAL_MACHINE\SYSTEM\CurrentControlSet\Control\SecurityProviders\SCHANNEL\Protocols\SSL 3.0\Server]
“Enabled”=dword:0000000
Always advisable to have encryption of more than TLS 1.2.
Note:
1) If you have this security enabled on the reverse proxy application through which your services are published, then the session for those connections will be terminated there itself.
But still its better to have this disabled on all the applications which are serving the clients.
2) Its very important to note that before disabling this type of connections we need to make sure that the application is not serving any clients with this encryption.If at all its found we need to make that application to work on TLS1.2 or later.
Thanks & Regards
Sathish Veerapandian
MVP – Office Servers and Services
Configure SCOM 2012 to receive Exchange 2016 Alerts in Email and SMS
Its better if we receive alerts regarding Exchange service level unavailability during any outage.
Though the managed availability self healing component is very much capable of self monitoring the Exchange services still few companies would request a display dashboard about the current Exchange services and to be notified via sms and email when there is any outage.
Below are the main prerequisites:
1) System Center Operations Manager 2012 R2 is in environment.
2) Exchange Server 2013 Management Pack is installed. Currently only Exchange 2013 management pack is present and it supports 2016.
Below are the high level steps that we need to perform in the SCOM 2012:
1) Create Channels – Basically a path through which the alert will be delivered to the destination (admins).
2) Create Subscribers – Persons who are supposed to be notified when an alert is identified in SCOM for Exchange.
3) Create Subscriptions – Selecting the components to be alerted when any Exchange services are unavailable.
This should be the case for any applications to be notified when there is an issue with their system.
To receive SCOM alerts in mobile as SMS we need to have an SMS routing agent configured.
Below work flow is the normal way of configuring to receive alerts in SMS :
SCOM – Mailbox Server Relay – Reaches Mail Contact local SMTP address domain.com – Finds the SMTP target address – Finds the appropriate send connector – Routes to the SMS routing Agent – Exchange Admin receives the SMS
To receive SCOM alerts in a Email:
Below work flow is the normal way of configuring to receive alerts in Email:
SCOM subscribers – Mailbox server relay – Finds Mail Group – Alerts Delivered to the Admin’s mailbox.
So we need to give relay permission to the SCOM 2012 server on the Exchange to send the alerts when any issue occurs.
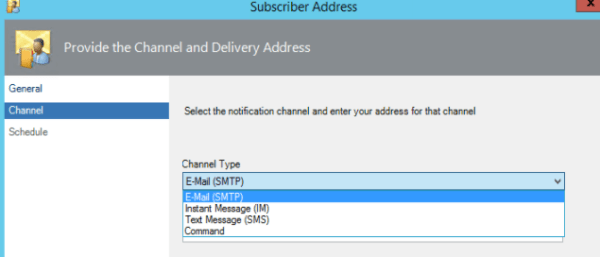
First we need to create Channel :
To create a channel perform the below :
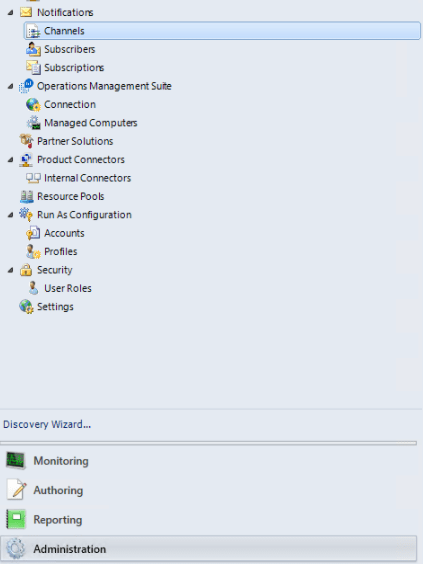
Navigate to Operations manager console – Click on Administration – Click on notifications- Select Channels
Right click on Channels – New Channel – Select the appropriate channel that we wish to route .
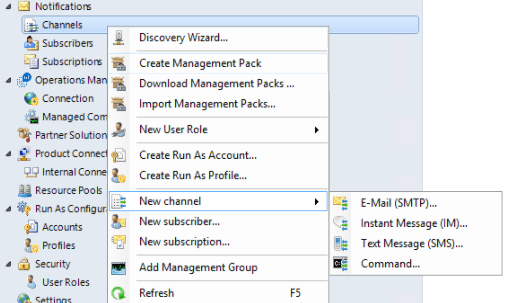
The best way always is to create only SMTP channels route them to exchange and from there deliver it to the appropriate destinations.
This will keep less complication.
Also we can create a DNS A record and point them to all mailbox servers to that record as well.
To create a Subscribers perform the below:
Navigate to Operations manager console – Click on Administration – Click on notifications- Select Channels
Right Click on Subscriptions – new Subscriber
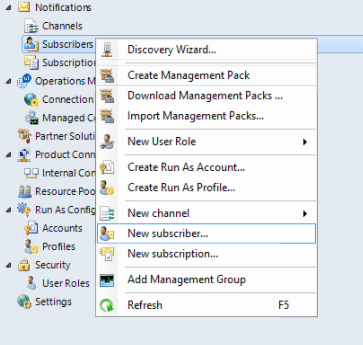
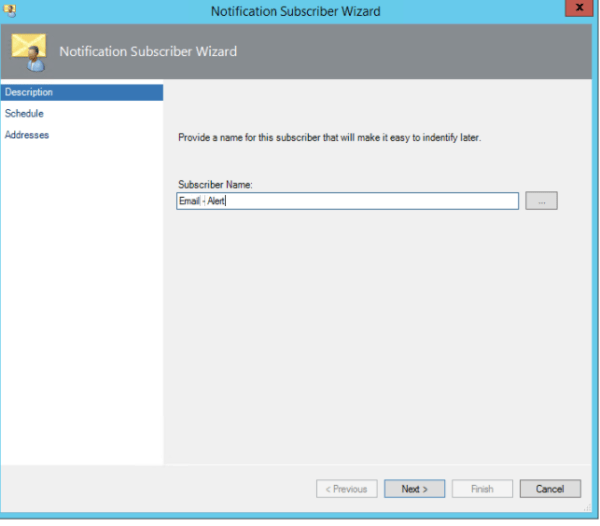
Create a new Subscriber
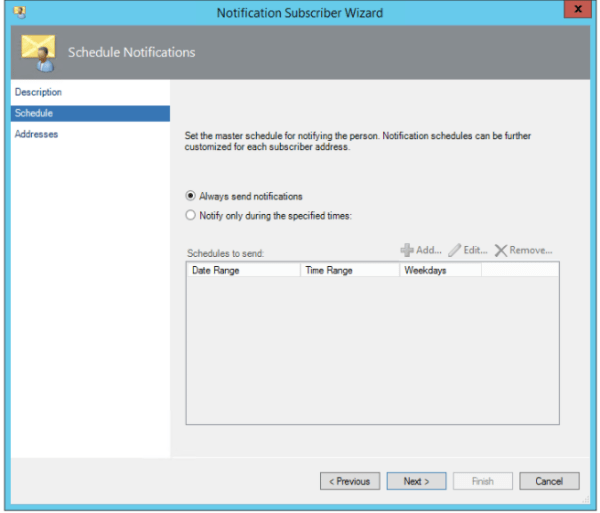
Select always send notifications
Add the delivery address – admin email address if it needs to be delivered to email or email contact if it needs to be routed to his mobile device
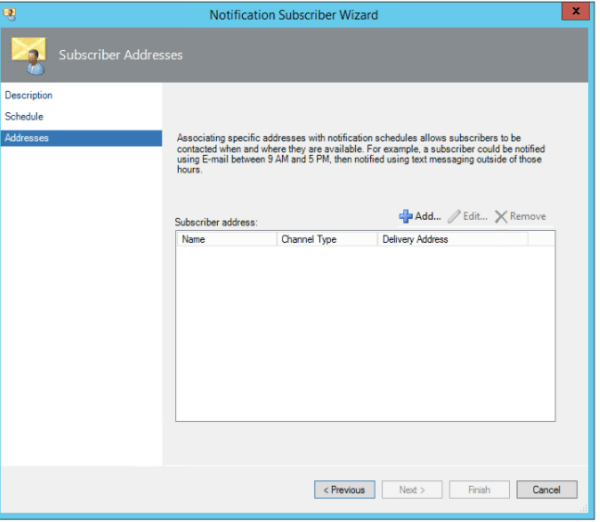
Select the channel type as Email(SMTP) – Its better if we route all the messages via Exchange and from there we can route to the appropriate destinations. I feel this will make less complication in creating the channels.
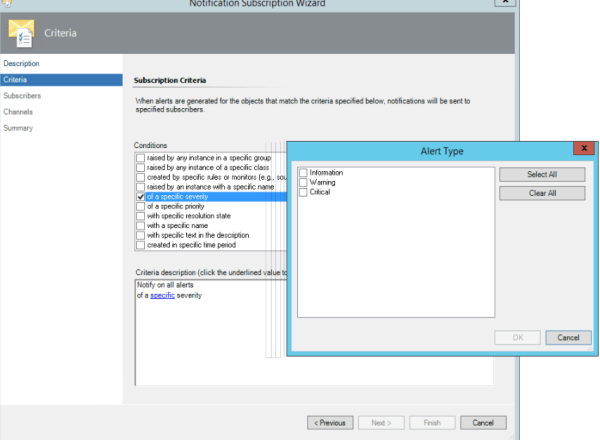
Now we need to create the Subscriptions
To create a Subscriptions perform the below:
Navigate to Operations manager console – Click on Administration – Click on notifications- Select Channels
Right Click on Subscriptions – new Subscriptions

Now this part is very important. We further need to fine tune this based on the setup, issues. Here we are actually specifying and subscribing the alerts which we will be notified on a application unavailability .
So you need to choose the alerts based on your request. For Exchange i can say if there is any issues with Database copies unhealthy , Database dismounted we can specify them with specific name , description in this criteria section and get notified via SMS.
For the exchange services EWS, Active Sync, MAPI we don’t need to configure here since we have the health probes configured on the load balancers and will be notified from them.
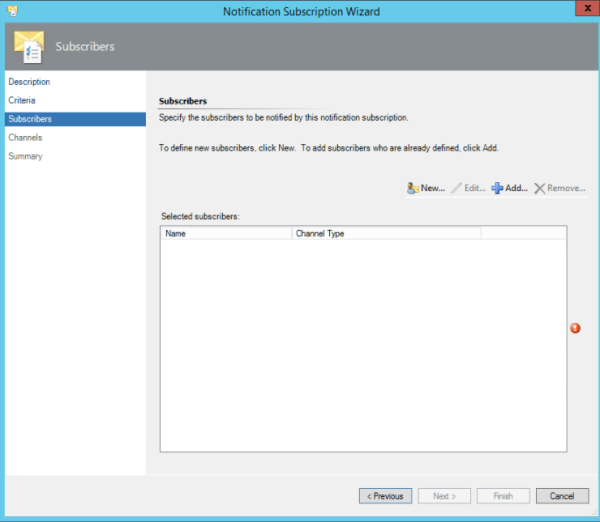
And in this part we specify the subscribers:
Usually the subscribers are the group of distribution that we created.
Now select the Channels that was configured to route the alerts to Exchange servers.
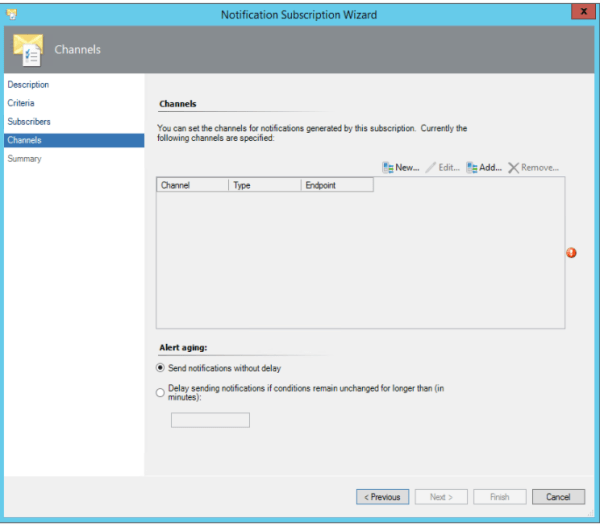
After this is done we would be able to receive the Exchange 2016 alerts through email and SMS.
Thanks & Regards
Sathish Veerapandian
MVP – Office Server and Services


