In this article we will have a look at steps to migrate from ADFS 2.1 to 4.0 which has been used for on-premise web based claim aware applications.
Things to perform on the ADFS 2.1 Server :
1) Export the Config Data
The config data can be exported with the scripts located in the \support\adfs folder on the Windows Server 2016 installation CD:

Mount the Windows 2016 Media
Export and backup the AD FS configuration data with the below script on a safe folder location
export-federationconfiguration.ps1 -path c:\adfs2backup
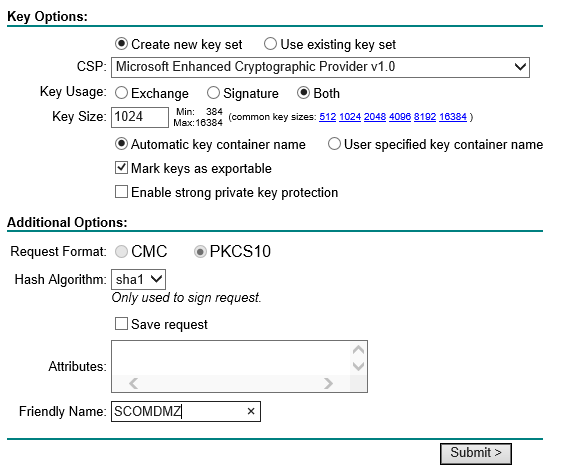
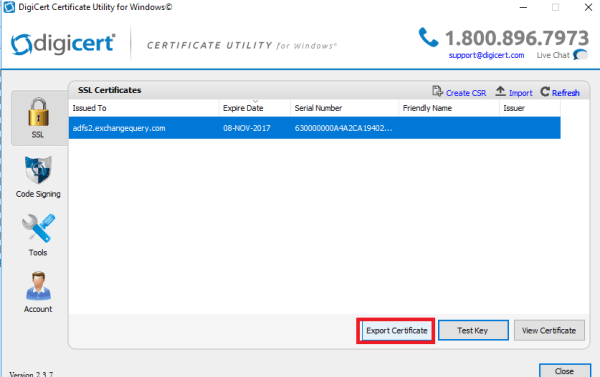
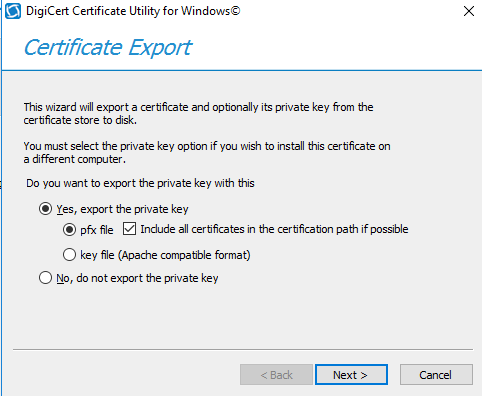
2) Export the certificate with the private key from the ADFS 2.1 personal store.
There are few ways to export the certificate along with the private key.We can export the certificate through DigicertUtil along with the private key from the personal store from this ADFS 2.1 Server.
3) Make a note of the account on which the ADFS Windows service is running .
This is very important and required during the installation of ADFS 4.0.
Go to local services ADFS Windows Service – Make a note of the logon account name
4) Make a note of the edit Federation Service properties
Open ADFS management – Edit Federation service properties – General – Organizational – Events. This is required in the configuration of the federation service on the new ADFS 4.0 farm.
Things to perform on the ADFS 4.0 new server:
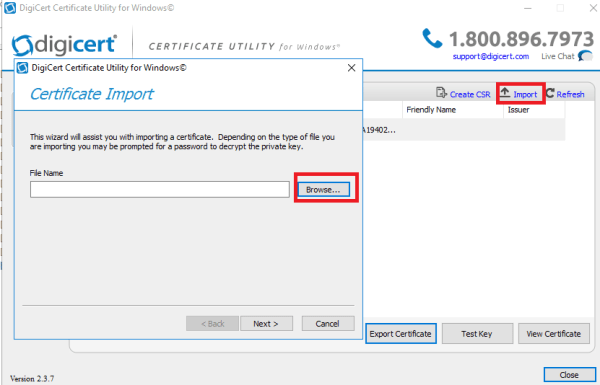
1)Import the certificate along with the private key on the new ADFS 4.0 server.
We can use the MMC certificates snap in and import the PFX format certificate that was exported from the old ADFS server. This procedure should be done before installing the ADFS 4.0 role.
2)Install the ADFS services role on this new computer and click configure.
Note:
In AD FS 2.1, we had to download and install the AD FS 2.1 software to deploy the AD FS server infrastructure.
From Windows server 2012 this component is present as a role in the server manager which provided improved configuration wizard which will automatically list and install the services that required during the installation.
a) From the server manager choose ADFS role
b) Select Create the first federation server in a federation farm

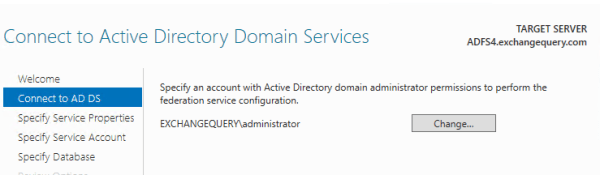
Select a domain admin account to install ADFS. Its not mandatory to provide the ADFS service account in this page.
c) In the next page select the certificate just imported to the personal store
Enter the federation service display name as is it was present on the ADFS 2.1

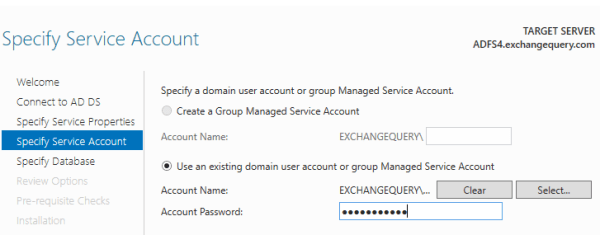
For the service account enter the exact service account name and the password present in ADFS 2.1
e) In the database field specify the database either WID database or the new SQL database on this new server according to the configuration.
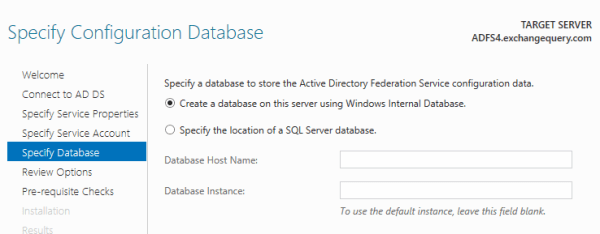
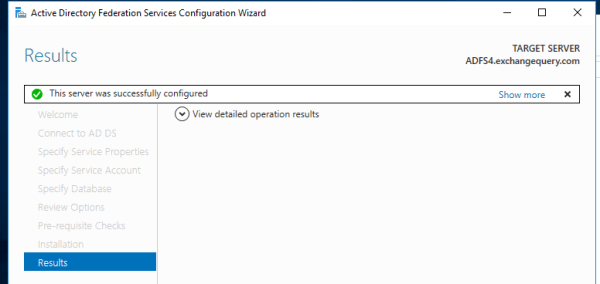
After specifying the database we can click on next post which the ADFS4.0 will be configured successfully .
3) Now import the federation data that was exported from the old ADFS 2.1
run import-federationconfiguration.ps1 -path c:\adfs2backup
After the import configuration is completed we would be able to see the ADFS configuration as is it was present in the previous server.
4) Enable IDP initiated sign on page by running the below command.
(get-adfsproperties).EnableIDInitiatedSignonPage
Verify the new ADFS Farm:
Verifying the new ADFS farm is very much important before we decommission the old farm.
Make a host entry directly to this new ADFS 4.0 server which consumes the ADFS service and visit the IDP initiated sign on page and make sure the application is able to reach the IdpInitiatedSignOn.aspx page .
Example below :
https://adfs.exchangequery.com/adfs/ls/idpinitiatedsignon.aspx
Good to Know:
1) ADFS on Windows Server 2012 R2 uses the SNI (server name indication) extension of SSL. This means that we need to reach the IdpInitiatedSignon.aspx page with the exact URL of the ADFS farm. So if the ADFS server is ADFS01.exchangequery.com with the IP address 10.34.42.11 and the name of the farm is adfs.exchangequery.com, the following apply:
https://adfs01.exchangequery.com/adfs/ls/idpinitiatedsignon.aspx does not work (TCP RST will be sent to terminate the TLS negotiation)
https://10.34.42.11/adfs/ls/idpinitiatedsignon.aspx does not work (TCP RST will be sent to terminate the TLS negotiation)
https://adfs.exchangequery.com/adfs/ls/idpinitiatedsignon.aspx works
2) ADFS 4.0 no longer uses IIS, so do not install IIS as a part of the prerequisite during the installation. ADFS 4.0 can be published via windows server web application proxy server.
3) Windows Server 2016 has the ability to perform an in-place upgrade of Active Directory Federation Services (ADFS) from 3.0 to 4.0. All we need to do is introduce the new ADFS 4.0 in the existing ADFS 3.0 farm (mixed farm) make them primary and then decommission the old 3.0 servers.But this option is not available if we are running ADFS 2.1 farm.
Thanks & Regards
Sathish Veerapandian
MVP – Office Servers & Services