
If you are interested in removing existing Exchange Server 2010 from a Database Availability Group then this article completely belongs to you. Continue reading
Disable RC4 and SSLV3 encryption for applications
Once any web application is deployed its always recommended to perform a thorough security testing to identify if there are any security risks.
In this article im just sharing my experience to disable RC4 and SSLV3 for applications hosted on Windows Servers.
We can use the below URL site to test the server configuration for HTTPS protocol
https://www.ssllabs.com/ – that will test your server’s configuration for the HTTPS protocol
Why RC4 needs to be disabled ?
RC4 should not be used, due to crypto-analytical attacks.
It’s been more than 25 years since Ron Rivest invented his RC4 stream cipher but still being used by legacy clients and browsers.
How RC4 Encryption Works:
A ciphersuite consists of a key exchange algorithm, an encryption method and an integrity protection method.
RC4 is a stream cipher, so it encrypts plaintext by mixing it with a series of random bytes used to encrypt it. But, the bytes used to encrypt the plaintext aren’t really as random as they should be, at least at the beginning of the process.
That makes it possible for an attacker to figure out the plaintext of an encrypted message with access to enough TLS requests. The problem is that there are biases in the keystream, making life easier for an attacker.
Why its not Disabled by default on Windows Server 2008 R2, 2012 R2 ?
Unfortunately, servers default configuration tends to support backward compatibility as well over security.
They are enabled by default only for supporting older versions of browsers and operating systems.
Basically we need to disable this on apps running Windows Server 2008 R2 , 2012 R2 and IIS.
Preventive Measures for RC4 Attack:
As a security its always recommend to use TLS 1.2 or above. So its better to disable them and support only the latest type of encryption.
Disable Ciphers by adding the below registry entries on the server hosting the application.
[HKEY_LOCAL_MACHINE\SYSTEM\CurrentControlSet\Control\SecurityProviders\SCHANNEL\Ciphers]
[HKEY_LOCAL_MACHINE\SYSTEM\CurrentControlSet\Control\SecurityProviders\SCHANNEL\Ciphers\RC4 128/128]
“Enabled”=dword:00000000
[HKEY_LOCAL_MACHINE\SYSTEM\CurrentControlSet\Control\SecurityProviders\SCHANNEL\Ciphers\RC4 40/128]
“Enabled”=dword:00000000
[HKEY_LOCAL_MACHINE\SYSTEM\CurrentControlSet\Control\SecurityProviders\SCHANNEL\Ciphers\RC4 56/128]
“Enabled”=dword:00000000
Disable SSLv3:
A Small history on SSL
SSLv1 was never publicly released.
SSLv2 was quickly found to be insecure.
SSLv3 was created, and, together with the newer TLSv1/1.1/1.2, it is still currently being used to secure the transport layer of the Internet.
Weakness of SSL V3:
Last year Google Engineers found the major loophole in SSLV3 with an exploitation technique known as POODLE Attack.
This is a plaintext recovery attack that focuses on HTTP headers and exploits a weakness in the SSLv3 protocol when used with block ciphers.
Its a protocol vulnerability attack.
So now its recommended to disable the SSLV3 on server side.
Preventive Measures for SSLV3 Attack:
Disable SSL V3 by adding the below registry entries on the server hosting the application.
[HKEY_LOCAL_MACHINE\SYSTEM\CurrentControlSet\Control\SecurityProviders\SCHANNEL\Protocols\SSL 3.0]
[HKEY_LOCAL_MACHINE\SYSTEM\CurrentControlSet\Control\SecurityProviders\SCHANNEL\Protocols\SSL 3.0\Client]
“DisabledByDefault”=dword:00000001
[HKEY_LOCAL_MACHINE\SYSTEM\CurrentControlSet\Control\SecurityProviders\SCHANNEL\Protocols\SSL 3.0\Server]
“Enabled”=dword:0000000
Always advisable to have encryption of more than TLS 1.2.
Note:
1) If you have this security enabled on the reverse proxy application through which your services are published, then the session for those connections will be terminated there itself.
But still its better to have this disabled on all the applications which are serving the clients.
2) Its very important to note that before disabling this type of connections we need to make sure that the application is not serving any clients with this encryption.If at all its found we need to make that application to work on TLS1.2 or later.
Thanks & Regards
Sathish Veerapandian
MVP – Office Servers and Services
Configure SCOM 2012 to receive Exchange 2016 Alerts in Email and SMS
Its better if we receive alerts regarding Exchange service level unavailability during any outage.
Though the managed availability self healing component is very much capable of self monitoring the Exchange services still few companies would request a display dashboard about the current Exchange services and to be notified via sms and email when there is any outage.
Below are the main prerequisites:
1) System Center Operations Manager 2012 R2 is in environment.
2) Exchange Server 2013 Management Pack is installed. Currently only Exchange 2013 management pack is present and it supports 2016.
Below are the high level steps that we need to perform in the SCOM 2012:
1) Create Channels – Basically a path through which the alert will be delivered to the destination (admins).
2) Create Subscribers – Persons who are supposed to be notified when an alert is identified in SCOM for Exchange.
3) Create Subscriptions – Selecting the components to be alerted when any Exchange services are unavailable.
This should be the case for any applications to be notified when there is an issue with their system.
To receive SCOM alerts in mobile as SMS we need to have an SMS routing agent configured.
Below work flow is the normal way of configuring to receive alerts in SMS :
SCOM – Mailbox Server Relay – Reaches Mail Contact local SMTP address domain.com – Finds the SMTP target address – Finds the appropriate send connector – Routes to the SMS routing Agent – Exchange Admin receives the SMS
To receive SCOM alerts in a Email:
Below work flow is the normal way of configuring to receive alerts in Email:
SCOM subscribers – Mailbox server relay – Finds Mail Group – Alerts Delivered to the Admin’s mailbox.
So we need to give relay permission to the SCOM 2012 server on the Exchange to send the alerts when any issue occurs.
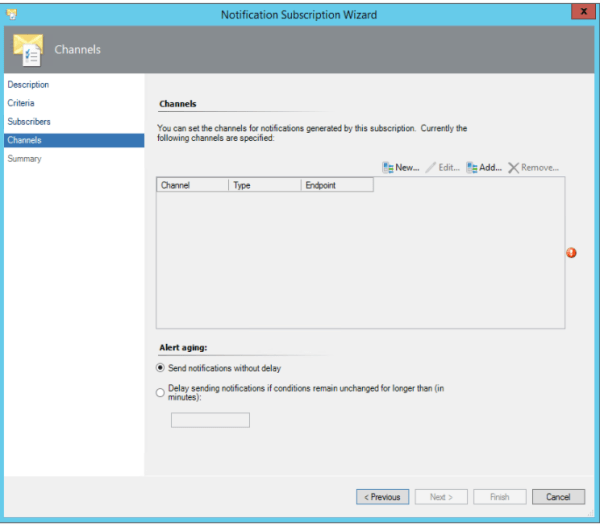
First we need to create Channel :
To create a channel perform the below :
Navigate to Operations manager console – Click on Administration – Click on notifications- Select Channels
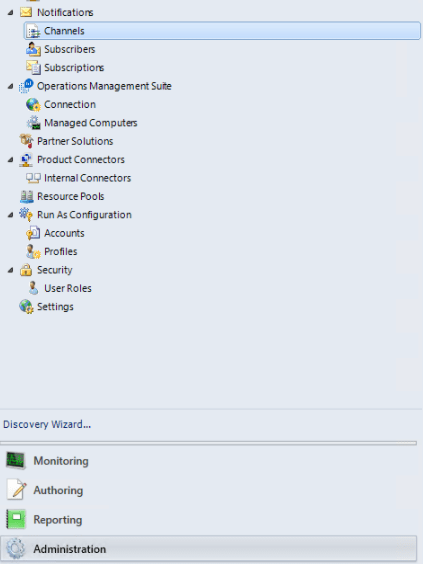
Right click on Channels – New Channel – Select the appropriate channel that we wish to route .
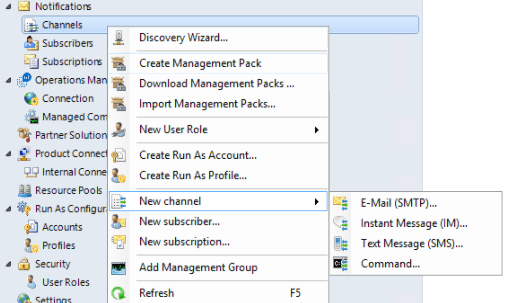
The best way always is to create only SMTP channels route them to exchange and from there deliver it to the appropriate destinations.
This will keep less complication.
Also we can create a DNS A record and point them to all mailbox servers to that record as well.
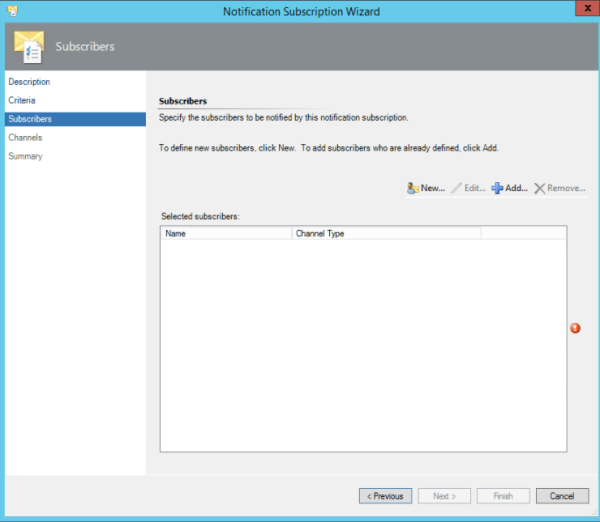
To create a Subscribers perform the below:
Navigate to Operations manager console – Click on Administration – Click on notifications- Select Channels
Right Click on Subscriptions – new Subscriber
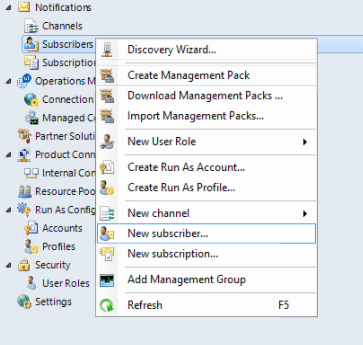
Create a new Subscriber
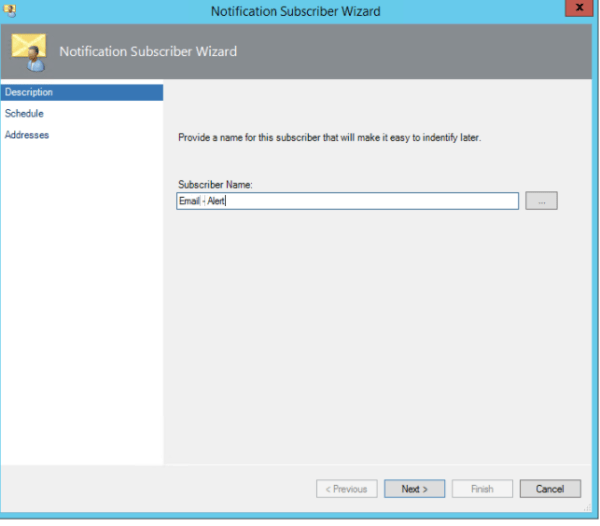
Select always send notifications
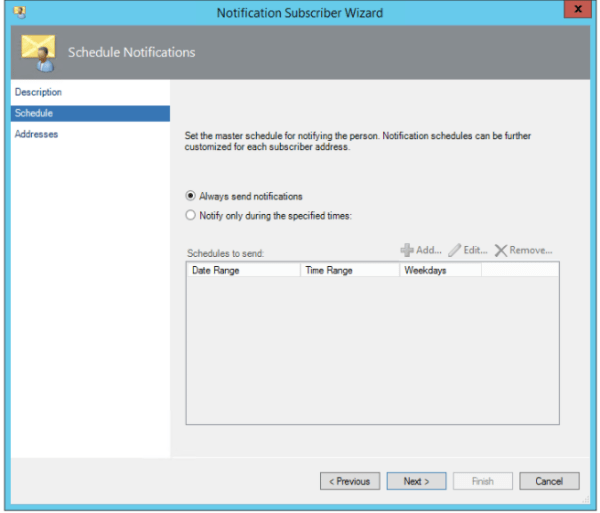
Add the delivery address – admin email address if it needs to be delivered to email or email contact if it needs to be routed to his mobile device
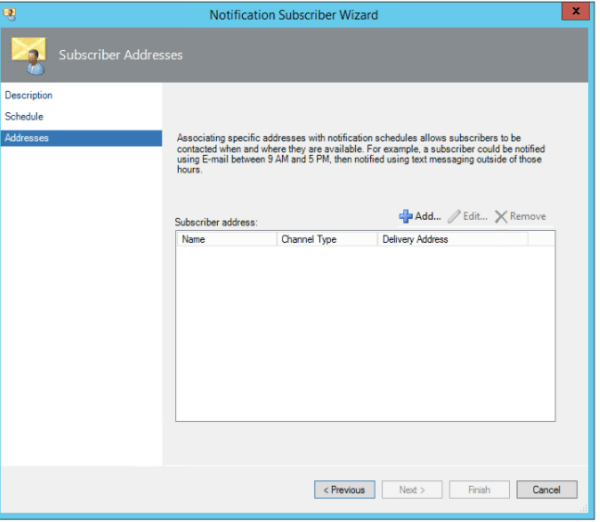
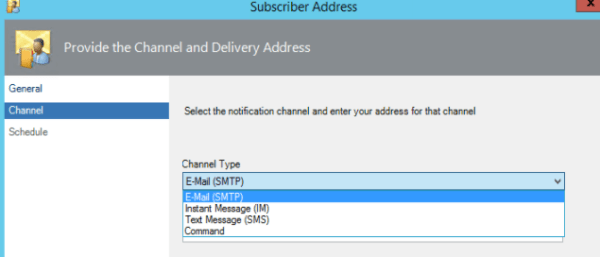
Select the channel type as Email(SMTP) – Its better if we route all the messages via Exchange and from there we can route to the appropriate destinations. I feel this will make less complication in creating the channels.
Now we need to create the Subscriptions
To create a Subscriptions perform the below:
Navigate to Operations manager console – Click on Administration – Click on notifications- Select Channels
Right Click on Subscriptions – new Subscriptions

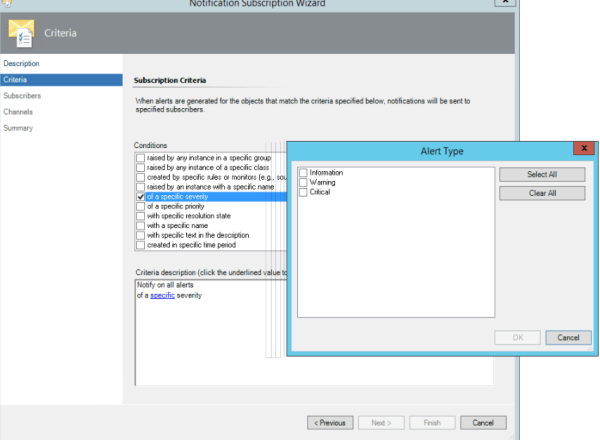
Now this part is very important. We further need to fine tune this based on the setup, issues. Here we are actually specifying and subscribing the alerts which we will be notified on a application unavailability .
So you need to choose the alerts based on your request. For Exchange i can say if there is any issues with Database copies unhealthy , Database dismounted we can specify them with specific name , description in this criteria section and get notified via SMS.
For the exchange services EWS, Active Sync, MAPI we don’t need to configure here since we have the health probes configured on the load balancers and will be notified from them.
And in this part we specify the subscribers:
Usually the subscribers are the group of distribution that we created.
Now select the Channels that was configured to route the alerts to Exchange servers.
After this is done we would be able to receive the Exchange 2016 alerts through email and SMS.
Thanks & Regards
Sathish Veerapandian
MVP – Office Server and Services
Resolve Frequent Account lockout of Notes ID
One of the notes user when trying to log in was getting the below message even though recovered and reset new notes ID was given to him from the server.
“Server error: Your password was expired and your account are locked; contact the system administrator to unlock it”
That message sounds more like a Windows lockout ,but the message is actually coming from Lotus Notes.
I was unaware that Notes would give a message like that and i’m seeing this for the first time . I haven’t worked much on domino other than creating notes ID, recovering ID, creating routing mailboxes , creating new DB’s, copying /moving the DB’s and monitoring the services.
Posting this solution so it may help others if they face this issue.
Solution:
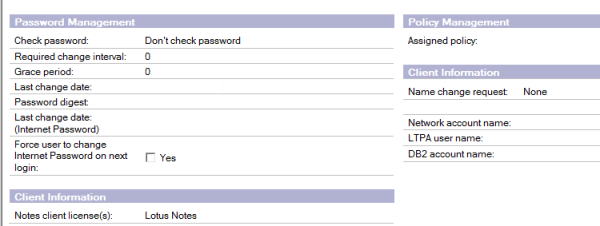
Open Domino Administrator – Go to the users person doc in the names.nsf – Go into edit mode – and then the administrator tab.
Go to Password management section in edit mode
Make sure check password is set to “don’t check password”
Set “Required Change Interval” to 0
Change the “Grace Period” to 0.
Clear the contents of the Password Digest field in the person document in the Domino Directory.
Once above is done replicate notes topology ,replicate names.nsf through Notes Network.
Once after making the above change user is able to login to the notes.
Always make sure the password digest field is removed for any new ID creation as well as for recovered ID files , which will help the user to login in the first attempt itself by the provided recovered notes ID file.
Thanks & Regards
Sathish Veerapandian
MVP – Office Servers and Services
Offline Address Book Configuration in Exchange 2010 & 2016 Coexistence
In this article we will have a look at the OAB configuration in Exchange 2016 in coexistence.
Outlook will trigger an OAB download every 24 hours right from the time it received the last fully updated OAB files.
A small background functionality of OAB from Exchange 2016:
1)Outlook Queries OAB through Autodiscover URL.
2)Reaches the Exchange 2016 mailbox OAB Virtual Directory.
3)Exchange 2016 Mailbox Client access service queries Active Manager and finds out database hosting organization Arbitration mailbox.
4)Then OABGen Assistant from the Arbitration mailbox will provide the required information.
5)Like with Exchange Web Services, Autodiscover will provide the Offline Address Book URL.This request will then be proxies to OABGEN mailbox which had the OAB information and this information is served back to the client.
The OAB files are stored in the same place as we have in Exchange 2013 CAS server but now it will be on Exchange 2016 Mailbox server itself since we do not have the CAS role.
In Exchange 2016, the OAB files are generated and stored in the Organization arbitration Mailbox with persisted capability first and later copied to the location %ExchangeInstallPath%\ClientAccess\OAB\ folder in the Mailbox Server.
Below are the important things to perform:
1) When we introduce Exchange 2016 we need to create a new Offline Address Book
New-OfflineAddressBook –name “OAB NEW” –Addresslists “\Default Global Address List” -VirtualDirectories $null
2)Make sure 2016 OAB Virtual Directories URL’s are pointing to the Exchange 2016 Servers.
Run the below command to check the settings
Get-OabVirtualDirectory | ft identity,internalurl,externalurl -AutoSize
3)Change the default OAB on Exchange 2016 databases, to do so open Exchange 2016 Management Shell and run the following command:
Get-MailboxDatabase | Set-MailboxDatabase -OfflineAddressBook “\Default Offline Address Book (Ex2016)”
Enable GlobalWebDistribution
The recommendation is to enable global web distribution for all OABs hosted on Exchange 2016.
What is the benefit of doing this?
The main benefit is all Exchange 2016 Mailbox servers can take part only in web distribution.
The OAB generation still remains with the mailbox server which hosts the active copy of the DB which has the Arbitration Mailbox with Persisted capability.
How to check if GlobalWebDistributionEnabled is set to true
Run the below command.
Get-OfflineAddressBook Select | Identity,Name,GLobal* |Fl
If it is set to false set it to True by running the below command.
Set-OfflineAddressBook <E16OAB> -GlobalWebDistributionEnabled $true
What is this GlobalWebDistributionEnabled parameter?
This parameter is used by Autodiscover to determine which mailbox OAB virtual directories are eligible candidates for distributing the OAB to the clients.
By doing the above action we are making all Mailbox Servers to distribute the address book automatically.
Enable Shadow Distribution:
By enabling this we can have a shadow copy of an OAB instance generated by an Arbitration Mailbox to another Arbitration Mailbox.
Prior to enabling shadow distribution, we should deploy an OAB generation mailbox in each AD site where Exchange 2016 infrastructure is deployed.
Benefits of Shadow Distribution:
1)Prevents the OAB download across WAN if the user is connecting from different site.
2)If we don’t have this Shadow distribution enabled then it will trigger a full instance of OAB download if the user logs in from another site .
We can enable Shadow distribution by running the below command.
Set-OfflineAddressBook “Redmond OAB” -ShadowMailboxDistributionEnabled $True
Again we can enable this option if the end users are travelling and connecting in multiple sites randomly.
Point new Exchange 2016 On-Premises DBs to the new default Offline Address Book that was created.
And make sure current Ex 2010 DBs are pointing to Ex 2010 OAB until the migration is completed.
After installing the 1st Ex 2016 new Ex 2016 DBs should point to new default OAB.
Do we need to move the Exchange 2010 OAB’s ?
No we don’t have to move, all OAB’s . They have already been created and stored in OABGEN mailbox and are Updating 12 times a day.
From Exchange 2013 all OABs have gone into <Default Offline Address Book>.
After the configuration try to browse the OAB end points and see if you are able to login
https://mail.domain.com/oab/07a8-6g35-7d30-36sh-84b5-15g4h/oab.xml
Below example of how it looks after successful authentication

OAB URL can be taken from Test Email AutoConfiguration Outlook results.
Download the OAB and see the results.
By default, a new OAB is generated every 8 hours in Exchange Server 2016, but we can change the interval by using the Exchange Management Shell by using a new-setting override.
New-SettingOverride -Name “OAB Generation Override” -Component MailboxAssistants -Section OABGeneratorAssistant -Parameters @(“WorkCycle=02:00:00”) -Reason “Generate OAB every 2 hours”
Note: It is better to leave the default work-cycle schedule and not modify them.
Thanks & Regards
Sathish Veerapandian
MVP – Office Servers & Services
Configure Enterprise Vault Office Mail App in Exchange 2016 Environment
The Enterprise Vault Office Mail App provides Enterprise Vault features in end users outlook and owa. This works in Integration with the Microsoft Office Mail apps feature.
It is desired that users will try to access archived items via OWA as well when their older items are being archived by a archive system.
The Enterprise Vault Office Mail App does not appear in Outlook or OWA by default.
It requires deployment to users or organizational level and only then they will appear.
In this article i will explain quick steps to perform this action on a environment where we have the Archive enabled for Exchange 2016 users through Enterprise Vault
There are 3 possible methods to perform this action:
1) We can deploy them to individual users.
2) We can deploy them to group of users.
3) We can deploy them to whole organization on the Mailbox Server Organization level.
The main methods are as below:
1) We need to deploy the Office Mail App on the Newly introduced Exchange 2016 Server on the org level to EV server.
2) Setting up the Enterprise Vault Office Mail App
3) One important note that we need to make is that if we enable this feature on organizational level then this option will appear on all mailboxes including the one’s which has not EV enabled.
4) The same Enterprise Vault server is used for Office Mail App requests from
all users.
The high level steps are as follows :
1)We need to run the PowerShell command New-App in the Exchange Management
Shell on Exchange 2016 Server .
The command requires the following:
2)An Exchange 2016 Server that is enabled for archiving and that you want to enable
for the Office Mail App.
3)The URL of the OfficeMailAppManifest.aspx page from the EV server.
The server that is specified in the URL can be any Enterprise Vault server
in your site can be http or https according to the IIS config on your EV server.
Office Mail Apps must only be served using Secure Sockets Layer (SSL). We need to obtain a certificate from a certification authority.
4)The Exchange server sends a request to Enterprise Vault server EV1 to
configure a manifest file.
We need to run the below command to enable this feature on organizational level :
Add-Type -AssemblyName System.Web
$Mbx = get-mailbox “mailbox”
New-App -OrganizationApp -DefaultStateForUser:enabled -Url `
(“https://EV_server/EnterpriseVault/OfficeMailAppManifest.aspx?LegacyMbxDn=” +
[System.Web.HttpUtility]::UrlEncode($Mbx.LegacyExchangeDN))
Where:
■ mailbox is the name of a mailbox that is enabled for archiving.
■ EV_server is the name of Enterprise Vault server which has this manifest file in your organization.
When a user access the EV office mail app from the owa or Outlook following things happens:
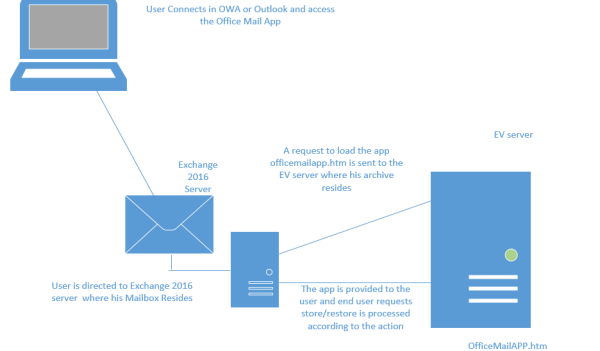
a) Basically this officeMailAppManifest.aspx page from EV server generates a manifest file
for Exchange and sends it to the Exchange 2016 server.
b) The manifest file contains the Office Mail App settings for Exchange.
c) The settings include the URL from which the Office Mail App will be loaded.
d) Later end user will be able to perform his archive action from the Office Mail App.
Below are the steps to enable EV web app for individual users :
$mbx = Get-mailbox mailbox@domain.com | select LegacyExchangeDN
$url = “https://EVurl.com/EnterpriseVault/OfficeMailAppManifest.aspx?LegacyMbxDn=”+ $mbx.LegacyExchangeDN
New-App -Mailbox $mbx.LegacyExchangeDN -Url $url
Later we can verify the end user web app readiness by accessing the Manifest URL from his PC
https://evurl.com/EnterpriseVault/OfficeMailAppManifest.aspx?LegacyMbxDn=/o=MSG/ou=Exchange Administrative Group (FYDIBOHF23SPDLT)/cn=Recipients/cn=mailbox
On accessing the end user should be able to see the XML file an example below.

On a failure to see the XML file will not result in accessing this feature from end user level.
After its enabled this will how it will be displaying for end users on their OWA and Outlook when they open any emails.
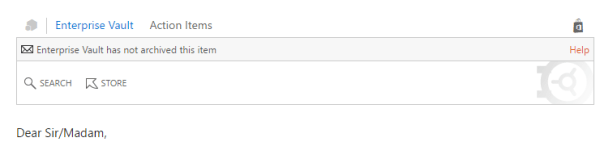
Note:
1) This office mail app is not an mandatory feature to be enabled for all users . All users can see their archived items from the archive URL and the EV thick client on their desktops. This mail app gives more comfort for the end users to access, make operations on their archive from the owa and viewing their email on outlook itself.
2) Support for the Enterprise Vault Office Mail App is pending from Exchange 2016 CU1 and not in Symantec compatibility lists.At this moment the Office mail app is working only on owa in Exchange 2016 CU2. Symantec has confirmed that they will be soon releasing a patch which will support this feature on Outlook as well.
3) With Exchange 2016 CU2 Archive is working fine on the Outlook EV Client and the EV Web URL.
4) Enterprise vault to be compatible with Exchange 2016 Cu2 server version requires Enterprise Vault 11.0.1 Cumulative Hotfix 4 or later.
Below are the following commands are available for managing Office
Mail Apps in Exchange 2016:
Get-App – Returns information about the installed Office Mail Apps.
New-App – Deploys an Office Mail App.
Remove-App – Removes the specified Office Mail App.
Disable-App – Disables a specific Office Mail App for a specific user.
Enable-App – Enables an Office Mail App for a specific user.
Set-App – Sets configuration properties on an Office Mail App.
Thanks & Regards
Sathish Veerapandian
MVP – Office Servers and Services
Extending the existing storage on Linux applications
It can happen that we arrive at a point where the storage is not sufficient or reached the maximum level on the Linux Servers.
In this case we need to add a new physical disk ,create a physical volume and extend the existing logical volumes assigned on the Linux based application.
There are many ways of doing this job.
In this article we will have a look at one step to accomplish this activity.
Before assigning the new physical disk to the application we need to check the below values.
Open Putty session ssh to the Linux server and run the below commands in order.
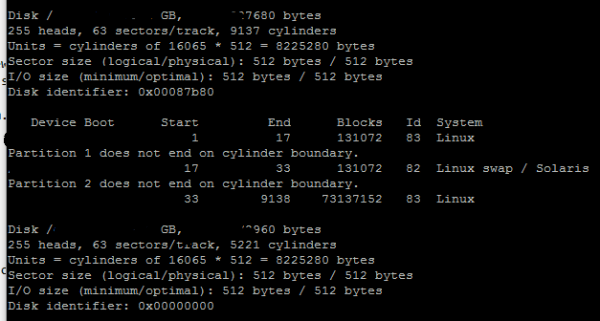
a. fdisk –l
This Fdisk command line utility is very useful in terms of creating space for new partitions, organising space for new drives, re-organizing an old drives and copying or moving data to new disks. It allows us to create a maximum of four new primary partition and number of logical (extended) partitions, based on size of the hard disk we have in our system.
In our case we use the above command to View all Disk Partitions their size and their name in Linux system
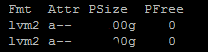
b. pvs
This reports information about physical volumes.
pvs produces formatted output about physical volumes.
In our case we use this to check the current physical volume size.
c. vgs
vgs command provides volume group information in a configurable form, displaying one line per volume group. The vgs command provides a great deal of format control, and is useful for scripting.
We are using this to display properties of LVM volume groups

d. df
To get the VG name and LVNAME
df displays the amount of disk space available on the file system containing each file name argument. If no file name is given, the space available on all currently mounted file systems is shown.
In our case why we are using this is to check the current free space on the disks currently assigned.

Also we get the current disk VG and LV names ,so that we run the LV extend on them after assigning the new disk in the next steps.
Now we need to follow the below steps after assigning the new disk
a. fdisk –l
Now after assigning the new disk we need to Compare the output from previous step fdisk output to find out the new disk name.
After identifying the new disk name we need to create the Physical Volume.
b. pvcreate /dev/sd<New Disk>
After we get the new disk name from the previous output we should run the above command with the new disk name.
Here we are actually choosing the newly assigned physical volumes that will be used to create the LVM.
We can create the physical volumes on the linux system using pvcreate command.
c. lvextend –lvresize +200GB /dev/VGNAME/LVNAME
lvresize can be used for both operations (shrinking and/or extending) The lvresize will resize only the virtual volumes.
In our case we are using this command utility to the newly added space to resize the existing LVs.
There are few other options to extend the logical volume. By using the above command syntax we are reserving additional 200 GB space on this physical disk.
This 200 GB free space can be extended any time online to any LV’s without need for a reboot or bringing down the application if we run out of space for the file system in future.
So It is always important to include the plus (+) signs while resizing a logical volume.
If we don’t do this then we are setting a fixed size for the LV instead of resizing it.
d. Finally after all the above steps are done we can run pvs
After running PV’s we can Compare the output from previous step output of PVS;
After the comparison the we need to extend new volume group by the below command.
resize2fs /dev/sd<newdisk>
Note:
Its very important to note that you need to understand how the LV’s , PV’s & VG’s are created and assigned on the Linux application.
Also do this only if you have worked and having knowledge on the Linux systems.
If you are not sure on this its always better to perform this action with Linux Admin.
Thanks & Regards
Sathish Veerapandian
MVP – Office Services & Servers
Technique for Monitoring Mailbox Audit Logging in Exchange Server 2010
Nowadays many business professionals want to track that who is accessing their mailbox in an organization to have details, who is performing certain actions on their mailbox items. To perform such monitoring of data, Exchange Server 2010 (SP1 or later) offers a feature known as Mailbox Audit Logging. This feature provides the monitoring mailbox audit logging in Exchange Server 2010. However, this functionality is not turned on by default. These are enable by the Exchange administrator for those mailboxes that are measured sensitive or can be accessed anywhere. In the following section, we will discuss the way to of enabling Mailbox Audit.
Setup Active Directory thumbnail photo for Outlook ,Skype for Business client
In order to maintain identity information users of web-based applications or desktop-based applications want to set image in their account profile.
In a similar condition surfaced while working with an email server giant, MS Exchange, a query arises ‘how to setup user account image in Exchange 2016?’ As an answer to the same, the following segment will be discussing a few workarounds to let users know of the same procedure.
Prerequisites for Image to be Setup
Some parameters are applicable on the images to be uploaded on the User accounts are mentioned below:
- The size of the image should not be more than 10KB
- The file format of the image should be JPG (JPEG)
Ways to Set Up Account Image on Exchange Server
Step1: Configuration of Global Catalog
The step comprises of following procedure to be followed, to configure the copy of image attributes to Global Catalog:
- Open your machine and login to your session
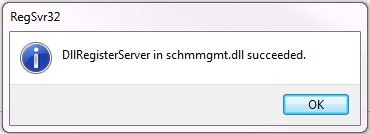
- From your keyboard, press Windows key + R to open the Run window on the screen. On that window, type regsrv32 schmmgmt.dll and press Enter
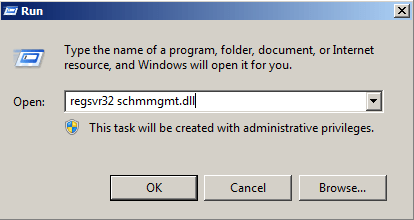
- A ‘DIIRegisterServer in schmmgmt.dll succeded’ message box will appear as below in front of you, click on OK
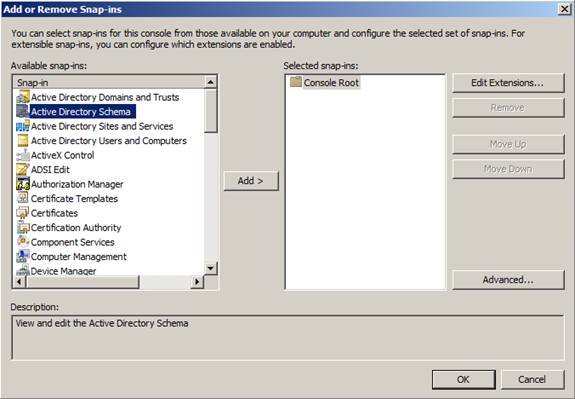
- Again, press Windows key+R, type mmc and press Enter
- Go to the menu bar of window and click on File >> Add/Remove Snap-ins >> Active Directory Schema >> Add >> OK
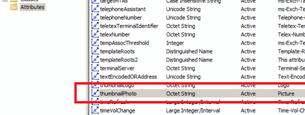
- Now expand the Active Directory Schema [<Your Server Name>] and then click on Attributes
- In attributes list, search for thumbnailPhoto attribute and double-click on it
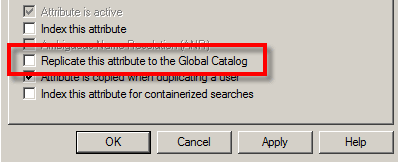
- From the options displaying in front of you, check on Replicate this attribute to the Global Catalog >> OK
Step 2: Import Pictures to Active Directory Users
For importing the picture that you want to set on your Exchange profile, you require a cmdlet: Import-RecipientDataProperty. The cmdlet is being used to import image in Exchange 2016.
You have to open command prompt window and type the following cmdlet:
Import-RecipientDataProperty-Identity <Mailbox> -Picture -FileData ([Byte[][]$(Get-Content-path<Image Path> -Encoding Byte -ReadCount 0))
Step 3: Validating the Procedure
To validate or check whether the image has been setup on your account or not, go to initial page of the Outlook and check whether the image has been uploaded or not. If not, then you must have performed the procedure incorrectly. In this case, repeat Step 1 and 2 until the image is not uploaded.
Conclusion
After going through the above information, we concluded with the fact that configuration of domain controller, i.e. Global Catalog is quite an important fact. If the configuration were improper, then the resultant would be that the Active Directory schema would not be activated. As a result, it was impossible to set the image on Exchange 2016. Moreover, if all goes correct, then user will successfully be able to setup account image in Exchange 2016.
Thanks & Regards
Tej Pratap
Configure Enterprise vault Archive for Exchange 2016 Server
In this article we will have a look at creating the EV Mailbox Archive task for Exchange 2016 server.
To know how to configure the storage can refer my previous post
Configure New Store, storage , provisioning groups in Enterprise Vault in Exchange Environment
To know the overview of the services can refer my previous post
All about enterprise vault services and its tasks
There are new additional configurations for the newly introduced Exchange 2016 in any environment for the Enterprise Vault archive to happen on them.We need to provision and target those servers for the archive to happen on their mailboxes.
As a first procedure we need to create system mailboxes for each new Exchange 2016 servers for the archive to happen on their mailboxes.System mailbox is nothing a dedicated mailbox which we need to create for the EV archive to happen on that server.
This mailbox should not be used for any other jobs and should not be hidden from the Address List.
Once we create this dedicated system mailboxes on new Exchange 2016 servers we need to grant permission to the Vault service account that is responsible to start the EV task on Exchange servers.Grant send as permission to the Vault service account on the newly created Enterprise vault system mailboxes for Exchange 2016 archive to happen.
Its better we can move the Vault Service account to the Exchange 2016 server from the legacy server. This will not impact the previous exchange servers EV Archive process until the migration is complete.
Once this is done we need to run two powershell scripts on the new Exchange servers to set the throttling policy and permission for the Enterprise Vault Service account.
These scripts are present by default on the Enterprise Vault Server in the below directory.

All we need to do is just need to copy these scripts on the Exchange server 2016 and run them as below
To set the EVthrottling policy run the below command
.\SetEVThrottlingPOlicy.ps1 -User domain\username -server mbxserver -Version 2013 -DomainController DCname
Domain is the AD that the vault service account belongs to.
User name is the vault service account.
Server name is the Exchange 2016 server name.
Version is 2013 currently for 2016 server as well
To Assign Exchange Server permissions to the vault service account run the below command:
.\SetEVExchangePermissions.ps1 -user domain\user-name
domain is the AD that the vault service account belongs to
user name is the vault service account
server name is the Exchange 2016 server name
Once the above procedure is completed we need to create the target from the Enterprise Vault Server to the new Exchange 2016 servers
Inorder to do that
Login to Enterprise Vault Server with Enterprise Vault Service account
Open vault Admin Console
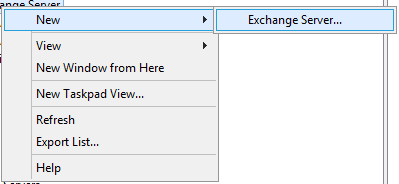
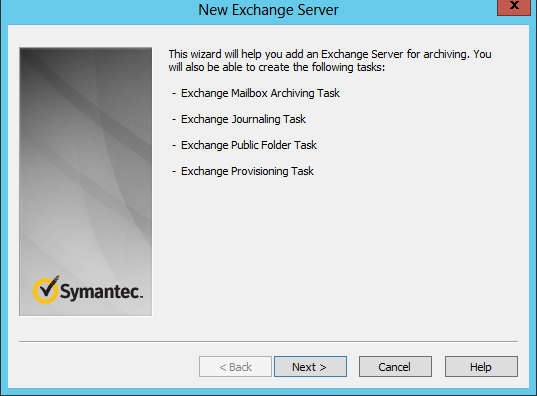
Navigate to Targets – Domain – Exchange server – New – Exchange Server
Proceed with the next option
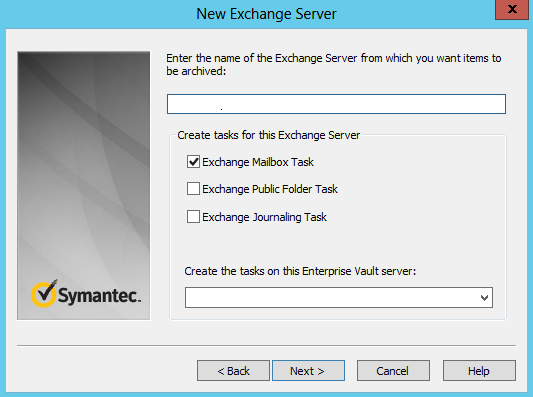
Select the Exchange Mailbox Task
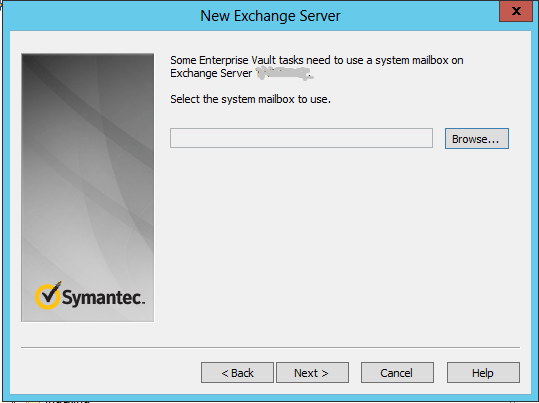
Select the system mailbox to use.Here we need to choose the designated EV system mailboxes that we created.
Once this is done the targets for the new server is successfully created.
Now we need to create a task for the each new Exchange 2016 servers for the archive to happen
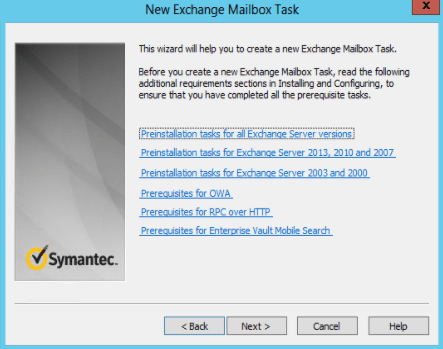
In-order to do that open Vault admin console – Navigate to task – new exchange mailbox task.
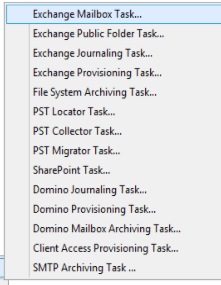
Proceed with the next option
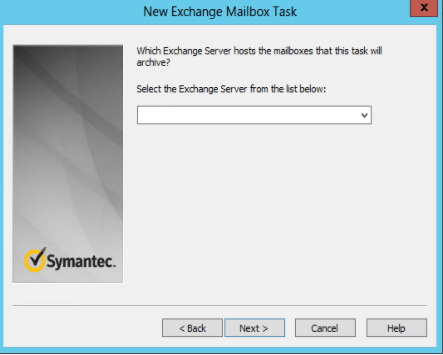
Choose the new provisioned Exchange 2016 Server
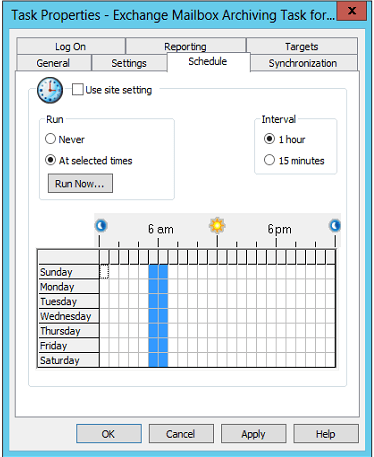
Once the new task for Exchange 2016 has been created we can schedule the archive period and the DB’s of those servers will be visible on the targets.
Do not make any change on the concurrent connections and the logon accounts on the task service its better to have them default.
After this is done we can move the mailboxes to Exchange 2016 from the previous version of exchange server.The provisioning group , targets and the retention policies will remain the same for the mailboxes moved to the exchange 2016 server.
Note: These steps are applicable only on a environment where there is an already existing Enterprise Vault configured on the legacy Exchange servers. These steps will be useful when we need to enable archive on newly introduced exchange servers. For a new configuration on the environment the Symantec configuration guide needs to be followed.
Thanks & Regards
Sathish Veerapandian
MVP – Office Servers & Services


