
In most of the cases we would like to know the Email client authentication attempts from external sources along with their source IPs.
It can be in below scenarios:
1) Frequent account lockouts happening for an email user where we would like to know the source host causing the account lockout.
2) Security team would like to collect the logs with the real ip for any future investigation for a compromised account.
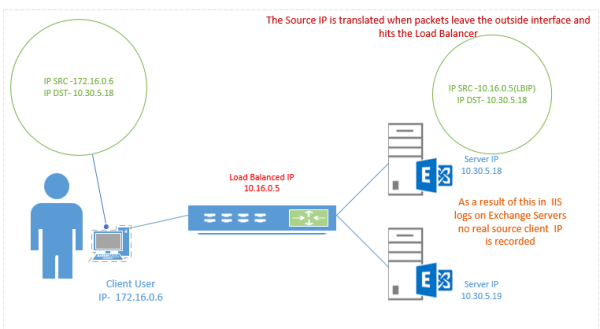
In most of the cases exchange services are published through load balancer and servers are behind the load balancers. When Exchange is load balanced at layer 7, it will become non-transparent. Due to this the the actual client source IP address is replaced by the load balancer’s own IP address, and therefore ONLY this address will be recorded in the IIS logs.
As a result of this the Microsoft IIS client logs in the Exchange for each client connections will have the assigned load balanced IP recorded rather than the actual source IP.
For example if the exchange services are published via SNAT through a load balancer like KEMP, F5 etc.., the IIS logs cannot get the real source ip. Because in a SNAT, the destination IP address is maintained but the actual source IP address is changed.
Example of SNAT :
When a packet passes through a NAT device Either source or destination IP address is changed/modified according to the type of NAT it is using. However the information about these changes made to packets are maintained in NAT device’s connection table
There is an option in the most of load balancers like KEMP , F5 to create an X-Forwarded header and enable them.
Once done The X-Forwarded-For header option when enabled will capture the source address of the client and append it in the header.
After this we need to add an extra value in the advanced logging module on all exchange servers to enable to log this real IP on the IIS logs.
Enable Advanced Logging on all Exchange 2016 Servers perform the below:
The first task is to deploy the Custom Logging role service. If we do not deploy this role service, we may receive an error “Feature not supported” error when trying to edit the custom log definition.
To enable the Custom Logging role service in Windows server 2012 R2 & 2016 :
1. Open Server Manager.
2. Click Add Roles and Features.
3. In the Add Roles and Features wizard navigate to Custom Logging Role which is under the Web Server > Web Server > Health and Diagnostics category.
4. On the Confirmation page, click Install.
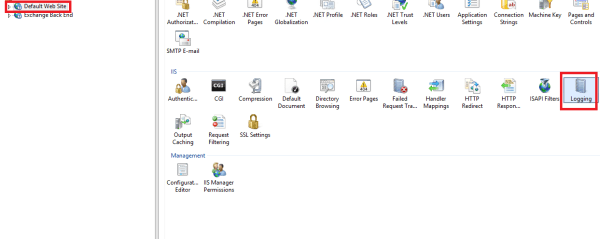
Now Open IIS Manager- Select Logging
Select Fields

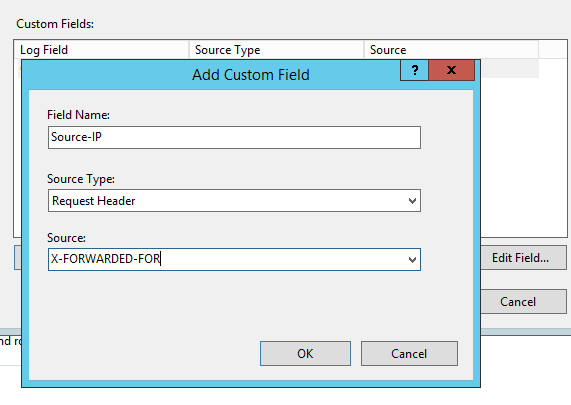
Create a new custom field-
Field Name – we can give any name so that it will reflect on the logs as new column
Source Type – Request Header
Source – X-FORWARDED-FOR
Perform an IIS reset after this.Now we will start seeing the IP address of the client PC’s in our IIS logs rather than the IP of the load balancer.


Leave a comment