
Continuing the previous article there are few more steps to complete the configuration of the Direct Routing with the office 365 tenant and in this article we will run through those steps.
Currently the SBC is up and running configured with the certificates and required SBC DNS records now the next step is to enable the direct routing. Well there are two options to enable the Direct Routing via skype online powershell session or via the Microsoft Teams Admin center. In our example we will try to enable them via the Teams admin center.
Before doing this make sure to meet the network prerequisite that is required for Direct Routing and have written an article about the same almost a year ago.
Login to the admin portal with the appropriate credentials.
Enter the DNS name of the SBC that was configured in our case its sbc.nl.exchangequery.com
Subsequently we must add all the required information over here. One important point to note over here is that the SIP signaling port that is present by default is port 5067. The Direct Routing SIP Trunk can be configured only by using a TLS connection. We can choose the SIP port any port of our choice. If we try to configure the port 5060 it will not work since the TCP connectivity is not supported due to security reasons.
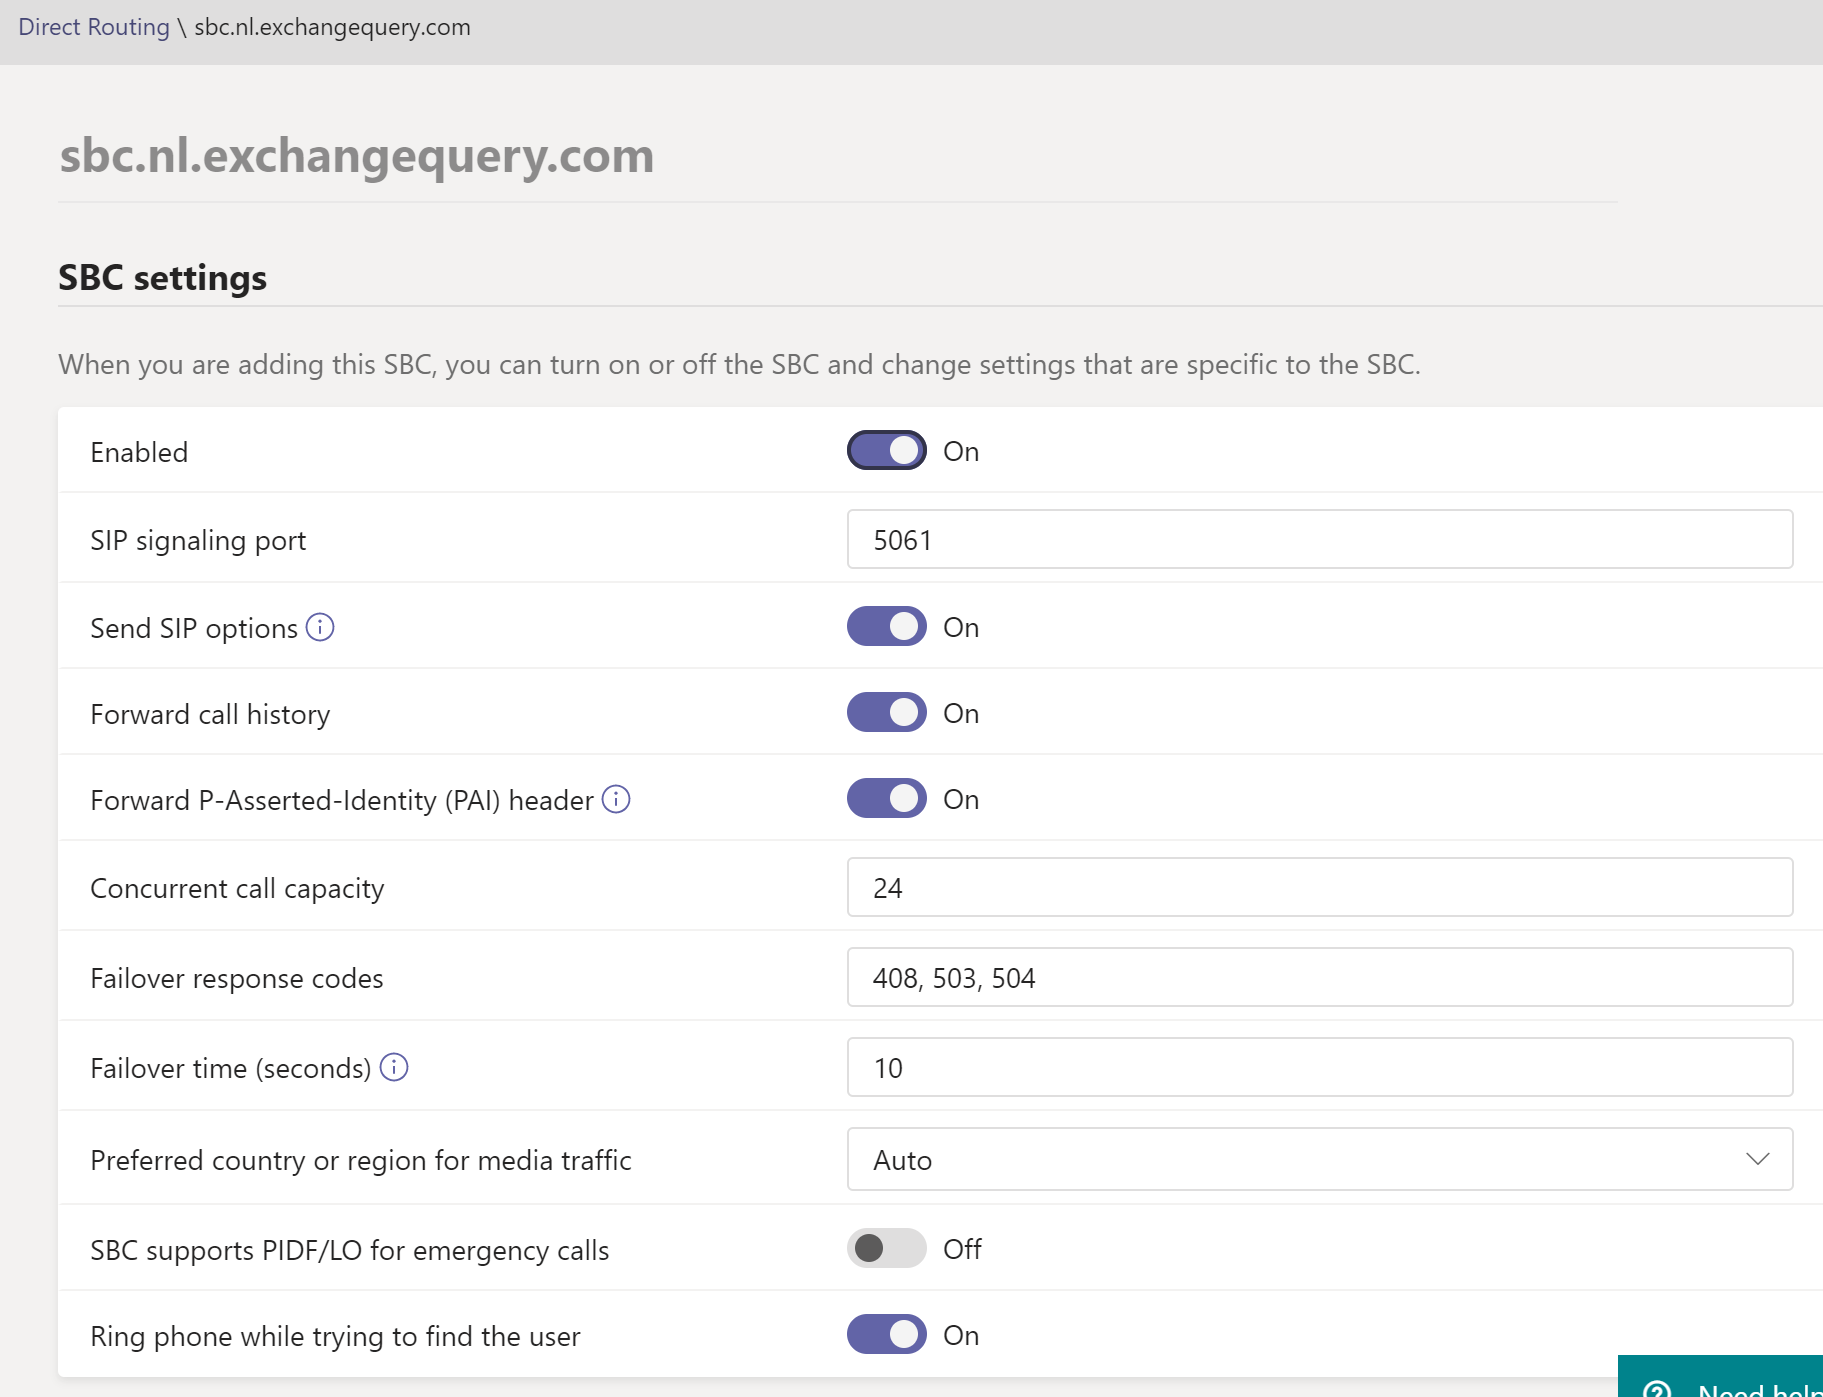
Enabling SIP option defines if an SBC will or won’t send SIP options messages and will be included in the monitoring. Rest of all the information have to be enabled as per the requirement. Also look into Location based routing and media optimization based on the requirement. Once done click on save and the configuration is complete.
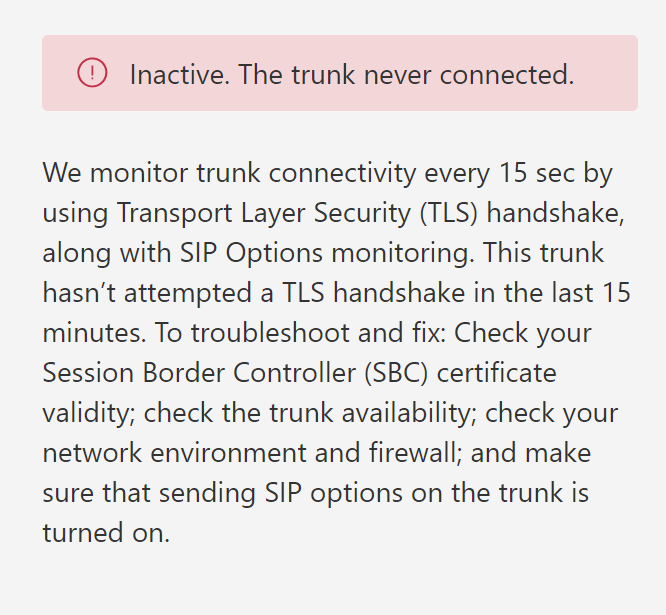
But we could see that the SBC status shows error message and the configuration seems to be unsuccessful. Even after the configuration is completed even after loading the named certificate, intermediate and the root on the audiocodes we could see that the TLS connectivity status still shows as inactive. In addition to that we also see the SIP option status shows us the warning message as well.

Now further drill down into the logs gives us more additional information of the reason why it is failing. Still we we do have the correct certificates uploaded but the connection seems not completed.
So the initial thought was the issue with the firewall however the firewall connectivity was already completed and could ping the SBC on port 5061.
When looking into the audiocodes documentation came to know that in addition to the normal named certificate for the DNS Name its mandatory to upload the Baltimore Trusted Root Certificates. This is mandatorily required for establishing a Mutual TLS Connection with the Microsoft Teams Network.
So the DNS name of Microsoft Teams pstnhub.microsoft.com is using this certificate provided from baltimore and hence this import is required for establishing the mutual TLS connection.
We can Download the certificate from https://cacert.omniroot.com/bc2025.pem and follow the same procedure stated on previous article part 1 to import them on the Audiocodes SBC and make sure they are present on the Trusted Root Certificates.

The first part that we need to complete before the certificate validation is to ensure that the NTP server is setup correctly. This is a mandatory requirement for these two remote parties validating the certificates for setting up the mutual TLS connection between them.
You can go to setup – Administration – Time & Date and configure your NTP server.

Further to the NTP server there are few more configurations that need to be performed on the AudioCodes SBC which we will see below.
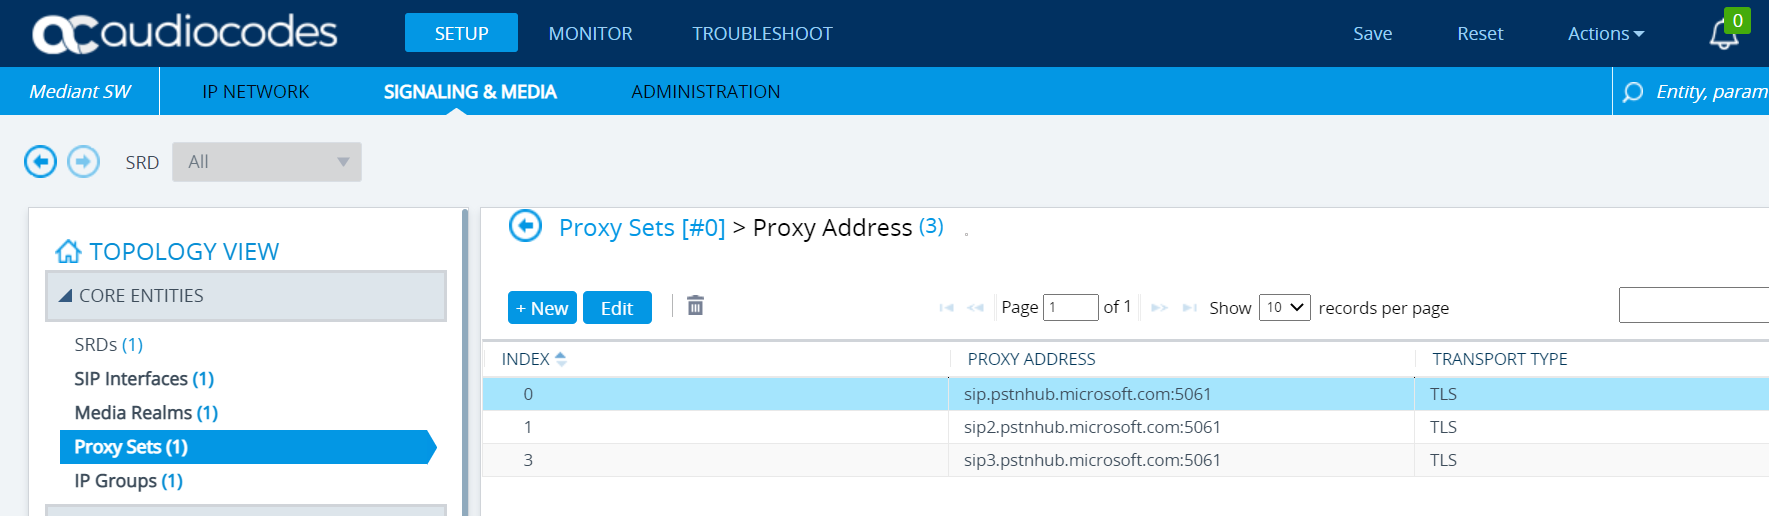
Configure the Proxy Sets: Add Microsoft SIP PSTN FQDNs
We have 3 Microsoft FQDNs as of now and all of them needs to be added over here and make sure the transport type is set to TLS.
Navigate to SetUp – Signaling & Media – Proxy Sets and add the 3 FQDNs over here.
SIP Interfaces:
We need to configure SIP interfaces for Teams Direct Routing as well. Configure as below. Keep the Enable TCP Keepalive option. SetUp- Signaling & Media – Core Entities – SIP Interfaces

Media Realms:
We need to configure Media Realms for Teams Direct Routing. Configure the settings as below. Select the default media realm as No. SetUp – Signaling & Media – Core Entities – Media Realms

Configure IP Groups:
Configure IP Groups as below – Make sure the Topology location is set as Up

In the Advanced make sure to mention the SBC published external FQDN. Keep the classify by proxy set Disable and keep the Client Forking Mode as Sequential.

Configure Coder Groups:
We need to add the supported coder groups for the leg SBC and the Direct Routing Configuration.
Teams supports OPUS and SILK Coders.
Inorder to configure the coder groups navigate to SetUp- Signaling & Media – Coders & Profiles – Coder Groups and mention the below values for Teams Direct Routing Leg. Later you might need to configure one for the SIP Trunk based on the coders they support.

Its mandatory to enable the SIP options for the SBC to monitor and for that we need to enable some configurations on the session border controller. In order to do that go to Setup- Signaling & Media – SBC – Routing – IP-to-IP Routing and configure all the required routing as per your requirement.
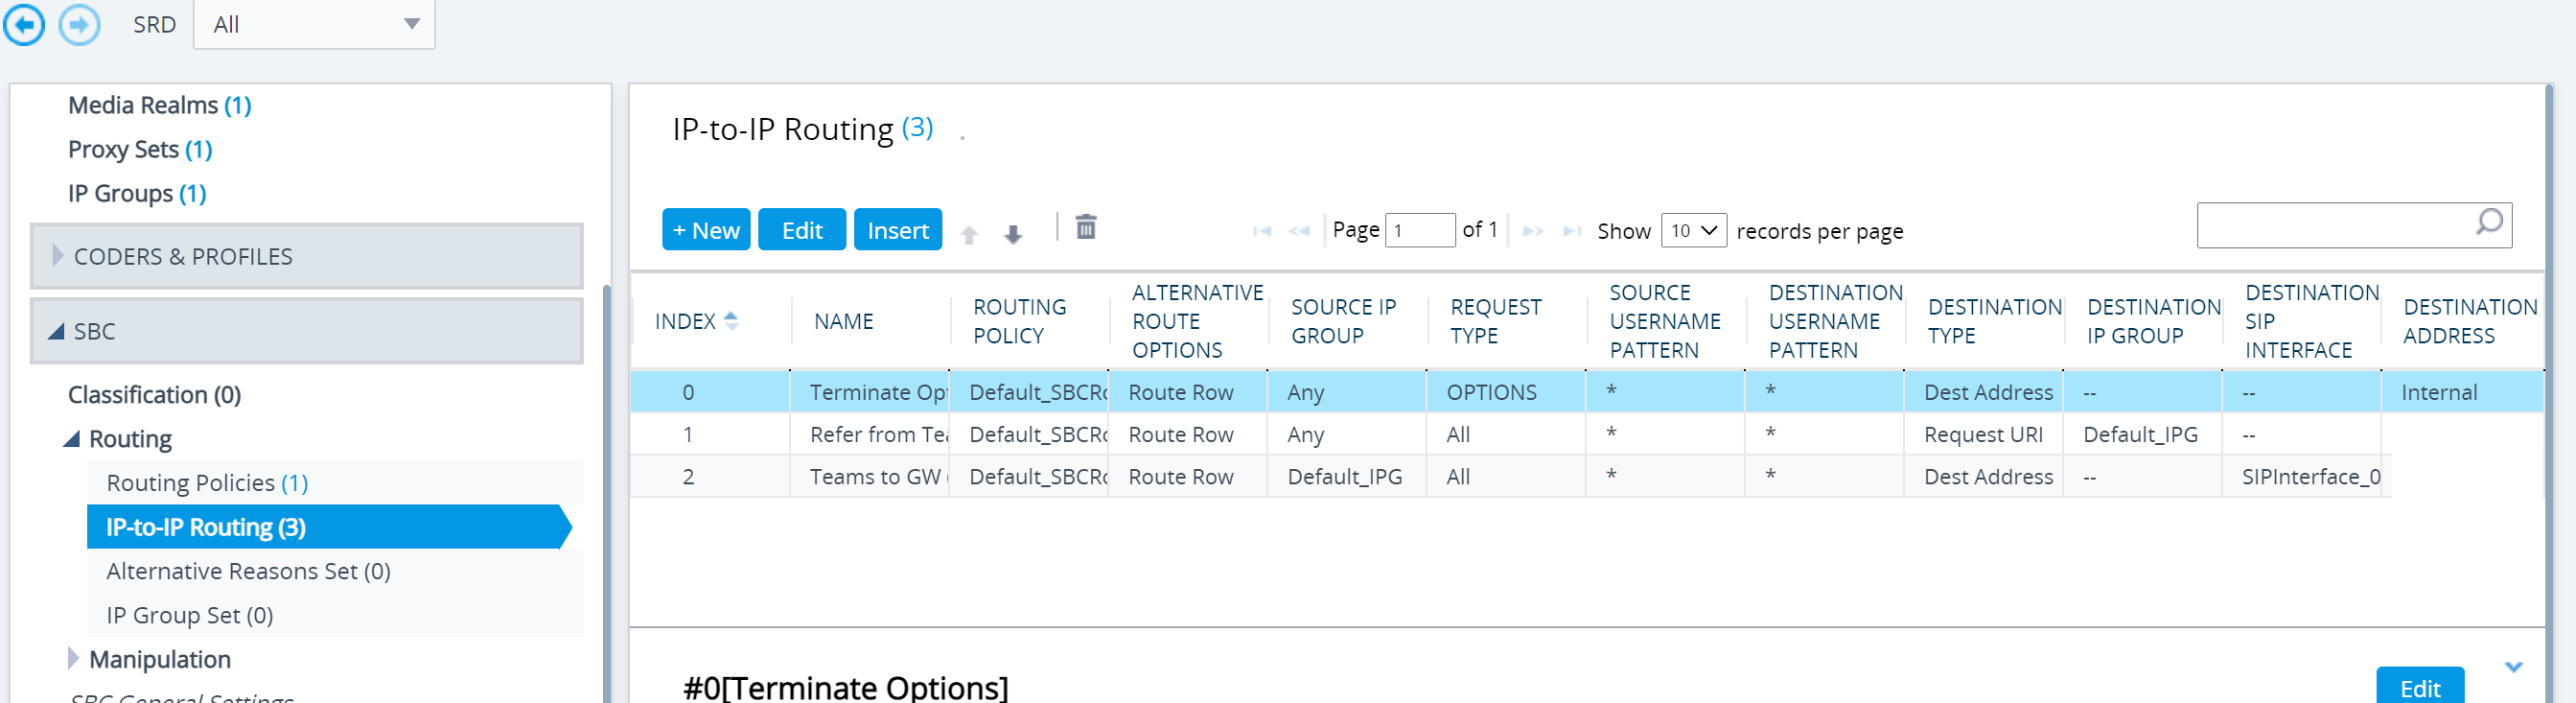
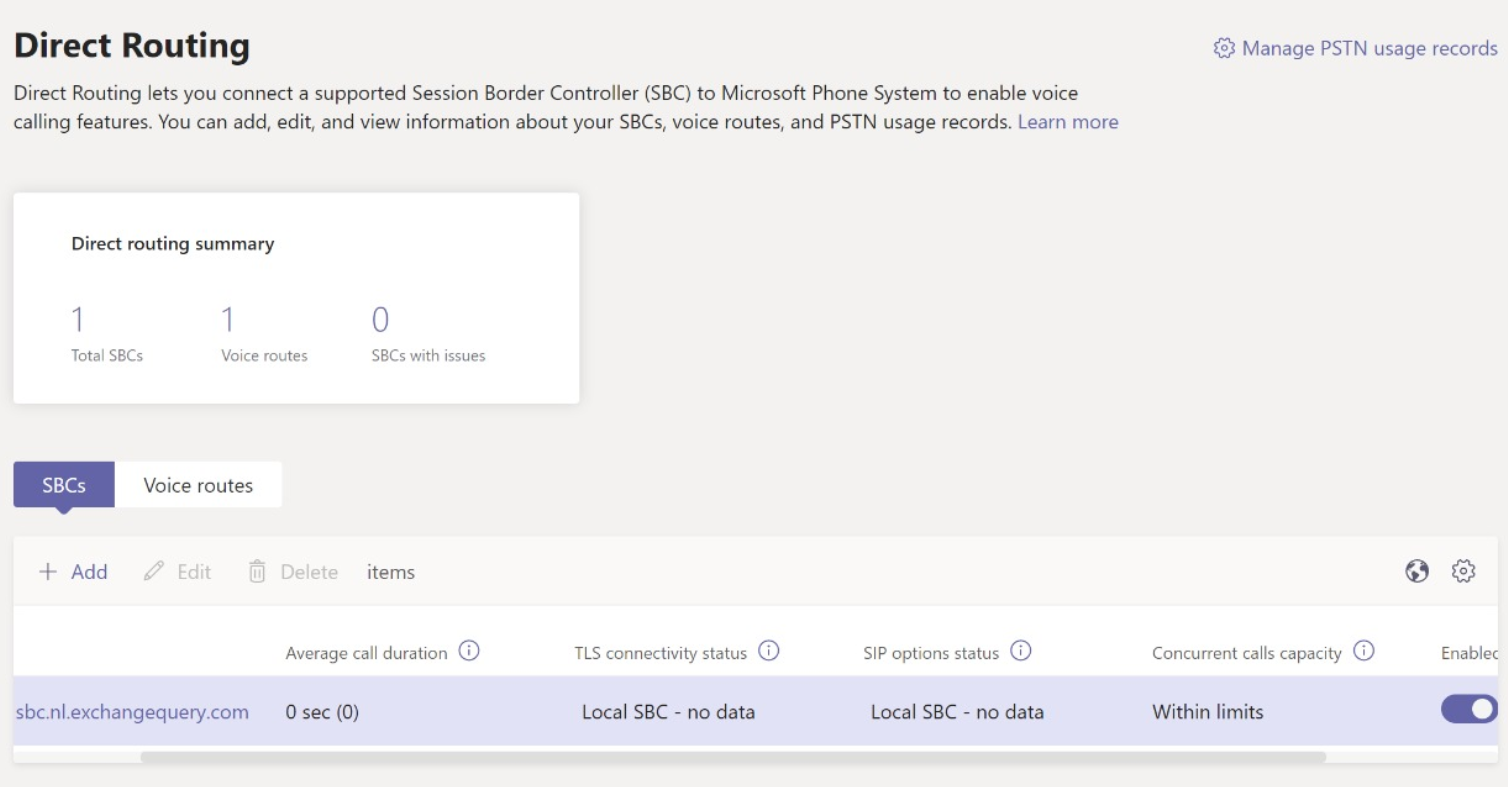
So we need to make sure other options are configured as per the documentation of the Audiocodes. Finally after the all the steps are done we can see the Teams Direct Routing Configuration is showing successful in the Teams Admin Center.
In our example we have 1 SBC, 1 Voice Routes and 0 SBCs with Issues which is a good sign. Since we didn’t initiate any real traffic we could see the message no data.
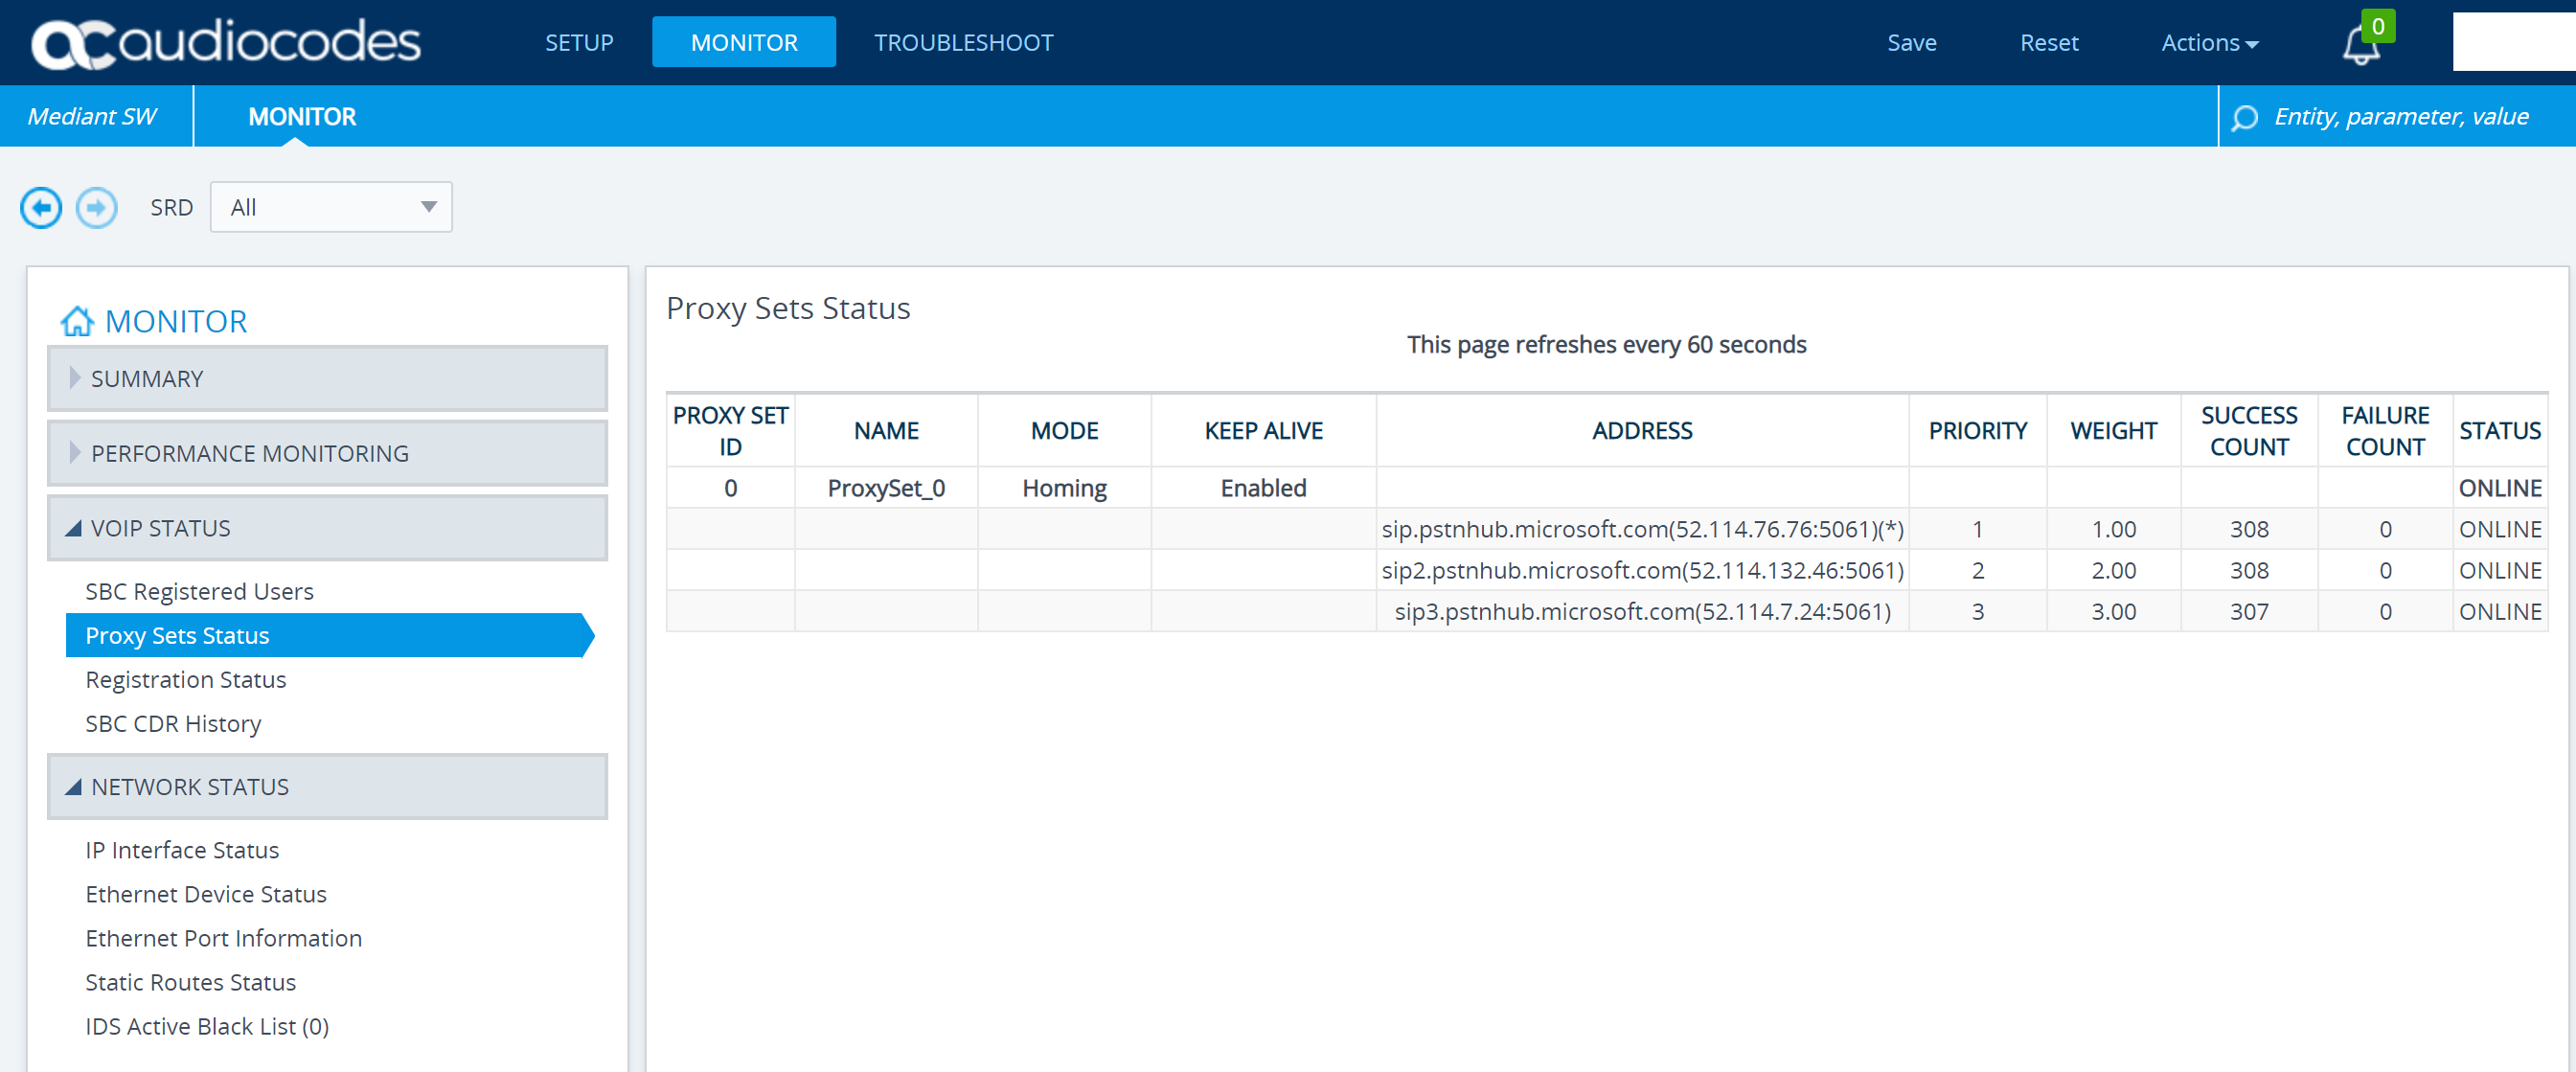
We do have a very good option to validate the pairing between the Audiocodes SBC and our Tenant Direct Routing. We can see the connectivity is successfully established over here and we can see that the status is showing online without any issues.
Now we have completed the Direct Routing And established the connectivity between SBC and the Teams Tenant there are lot more other configurations that needs to be performed on the SBC to complete the entire enterprise voice configuration. We will look into those on the upcoming articles.
Regards
Sathish Veerapandian


[…] the previous article now we’ll go through the next steps that is required to complete the enterprise voice […]
LikeLike