
Continuing the previous article now we’ll go through the next steps that is required to complete the enterprise voice configuration. Now we have setup the AudioCodes SBC , configured SIP trunk from Office 365 to SBC the next step is to setup PSTN trunk from the SBC to the Telephony Provider.
If there is already an existing setup then this part is not required because the configuration will be already present in that case. In this article we will have a look at how to configure the PSTN Trunk for a new telephony provider.
There are multiple PSTN Sip Providers that we can use to complete this configuration. In our case we have chosen Telnyx as the PSTN Sip Provider for this demo purpose. They provide us the flexibility to purchase numbers as low as 10 USD and hence have chosen this for our testing.
Over here we are not going to deep dive much into Telnyx configuration since our task is to create a PSTN Trunk between them and our SBC. So we will go through only the steps that is required to complete the Direct Routing Configuration.
The moment when we subscribe with Telnyx they provide an advance credit of 10 USD and a portal like below. As per the Telnyx documentation we need to create a new SIP connection to our SBC in the below section where we could see they have a SIP connection with their backend system as a default setup.
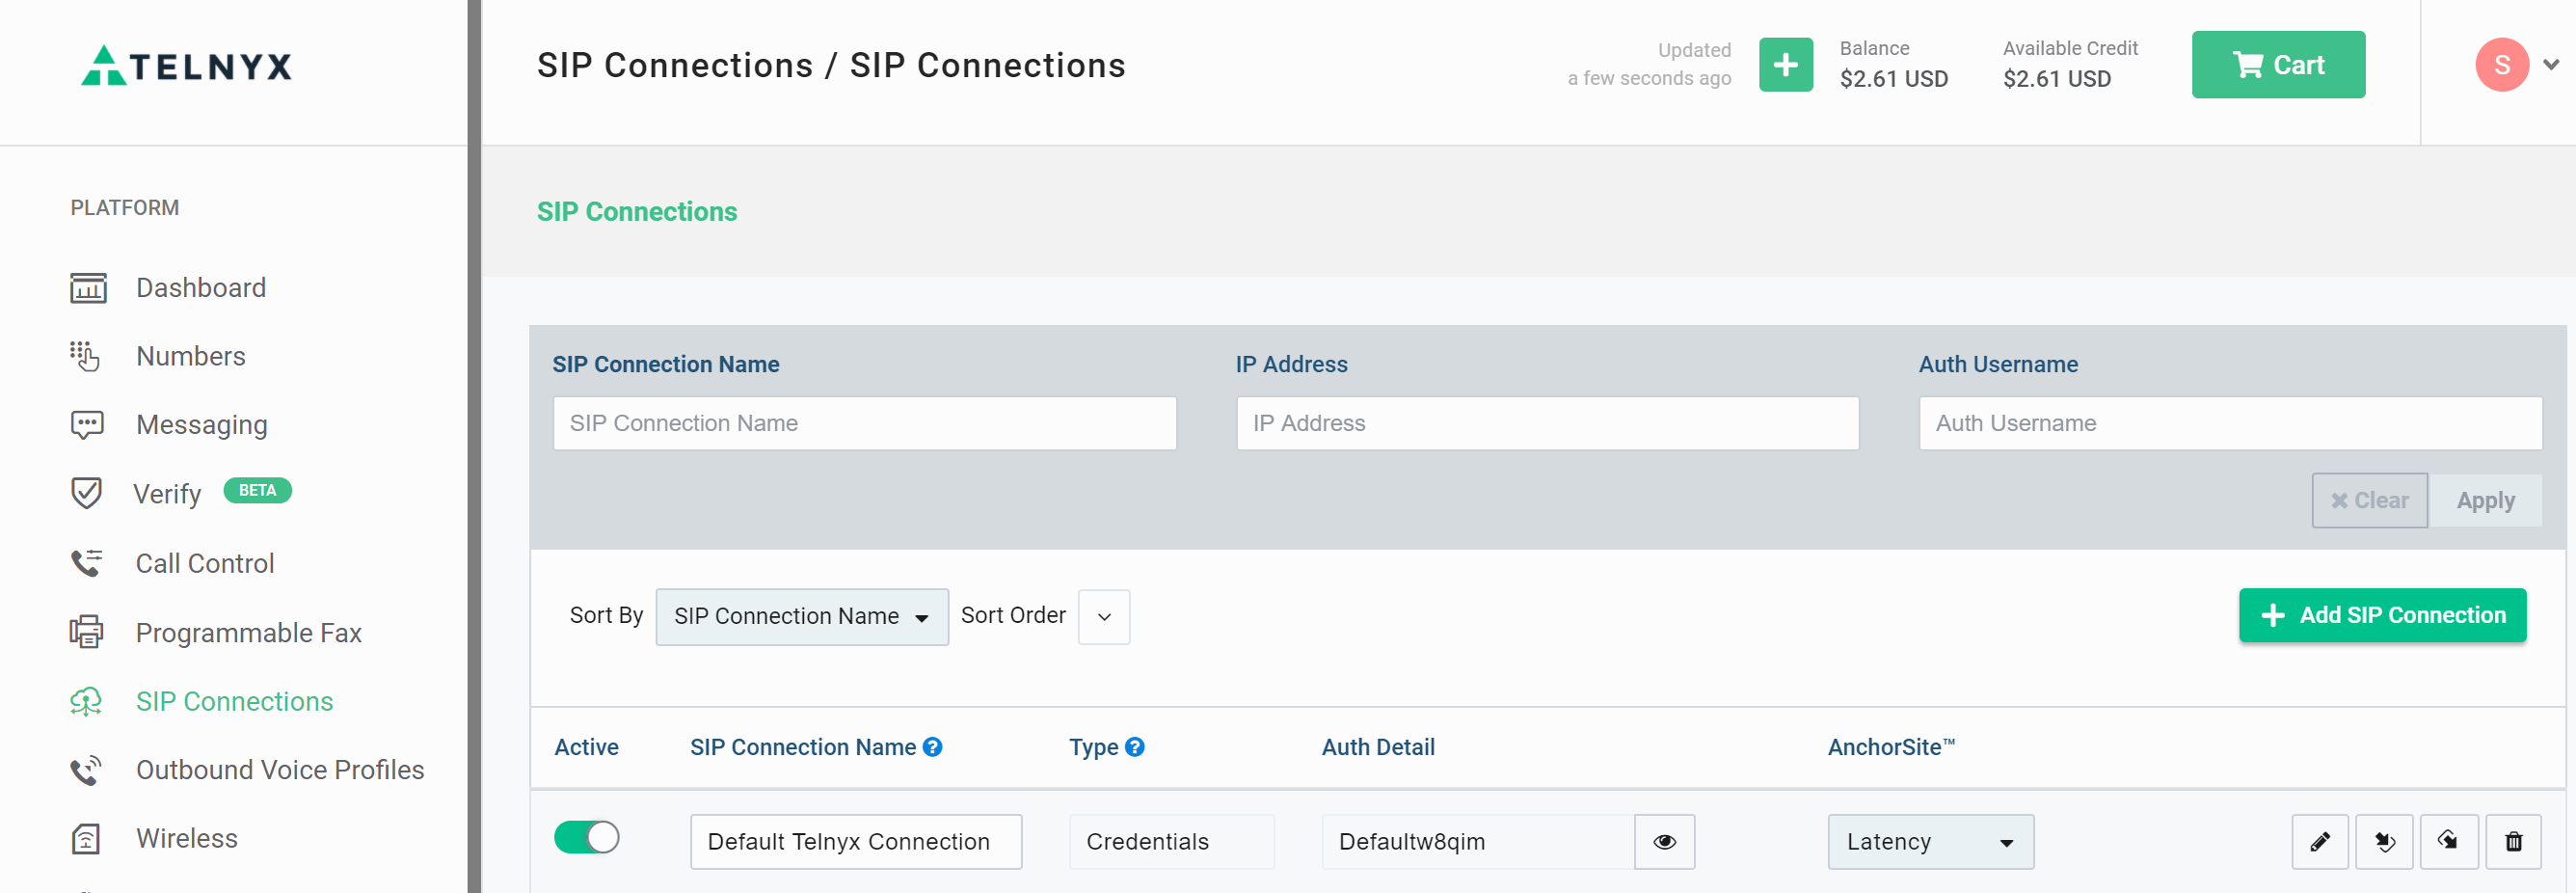
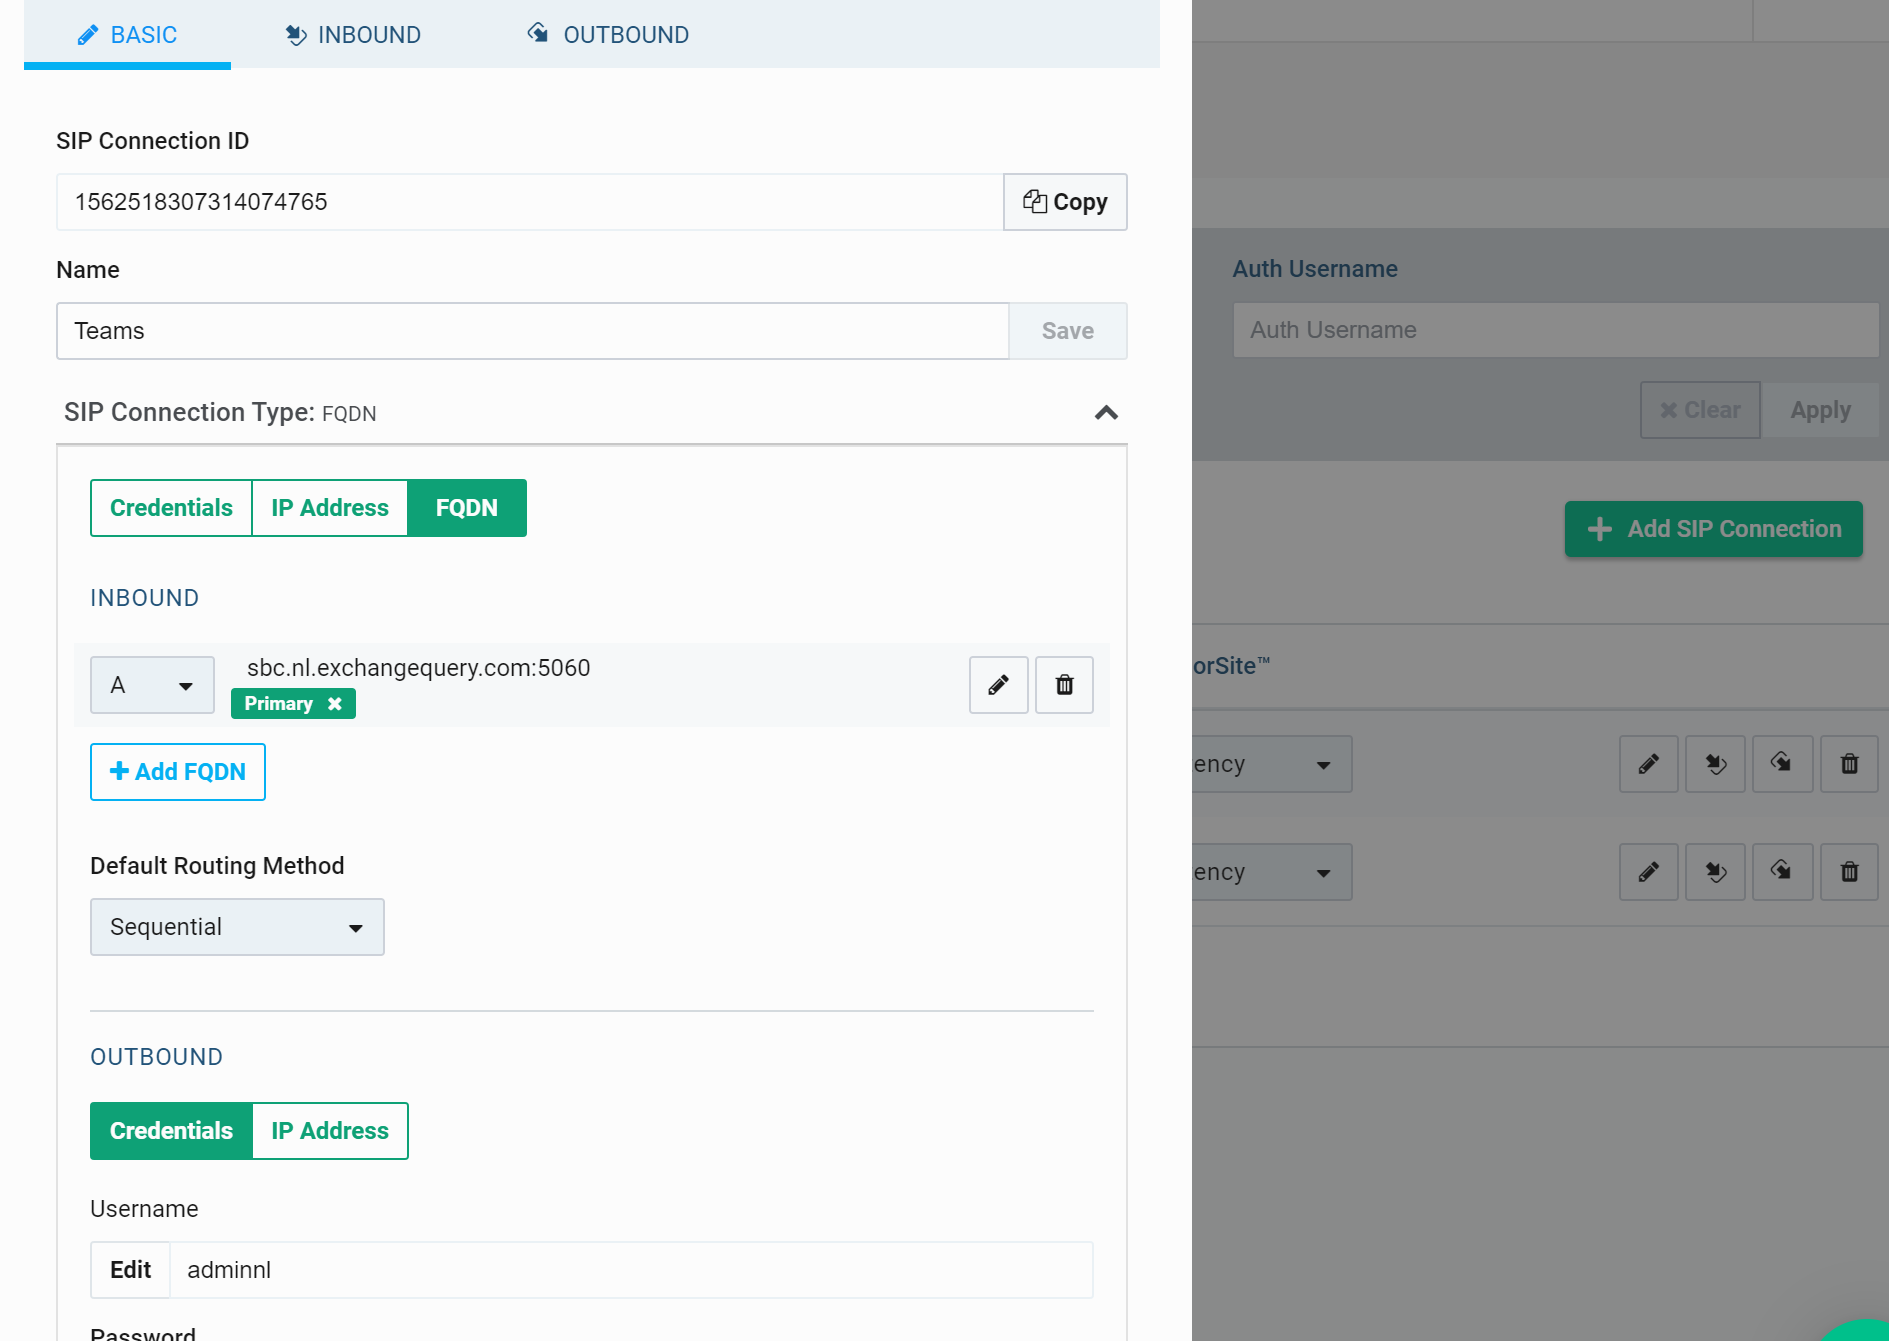
So over here have created a new SIP connection to the SBC as below. In order to proceed click on Add SIP connection. Added a name Teams SIP Connection Type – FQDN – Provide the SBC published FQDN – Keep the rest default – Finally use the authentication type credentials and use their login details that was received when registered and click save.
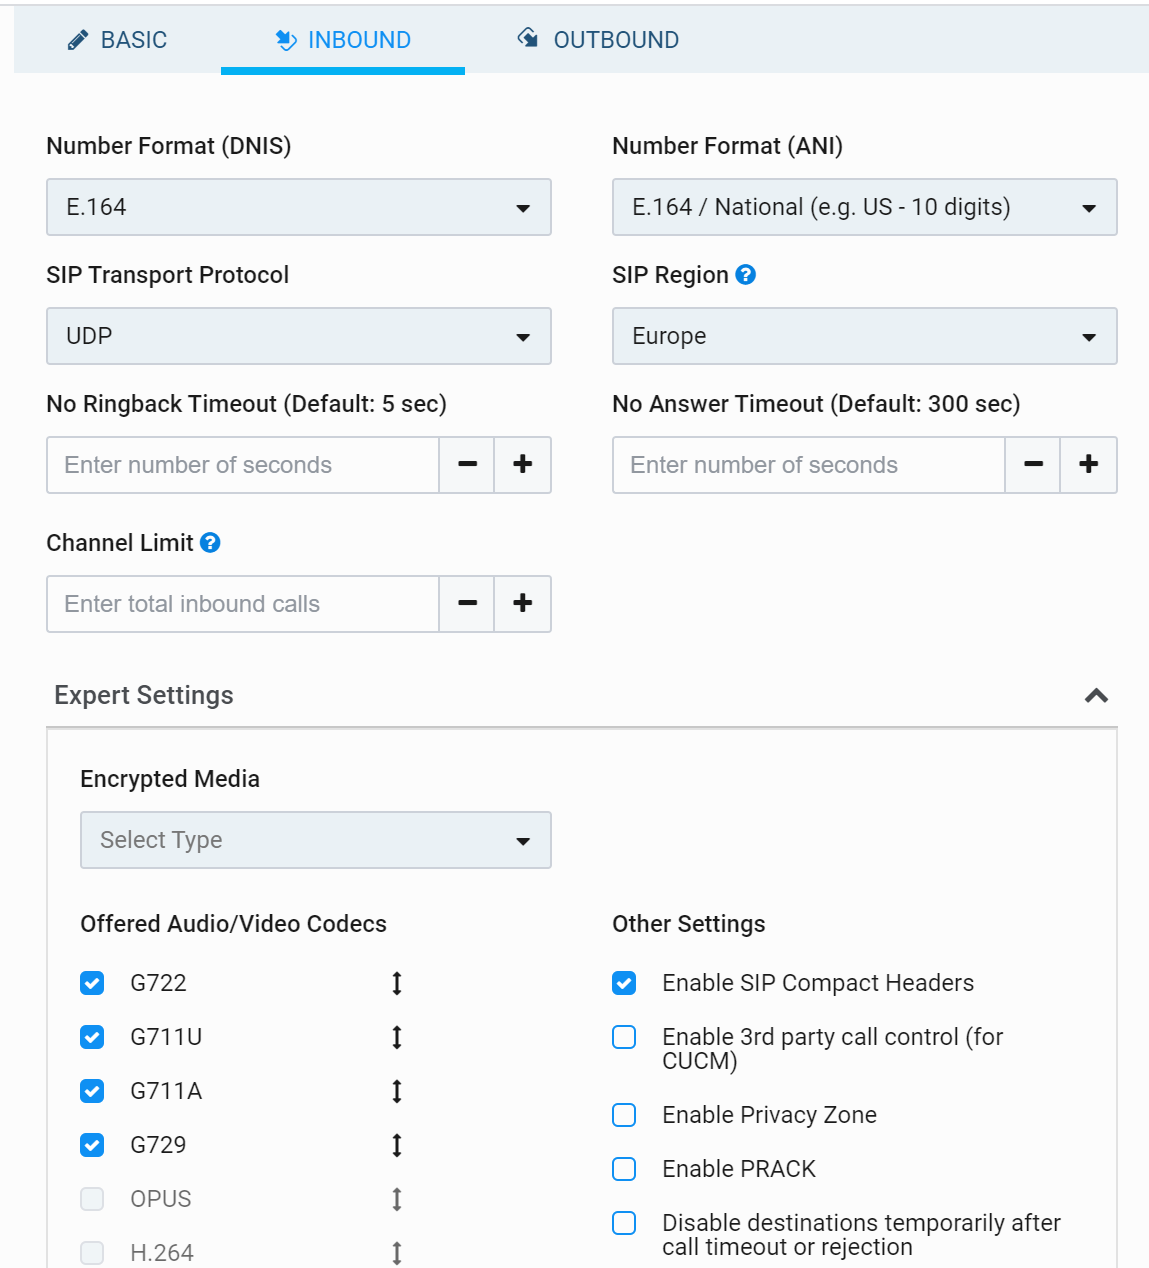
Now we have the inbound/outbound configuration that needs to be completed and have to choose number format, SIP Transport Protocol, SIP region based on our requirement.
And the moment when we expand the expert settings we could see the audio/video codec types that we need to choose based on our requirement.
And for the outbound have to choose the correct country where the number have been purchased.
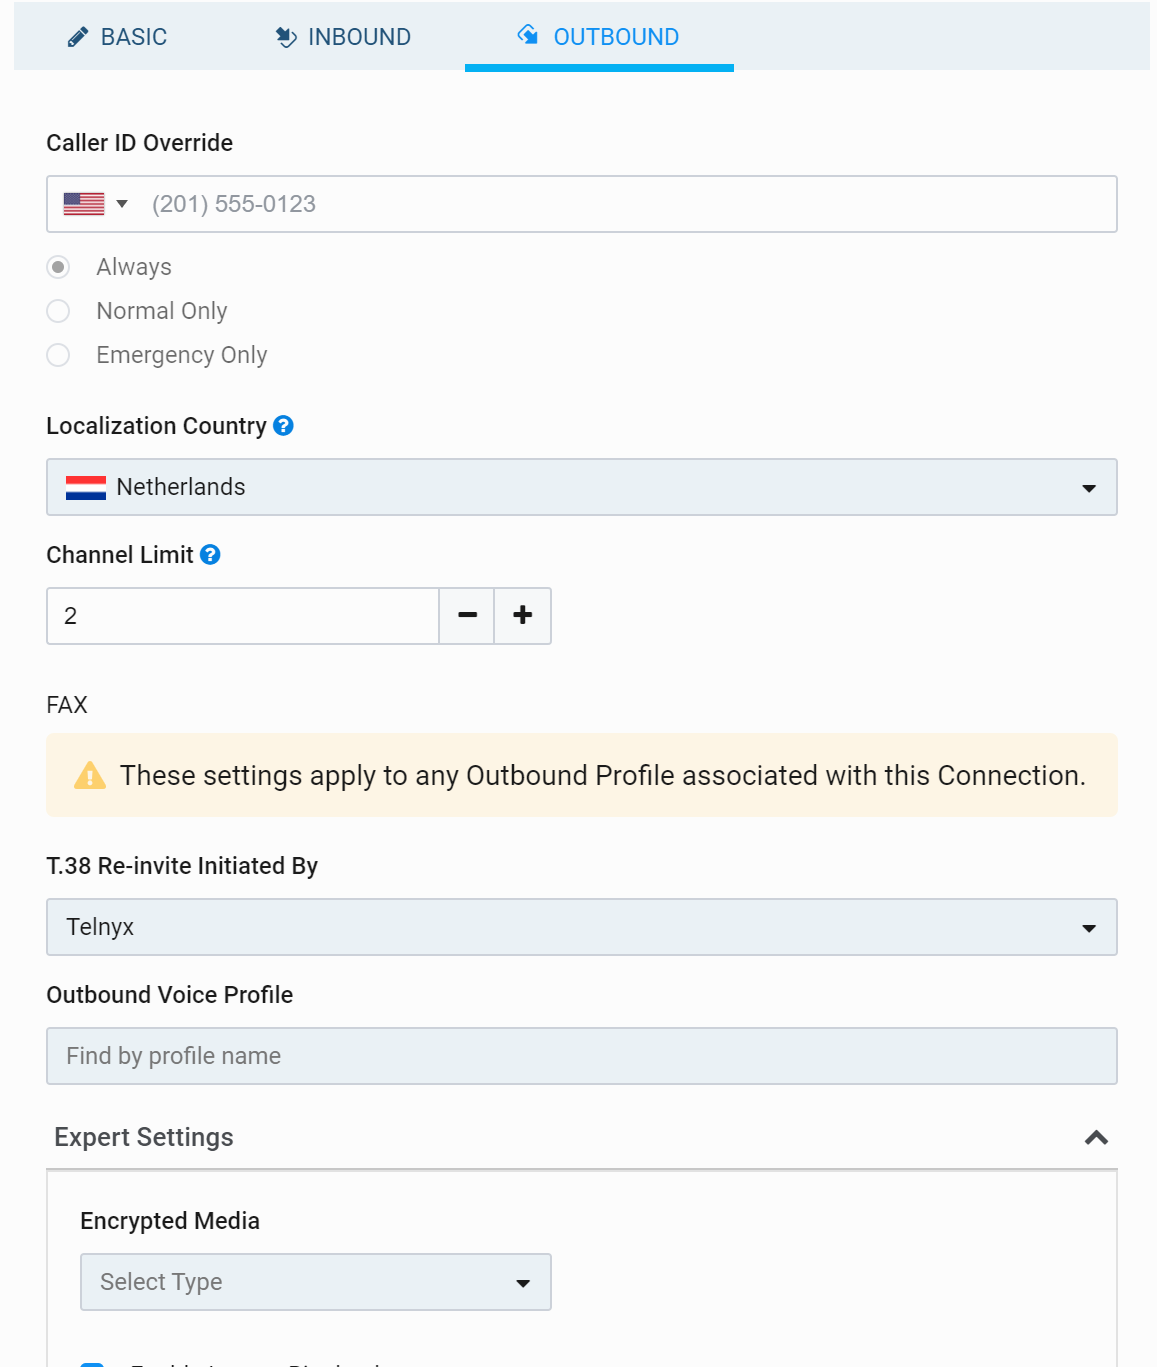
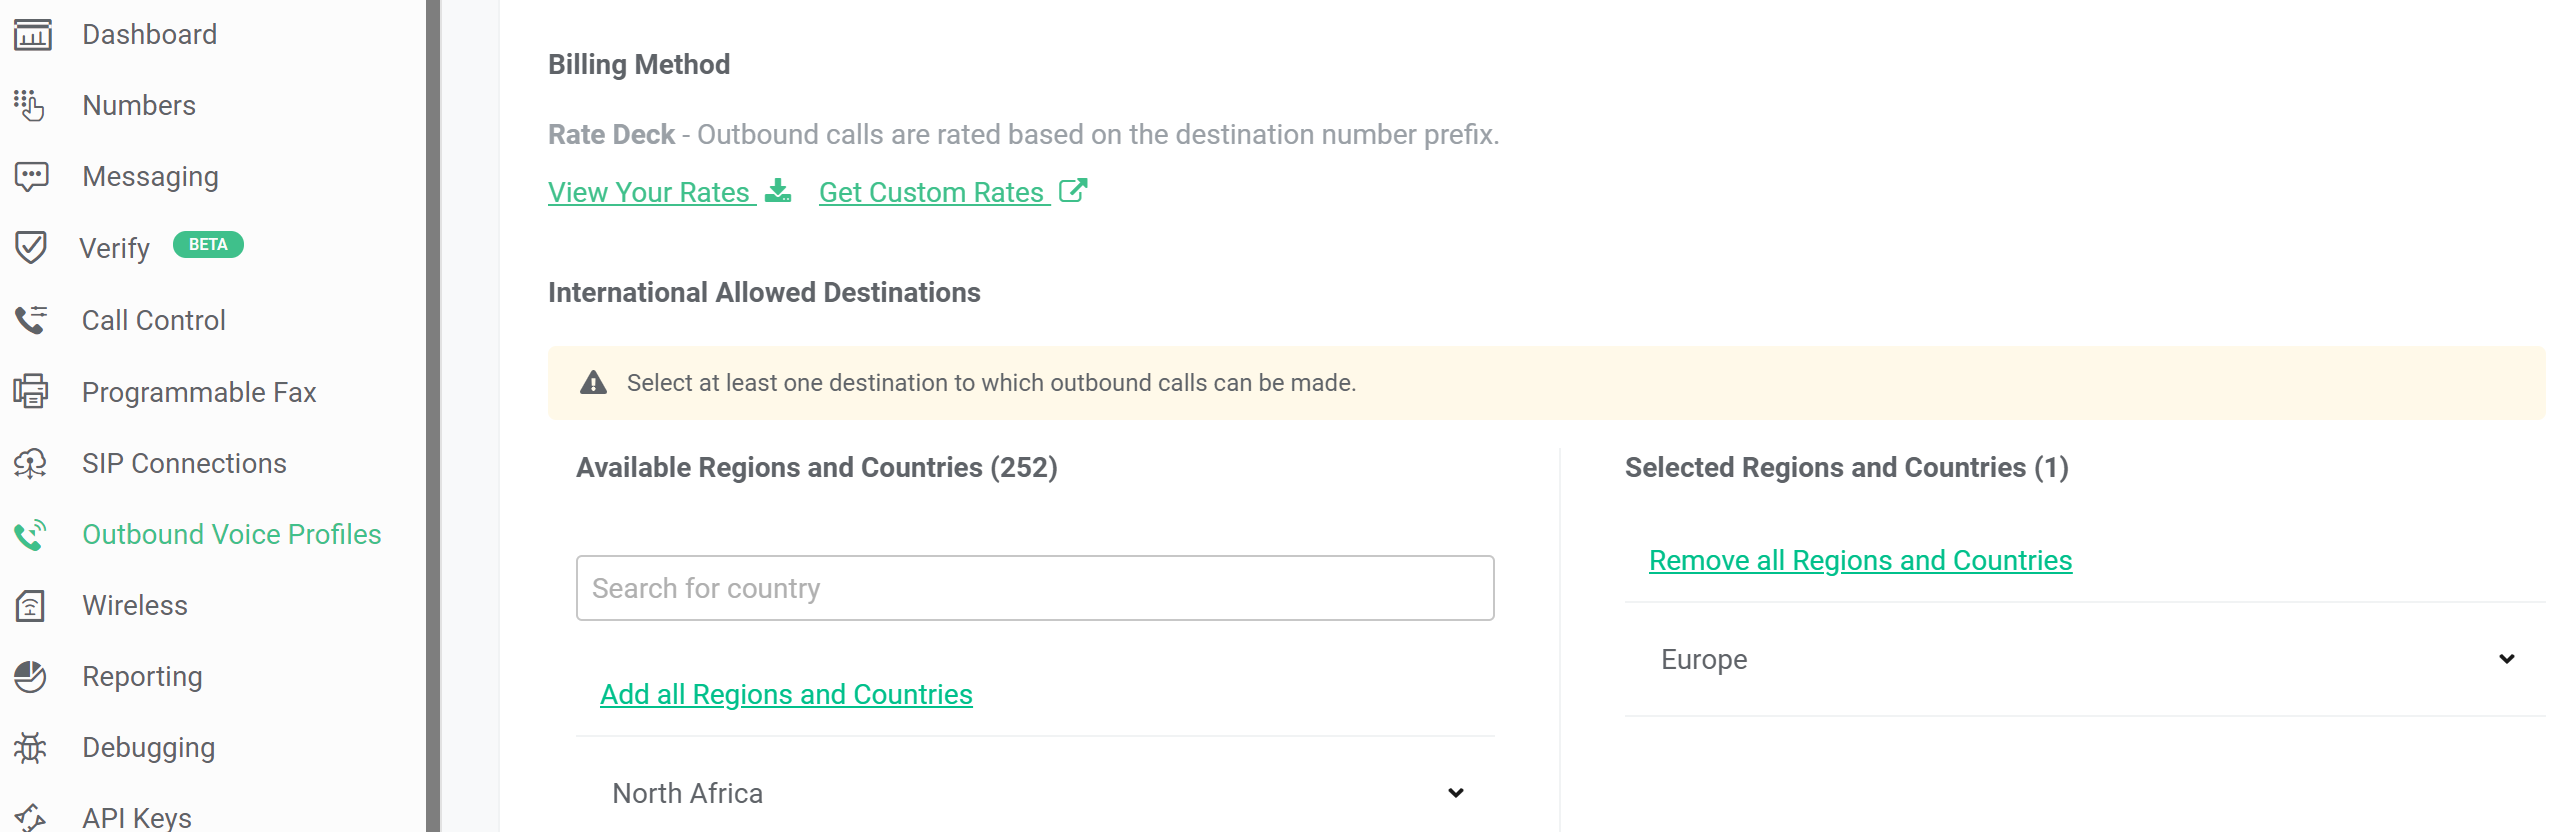
Finally we need to create the outbound voice profile and whitelist the country where the call will be done. The outbound connection type can be selected as FQDN since we have the available SBC FQDN for the Direct Routing which will be published in the internet.

Whitelist of the country can be done by just searching for the appropriate country over the Available Regions and Countries section on the left and adding them to the selected regions and countries over the right side. FQDN connections need to chosen from the Connection’s outbound settings in the SIP Connections section of the portal which is shown in the outbound tab in SIP connection section.
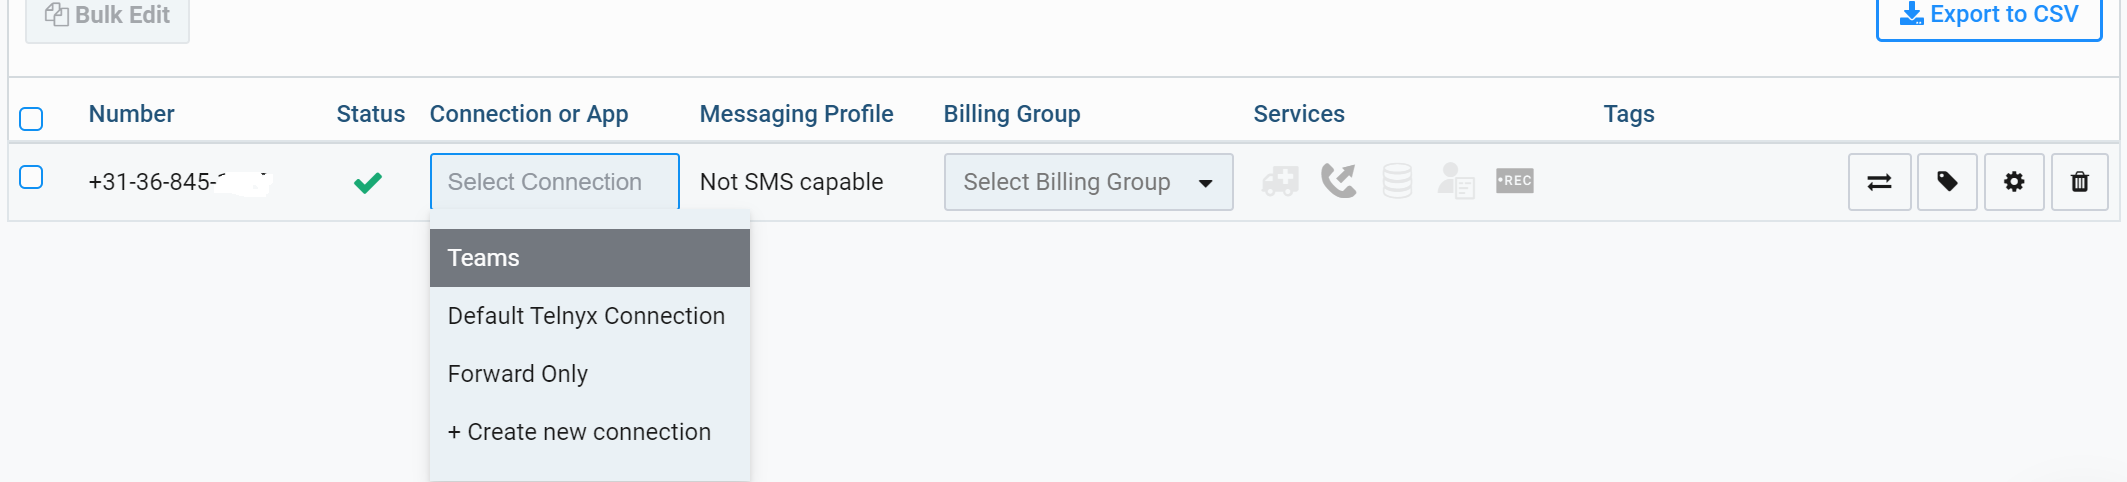
Finally we need to purchase the numbers from them and setup a DID to a SIP connection. This is mandatorily required to receive the inbound calls from the PSTN Provider. We can navigate to numbers choose the number that needs to be setup as DID . Navigate to connection or app and choose the SIP connection that was created between Telnyx and the SBC. There is option to assign multiple DIDs to a single SIP connection , however since its our testing we have used only one in our example.
Having completed the configuration on the SIP provider portal, we need to setup few more configuration on the SBC part.
There are 3 configurations that needs to be completed on the SBC part.
- Sip Proxy
- IP Group
- Define Coders
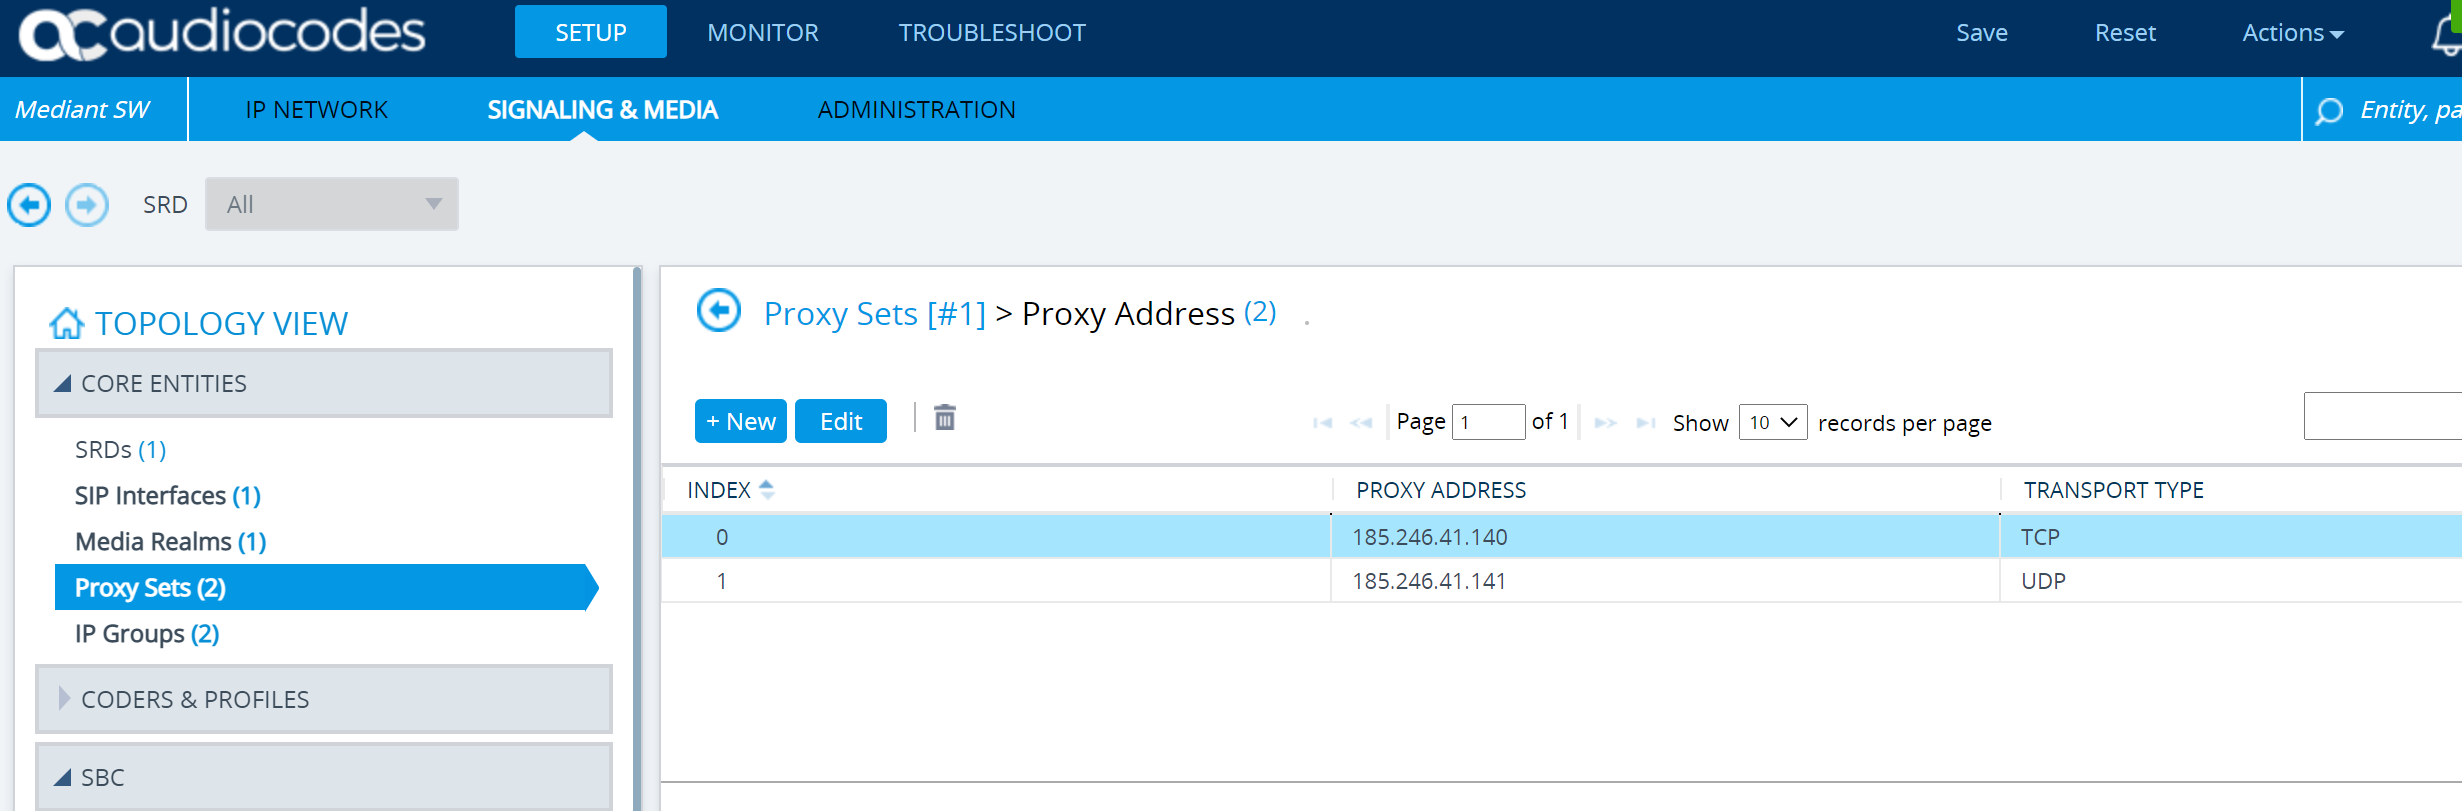
Now we need to setup proxy sets to establish outbound and inbound connections from the SBC.

The appropriate ipaddress have to be chosen based on the location as per this information. In the Proxy addresses add the appropriate Ip addresses in the new proxy set type. The Transport type must be UDP. In our example have selected TCP and UDP for testing purposes.
Now we need to define the IP Group to denote the source and destination of the calls and associate them with the proxy sets created for the PSTN Trunk.

Having completed this the final step is to define the coders that is supported by Telnyx. This can be completed by navigating to the coders & profiles and selecting the coder groups.

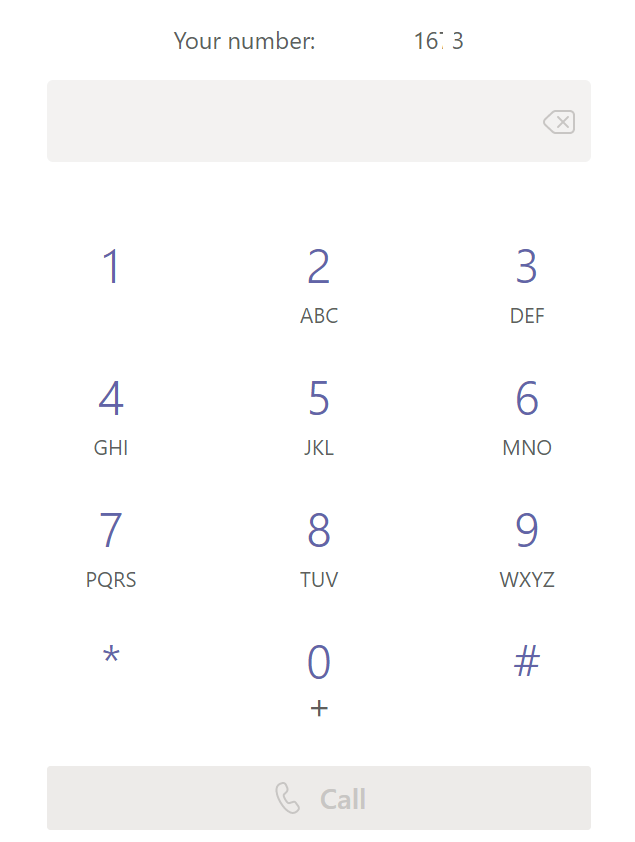
The moment when it is completed we are ready to assign the number to the Teams Client. On a successful number assignment as per this article we get the assigned number.

And we receive the dial pad as below with the number.
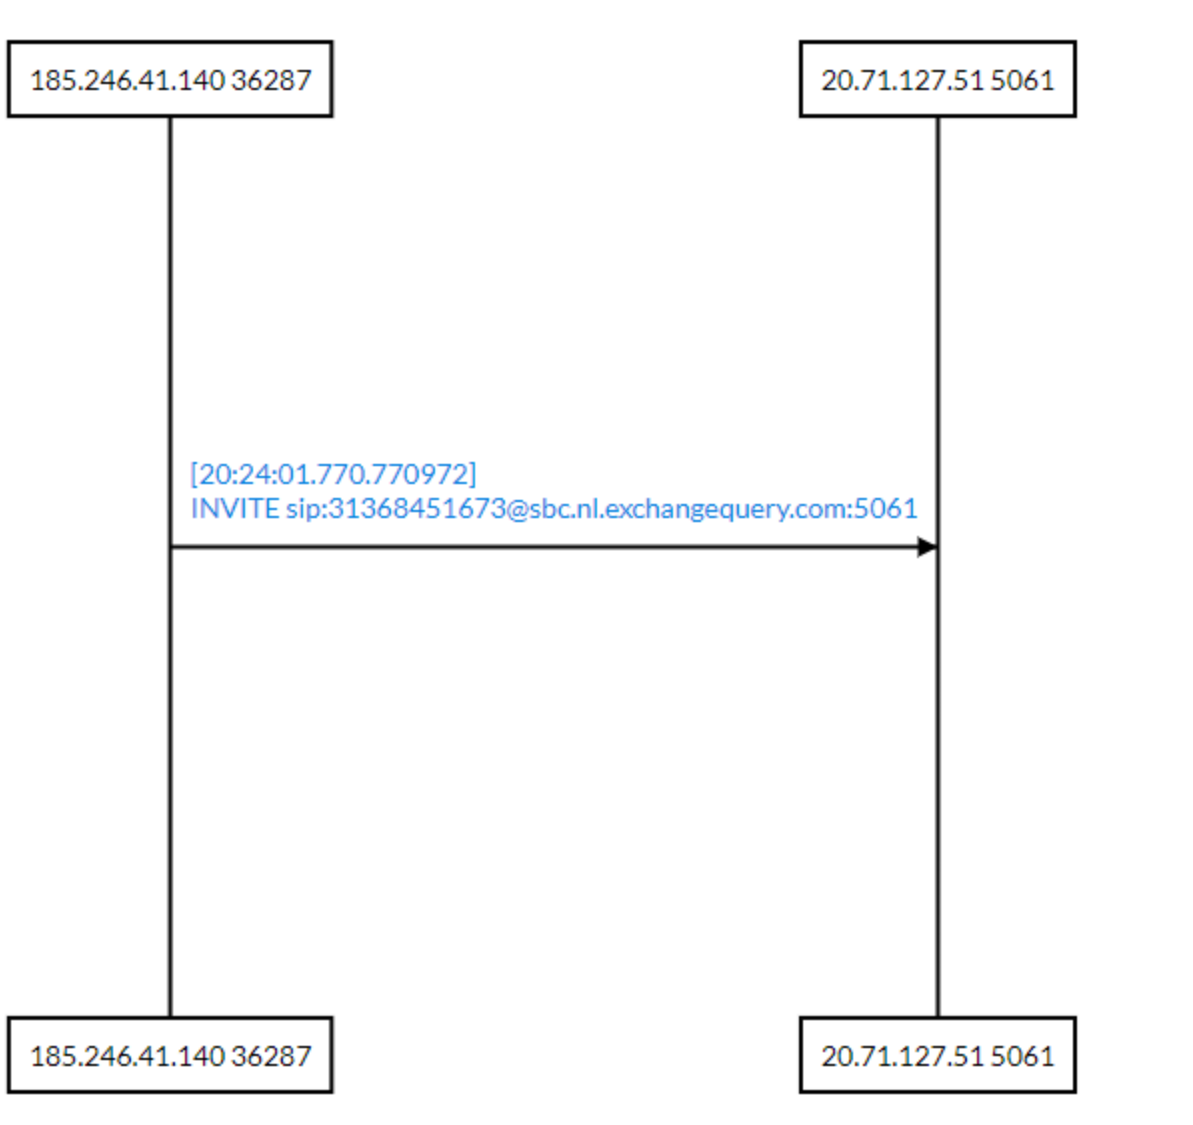
Having reached this state the there are few scenarios that are not getting successful and may be it might require additional tweaking in my test environment which I haven’t visited for a quite long time. An inbound call is not getting successful. The SBC is not responding to Inbound INVITE from Telnyx even though it is listening on the port.
I will test further on the configuration and probably update the results in the upcoming posts. Similarly depending on your requirements, you may need to set more configurations such as IP profiles ,Routing , Additional Codecs and Proxy Sets.
Regards
Sathish Veerapandian


Leave a comment