
In previous article we had a look at how to manage the Logitech Peripherals from the the LogiSync Portal. In a small scale deployment installing them manually from handful of devices will be an easier approach. However when we have more number of devices that needs this installation and if they are present in different locations sharing the local admin passwords to the local support might also be a bit risky approach.
If the devices are Azure AD joined and Intune registered in this case we can benefit the remote installation of this client via Microsoft Intune Apps. Logitech has provided option to install them remotely from an SCCM instance as well which might be beneficial if you have the device managed via SCCM. In this article we will run through the steps that we will be doing to install the LogiSync Agent from the Microsoft Intune.
As a first step we need to download the Windows Sync Provisioning Bundle by logging into https://sync.logitech.com System–>Bulk provisioning.
In our case we are choosing windows since we are attempting the automated agent installation via Microsoft Intune.

Later once downloaded they can be placed to a folder location. Example like below. We do not need the instruction notepad file which can be deleted.

Now we need to prepare the intune win app. It can be downloaded from this github website
Then create installsync.cmd with the below code
| start /wait LogiSyncProvisionStub.exe Set ErrorState=%errorlevel% echo %ErrorState% > %WinDir%\Temp\LogiSync\%ErrorState%.txt echo %ErrorState% exit /B %ErrorState% |
Installing the app is now quite easy. I saw a small challenge in following the steps mentioned in the Logitech website.
For me the easier method was to right click the intunewinapp.exe , specify the folder location as requested below which allowed to create the deployment package in few seconds.
The source folder is the folder location where the Logisync provisioning exe files reside. And the setup file is the file name that we need to give it exactly as it is present in the source folder.
Finally output folder is the folder that we need to provide where the intunewin file will be successfully created.
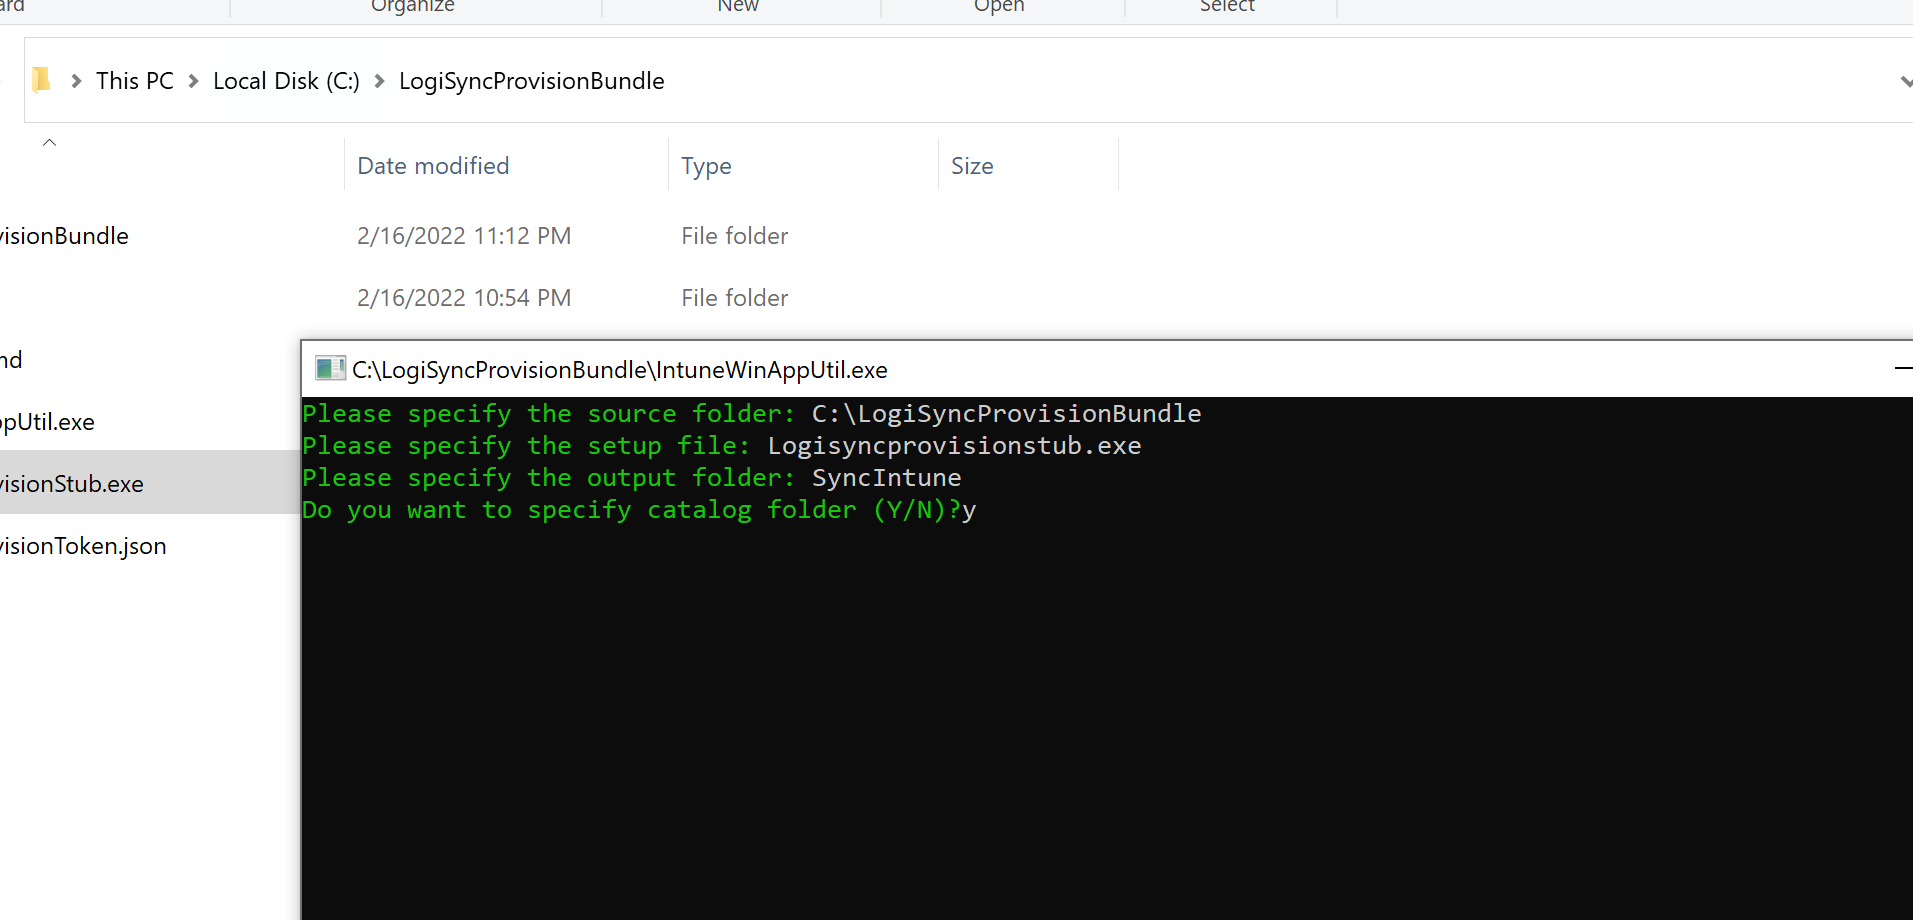
After running the above command finally we see the .intunewin file that has been created in the target folder location.

Also more importantly it creates installsync.cmd file . This is the main cmd that starts the installation, sets the error state if it finds any and then exit the installation.

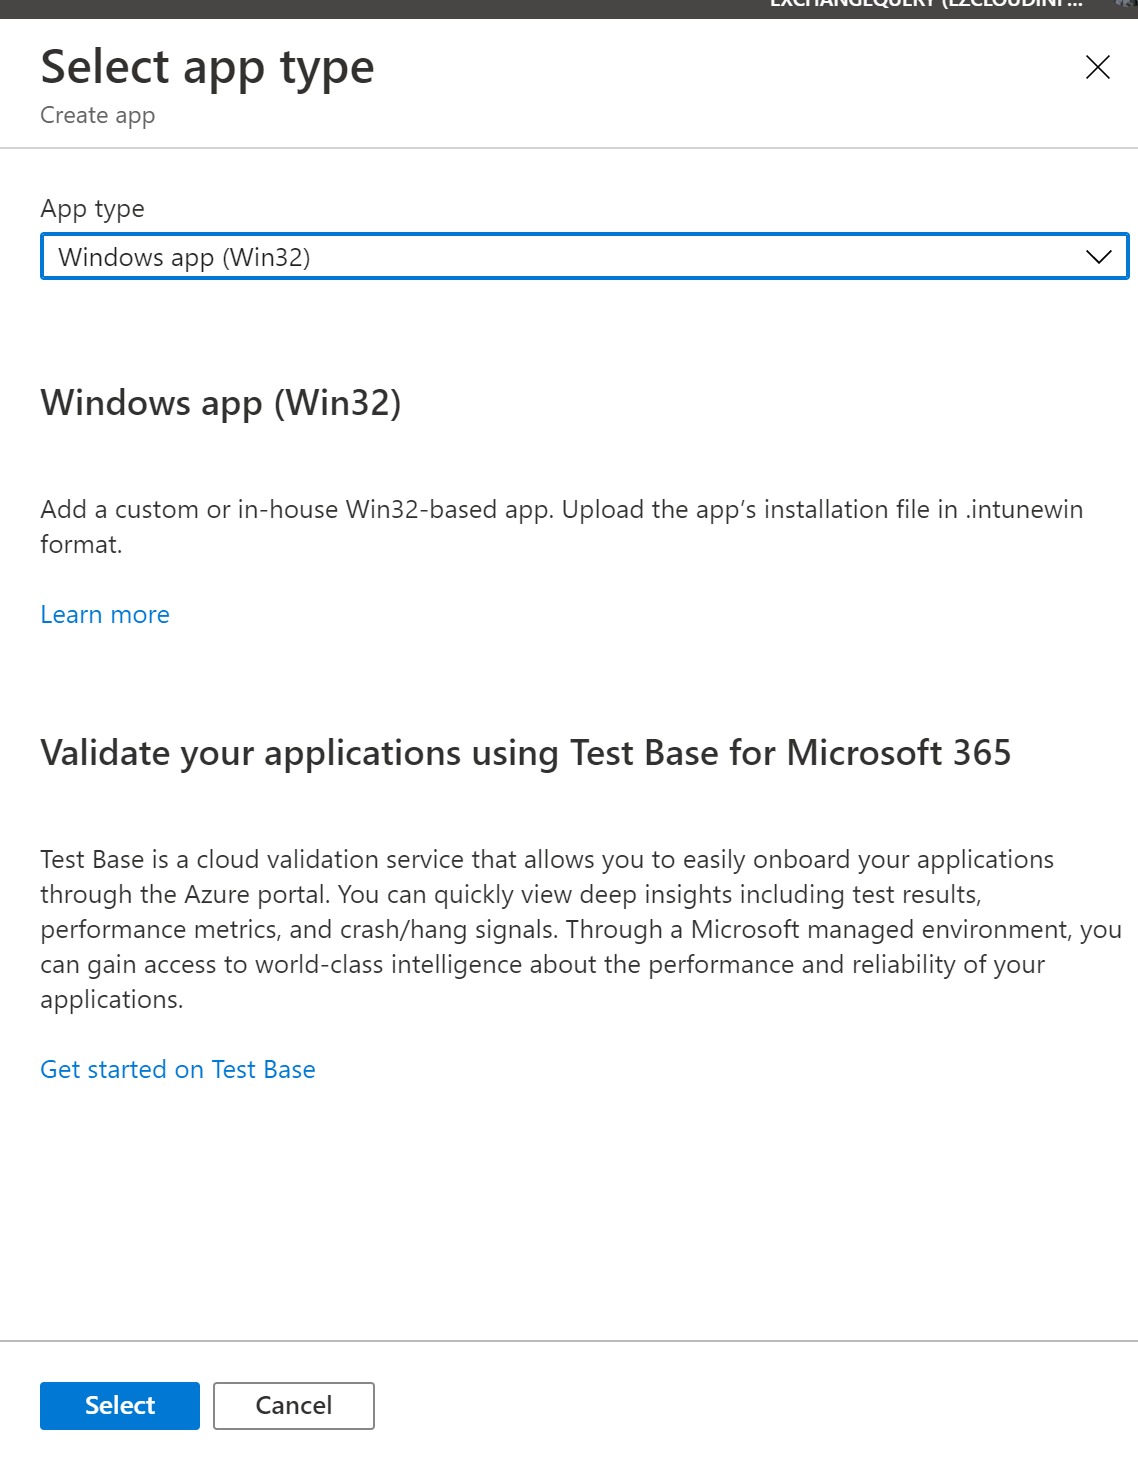
Now we have created the required installation media now we need to create the Intune Apps Policy to target them to the required room systems. Navigate to Intune – select all apps – Add new app type and select Windows app (win 32)

Now we need to select the app that we have created which is logitechprovisionstub.intunewin
Later successfully select and upload the app file and click on ok.

In the app description we can provide a name and description as per our requirement. In the Publisher provide name as Logitech, Category Computer Management, Information url https://sync.logitech.com and Developer Logitech.

In the next screen in add app section use the install command installsync.cmd
Uninstall command “C:\Program Files (x86)\Logitech\LogiSync\uninst-main.exe”
Install behavior: System
Restart behavior: No specific Action
Add the below return codes:

Now in the operating system requirements specify the below details.
Operating system architecture – 64 bit
Minimum operating system – Windows 10 1607

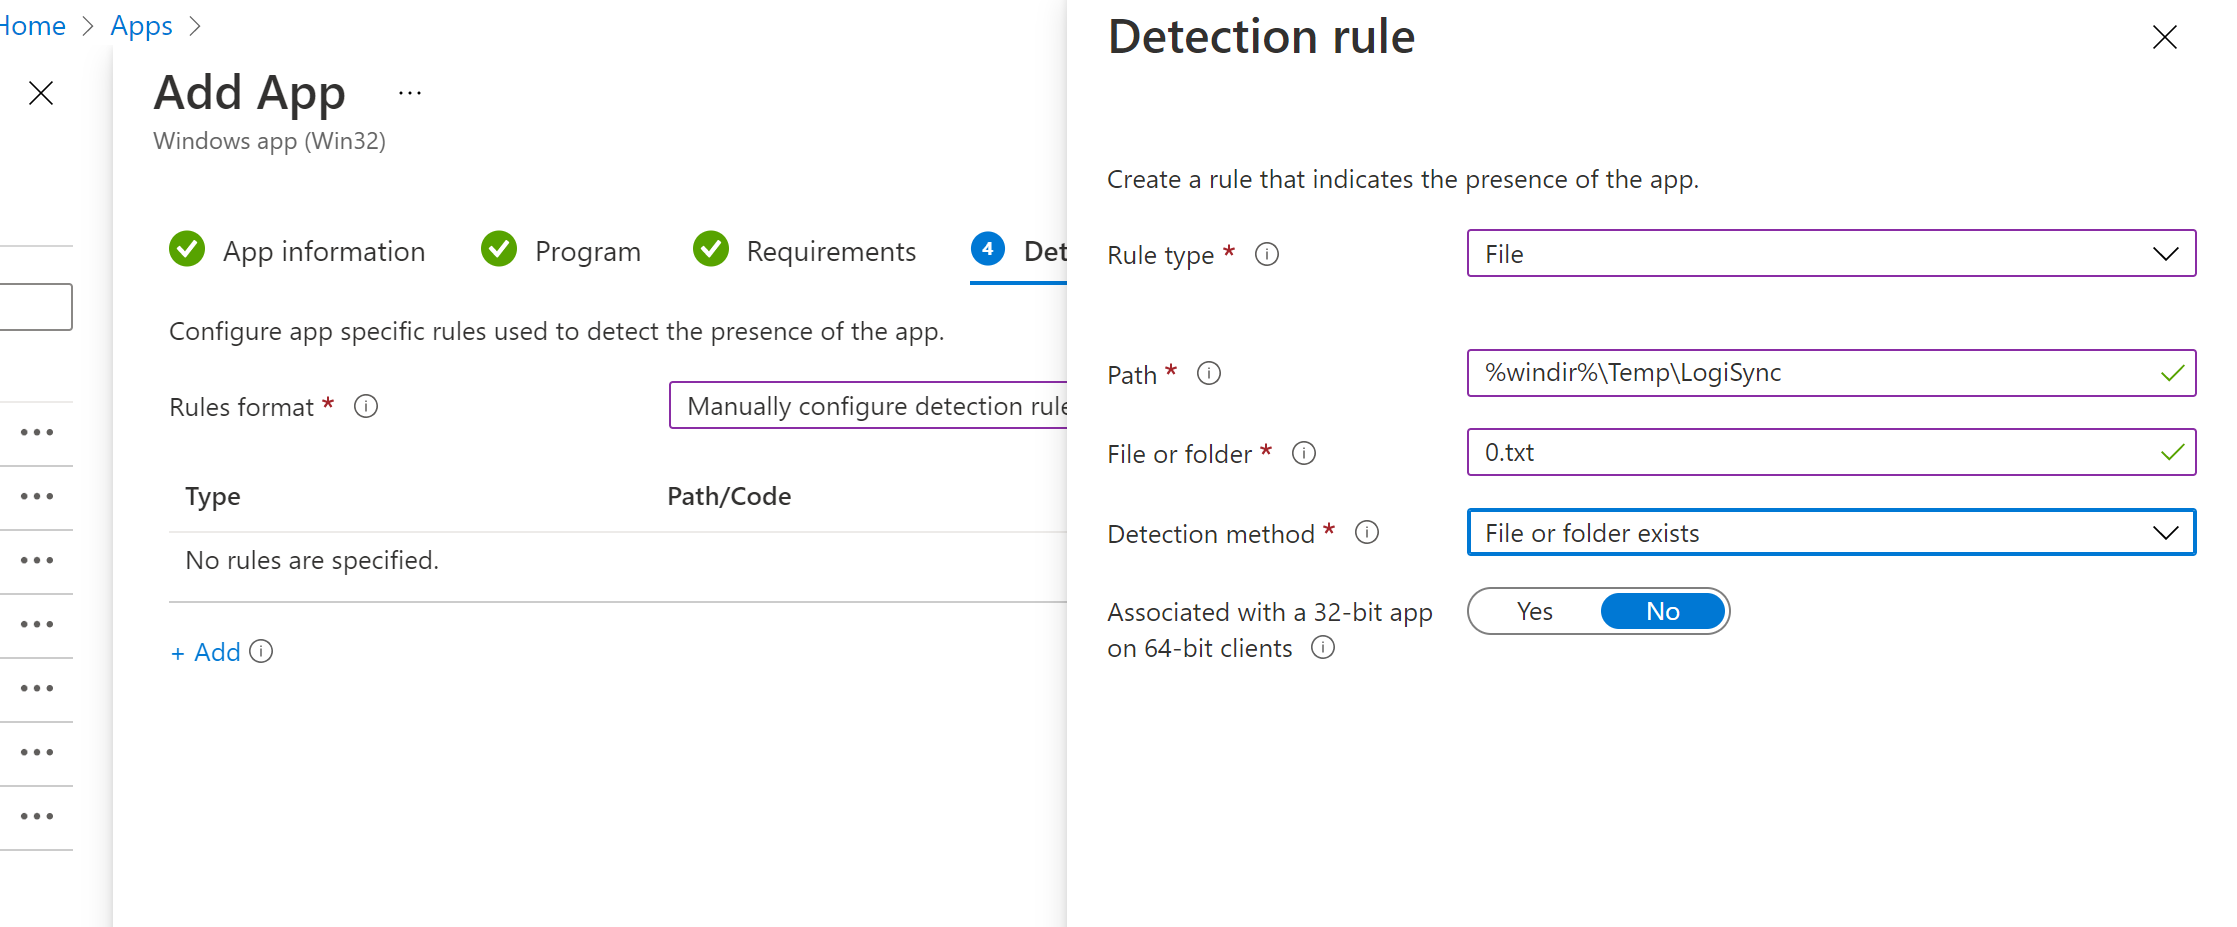
Now in the detection rules specify the below action
Rule Type – File , Path – %windir%\Temp\LogiSync, File 0.txt and detection method File or Folder exists.
Once after the file is successfully uploaded we receive a confirmation notification message like below;.

And after few times if the installation is successful we can see the below message.

And the device installation status is also showing successful.

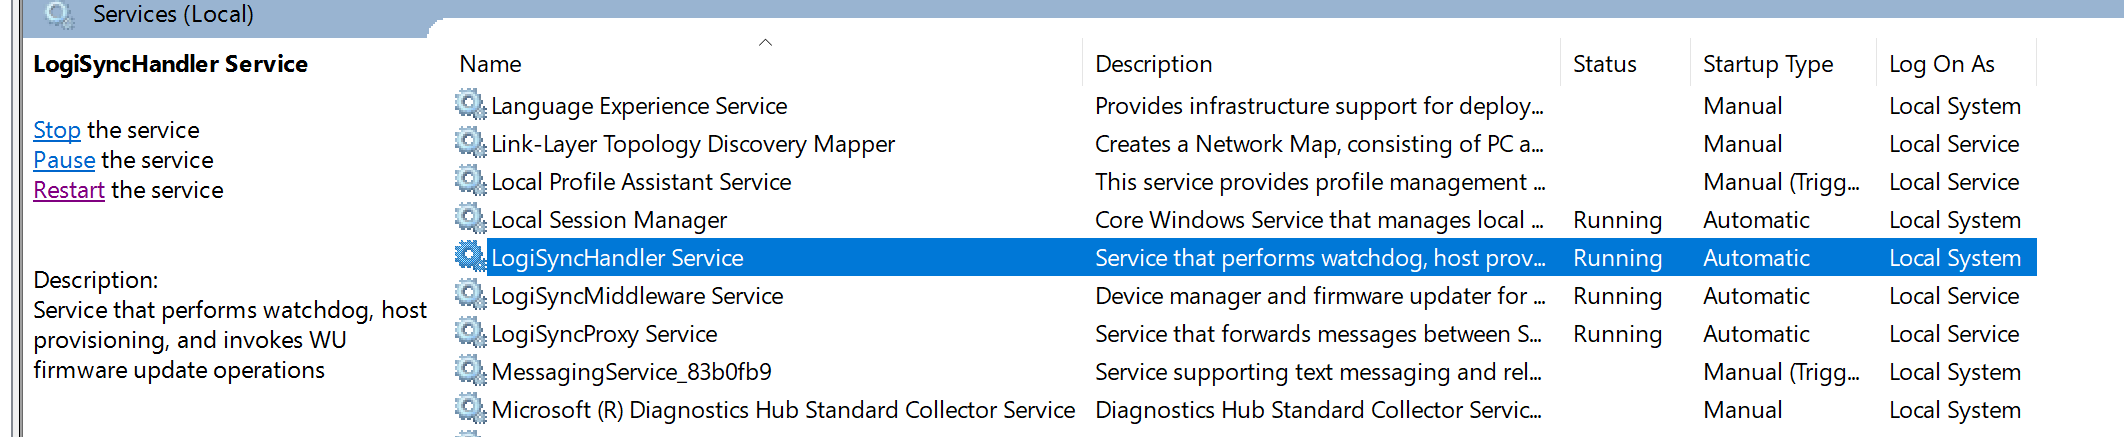
When logging into the system could see that the Logitech services are installed and running.
One more important thing in my case the local antivirus running in the system did not allow to perform full installation of Intune in this location – C:\Program Files (x86)\Microsoft Intune Management Extension\Content
I have to exclude them from the scanning part and after that the installation was successful.
With Microsoft Intune we are able to install the Logisync App Deployment in an automated way without any hassle. Apps can only be installed in the device context if they are supported by the device and the Intune app type. Device context installations are supported on Windows 10 desktops and Teams devices, such as the Surface Hub.


Great Share! Thanx for sharing.
LikeLike
Good article, thanks for sharing!
But once the agent is installed, you cannot actually find the GUI version, I think that’s expected. Do you know how to register these systems to Sync portal if we cannot find it?
LikeLiked by 1 person
Thanks for the article! Just what I am looking for. But a little confused, do I need to manually create the installsync.cmd by copying and pasting the code into a blank cmd file? When creating the intunewin file, it did not create an additional cmd.
Thanks!
Dave
LikeLiked by 1 person
Hi you can follow this link to create the intune win app – https://github.com/Microsoft/Microsoft-Win32-Content-Prep-Tool
LikeLiked by 1 person
Thanks Sathish. I created the intunewin file but it did not create the installsync.cmd. That has to be created manually?
LikeLiked by 1 person
Yep create installsync.cmd with the below code
start /wait LogiSyncProvisionStub.exe
Set ErrorState=%errorlevel%
echo %ErrorState% > %WinDir%\Temp\LogiSync\%ErrorState%.txt
echo %ErrorState%
exit /B %ErrorState%
LikeLiked by 1 person