
It’s been a long time since I’ve written a blog article about RBAC roles, especially in relation to Exchange. Because working in Exchange areas was my first job, I had the opportunity to have a sneak peek at this topic when a colleague suggested that we consider providing a scaled down permission level for EXO operations search and remove suspicious emails.
It’s always advisable to give the least amount of authorization for daily operational tasks, such as when an end user reports a suspicious spam email to the security team and helpdesk. There are circumstances when global admin is granted for this operation in this case, because by default there is no direct Azure AD built in roles for instance search & purge roles that is present in the compliance center.
Though there is no direct way to assign the permission via Azure AD roles we have the option to connect it to office 365 security and compliance and add this group to search & purge role. We are going to look out for providing such access via this blog.
We will use PIM to grant just-in-time access to Defender for Office 365 related tasks
In our case in this demo we are going to run this example with a user called Selvam who does not have any access apart from a regular user privilege’s. In our example Selvam will be a SOC Admin who is responsible for searching and deleting suspicious emails when an incident is reported.
The first task is to customize and add some permission entry for Selvam .
Navigate to security reader role in roles and administrator.
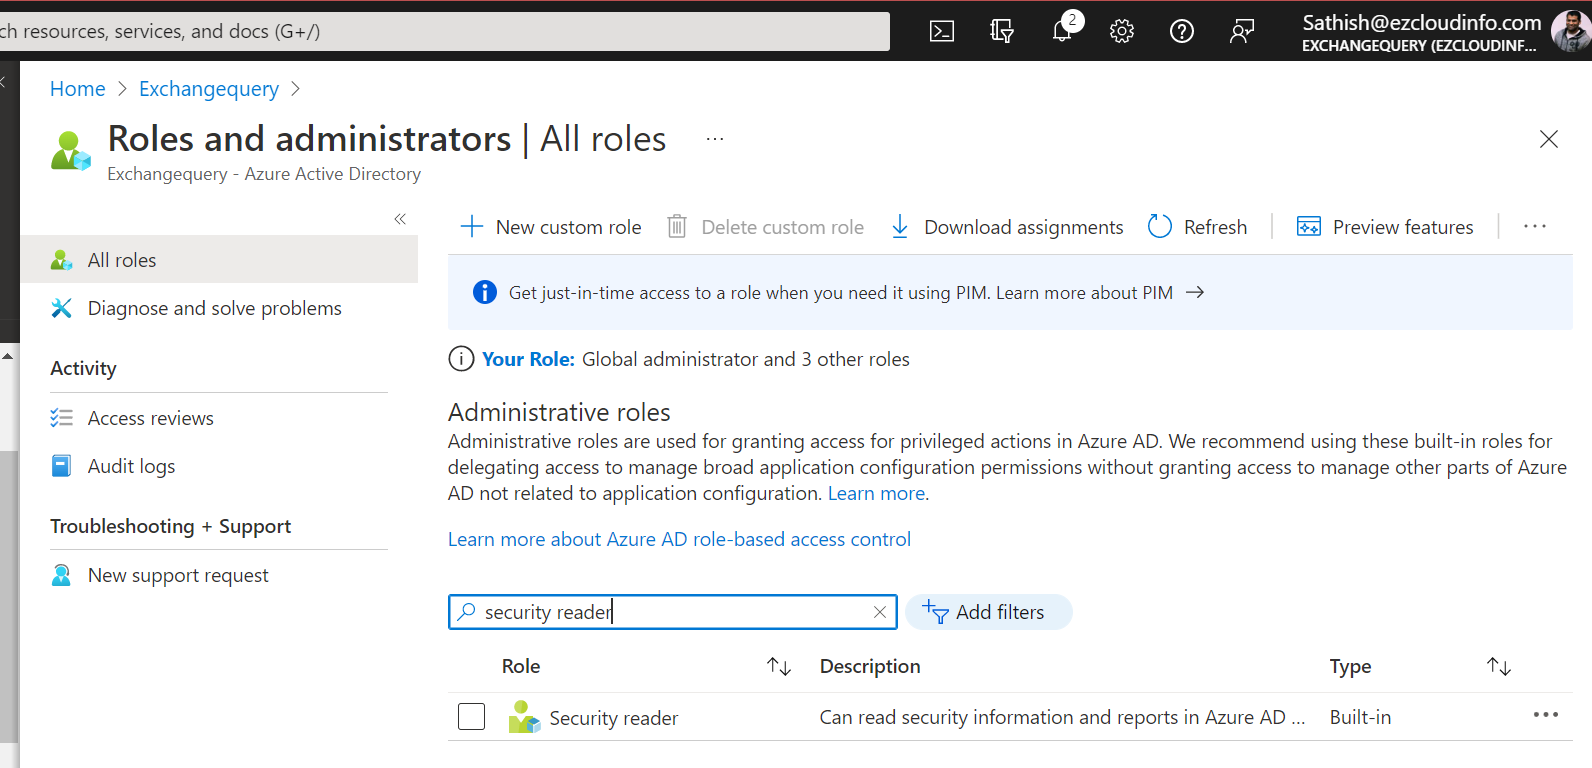
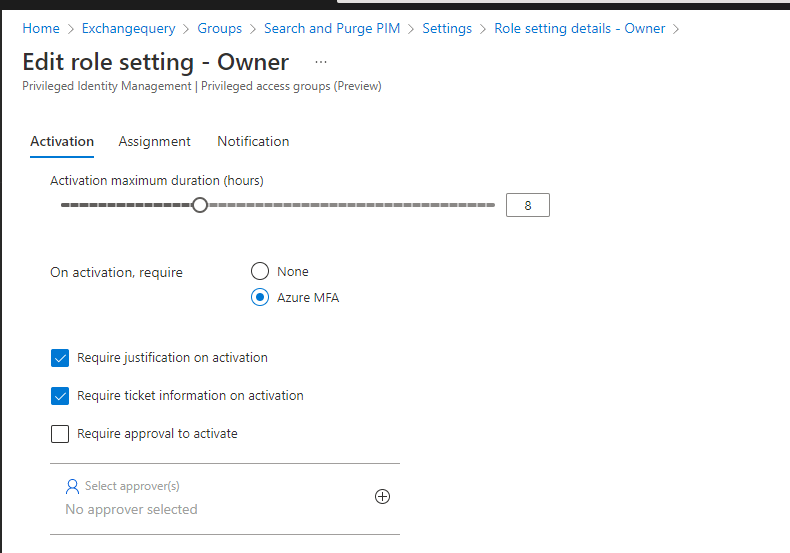
And go to role settings and here we need to tweak the activate maximum duration hours settings

In the next pane we can choose the role settings for example the duration hours to be 24 hours.
Also we can choose additional information like require justification, ticket information and approval. In below example I’m not choosing approval.

In our example we are adding Selvam to this assigned membership.

And finally Selvam must be eligible in the eligible assignments and not in the active assignments.

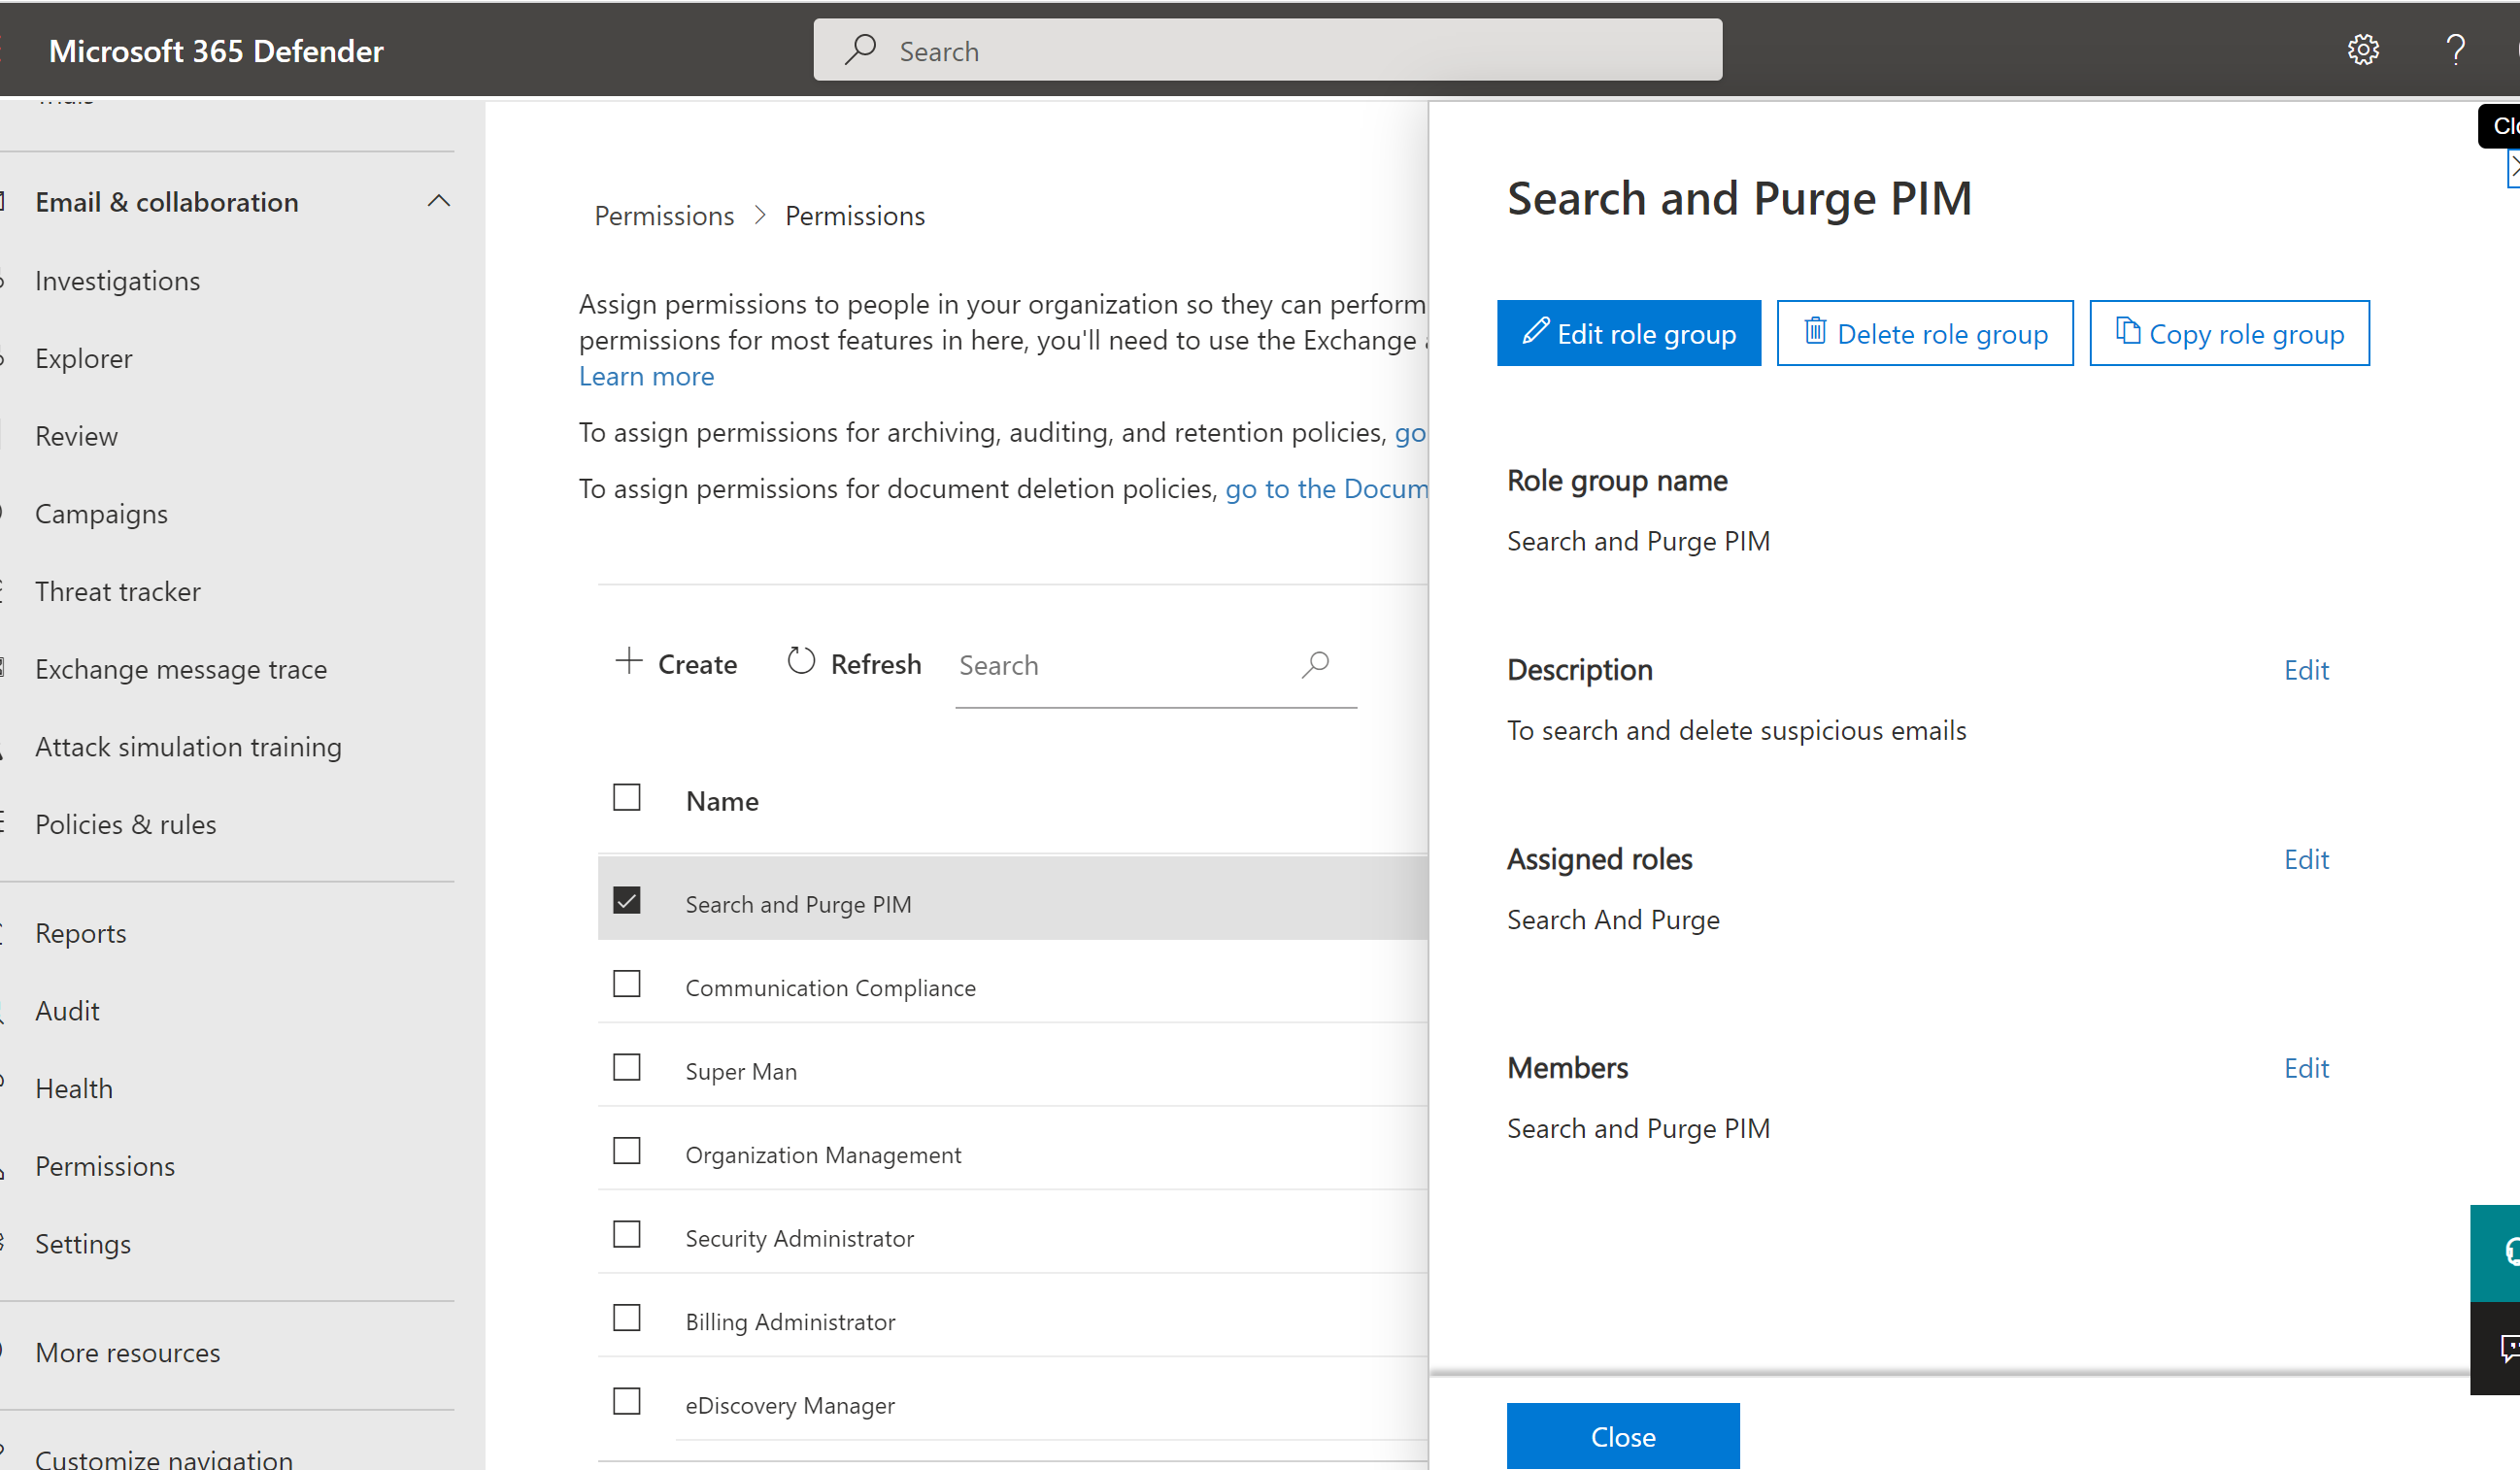
Having completed this part , now we need to create the 2nd elevated permission. Creating the role Group in the defender elevating the permissions.
Using Privileged access groups we need to create custom groups and create this role.
Create the role like below
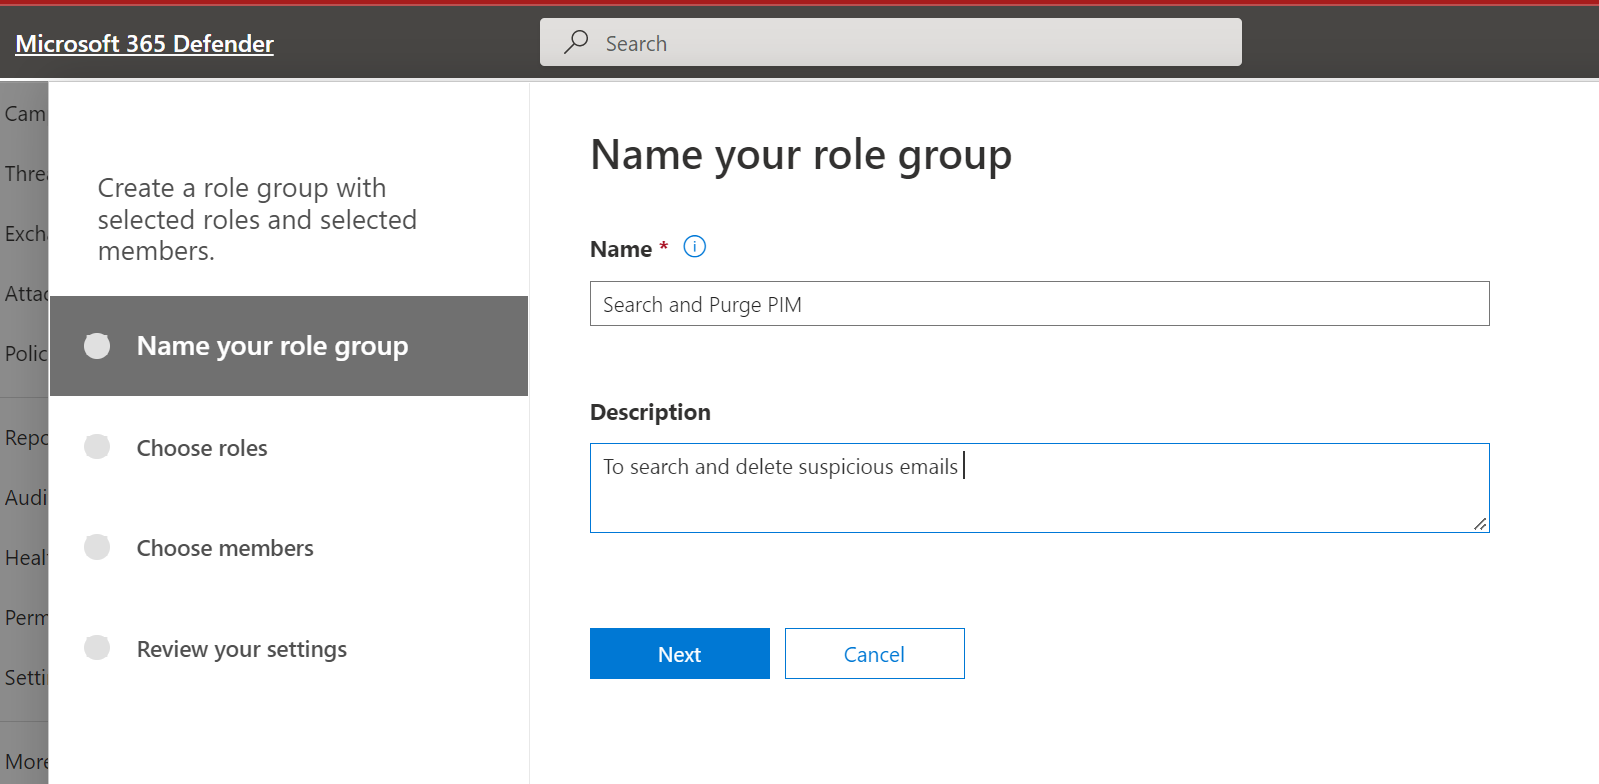
In this pane add the search & purge role

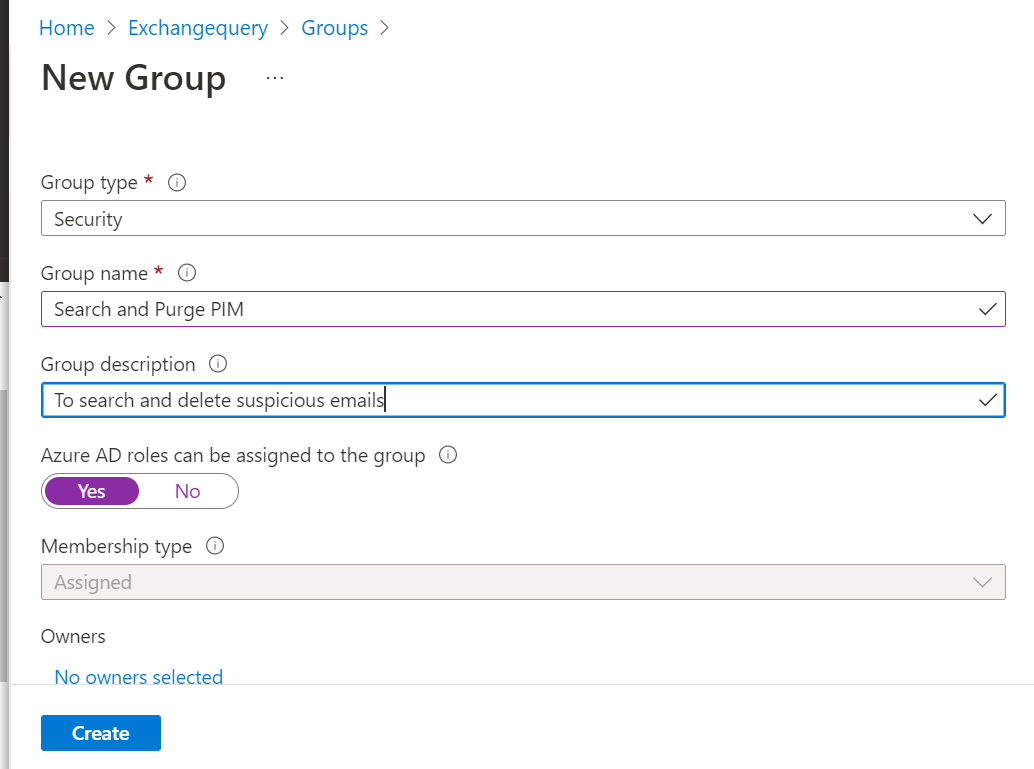
In the members tab just leave it empty and do not add anyone.

Here no need to add any members, but make sure to turn on Azure AD roles can be assigned to the group.
Now just enable the priviliged access alone once this group has been created.

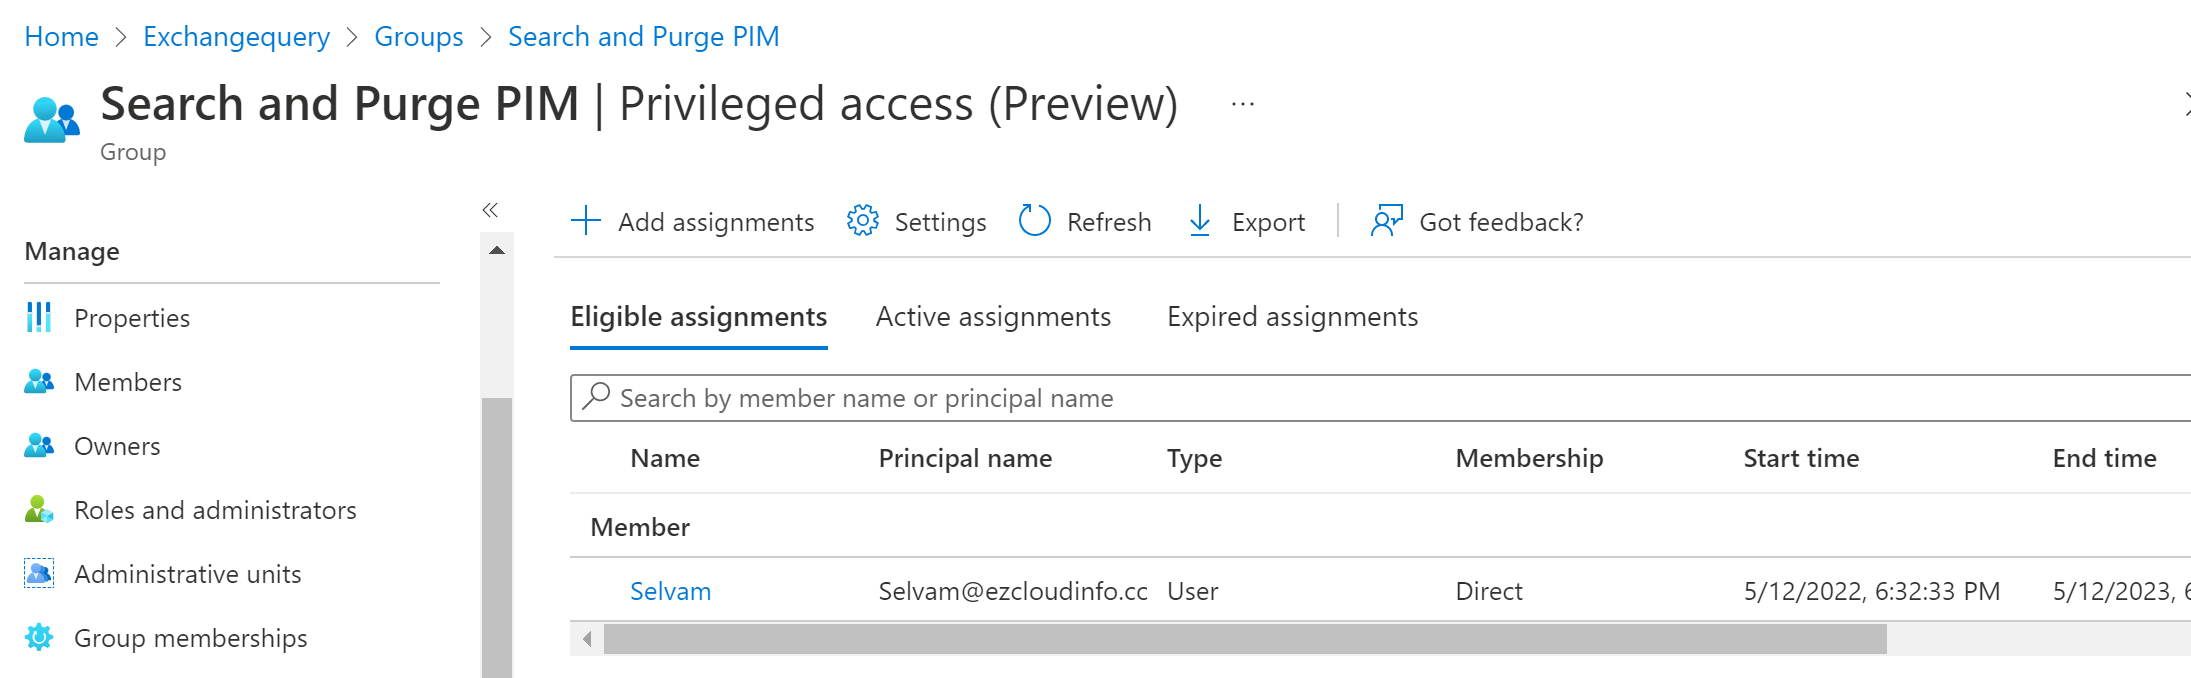
And in this assignments add Selvam as the eligible assignments user.
Add additional security settings as per the organization requirements like for example on activation require MFA
Now we need to connect the Security Group Roles to the Azure AD group with the below command.
In my example im using security group role with name and azure group with object id. This is required if you use the same name in the azure group and in the security center.

After running this command we see that the associated Azure AD group we created is a member of custom role group in office 365 defender
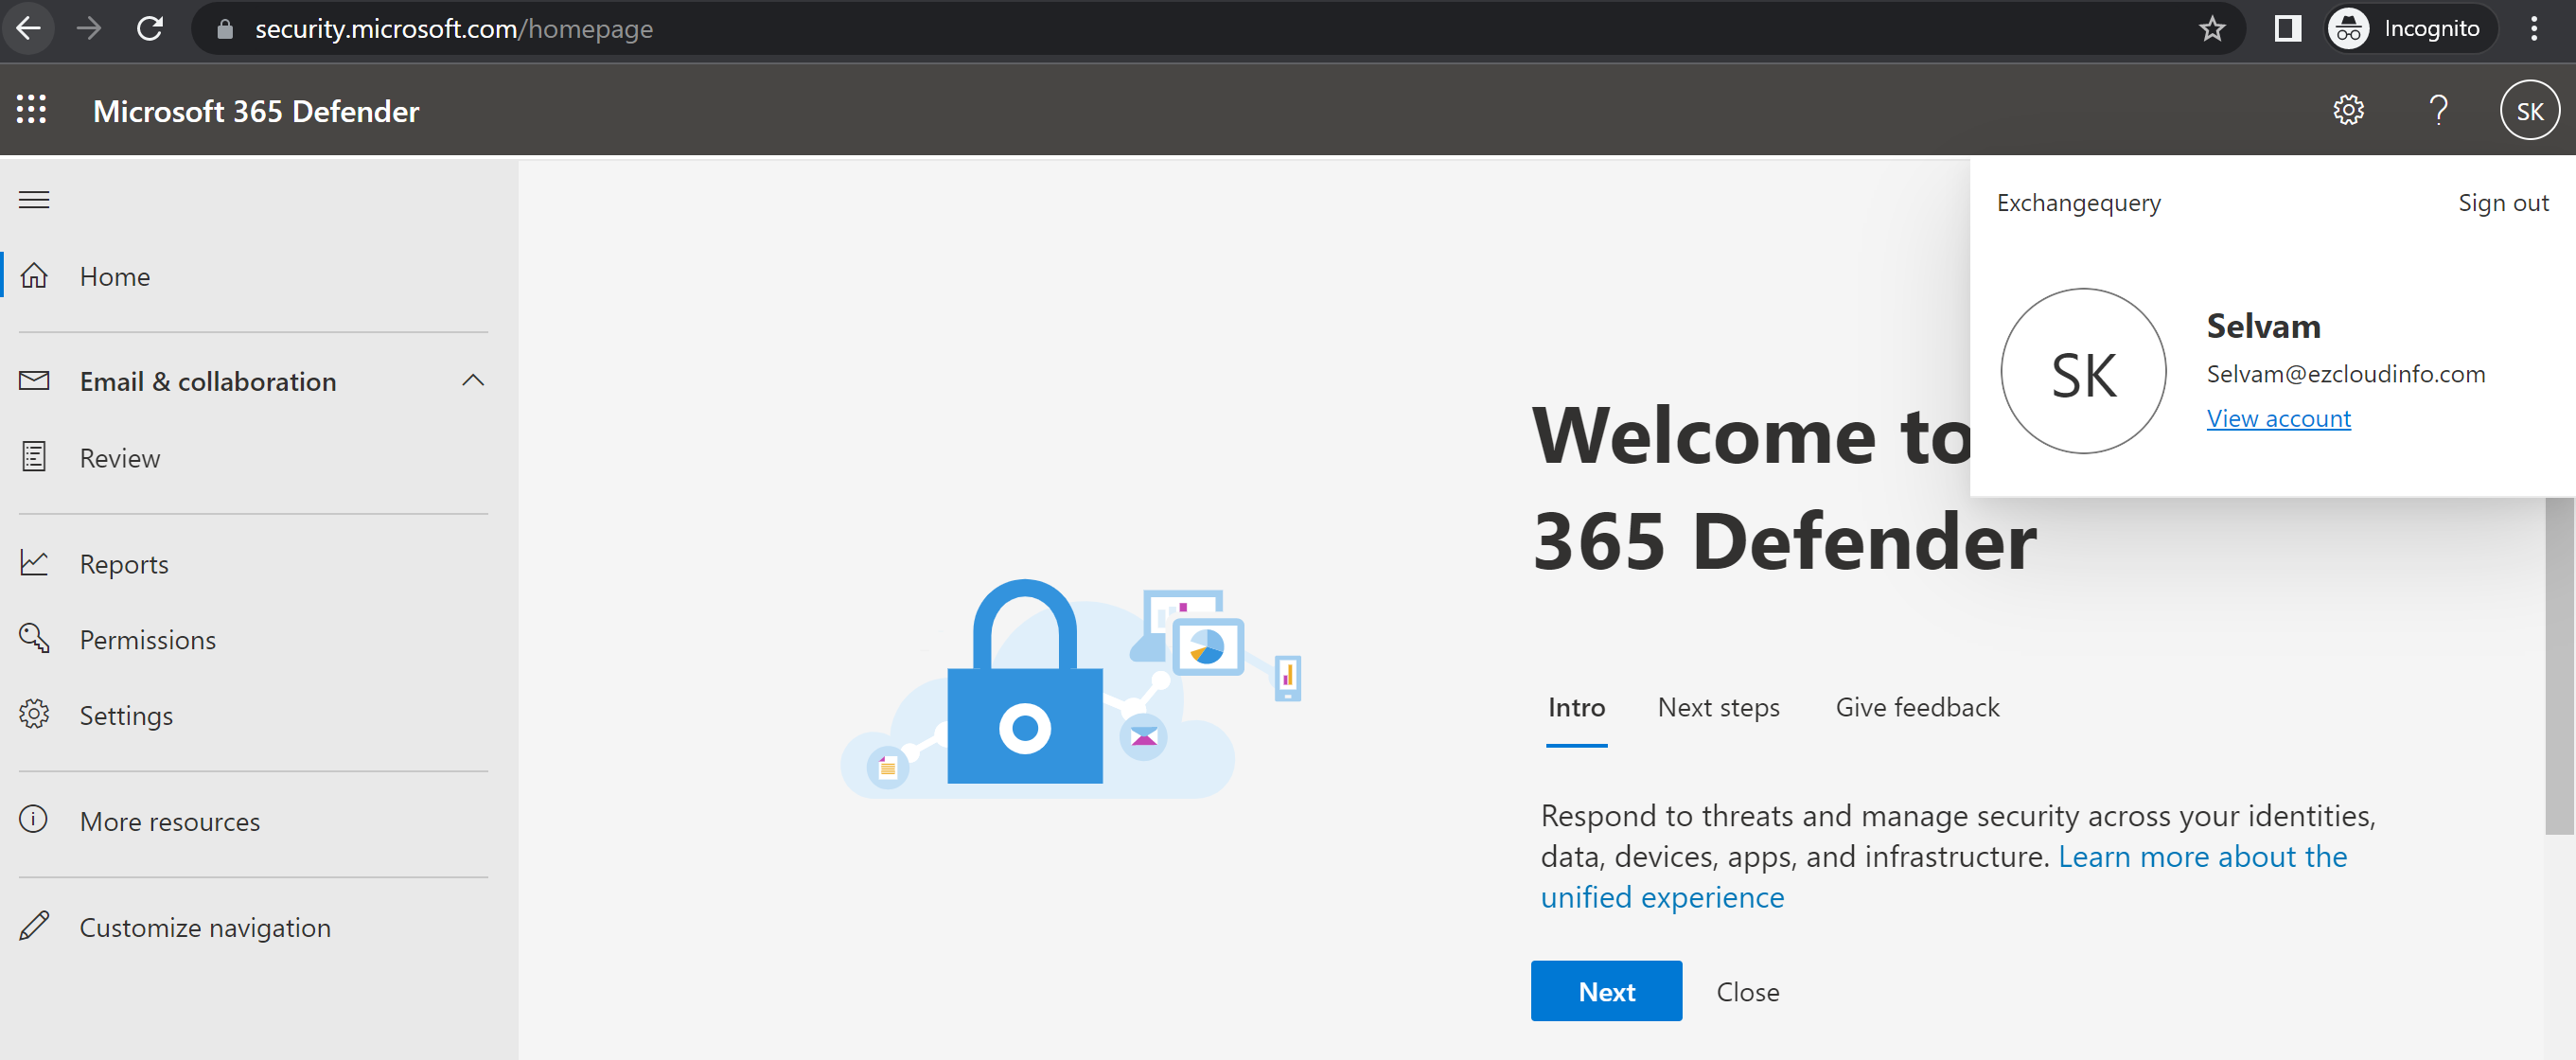
Having done all the permission lets try to see how is the user experience for SOC analyst Selvam
He can see the portal as below when logging to Microsoft 365 defender portal.
However when trying to navigate to threat explorer he gets the below error

Now he goes and activates his PIM role security reader.

Now the role is activated

After a refresh the threat explorer is visible to the user Selvam. But i noticed a small minutes of delay to get the actual permission for the user.
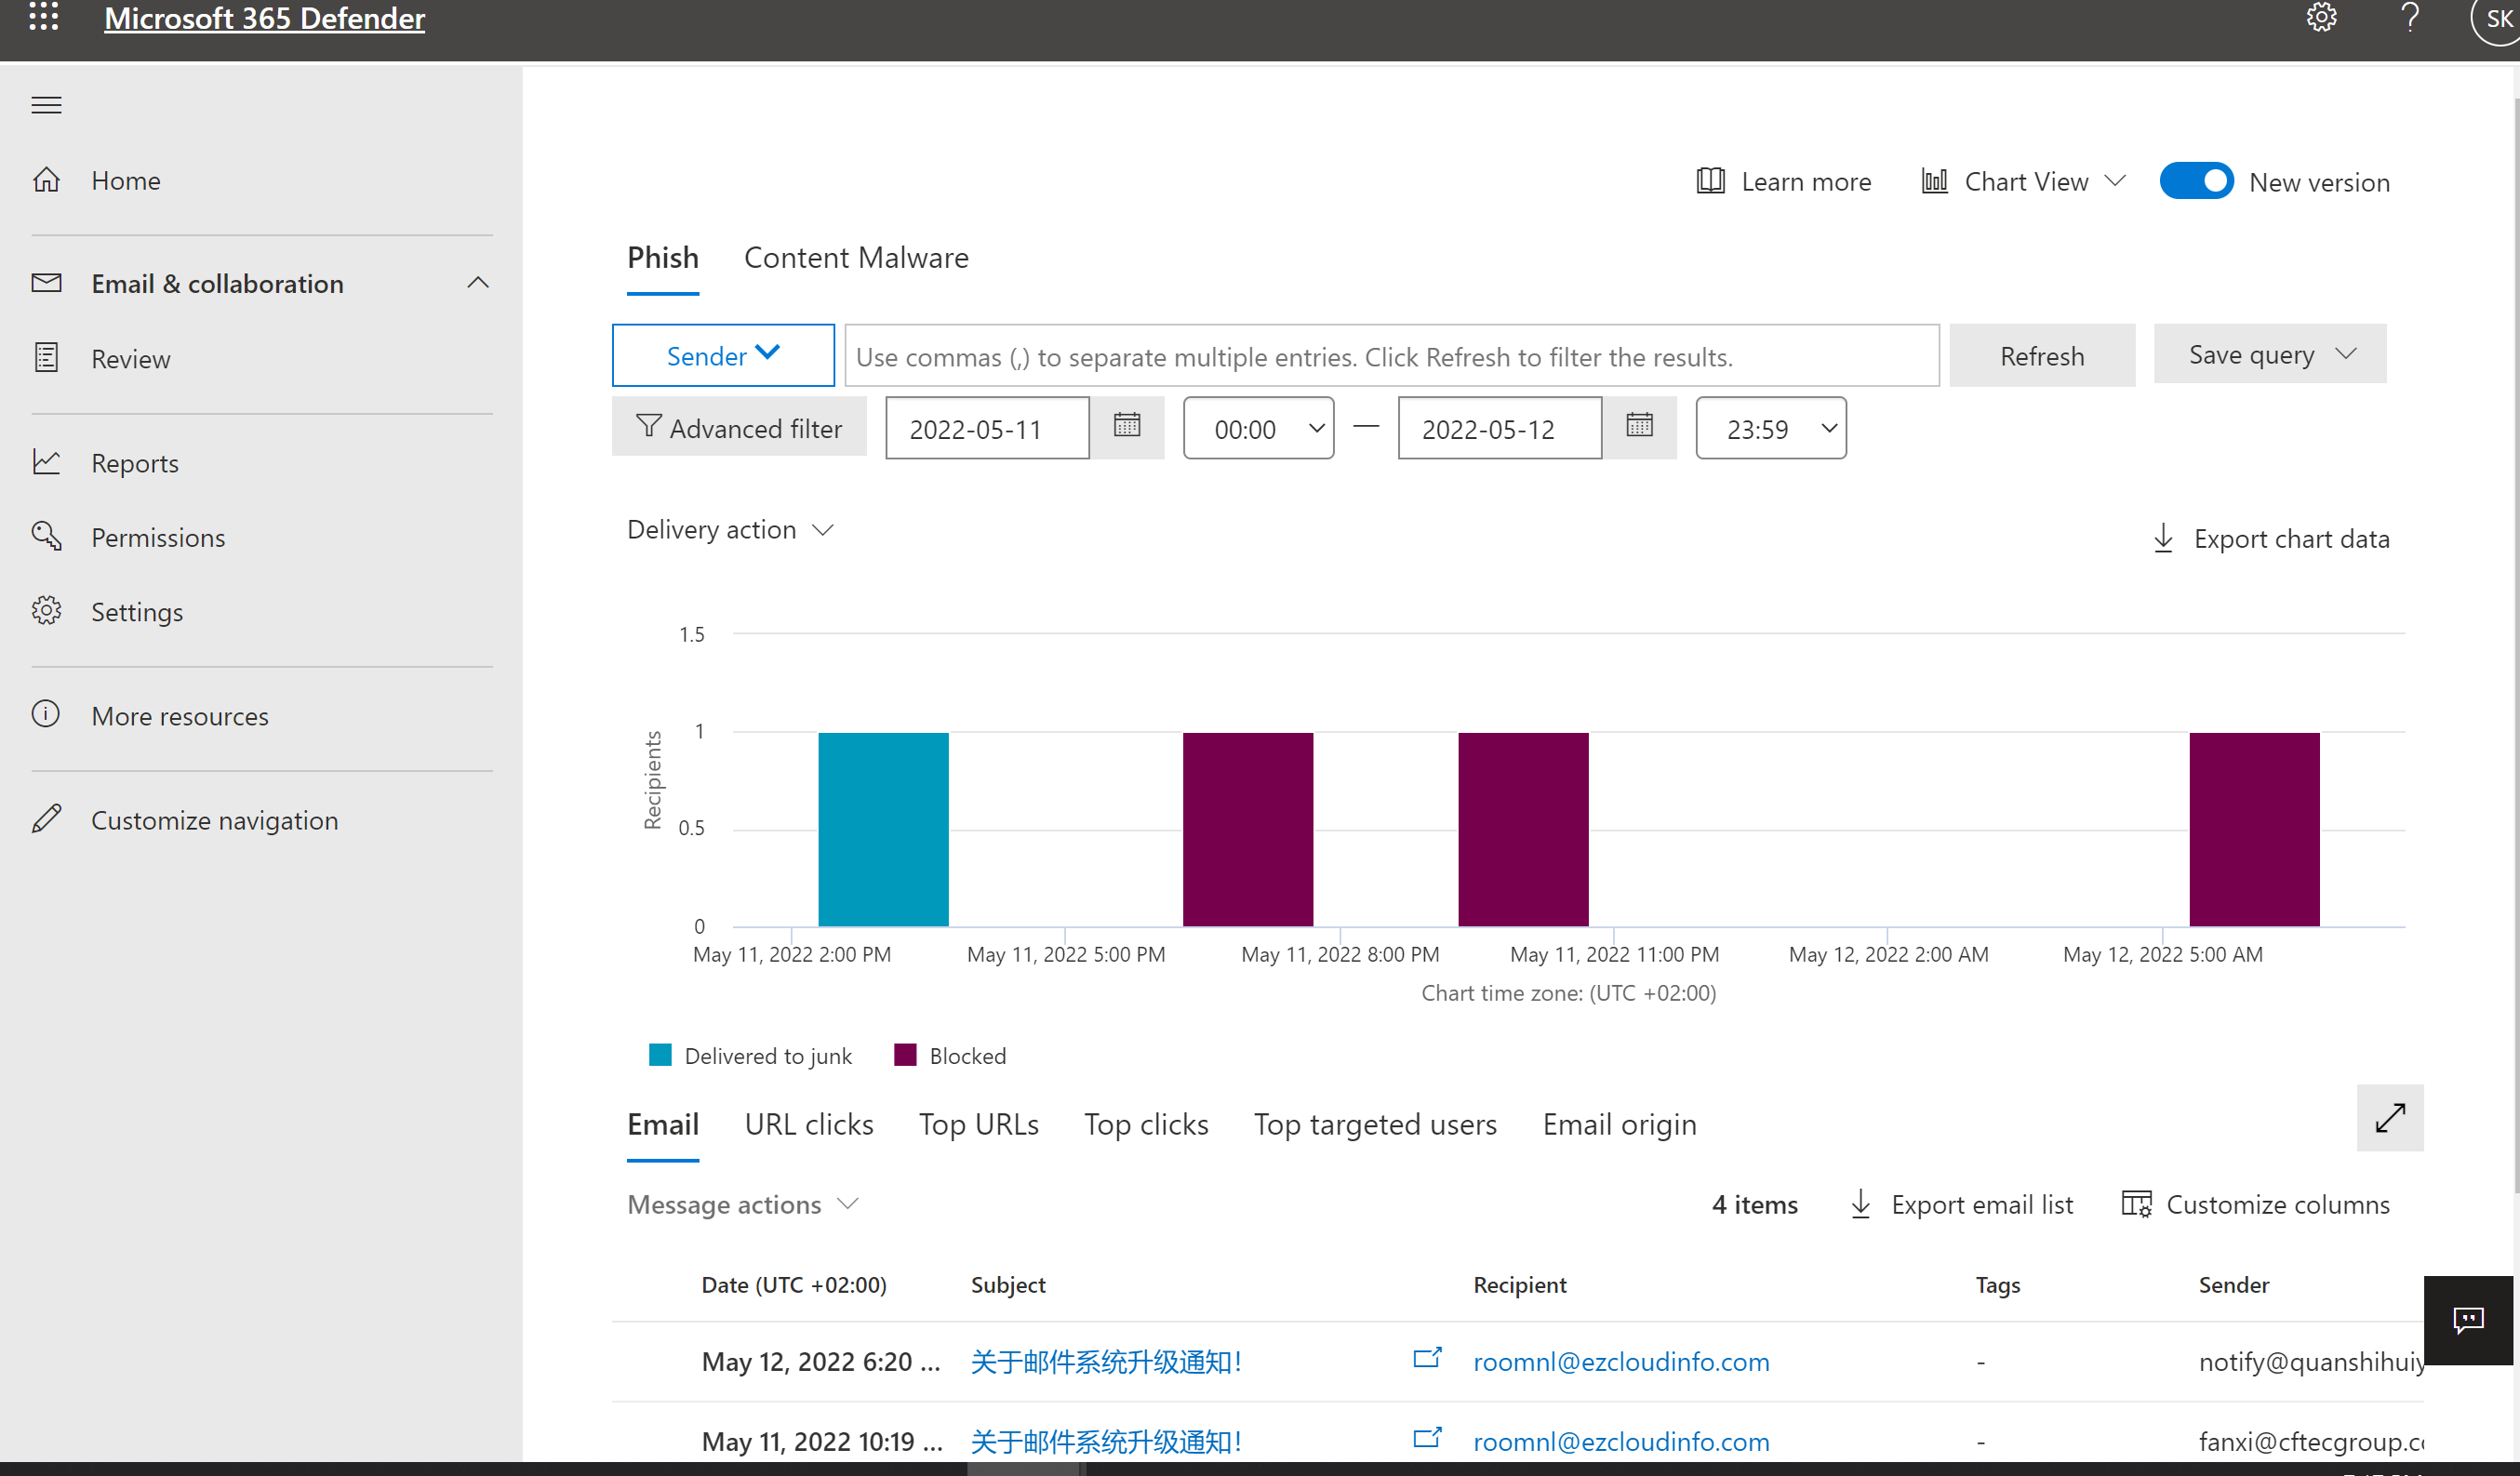
And finally Selvam could search for one sender email address for example like below and when choosing on message actions he is eligible to delete them without any issues.
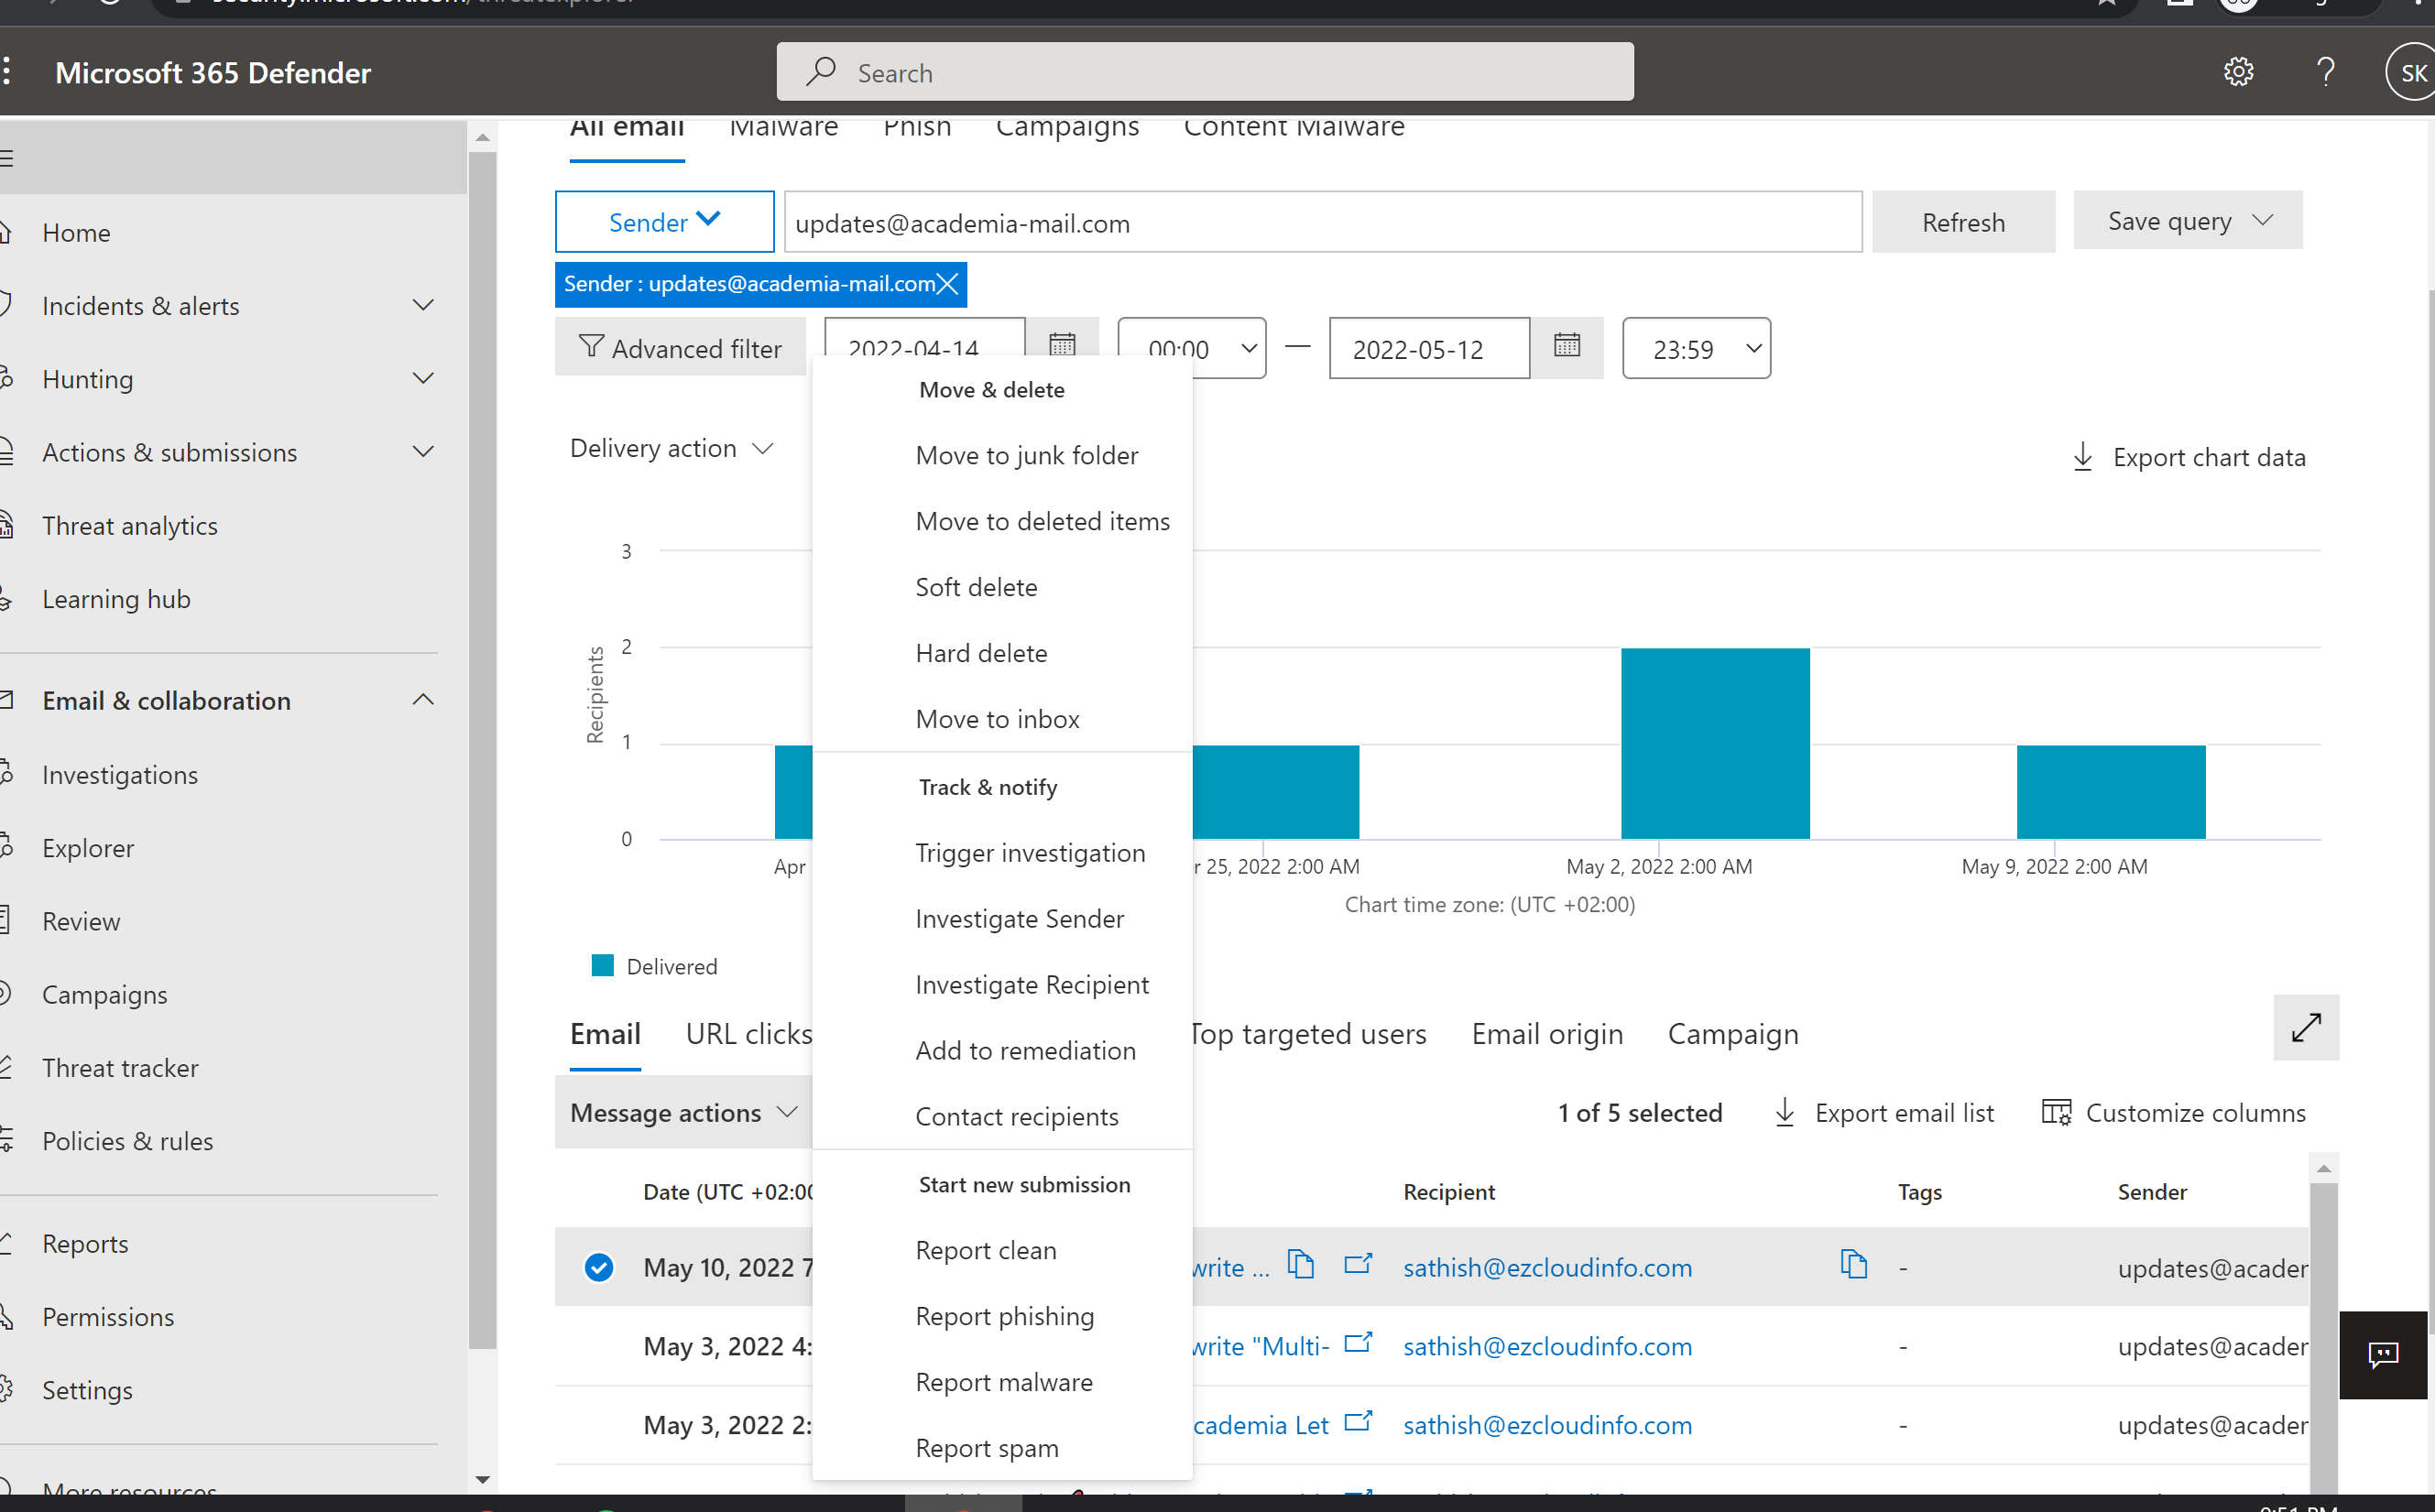
And finally Selvam is also able to delete any suspicious email with the correct trimmed down permission.

With this PIM we have provided great just in time access for this daily operational task. This is a fantastic method to leverage PIM to set up Just-in-Time access to Defender for Office 365 related tasks.
Reference Microsoft Docs – https://docs.microsoft.com/en-us/microsoft-365/security/office-365-security/use-privileged-identity-management-in-defender-for-office-365?view=o365-worldwide


Leave a comment