For the first time in the enterprise platform Microsoft has given the option of an in-place Upgrade for its universal platform .
Since Skype for Business hasn’t changed much with Lync 2013 server architecture,and the hardware prerequisites remains the same. If we have a good hardware configuration or if you have recently migrated to Lync 2013 in your infrastructure this option completely makes sense to perform and inplace upgrade .
This will obviously help in reducing the IT cost for this new deployment and reducing the time required for this new deployment.
Recently our team had an experience in upgrading from Lync 2013 to Skype for business and i this article we will have a look at the best practices and the prerequisites that needs to be followed in the upgrade procedure.
Supported coexistence scenarios for the SFB in-place upgrade:
- Lync 2013 Standard standalone .
- Lync 2013 Enterprise Pool.
- Lync 2013 Multiple pools
- No upgrade path available from Lync 2010 to SFB.
- No upgrade from Lync 2010\2013 coexistence scenarios
Readiness for the upgrade:
- Take a snapshot backup all your servers, This will help you to revert the changes on each server just in case if the upgrade wasn’t smooth with the downtime provided.
- Save the previous Topology and take a backup of them.
- Take a backup of file server.
- If the Lync 2013 is running on Windows Server 2008 R2 then its not recommended to perform an in-place upgrade.
Never upgrade the OS of a Lync server. Install a new pool on a fresh OS and move all accounts and objects over . In-place upgrade will not help in this scenario.
Prerequisites for the upgrade:
1. net 3.5 on FE, Edge and mediation servers.
2. Below hotfixes needs to be installed in following order.
https://www.microsoft.com/en-us/download/details.aspx?id=42162
https://support.microsoft.com/en-us/kb/2919355
https://support.microsoft.com/en-us/kb/2982006
3. RTC local instance should be Microsoft SQL server 2012 SP1 or later.
So make sure on the Lync 2013 FE’s and servers that we are going to upgrade should have a local instance of 2012 SP1 or later.
4. One member server in the same domain where the lync pool resides.
On this we will be installing the SFB administrative tools , upgrade the existing topology and then publishing them. It should be a non-lync server.
5. All the lync servers needs to be updated to minimum 8308.815. Better to have the latest version.
Upgrade can be done in the following order:
1. Install the SFB Administrative tools on the newly introduced member server.
Upgrade the topology in the below order.
a) First upgrade the Front end pool.
b) Upgrade the persistent chat pool.
c) Upgrade the edge server pool.
d) Upgrade the Trusted Application pool.
In-order to upgrade the topology perform the below :
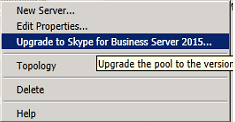
Open SFB topology builder from the newly installed admin server – Right click on the front end pool – Select the option Upgrade to Skype for business server 2015 as below
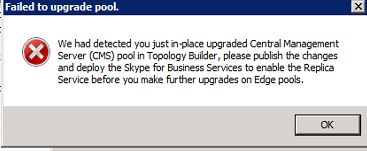
This process will take few minutes and after it gets completed we need to publish the newly updated topology first.
Failing to do this and proceeding with other pools (persistent, edge, Trusted) will result in the below error.
Once the topology is updated and published now we need to upgrade all of the existing lync 2013 servers to Skype for Business.
In-Order to perform that action we just need to run the setup from each servers.
Note: If there is only one front end pool in the deployment (this should be the setup in most of the environments) the servers then there will be user interruption till the pools are upgraded. So it requires a downtime when performing this upgrade.
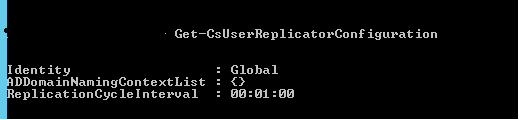
We need to run the below command to make sure that the replicas are up to date
Get-CsManagementStoreReplicationStatus

Before running the setup we need to disable all the services on the existing front end services. Run the below command in the Lync management shell to perform the action
Disable-CsComputer -Scorch
After running the above command make sure that you close topology builder, Lync Management shell , Deployment wizard . Make sure all consoles are closed for the upgrade to complete smoothly.
Once performing the above action just run the setup from each existing lync 2013 servers.Better to start with FE’s , Mediation , Director , Persistent and then Edge.
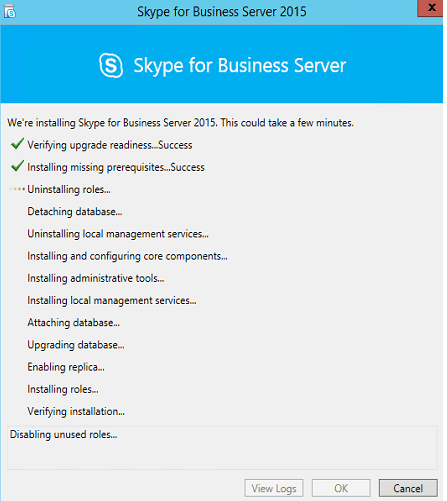
You will be prompted with the below screen.
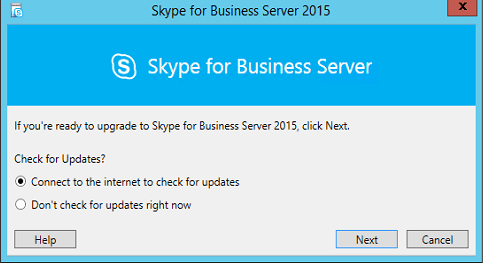
upgrade will go through the process as below
We will get a screen like below on a successful upgrade
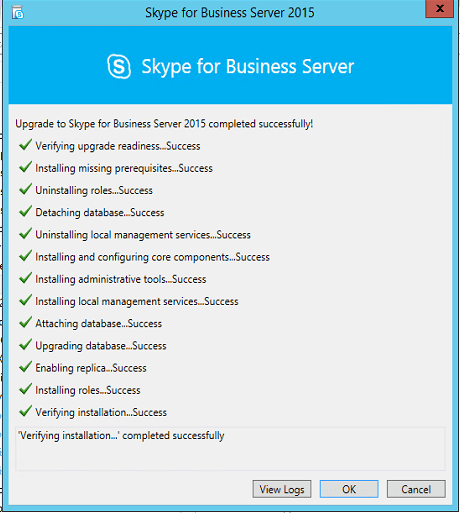
We can continue to point all URLs to the existing pool since its an in-place upgrade and this make this task very easier.
Thanks & Regards
Sathish Veerapandian