Mailbox move from Exchange 2010 to 2016 might stall with the message move status RelinquishedWlmStall

Recently on one of our migration from Exchange 2010 to 2016 we were unable to move the mailboxes from Exchange 2010 and 2016.

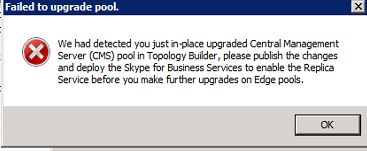
It was giving us the below error and the move request was not progressing

P12

Not sure what was the reason behind this but Below are the possible work around :

 
1) First preferred option is we can submit the new move requests by modifying the Priority to emergency or highest by running the below command.
New-MoveRequest -Identity Mailbox -TargetDatabase “DB Name” -BatchName Test -Priority Highest

There is an option of modifying the workload type of MRS as a whole from Exchange 2016.
But this parameter is reserved only for Microsoft at the moment.
This is because not to change the workload parameter for the move requests since the other operations might be affected and might run out of resources.
Its better to use the above command only which will bypass the WLM throttling and will not disturb the other system operations.
Anyways we do not have an to option to specify this parameter at this moment and as per my view this is good based on the previous line.

2) As a workaround for the ReLinguishedWlmStall Status we can also temporarily change the following registry key:

Change “MRS” value in the Exchange 2016 server

Navigate to  [HKEY_LOCAL_MACHINE\SYSTEM\CurrentControlSet\services\MSExchange ResourceHealth] and set the value to 0 on the 2016 server.
Then restart the Mailbox Replication service.
Now try the move requests

 
3) Also you can create a new management override temporarily until the migration completes by running the below command. But keep this as a last option.

Get-ExchangeServer | ?{$_.AdminDisplayVersion -like “*15*”} | ForEach {New-SettingOverride -Component “WorkloadManagement” -Name “$_ MRS Override” -Server $_.Name -Section MailboxReplicationService -Reason “move request temp” –
Parameters Classification=Urgent -MinVersion 15.0}

Usually they say that this issue might occur if there are any performance issues experienced on the server.
But in my case there was no performance issue experienced by exchange 2016 server.
IMP Note:

These all changes must be done carefully on production environment after careful analysis and investigation.
There are few chances that the other operations might be affected on changing the Work Load Management option.
Keep an eye of the system resources during this process and Make sure that you revert back all the settings once the migration is completed.

If you want to know more on Work load Management there is an excellent write up by MVP Ratish – http://msexchangeguru.com/2015/02/23/exchange-workload-management/

Thanks & Regards

Sathish Veerapandian 

MVP – Office Servers & Services

CodeTwo Exchange Cross Forest Migration

Mailbox Migration in cross forest scenarios is always been a difficult , challenging and will  definitely vary according to the environment, scenario and requirement basis.

In this article i would like to explain the cross forest migration scenarios using the code two exchange migration tool.

In this example we are trying to migrate the mailbox from source different forest to target different forest using the CodeTwo migration tool.

The source will be Exchange 2010 SP3 and the Target will be Exchange 2013 CU10

Lets see the prerequisites before we start this migration job:

Code two says only network and EWS connectivity is enough. But its better to have all these below things in place before starting the migration so that migration can be completed in the provided timeline.

1.Prepare a healthy network link speed for this migration from source to target.

2.Make sure All the required ports/connectivity are open between source Exchange   server\DCs to Target Exchange 2013/and DCs
3.Create a DNS name resolution in source as well as target using conditional forwarders        or by using dummy zones

4.Create AD trust between domains Source and target (Not Mandatory required only if you need to migrate Group)
5. Add the Target domain admin in the built in admin group of source domain.

6. Make sure the MRS proxy is enabled for cross forest move in the target or source domain according to your requirement pull or push
Set-WebServicesVirtualDirectory -Identity “Exch1.fabrikam.com\ews (default web site)” -MRSProxyEnabled $true

Perform the above action depending on the mailbox move you are going to Trigger.

7.Change the autodiscover SRV DNS record to point to Target domain

Once the above prerequisites are set in-place we have to download the software and install them

The setup is normal just need to install with the default settings. You need to install the software where the connectivity is reachable for the EWS .

Note:

a) You can install the CodeTwo setup either on the source forest or on the target based on your requirement.( Push migration or Pull Migration)

b) You should to be able to reach the EWS url of the target domain from the server where you are installing them.

Better to install them on the CAS server where you can reach the EWS of the other domain if  all the prerequisites are set in place.

You will get the welcome screen as below

c1.png

You will run through a normal installation as below

C2.png

On a successful completion of the installation you will get a below GUI


Code3

Now we need to configure the source and the Target domains in the setup

Inorder to perform that do the following steps

Configure the below settings as source where you have installed this application

Go to server connections and select source server

Here we have 2 options to establish a connection

First one will discover the source ews url automatically if its resolvable from the server where this software is installewd.

Second option where we need to manually enter the CAS server FQDN and EWS URL .

Code4

post which we will get the below screen

Code5

After successful configuration you will get a green signal as below.

Code6

The same procedure needs to be followed in the target domain as well .

Need to install the Target server as well

CD9

Once after the source and target domains are defined and successful you can create a new Migration Batch.

Good Features which have identified in this application are below

We have an option to choose the migration batch per OU , Users , Group etc..,

33


You have an option to auto-match the MEU as well

Note: You have to choose the option Auto-match selected mailboxes  only  if similar already existing users are present in the target domain on a different OU.

CD16

We have an option to schedule the migration as well  which is really good.

CD17

The amazing option which is found really beneficiary is below

This is something great option which will help in planning for a migration where we have a weak n/w bandwidth between the source and the forest. By having this we can very well plan a smooth migration without choking the network bandwidth in these kind of scenarios.

CD18


Finally we have an option to choose only the required items to migrate

CD19

This option is very amazing for scenarios where a company is merging or during acquisition.

CD20

Finally we can view the migration job status in the console as below

We have an option to manually choose the target mailbox as well.

Test333


CM3


It keeps us posted about the good status and bad status about the migration as well which is very good.

We also have an option to send notifications to admin mailbox about the migration status as well.

CM6

We have an option to set the maximum number of concurrent moves as well

Cm

Conclusion:

As per my understanding this CodeTwo software uses an excellent coded API .When configured all the prerequisite for the cross forest migration this works in the background with the EWS and gives us these many options features during the migration.

This makes the migration job very smooth and keeps the admin informed about the migration status.We can customize the cross forest migration based on our requirement by using this tool.Once the migration is done you need to perform the normal procedure of shifting the MX records and you are done.

To get Started with them you can refer more on this  CodeTwo Migration

Thanks & Regards

Sathish Veerapandian

MVP – Office Services & Servers

Extending Persistent Chat on Mobile Devices

Currently Skype for business persistent Chat is not supported on mobile devices by default. Only the Lync and Skype for Business  desktop client supports Persistent Chat.

To extend this feature on mobile devices we need to bring an additional component software from MindLink. Mind Link Software is a Microsoft Gold Partner who is offering support for Persistent Group Chat on mobile devices (iOS, Android and BlackBerry). Mind-link are the only developer available at the moment who would be able to fill the gap and extending this functionality to the mobile devices.

In this article we will have a look at configuring MindLink software for Persistent chat feature on mobile

You can download the evaluation version from the below Link

http://www.mindlinksoft.com/products

Basically  they have 3 servers in their architecture which are having different roles if we consider as a whole package.

1) Mind Link Anywhere server – Can be used for Having corporate Persistent chat feature on the Web(like Whats-app web) and integrating SharePoint sites with the chat services.

E.g. below for Mind Link Anywhere :

Having persistent chat on the web

Test.png


Having this chat feature enabled on the SharePoint sites

3.png

2) MindLink Integration server – Used for integrating social  News Feed and  social twitter feed.

3) MindLink Mobile Server – Used for integrating with our persistent chat pool.

So we require only one server at this point to extend persistent chat functionality to the mobile devices.So now lets look into the steps to extend the persistent chat functionality alone  on the mobile devices since we are focusing only on them in this blog.

Hardware Requirements:

Each host machine should meet the following minimum requirements:

  • Dual or Quad core, 64-bit CPU (Minimum 2.4GHz)
  • 4GB RAM
  • Gigabit Ethernet connection
  • 1Gb disk space (80Mb for installation of binaries and up to 1Gb for Preferences to support over 1000 users)
  • Additional Disk Space may be required for storing log files, minimum of 100MB
  • Windows Server 2008 R2, 2012, or 2012 R2

Readiness for the persistent chat integration:

  • A trusted application pool needs to be created between your Lync/SFB server and the MindLink server FQDN or pool FQDN if its multiple servers based on the environment.
  • An URL must be decided for the MindLink server to publish them externally so that users can access them from mobile devices for persistent chat.
  • An SSL certificate must be purchased for the external URL for secure communication.
  • An internal certificate from Trusted CA must be placed in the MindLink server to trust this application pool.
  • Apple device APN’s certificate must be placed on the MindLink server for Apple devices push notifications and revocation check.

Ports and protocol requirements :

  • Port 7072 for socket server needs to be opened
  • Port 7074 for web service needs to be opened
  • Port 7073 for file service needs to be opened
  • APN port 2195 for gateway.push.apple.com needs to be opened


Overall the Architecture of the MindLink provision should look like below


MindLink

Installation :

The installation of the software is very simple. All you need to do is download and install the Mindlink mobile on the new server . MindLink uses REST API. It integrates data from existing Lync servers and persistent chat groups through the trusted application pool.
This allows users to access and discuss information within the right context.
MindLink API provides a straight forward web services layer that simplifies the publishing and dependency on .net platform.

Make sure that you have the local trusted CA, Public SSL for the url published and the apple device APN’s placed on that server in the local computer account.

After this is done we just need to enter the url in the location , import the license file from Mind Link support and start the Mind Link service.

After this what happens is that when a user logs in from the mobile client it reaches the MindLink server. It identifies a trusted application created between the MLM and Lync. Post verification of the user account it provides successful authentication.

You might face some challenges in these customized non standard ports on the firewall to the internet and to the server apart from that rest all would be smooth.

An example below of entering the external host name

Note: Only the first hostname URL is mandatory and rest all are optional. Enter the URL name here that will be publishing outside.

image015.png


This is an example for apple device connection settings

image017

MindLink Mobile App Experience

After successful configuration we just need to enter the URL that has been published externally for this service

image062

After successful login users will have the below option

They can see live streaming of the persistent chat groups where they are member of

They can send and receive  messages in the persistent chat

They can search for persistent chat groups

They can search and IM individuals

Users can receive IM notifications even if they are not logged in to their Lync/SFB mobile client

Users can search for persistent chat messages, hashtag and mention option is also there.

Visible Persistent Chat Groups

image4.3a.jpg

Able to change the IM and Presence

P1

Live streaming of the persistent chat can be seen

P2.png

Overall Features & Limitations:

  • Its a secure Enterprise Group Chat compatible with Microsoft Lync & Skype for Business.
  • IM Presence can be updated.
  • They cannot participate in audio and video calls from this application.
  • Currently users have the ability to open files which are sent from Lync desktop.
  • File Transfer and sharing from the application is not available at the moment.However an option to insert a weblink option in the chat is available.
  • Custom Ports for the application to be accessed from externally is little bit difficult. Its not possible to change them to the default ports since the application API is configured to bind and listen on these ports 7072,7073 & 7074 only.

Thanks 

Sathish Veerapandian

MVP – Office Server & Services


Exclaimer signature manager for on-premise

Maintaining the signature format uniformly for all the users is really a difficult task.Also the signature format will be changing on department, user and job role basis.

At times there might be a requirement to modify the signatures for departments based on events as well.

As an admin it  will be very difficult if you are not having any centralized signature system for the messaging systems.

Out of the available signature applications in the market i always prefer Exclaimer based on their support and options available in their product. In this article we will have a look at configuring the Exclaimer Signature and run through some of the options available in their product.

The installation and configurations are very simple since it is just a transport agent which will be triggered in the categorizer  part and signature will be applied. So this application has to be installed on a server where the transport categorization takes place.

In Exchange 2010 this application needs to be installed on the Hub Transport server

In exchange 2013 & 2016 it has to be installed on Mailbox servers.

One thing we need to make sure is that it has to be installed on all the HUB servers if its exchange 2010 and all the mailbox servers if its exchange 2013 & 2016. This is because the Mail-routing can happen in any of the available transport services and this application needs to be there to trigger in the categorization part.

The installation is pretty simple and straight forward which is very easy .Just need to download the application and install them.

The application can be downloaded from below url

https://www.exclaimer.ae/signature-manager-exchange-edition/download

Ex1

We have the option to keep a backup of the previous configurations which will be easier to revert.

There is option called remote deployment where we need to configure a shared folder for the exclaimer images, configuration files to be stored in a common location so that all the transport servers can be updated without any delay.

EX01.png

Below are the options available for the sent items configuration which are pretty much easier to understand.

It has a temporary file folder where it processes all the signature as a cache before applying them. You can specify a drive on your own.

Ex03

After a successful installation we  will get a screen as below

We can have multiple signature policies based on department, Organizational Unit and apply to respective ones.

Ex09

So this signature pulls all the information like Name, Company, Phone Number ..etc from the information present in the mailbox.

So all we need to do is to create a new policy choose and apply the desired values as below from the new created template

Ex04

We have an option to change the element behavior , layouts as well.

ex05

Note: We need to make sure that all the user information like Name, Phone Number, Company are updated. Only then it will update the information from the User object and reflecting in the signature. If the field is not updated then the information will show empty.

The signature can be customized further as well by adding an image, hyperlink to the attached image to them. All kinds of alignments, layouts can be done for the same.

Ex11

Moreover we have an option to edit the source code of the HTML which is a great amazing feature. By having this option we can customize the signature templates of our own according to the requirement.

Ex12.png

There are multiple options available to apply signature based on the requirement.

An example below.

EX8

Also we can set exceptions for few users who does not like to have this automated signature policy.We have an option to apply the signature only on a specific date and after that it will be disabled automatically.

There are more features and options available to explore on this product.

Overall we will get a very good support, latest updates, very simple installation configuration  and more features available to customize with this  exclaimer application. And so far with all versions of exchange this product has been always a bread and butter and haven’t caused any issues in terms of considering them as a third party Transport Agent.

Thanks & Regards
Sathish Veerapandian

MVP – Office Servers & Services

Connect Bridge – Synchronize the Exchange Mailboxes

If  you have more Exchange mailboxes  with Multiple servers in different sites , or  you have a hybrid setup in your organization we would always like to keep these mailboxes synchronized without any delay.

This article will describe one solution that brings synchronization of mailboxes to reality with a product named  CB Exchange Server Sync.

The CB Exchange Server Sync Tool is an application dedicated to synchronize Microsoft Exchange user folders. Users and folders can be located either on the same version and instance of Exchange Server or they can be located on multiple instances and different versions.

The tool is a Windows service that performs synchronization of selected mailbox folders pairs based on periodical run. You can specify the synchronization pairs via Manager Tool (UI for configuration of CB Exchange Server Sync), which is distributed within the installation package.

Supported Exchange versions:

  • Microsoft Exchange Server 2010
  • Microsoft Exchange Server 2013
  • Office 365

Below are the key features identified in the product:

  • Synchronize email folders
  • Synchronize contacts
  • Synchronize tasks
  • Synchronize calendar
  • Synchronization between different Exchange versions
  • Easy to install and to maintain
  • Separate Custom configuration for each synchronized user
  • Provides run-time information about the executed sync operations
  • Multiple tenants
  • One-way and two-way synchronization

Components involved in the Functionalities:

The synchronization tool consists of:

The synchronization service looks for the changes in the synchronization pairs and process the synchronization with help of Connect Bridge. The synchronization pair is the ‘structure’ of the two users and folders which will be synchronized (e.g.: user1@a.com user2@b.com Inbox folder).


1. Connect Bridge

Connect Bridge is used for internal communication with Microsoft Exchange. Connect Bridge is a powerful integration platform that allows you to connect to the target system through ODBC, JDBC driver and Web Service with 31 connectors. So basically, you can connect at least 31 target systems such as Exchange, Google, Microsoft CRM, SharePoint and many other LOB’s simultaneously in different environment (on prem., cloud, hybrid) and with a bidirectional communication. There is no need for you, as a developer, to study documentation and know the language of the target system. You can simply use SQL statements to communicate with the target system. To get a general overview about the architecture of the tool there is a bunch of useful videos and online documentation.

2. Sync Process Description

Most profound explanation is through a short showcase description. Let’s talk about synchronization of two Exchange accounts one on premise (2010) while the second is hosted on cloud (2013). Setting a connection strings as “Master” and as a “Slave” are just for an easy recognition, Connect Bridge handles both systems equally.

Below string example for MASTER & SLAVE connection

6666

The process is quite simple and straight forward. The application seeks for inserted, updated and deleted items within both synchronized mailboxes. This is done within Exchange quite simply. The Exchange provides possibility to obtain changes since some ‘time stamp’.

Below is the example of how the sync works without any delay

6667.jpg

After the application obtains information what was inserted, deleted or updated, the logic of the CB Sync has to decide which action needs to be done to perform corresponding operations correctly.

In case items are inserted on the “Slave side” the logic needs to import those inserted items to the “Master side” of synchronization and remember the item pairs internally because it is needed for next possible operations (update, delete). In other cases if update or delete occurs the logic needs to find internally the pair of the item and make corresponding operation.

Below video is a real time example of how the synchronization works


Final Conclusion:

CB Exchange Server Sync brings benefits to  example lawyers , Auditors who work for different companies, university teachers who teach on more universities, chairman of the board and basically to all people who need to arrange all their tasks, meetings and duties ordered perfectly in one Exchange app instead of logging on and off in multiple accounts which can lead to duplicate meetings, bad user experience, unnecessary business mistakes etc.

Worth mentioning is a feature which can cover privacy of Exchange users. Let’s say you have a department in your company with high security clearance using their own Exchange server and other departments which don’t have security clearance have their own Exchange server.

Problem arises when employee of Marketing Department needs to schedule a meeting for employees with high security clearance. They need to know exactly when is their schedule free without breaching security model of the company (access details of already set appointments).

CB Exchange Server Sync can reveal needed information to set up a meeting while still be able to protect security model of the company. This is one of the many scenarios you can cover with CB Exchange Server Sync.

In the near feature they are about to create the Software as a Service (SaaS) product out of it so it  could come closer to customers and simplify the whole process to “ready to use in one-click”.

Thanks 

Sathish Veerapandian

MVP – Office Servers and Services

Inplace upgrade from Lync 2013 to Skype for Business

For the first time in the enterprise platform Microsoft has given the option of an in-place Upgrade for its universal platform .

Since Skype for Business hasn’t changed much with Lync 2013 server architecture,and the hardware prerequisites remains the same. If we have a good hardware configuration or if you have recently migrated to Lync 2013 in your infrastructure this option completely makes sense to perform and inplace upgrade .
This will obviously help in reducing the IT cost for this new deployment and reducing the time required for this new deployment.

Recently our team had an experience in upgrading from Lync 2013 to Skype for business and i this article we will have a look at the best practices and the prerequisites that needs to be followed in the upgrade procedure.

Supported coexistence scenarios for the SFB in-place upgrade:

  1. Lync 2013 Standard standalone .
  2. Lync 2013 Enterprise Pool.
  3. Lync 2013 Multiple pools
  4. No upgrade path available from Lync 2010 to SFB.
  5. No upgrade from Lync 2010\2013 coexistence scenarios

Readiness for the upgrade:

  1. Take a snapshot backup all your servers, This will help you  to revert the changes on each server just in case if the upgrade wasn’t smooth with the downtime provided.
  2. Save the previous Topology and take a backup of them.
  3. Take a backup of file server.
  4. If the Lync 2013 is running on Windows Server 2008 R2 then its not recommended to perform an in-place upgrade.
    Never upgrade the OS of a Lync server. Install a new pool on a fresh OS and move all accounts and objects over . In-place upgrade will not help in this scenario.


Prerequisites for the upgrade:

1. net 3.5 on FE, Edge and mediation  servers.

2. Below hotfixes needs to be installed in following order.

https://www.microsoft.com/en-us/download/details.aspx?id=42162

https://support.microsoft.com/en-us/kb/2919355

https://support.microsoft.com/en-us/kb/2982006

3. RTC local instance should be Microsoft SQL server 2012 SP1 or later.

So make sure on the Lync 2013 FE’s and servers that we are going to upgrade should have a local instance of 2012 SP1 or later.

4.  One member server in the same domain where the lync pool resides.

On this we will be installing the SFB administrative tools , upgrade the existing topology and then publishing them.  It should be a non-lync server.

5.  All the lync servers needs to be updated to minimum  8308.815. Better to have the          latest version.

Upgrade can be done in the following order:

1.  Install the SFB Administrative tools on the newly introduced member server.

Upgrade the topology in the below order.

a) First upgrade the Front end pool.

b) Upgrade the persistent chat pool.

c) Upgrade the edge server pool.

d)  Upgrade the Trusted Application pool.

In-order to upgrade the topology perform the below :

Open SFB topology builder from the newly installed admin server – Right click on the front end pool – Select the option Upgrade to Skype for business server 2015 as below


01

This process will take few minutes and after it gets completed we need to publish the newly updated topology first.

Failing to do this and proceeding with other pools (persistent, edge, Trusted) will result in the  below error.

02

Once the topology is updated and published now we need to upgrade all of the existing lync 2013 servers to Skype for Business.

In-Order to perform that action  we just need to run the setup from each servers.

Note: If there is only one front end pool in the deployment (this should be the setup in most of the environments) the servers then there will be user interruption till the pools are upgraded. So it requires a downtime when performing this upgrade.

We need to run the below command to make sure that the replicas are up to date

Get-CsManagementStoreReplicationStatus

imp

Before running the setup we need to disable all the services on the existing front end services. Run the below command in the Lync management shell to perform the action

Disable-CsComputer -Scorch 

After running the above command make sure that you close topology builder, Lync Management shell , Deployment wizard . Make sure all consoles are closed for the upgrade to complete smoothly.

Once performing the above action just run the setup from each existing lync 2013 servers.Better to start with FE’s , Mediation , Director , Persistent and then Edge.

You will be prompted with the below screen.

RE.png

upgrade will go through the process as below

33

We will get a screen like below on a successful upgrade

3366556.png

We can continue to point all URLs to the existing pool since its an in-place upgrade and this make this task very easier.

Thanks & Regards

Sathish Veerapandian

Foreign Connectors VS Delivery Agent connectors

Over the period of time these foreign connectors have been playing a major role in handling the non SMTP messages from the applications and FAX machines.

These foreign connectors manage a file transfer system process to route inbound/outbound messages from a NON-SMTP systems.

For outbound systems it uses the drop directory where applications must create and submit their own messages to this drop directory .
These foreign connectors checks if the messages are properly formatted (MIME)
and then move them to the drop directory. From here Exchange has done its job and its the responsibility of the NON-SMTP system to pick these messages and deliver them.

For the inbound flow the message should be submitted to to the replay directory from the non-smtp system. We need to make sure that the submitted messages are properly formatted in MIME or TIFF(Usually used format) so that  exchange picks them up, processes these messages and delivers them to the directory.

Usually these directories are not scoped to these connectors and we need to run the below command  an example below

Set-ForeignConnector -identity Test -DropDirectory \\exchange2010\share

Running the above command will create a shared directory for the outbound so that after exchange drops the email the non-smtp system will pick these messages for delivery.

From Exchange 2013 these foreign connectors have been depreciated.Since it uses  file transfer systems to route the messages through drop(outbound) and replay (inbound) the sender will not be aware if the message has been delivered to the recipients.

But still this foreign connectors can be configured in Exchange 2013

From Exchange 2013 Microsoft recommends to have the delivery agent connectors which is having a simpler configuration compared to the foreign connectors.

Below are the advantages of having the delivery agent connectors:

  1. There is no need to manage file transfer to a Drop directory and check the drop directory quota, permissions etc.
  2. We can use the queue management for messages that are routed to non-smtp systems through this method.
  3. We can verify and acknowledge the message delivery to which is a major benefit when compared to foreign connectors.


Each delivery agent is associated with a Delivery Agent connector, which queues messages routed to the delivery agent for processing and delivery to the non-SMTP device or system

A delivery agent is a component installed in the Transport service of a Mailbox server.
Example there is a Citrix Virtual Delivery Agent which is used for one of the citrix application to route the non smtp messages.
If there is a agent required for your non-smtp system then we need to install that agent on Mailbox servers of exchange 2013 & 2016

By Default there is a text messaging Delivery Agent connector.
This is an agent which is installed by default in the Mailbox Servers of Exchange 2013 & 2016.
This delivery agent connectors are available from exchange 2010 where they are present in hub roles.

By default it will have only the default mobile delivery agent connector. You can see the delivery protocol is mentioned as MOBILE.

So for other delivery agent connectors we need to specify the protocol types.

D1.png

Example if we need a delivery protocol as x400 which most of the fax applications and non-smtp application uses we need to run the below command.
New-DeliveryAgentConnector -Name “Contoso X.400 Connector” -AddressSpaces “X400:c=US;a=Fabrikam;p=Contoso;1” -DeliveryP
rotocol “X.400” -SourceTransportServers Mailboxserver

D2.png

After performing the above the  message is routed to a Delivery Agent connector, the associated delivery agent performs the content conversion and message delivery.

Thanks

Sathish Veerapandian

Troubleshooting addressbook issues in Lync 2013/Skype For Business


You might come across a scenario where end users might report that they are not able to search for contacts  through Lync/Skype for Business client.

In this article i have collected few troubleshooting steps based on my experience which might help in addressing these kind of issues

Before looking into troubleshooting lets have a small idea on the address book synchronization :

The address book creation in Lync client happens separately and it never talks to Exchange.

The core component user replicator which was introduced from Lync 2010 contacts Active Directory very frequently once in every 60 seconds and updates the information of the users present in the Lync server. This interval is set by default and can be altered.

These updated information is stored in the backend SQL database named RTCab.

After the above job is completed it doesn’t mean that the address book is updated.After this the responsible server for  update process of  address book will start a synchronization pass once in every 24 hours usually 1:30 AM local server time.

This information will be updated in the address book files in the shared folder in the type dabs file.

So by looking into the above process there can be so many factors which might block searching the address book from client perspective.

Below  troubleshooting steps which might help in fixing these issues.

1)  First identify how many users are affected. Check the version of the client Lync 2013, Skype for business 2015 or Skype for Business 2016 client.

Pick any one of the affected user and perform the below tests.

From the affected PC try to access the URL you have published for lync  https://webs.contoso.com/abs and see if you get the authentication prompt.

If you are not getting the authentication prompt then there is some serious issue with the connectivity from your end reaching the server. You have to fix this issue.

2)  Run the command Get-CsUserReplicatorConfiguration and see the replication cycle interval.

Lync2

The replication cycle interval by default is 60 seconds. If this value has been modified then we need to wait till the replication interval period gets completed.

3)  Its better to check the Synchronizepolling interval .This is the value which the addressbook server looks for any pending synchronization events for the lync users.Because there are more chances this value might be altered if you don’t want to happen this for every 5 minutes. In that case we need to wait till the interval period completes or run the Update-CsAddressBookConfiguration.

This value can be altered from 5 minutes to 3 hours.

Lync3

4) Check the Csclientpolicy

Run the command Get-CSClientPolicy and see the AddressBookAvailabilty configuration.

Lync1

Basically there are 3 options which we can set based on our requirement for this Lync/Skype for business address book availability.

a) Websearchandfiledownload.

b) Websearchonly.

c) FileDownloadOnly.

Its very self explanatory based on the names that we have for the addressbook.

By default this value is set to Websearchandfiledownload only. By having this option what it does is a local address book cache file from each client will be downloaded from the server. After that the Lync client will use the local cache. In-turn it will use the websearch functionality to download the user photos only.

So basically it takes 24 hours of time to have a fully updated local cache files.

When we have a web search only option  it does a direct lookup to the RTCAB database which will give the fully updated information for the lync/SFB clients. This is more or less similar like difference between having users in Outlook Cache Mode and in online Mode.

It would be better if we have a separate client policy only for the top VIP users. This will help them to see all the updated information from the Active Directory.

Inorder to create the client policy you can run the below command

New-CsClientPolicy -Identity VIP -AddressBookAvailability WebSearchOnly.

You can use this option for all users as well if we have less number of users where the user attribute changes happens very often and provided your network bandwidth is strong.

5) One last step that we can try is to run the below command.

The output of the command result should say there are no unindexed or abandoned objects.

Lync4

If you see any errors on them then you can try running Update-CSAddressBookConfiguration and see if it helps.

Hope this helps

Thanks

Sathish Veerapandian

MVP – Exchange Server 

Quick Tip – legacy log off mode for Exchange 2016 OWA logoff request

As we know the importance of securing the web applications which are published on the internet have been increased.
So usually these external url’s are published in a secure way via reverse proxy which will handle this job.

When a end user logs into the OWA URL the session proxies via the published reverse proxy.
From Exchange 2013 we can notice that clicking on logoff will not trigger GET/OWA/Logff.owa like it was till Exchange 2010 where it generates a logoff page owa/auth/logoff.aspx?Cmd=logoff&src=exch
This log off page in 2010 was used by few Reverse Proxy to terminate the connection. This value can be modified in Exchange 2013 web.config file to bring this same page like 2010.

On Exchange 2016 we need to perform the below operation :

Navigate only to the below location

%ExchangeInstallPath%\ClientAccess\OWA\web.config

Remove the following line and do iisreset(make sure you make a backup of web.config before you do this):
<!– Disable logout page temporarily until UX is updated –>
<add key=”LogonSettings.SignOutKind” value=”LegacyLogOff” />


After performing this action the cookie session can be terminated.


Thanks 
Sathish Veerapandian

MVP – Exchange Server

Create private key and certificates for load balancer ,firewalls through Certificate Authority

All of the Load balancer’s require an SSL certificate since they use HTTPS as a front end listener for all of the services that are handled by them.
So basically a certificate is very much mandatory here to terminate the incoming connections and then decrypt the requests from the clients and sending them to the appropriate instances.
In order to install the SSL certificate on your load balancer , you must create a certificate request , submit them to a CA , get them signed by your internal CA or a third party trusted CA and then installing them on your load balancers.

Before creating a CSR, the applicant first generates a key pair, keeping the private key secret.
The CSR has the public key chosen by the requester. So in most of the cases these CSR gets generated from a web application and the private key is not shared and is stored in the application itself.

In most of the cases SSL certificate for these load balancers can be either a self-signed certificate or a trusted Certificate Authority (CA) certificate.

A self-signed SSL certificate is a certificate that has been signed by its own private key

A trusted CA is an SSL certificate that is signed by a CA’s private key

Though there is an option to create a self signed certificate,most of the load balancers recommends using only a trusted CA certificates since it is more secure than using self-signed certificates.

In this article we will have a look at generating a certificate through CA for a load balancer.

First in order to create the CSR request we need to login to the certificate authority (certsrv) and submit the CSR request with your internal IP of the load balancer

usually it is https://yourinternalCAserver/certsrv

CA


Now select the 2nd option in the next page as below

CA1


Now select the 1st option as shown below

CA2

Next comes the main page where we need to provide the ip address of the load balancer as the common name for which it will generate the CSR from the CA server and submit to the CA.

In the name section we need to make sure that the IP address is specified

We need to make sure that we are selecting the option mark keys as exportable which will allow us to export the private and the public key (for giving the key pair) to the load balancer.

Also we need to make sure that we select the format as PKCS10

CA3


once the request is submitted you need to go to the home and click on  view request status

CA4

You will get the status of the pending requests as below

CA5

Once you click on this you can see this certificate will be issued to the CA for verification.

On a successful submission of this CSR this request will go to the CA in the pending queue and will show in the pending requests.

Then we need to go ahead and issue this certificate from the pending requests

Once the certificate is issued successfully you can go to the issued certificates and there we can see this certificate. When we double click on that certificate and in the general tab we will see an information that says you have a private key that corresponds to this certificate.


CA6

So this ideally means that the private key as well as the public for the load balancer is generated from the certificate authority in my example. And it was my CA who generated the private key and the CSR request.

Now  we need to export this certificate in the pfx format with the keypair (private & public) and then import them on the load balancer.

So now while exporting this certificate i need to export the certificate with the below option

CA7

Once exported we can install this certificate on the load balancer.

Disclaimer:

We need to be very careful while working with certificates .In the above method key-pair will be generated and this key pair should not be shared to any of the external parties. Sharing this key-pair to any of the third parties will easily compromise your whole network since they are load balancer certificates. Proper planning and understanding of the scenario according to your environment needs to be done before performing such kind of tasks.

Hope this helps !!

Thanks 

Sathish Veerapandian

MVP – Exchange Server