
In today’s hybrid work environment, secure access to internal resources without relying on traditional VPNs is a key requirement. Microsoft Entra Private Access, part of the Global Secure Access suite, enables Zero Trust-based connectivity to private applications hosted on-premises or in private networks.
In this demo, we’ll walk through setting up a home lab using an Azure tenant, installing the Entra connector, and configuring access to a Synology NAS as a private application—all from a personal laptop and home network.
Before starting, make sure you have:
- Microsoft Entra ID tenant with Global Secure Access enabled.
- Microsoft Entra Global Secure Access license (Private Access feature).
- Windows 11 Pro device (required for advanced networking and policy support).
- Device joined to Microsoft Entra ID (Azure AD joined or Hybrid joined).
- Intune-managed device for policy enforcement and NRPT configuration.
- Administrative access to your Azure tenant and local machine.
- Microsoft Entra Connector installer downloaded from the Entra Admin Center.
- Global Secure Access Client installer for Windows.
- Internal resource (Synology NAS or similar) reachable on your home network.
- Internal IP address of the resource (e.g., 10.0.x.x).
- Optional DNS setup:
- Private DNS zone or hosts file entry for FQDN (e.g., demo.synology.me).
- Self-signed certificate (optional) for HTTPS access.
- Internet connectivity for connector registration and client sign-in.
Step 1: Prepare Your Internal Resource
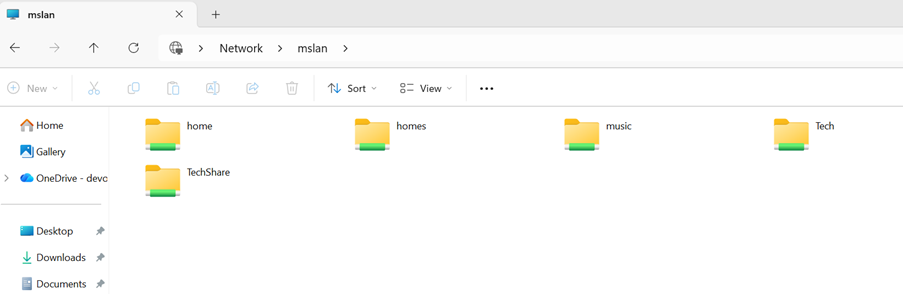
For this demo, we’ll use a Synology DiskStation as the internal resource.
- Ensure your Synology NAS is powered on and accessible on your home network.
- Note its IP address (e.g., 10.0.0.8) and the services you want to expose (e.g., DSM web UI on port 443).
In my case this is the Synology NAS and accessible from the test laptop where im demoing the Microsoft Entra Private Access
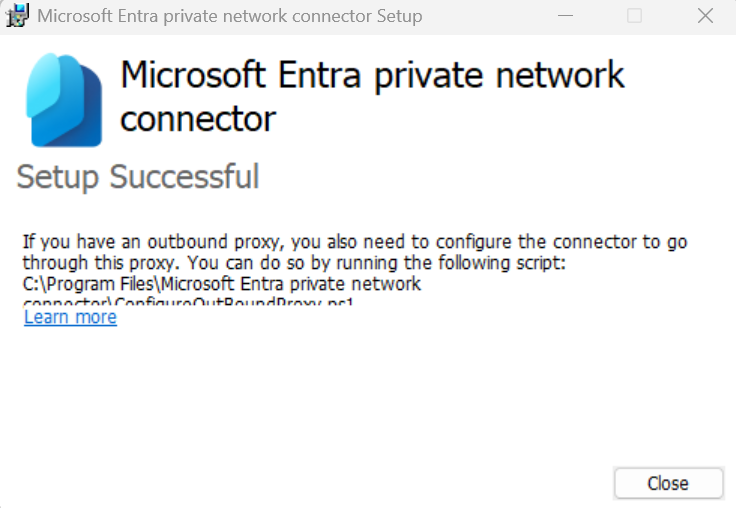
Step 2: Install Microsoft Entra Connector
- Download the connector from the Microsoft Entra Admin Center.
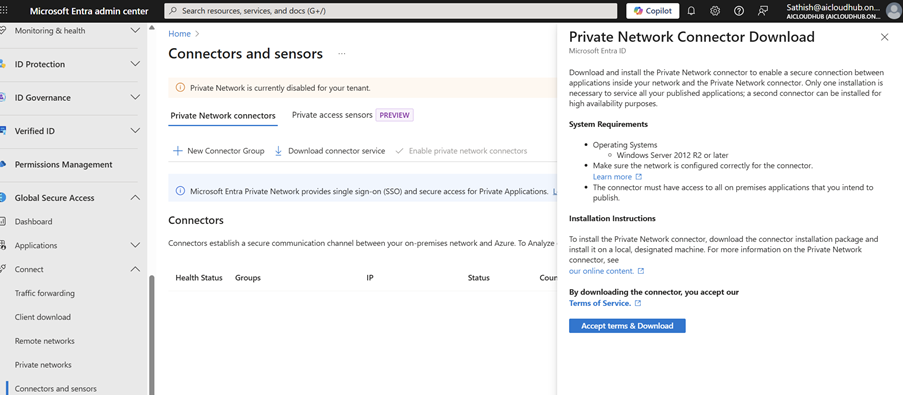
- Install it on a device that can reach your Synology NAS (can be your laptop or another machine).
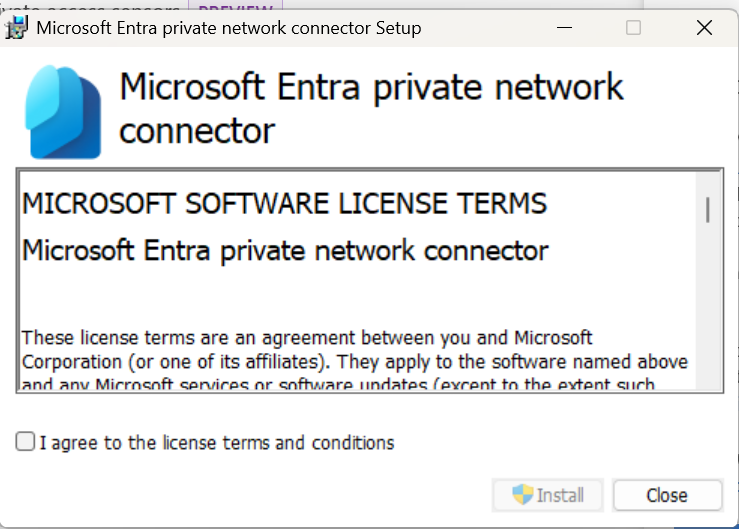
- During setup, register it with your Azure tenant.
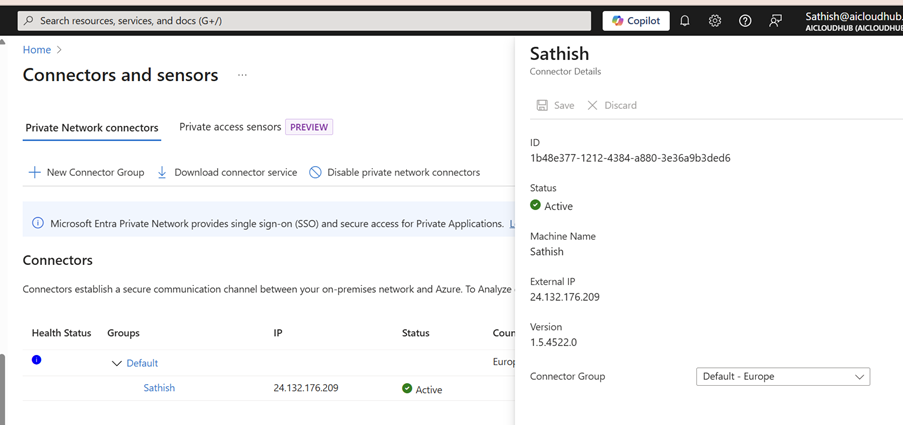
Verify Installation:
- In the Entra Admin Center, go to Global Secure Access → Connectors.
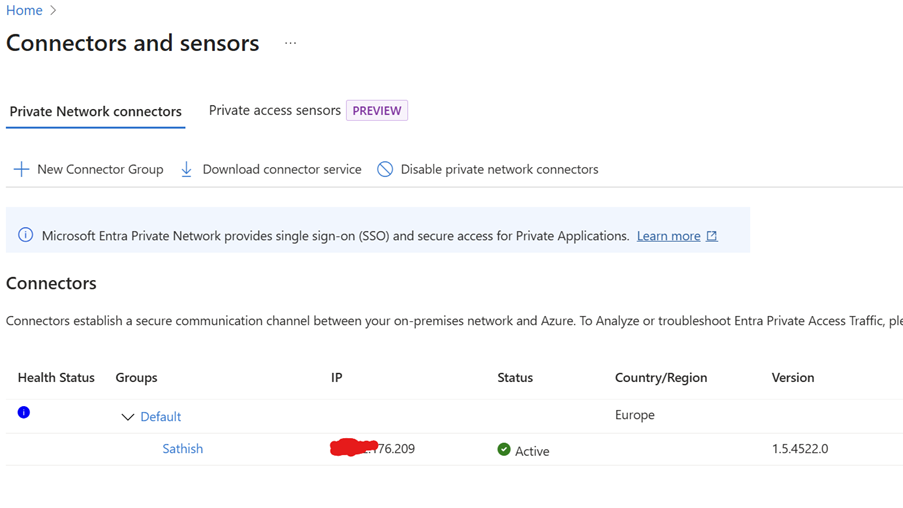
- Confirm your connector shows as Active.
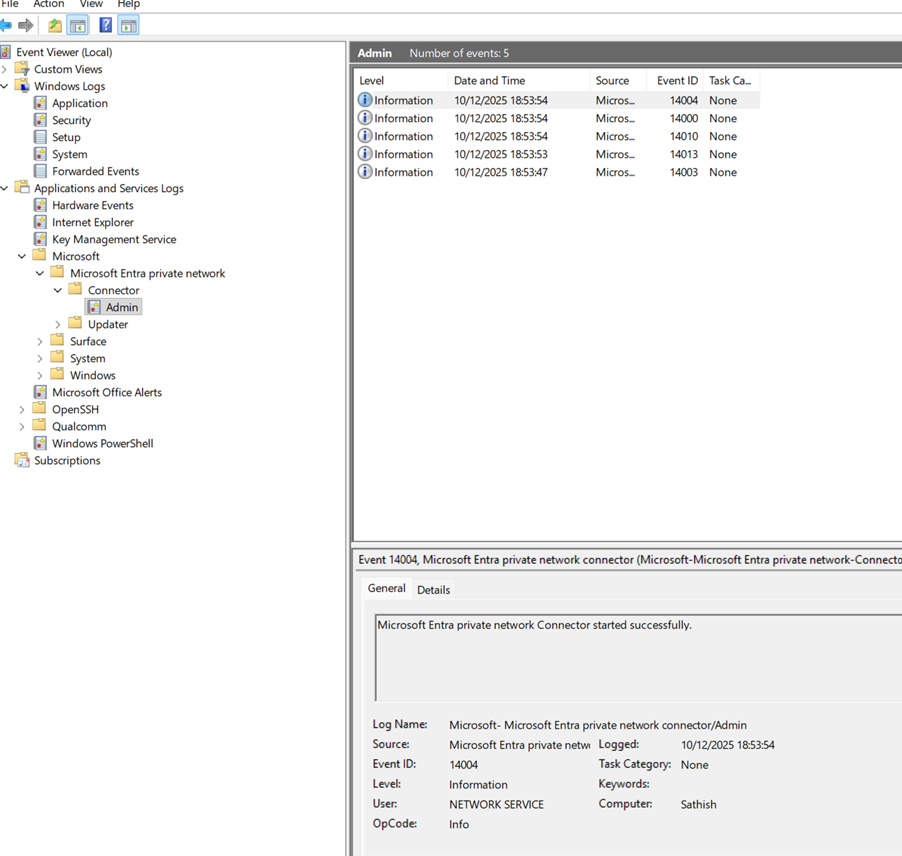
- Check logs in Event Viewer → Applications and Services Logs → Microsoft → AADApplicationProxyConnector for status messages.
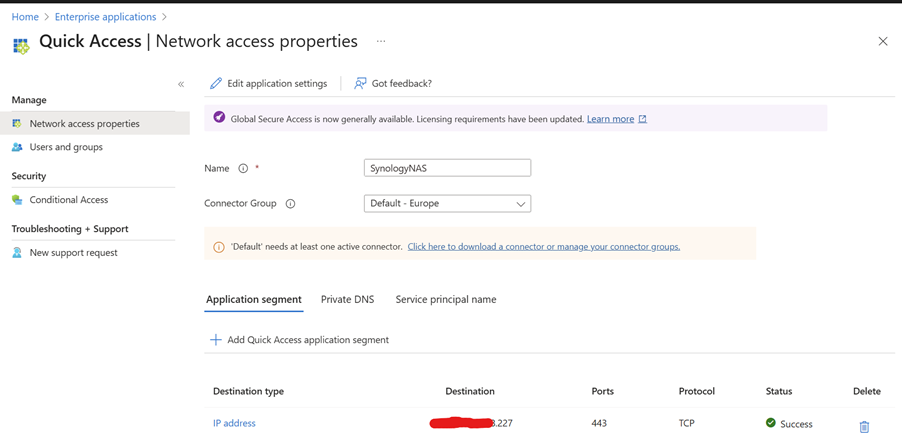
Step 3: Create an Application Segment for Synology
- Navigate to Global Secure Access → Application Segments → Add Segment.
- Configure:
- Name: SynologyNAS
- Destination type: IP address
- Destination: your nas IP
- Ports: 443
- Protocol: TCP
- Save and verify the status shows Success.
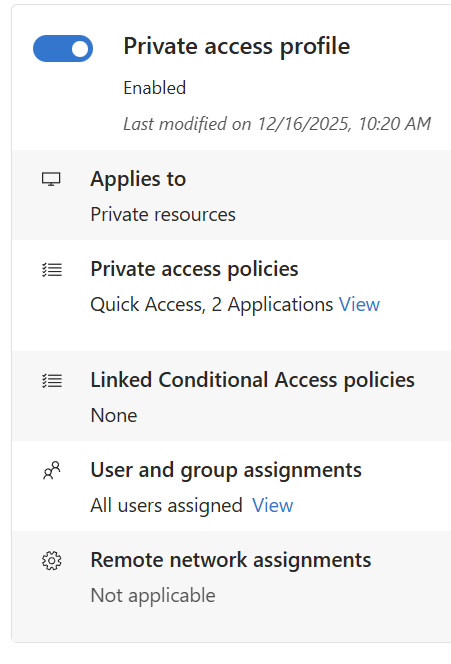
Step 4: Link the Segment to Private Access Profile
- Go to Global Secure Access → Connect → Traffic forwarding → Private access profile.
- Under Private access policies, click Edit.
- Add your SynologyNAS segment to the profile.
- Assign users or groups (e.g., your account) to the profile.
In my example I have selected 2 private apps and hence you see the number as 2 and have assigned to all users
Step 5: Configure Private Networks (Optional but Recommended)
- Navigate to Global Secure Access → Connect → Private Networks (Preview).
- Click Add Private Network.
- Enter:
- Name: Synology
- DNS servers: 127.0.0.1 (or your internal DNS server IP)
- Fully qualified domain name: Your Synology FQDN resolvable
- Resolved to IP address type: IP address
- Resolved to IP address value: (Your Synology NAS IP)
- Save the configuration.
Why?
This ensures that when you access Synology the GSA client routes traffic correctly through the Private Access tunnel.
Step 6: Install the Global Secure Access Client
- Download and install the Microsoft Entra Global Secure Access client on your laptop.
- Sign in with your Azure AD account.
- Verify the client is active and connected.
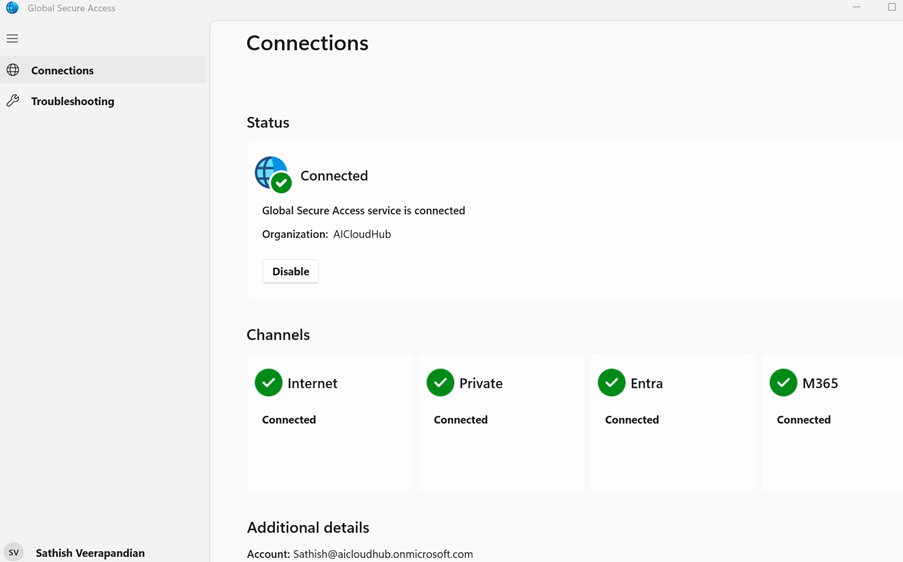
Very Imp you must have all the channels green tick so your GSA client routes all the traffic to the Global Secure Access
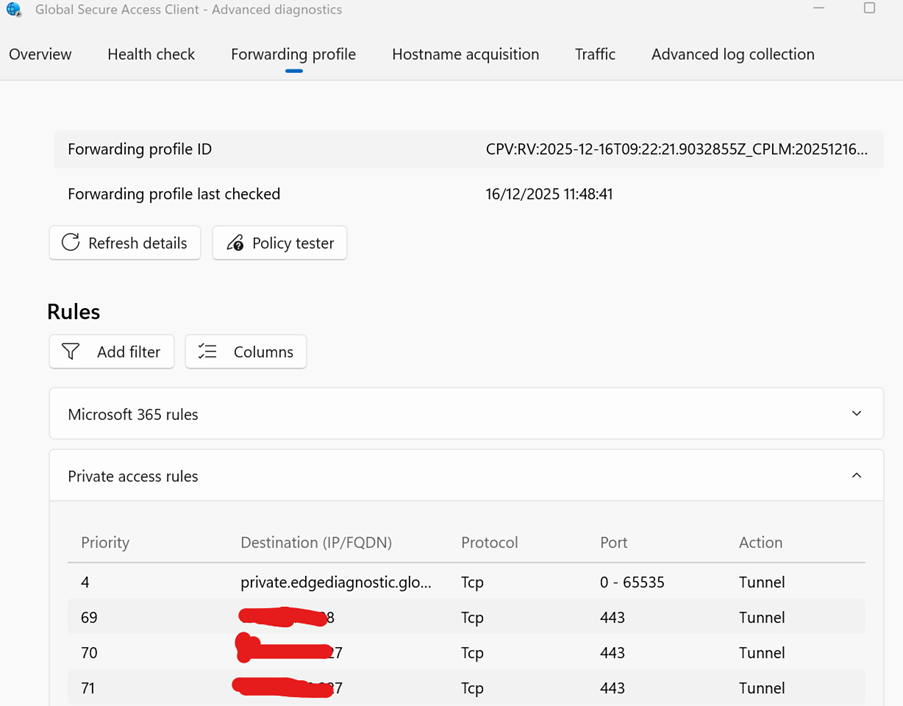
Step 7: Test Access
- From your laptop, try accessing the Synology DSM web UI using its hostname or IP .
- Check Advanced Diagnostics → Traffic in the GSA client to confirm traffic is tunneled.
- Apply Conditional Access policies if needed for security. (Did not get time to explore this one will do it in the next blog)
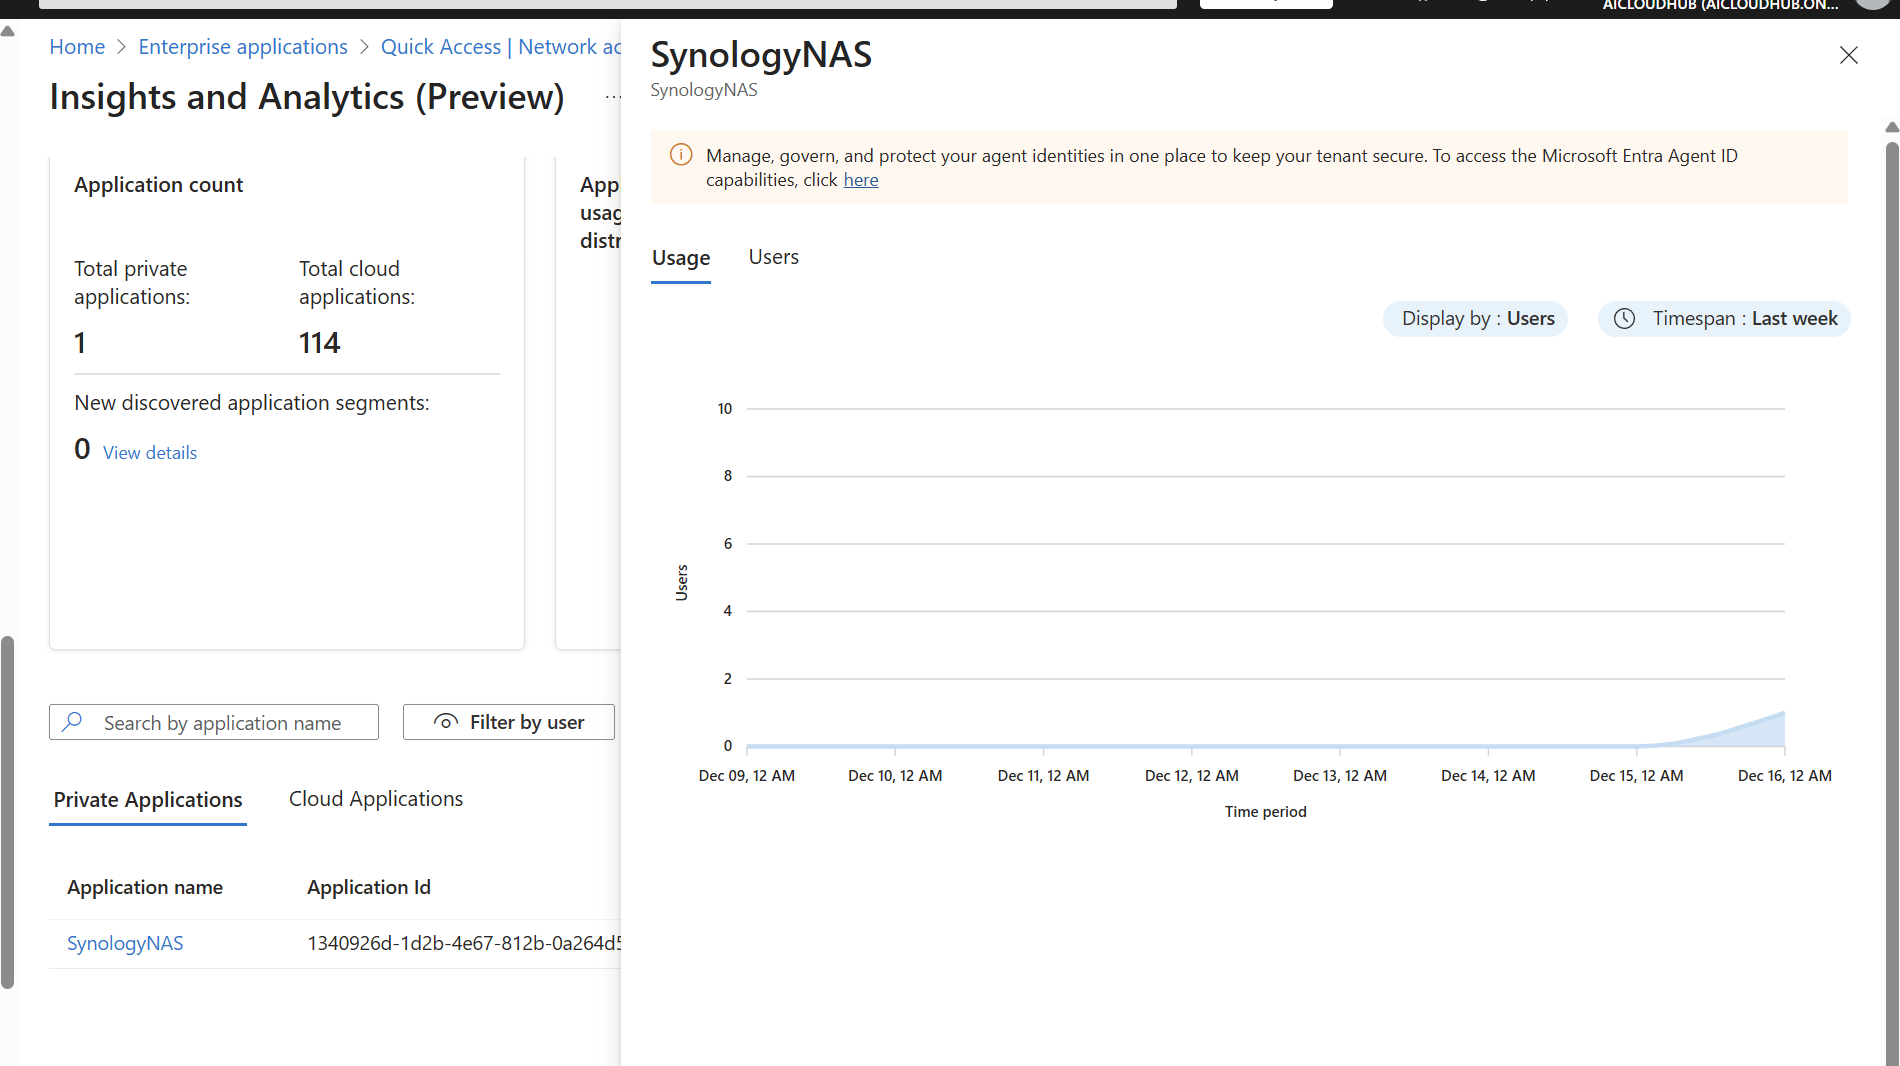
Step 7: Validate in Insights & Analytics
- Go to Global Secure Access → Insights and Analytics
- Confirm your Synology NAS appears under Private Applications.
- Monitor usage trends and transactions for visibility.
After a successful setup the first thing you would notice is that the Total Private Applications count will be showing as 1
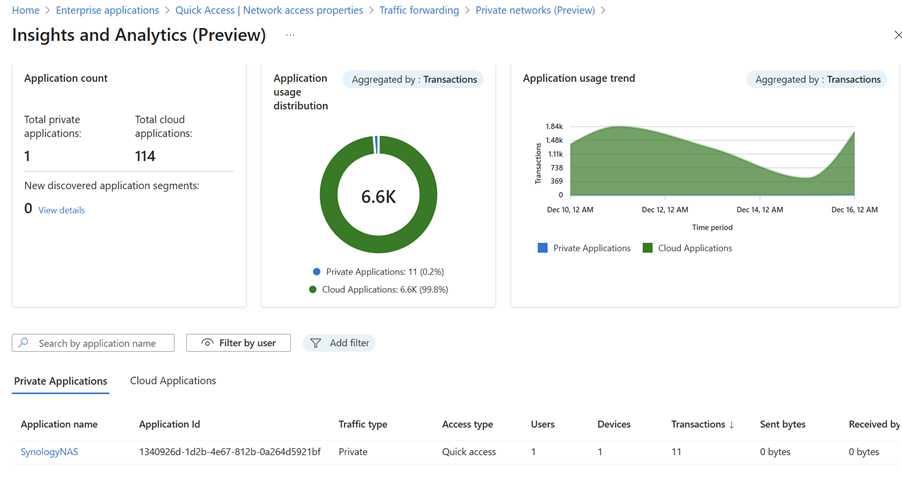
There is also further drill down where we could look at the usage pattern via Graph
So now we are successfully able to route the private traffic via Global Secure Access.
In this demo, we successfully showcased how Microsoft Entra Private Access can securely connect users to internal resources without traditional VPNs, leveraging Zero Trust principles. By setting up a home lab with an Azure tenant, installing the Entra connector, and configuring Application Segments, we exposed a Synology NAS as a private application and validated access through the Global Secure Access client.
This approach demonstrates how organizations can modernize remote access, reduce attack surfaces, and improve user experience without relying on legacy VPN solutions.
Sathish Veerapandian
Tagged: Azure, cloud, Microsoft, Security, technology


[…] For architectural flow diagrams and examples (e.g., Synology NAS), refer to my previous blog. […]
LikeLike