Author Archives: Sathish Veerapandian

Exclaimer signature manager for on-premise

Maintaining the signature format uniformly for all the users is really a difficult task.Also the signature format will be changing on department, user and job role basis.

At times there might be a requirement to modify the signatures for departments based on events as well.

As an admin it  will be very difficult if you are not having any centralized signature system for the messaging systems.

Out of the available signature applications in the market i always prefer Exclaimer based on their support and options available in their product. In this article we will have a look at configuring the Exclaimer Signature and run through some of the options available in their product.

The installation and configurations are very simple since it is just a transport agent which will be triggered in the categorizer  part and signature will be applied. So this application has to be installed on a server where the transport categorization takes place.

In Exchange 2010 this application needs to be installed on the Hub Transport server

In exchange 2013 & 2016 it has to be installed on Mailbox servers.

One thing we need to make sure is that it has to be installed on all the HUB servers if its exchange 2010 and all the mailbox servers if its exchange 2013 & 2016. This is because the Mail-routing can happen in any of the available transport services and this application needs to be there to trigger in the categorization part.

The installation is pretty simple and straight forward which is very easy .Just need to download the application and install them.

The application can be downloaded from below url

https://www.exclaimer.ae/signature-manager-exchange-edition/download

Ex1

We have the option to keep a backup of the previous configurations which will be easier to revert.

There is option called remote deployment where we need to configure a shared folder for the exclaimer images, configuration files to be stored in a common location so that all the transport servers can be updated without any delay.

EX01.png

Below are the options available for the sent items configuration which are pretty much easier to understand.

It has a temporary file folder where it processes all the signature as a cache before applying them. You can specify a drive on your own.

Ex03

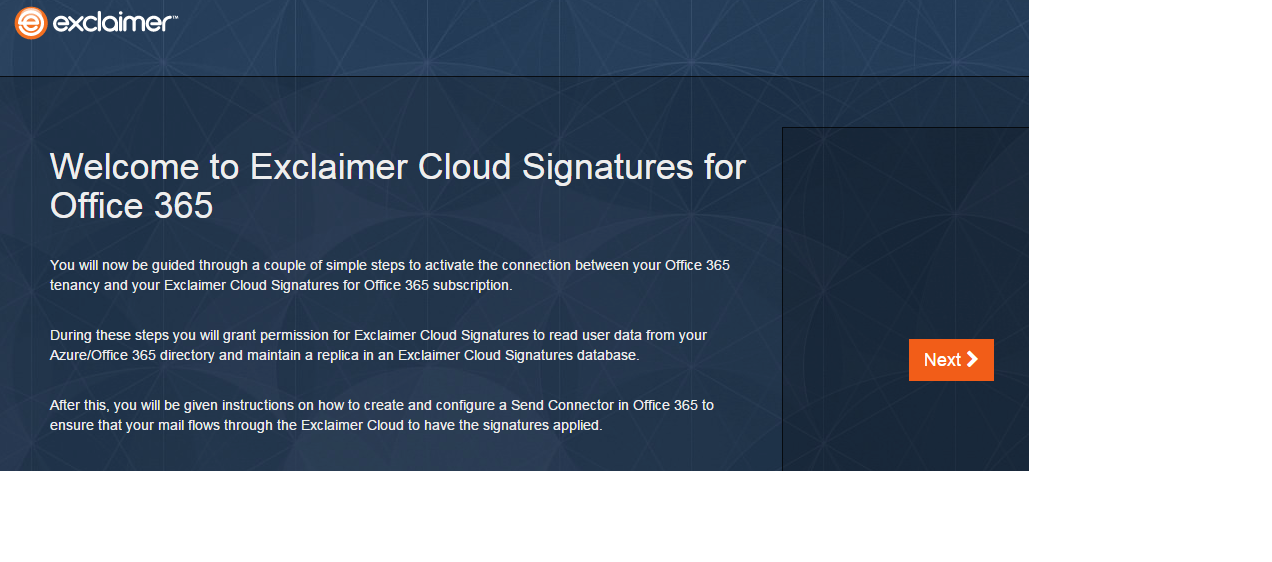
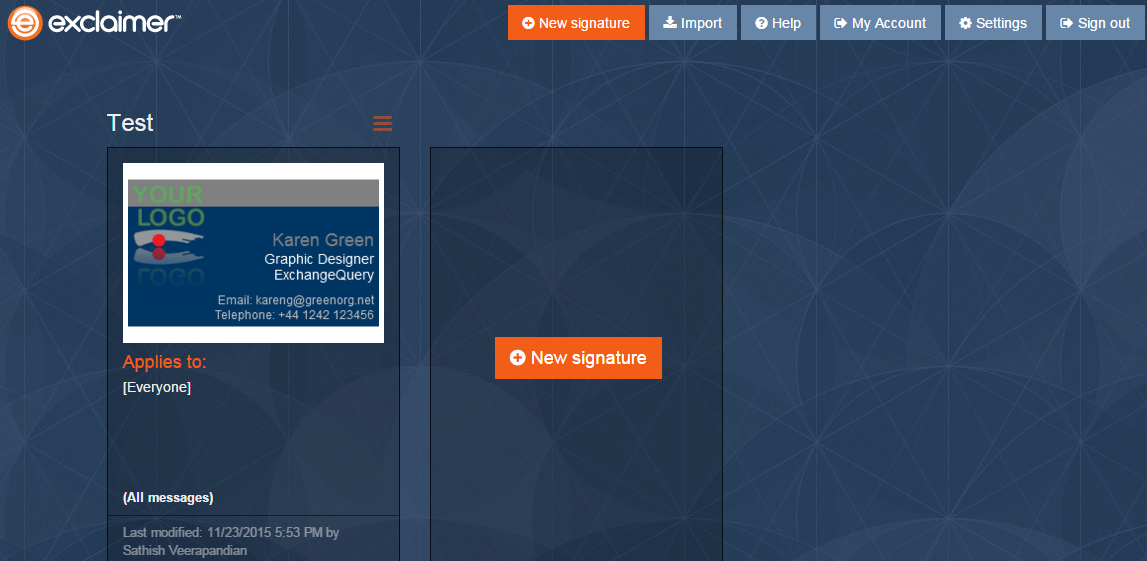
After a successful installation we  will get a screen as below

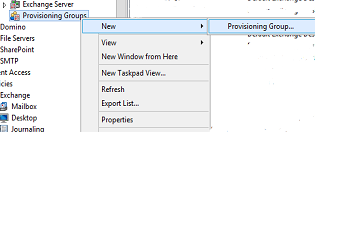
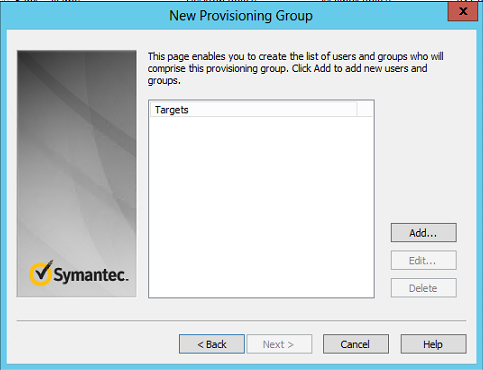
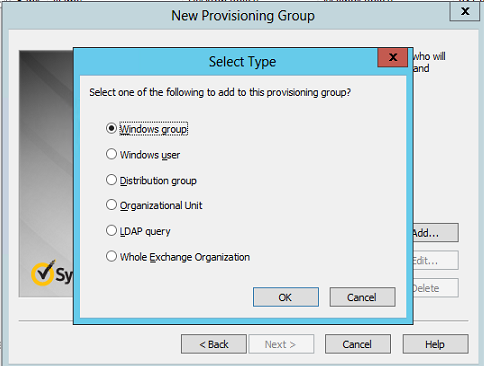
We can have multiple signature policies based on department, Organizational Unit and apply to respective ones.

Ex09

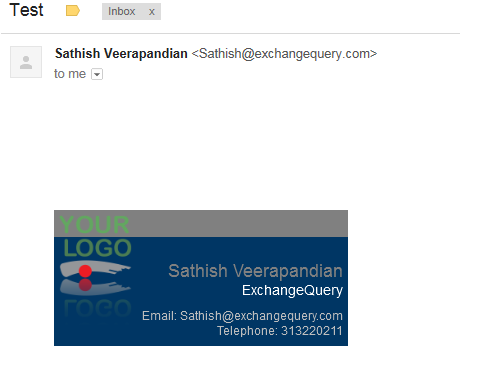
So this signature pulls all the information like Name, Company, Phone Number ..etc from the information present in the mailbox.

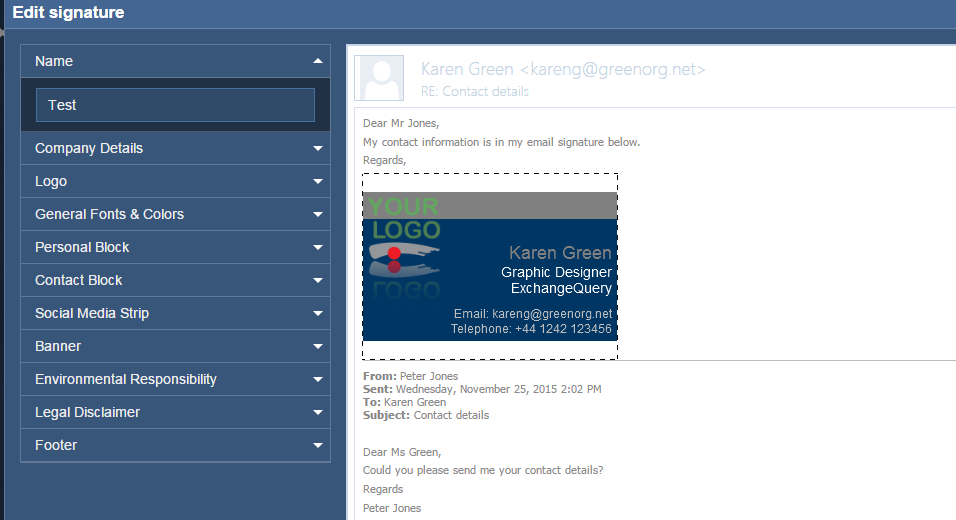
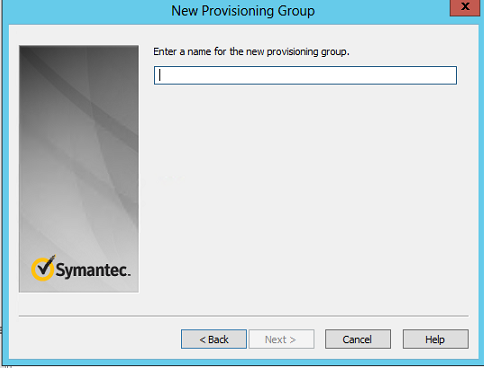
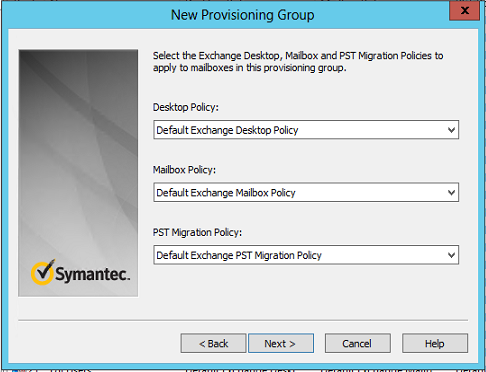
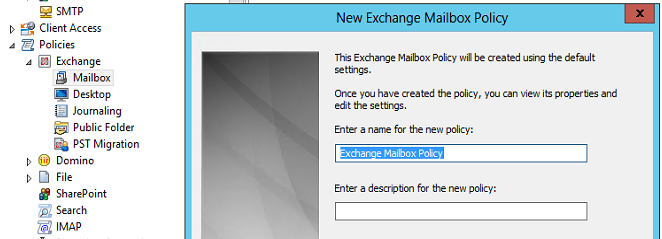
So all we need to do is to create a new policy choose and apply the desired values as below from the new created template

Ex04

We have an option to change the element behavior , layouts as well.

ex05

Note: We need to make sure that all the user information like Name, Phone Number, Company are updated. Only then it will update the information from the User object and reflecting in the signature. If the field is not updated then the information will show empty.

The signature can be customized further as well by adding an image, hyperlink to the attached image to them. All kinds of alignments, layouts can be done for the same.

Ex11

Moreover we have an option to edit the source code of the HTML which is a great amazing feature. By having this option we can customize the signature templates of our own according to the requirement.

Ex12.png

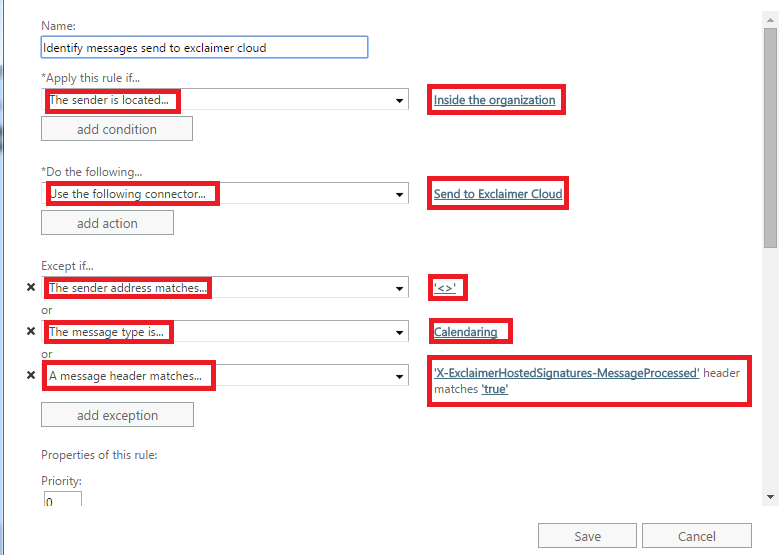
There are multiple options available to apply signature based on the requirement.

An example below.

EX8

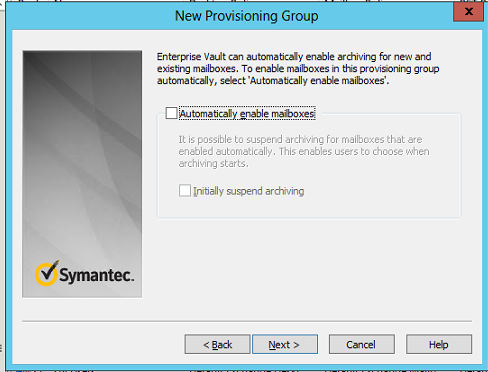
Also we can set exceptions for few users who does not like to have this automated signature policy.We have an option to apply the signature only on a specific date and after that it will be disabled automatically.

There are more features and options available to explore on this product.

Overall we will get a very good support, latest updates, very simple installation configuration  and more features available to customize with this  exclaimer application. And so far with all versions of exchange this product has been always a bread and butter and haven’t caused any issues in terms of considering them as a third party Transport Agent.

Thanks & Regards
Sathish Veerapandian

MVP – Office Servers & Services

Connect Bridge – Synchronize the Exchange Mailboxes

If  you have more Exchange mailboxes  with Multiple servers in different sites , or  you have a hybrid setup in your organization we would always like to keep these mailboxes synchronized without any delay.

This article will describe one solution that brings synchronization of mailboxes to reality with a product named  CB Exchange Server Sync.

The CB Exchange Server Sync Tool is an application dedicated to synchronize Microsoft Exchange user folders. Users and folders can be located either on the same version and instance of Exchange Server or they can be located on multiple instances and different versions.

The tool is a Windows service that performs synchronization of selected mailbox folders pairs based on periodical run. You can specify the synchronization pairs via Manager Tool (UI for configuration of CB Exchange Server Sync), which is distributed within the installation package.

Supported Exchange versions:

  • Microsoft Exchange Server 2010
  • Microsoft Exchange Server 2013
  • Office 365

Below are the key features identified in the product:

  • Synchronize email folders
  • Synchronize contacts
  • Synchronize tasks
  • Synchronize calendar
  • Synchronization between different Exchange versions
  • Easy to install and to maintain
  • Separate Custom configuration for each synchronized user
  • Provides run-time information about the executed sync operations
  • Multiple tenants
  • One-way and two-way synchronization

Components involved in the Functionalities:

The synchronization tool consists of:

The synchronization service looks for the changes in the synchronization pairs and process the synchronization with help of Connect Bridge. The synchronization pair is the ‘structure’ of the two users and folders which will be synchronized (e.g.: user1@a.com user2@b.com Inbox folder).


1. Connect Bridge

Connect Bridge is used for internal communication with Microsoft Exchange. Connect Bridge is a powerful integration platform that allows you to connect to the target system through ODBC, JDBC driver and Web Service with 31 connectors. So basically, you can connect at least 31 target systems such as Exchange, Google, Microsoft CRM, SharePoint and many other LOB’s simultaneously in different environment (on prem., cloud, hybrid) and with a bidirectional communication. There is no need for you, as a developer, to study documentation and know the language of the target system. You can simply use SQL statements to communicate with the target system. To get a general overview about the architecture of the tool there is a bunch of useful videos and online documentation.

2. Sync Process Description

Most profound explanation is through a short showcase description. Let’s talk about synchronization of two Exchange accounts one on premise (2010) while the second is hosted on cloud (2013). Setting a connection strings as “Master” and as a “Slave” are just for an easy recognition, Connect Bridge handles both systems equally.

Below string example for MASTER & SLAVE connection

6666

The process is quite simple and straight forward. The application seeks for inserted, updated and deleted items within both synchronized mailboxes. This is done within Exchange quite simply. The Exchange provides possibility to obtain changes since some ‘time stamp’.

Below is the example of how the sync works without any delay

6667.jpg

After the application obtains information what was inserted, deleted or updated, the logic of the CB Sync has to decide which action needs to be done to perform corresponding operations correctly.

In case items are inserted on the “Slave side” the logic needs to import those inserted items to the “Master side” of synchronization and remember the item pairs internally because it is needed for next possible operations (update, delete). In other cases if update or delete occurs the logic needs to find internally the pair of the item and make corresponding operation.

Below video is a real time example of how the synchronization works


Final Conclusion:

CB Exchange Server Sync brings benefits to  example lawyers , Auditors who work for different companies, university teachers who teach on more universities, chairman of the board and basically to all people who need to arrange all their tasks, meetings and duties ordered perfectly in one Exchange app instead of logging on and off in multiple accounts which can lead to duplicate meetings, bad user experience, unnecessary business mistakes etc.

Worth mentioning is a feature which can cover privacy of Exchange users. Let’s say you have a department in your company with high security clearance using their own Exchange server and other departments which don’t have security clearance have their own Exchange server.

Problem arises when employee of Marketing Department needs to schedule a meeting for employees with high security clearance. They need to know exactly when is their schedule free without breaching security model of the company (access details of already set appointments).

CB Exchange Server Sync can reveal needed information to set up a meeting while still be able to protect security model of the company. This is one of the many scenarios you can cover with CB Exchange Server Sync.

In the near feature they are about to create the Software as a Service (SaaS) product out of it so it  could come closer to customers and simplify the whole process to “ready to use in one-click”.

Thanks 

Sathish Veerapandian

MVP – Office Servers and Services

Inplace upgrade from Lync 2013 to Skype for Business

For the first time in the enterprise platform Microsoft has given the option of an in-place Upgrade for its universal platform .

Since Skype for Business hasn’t changed much with Lync 2013 server architecture,and the hardware prerequisites remains the same. If we have a good hardware configuration or if you have recently migrated to Lync 2013 in your infrastructure this option completely makes sense to perform and inplace upgrade .
This will obviously help in reducing the IT cost for this new deployment and reducing the time required for this new deployment.

Recently our team had an experience in upgrading from Lync 2013 to Skype for business and i this article we will have a look at the best practices and the prerequisites that needs to be followed in the upgrade procedure.

Supported coexistence scenarios for the SFB in-place upgrade:

  1. Lync 2013 Standard standalone .
  2. Lync 2013 Enterprise Pool.
  3. Lync 2013 Multiple pools
  4. No upgrade path available from Lync 2010 to SFB.
  5. No upgrade from Lync 2010\2013 coexistence scenarios

Readiness for the upgrade:

  1. Take a snapshot backup all your servers, This will help you  to revert the changes on each server just in case if the upgrade wasn’t smooth with the downtime provided.
  2. Save the previous Topology and take a backup of them.
  3. Take a backup of file server.
  4. If the Lync 2013 is running on Windows Server 2008 R2 then its not recommended to perform an in-place upgrade.
    Never upgrade the OS of a Lync server. Install a new pool on a fresh OS and move all accounts and objects over . In-place upgrade will not help in this scenario.


Prerequisites for the upgrade:

1. net 3.5 on FE, Edge and mediation  servers.

2. Below hotfixes needs to be installed in following order.

https://www.microsoft.com/en-us/download/details.aspx?id=42162

https://support.microsoft.com/en-us/kb/2919355

https://support.microsoft.com/en-us/kb/2982006

3. RTC local instance should be Microsoft SQL server 2012 SP1 or later.

So make sure on the Lync 2013 FE’s and servers that we are going to upgrade should have a local instance of 2012 SP1 or later.

4.  One member server in the same domain where the lync pool resides.

On this we will be installing the SFB administrative tools , upgrade the existing topology and then publishing them.  It should be a non-lync server.

5.  All the lync servers needs to be updated to minimum  8308.815. Better to have the          latest version.

Upgrade can be done in the following order:

1.  Install the SFB Administrative tools on the newly introduced member server.

Upgrade the topology in the below order.

a) First upgrade the Front end pool.

b) Upgrade the persistent chat pool.

c) Upgrade the edge server pool.

d)  Upgrade the Trusted Application pool.

In-order to upgrade the topology perform the below :

Open SFB topology builder from the newly installed admin server – Right click on the front end pool – Select the option Upgrade to Skype for business server 2015 as below


01

This process will take few minutes and after it gets completed we need to publish the newly updated topology first.

Failing to do this and proceeding with other pools (persistent, edge, Trusted) will result in the  below error.

02

Once the topology is updated and published now we need to upgrade all of the existing lync 2013 servers to Skype for Business.

In-Order to perform that action  we just need to run the setup from each servers.

Note: If there is only one front end pool in the deployment (this should be the setup in most of the environments) the servers then there will be user interruption till the pools are upgraded. So it requires a downtime when performing this upgrade.

We need to run the below command to make sure that the replicas are up to date

Get-CsManagementStoreReplicationStatus

imp

Before running the setup we need to disable all the services on the existing front end services. Run the below command in the Lync management shell to perform the action

Disable-CsComputer -Scorch 

After running the above command make sure that you close topology builder, Lync Management shell , Deployment wizard . Make sure all consoles are closed for the upgrade to complete smoothly.

Once performing the above action just run the setup from each existing lync 2013 servers.Better to start with FE’s , Mediation , Director , Persistent and then Edge.

You will be prompted with the below screen.

RE.png

upgrade will go through the process as below

33

We will get a screen like below on a successful upgrade

3366556.png

We can continue to point all URLs to the existing pool since its an in-place upgrade and this make this task very easier.

Thanks & Regards

Sathish Veerapandian

Foreign Connectors VS Delivery Agent connectors

Over the period of time these foreign connectors have been playing a major role in handling the non SMTP messages from the applications and FAX machines.

These foreign connectors manage a file transfer system process to route inbound/outbound messages from a NON-SMTP systems.

For outbound systems it uses the drop directory where applications must create and submit their own messages to this drop directory .
These foreign connectors checks if the messages are properly formatted (MIME)
and then move them to the drop directory. From here Exchange has done its job and its the responsibility of the NON-SMTP system to pick these messages and deliver them.

For the inbound flow the message should be submitted to to the replay directory from the non-smtp system. We need to make sure that the submitted messages are properly formatted in MIME or TIFF(Usually used format) so that  exchange picks them up, processes these messages and delivers them to the directory.

Usually these directories are not scoped to these connectors and we need to run the below command  an example below

Set-ForeignConnector -identity Test -DropDirectory \\exchange2010\share

Running the above command will create a shared directory for the outbound so that after exchange drops the email the non-smtp system will pick these messages for delivery.

From Exchange 2013 these foreign connectors have been depreciated.Since it uses  file transfer systems to route the messages through drop(outbound) and replay (inbound) the sender will not be aware if the message has been delivered to the recipients.

But still this foreign connectors can be configured in Exchange 2013

From Exchange 2013 Microsoft recommends to have the delivery agent connectors which is having a simpler configuration compared to the foreign connectors.

Below are the advantages of having the delivery agent connectors:

  1. There is no need to manage file transfer to a Drop directory and check the drop directory quota, permissions etc.
  2. We can use the queue management for messages that are routed to non-smtp systems through this method.
  3. We can verify and acknowledge the message delivery to which is a major benefit when compared to foreign connectors.


Each delivery agent is associated with a Delivery Agent connector, which queues messages routed to the delivery agent for processing and delivery to the non-SMTP device or system

A delivery agent is a component installed in the Transport service of a Mailbox server.
Example there is a Citrix Virtual Delivery Agent which is used for one of the citrix application to route the non smtp messages.
If there is a agent required for your non-smtp system then we need to install that agent on Mailbox servers of exchange 2013 & 2016

By Default there is a text messaging Delivery Agent connector.
This is an agent which is installed by default in the Mailbox Servers of Exchange 2013 & 2016.
This delivery agent connectors are available from exchange 2010 where they are present in hub roles.

By default it will have only the default mobile delivery agent connector. You can see the delivery protocol is mentioned as MOBILE.

So for other delivery agent connectors we need to specify the protocol types.

D1.png

Example if we need a delivery protocol as x400 which most of the fax applications and non-smtp application uses we need to run the below command.
New-DeliveryAgentConnector -Name “Contoso X.400 Connector” -AddressSpaces “X400:c=US;a=Fabrikam;p=Contoso;1” -DeliveryP
rotocol “X.400” -SourceTransportServers Mailboxserver

D2.png

After performing the above the  message is routed to a Delivery Agent connector, the associated delivery agent performs the content conversion and message delivery.

Thanks

Sathish Veerapandian

Troubleshooting addressbook issues in Lync 2013/Skype For Business


You might come across a scenario where end users might report that they are not able to search for contacts  through Lync/Skype for Business client.

In this article i have collected few troubleshooting steps based on my experience which might help in addressing these kind of issues

Before looking into troubleshooting lets have a small idea on the address book synchronization :

The address book creation in Lync client happens separately and it never talks to Exchange.

The core component user replicator which was introduced from Lync 2010 contacts Active Directory very frequently once in every 60 seconds and updates the information of the users present in the Lync server. This interval is set by default and can be altered.

These updated information is stored in the backend SQL database named RTCab.

After the above job is completed it doesn’t mean that the address book is updated.After this the responsible server for  update process of  address book will start a synchronization pass once in every 24 hours usually 1:30 AM local server time.

This information will be updated in the address book files in the shared folder in the type dabs file.

So by looking into the above process there can be so many factors which might block searching the address book from client perspective.

Below  troubleshooting steps which might help in fixing these issues.

1)  First identify how many users are affected. Check the version of the client Lync 2013, Skype for business 2015 or Skype for Business 2016 client.

Pick any one of the affected user and perform the below tests.

From the affected PC try to access the URL you have published for lync  https://webs.contoso.com/abs and see if you get the authentication prompt.

If you are not getting the authentication prompt then there is some serious issue with the connectivity from your end reaching the server. You have to fix this issue.

2)  Run the command Get-CsUserReplicatorConfiguration and see the replication cycle interval.

Lync2

The replication cycle interval by default is 60 seconds. If this value has been modified then we need to wait till the replication interval period gets completed.

3)  Its better to check the Synchronizepolling interval .This is the value which the addressbook server looks for any pending synchronization events for the lync users.Because there are more chances this value might be altered if you don’t want to happen this for every 5 minutes. In that case we need to wait till the interval period completes or run the Update-CsAddressBookConfiguration.

This value can be altered from 5 minutes to 3 hours.

Lync3

4) Check the Csclientpolicy

Run the command Get-CSClientPolicy and see the AddressBookAvailabilty configuration.

Lync1

Basically there are 3 options which we can set based on our requirement for this Lync/Skype for business address book availability.

a) Websearchandfiledownload.

b) Websearchonly.

c) FileDownloadOnly.

Its very self explanatory based on the names that we have for the addressbook.

By default this value is set to Websearchandfiledownload only. By having this option what it does is a local address book cache file from each client will be downloaded from the server. After that the Lync client will use the local cache. In-turn it will use the websearch functionality to download the user photos only.

So basically it takes 24 hours of time to have a fully updated local cache files.

When we have a web search only option  it does a direct lookup to the RTCAB database which will give the fully updated information for the lync/SFB clients. This is more or less similar like difference between having users in Outlook Cache Mode and in online Mode.

It would be better if we have a separate client policy only for the top VIP users. This will help them to see all the updated information from the Active Directory.

Inorder to create the client policy you can run the below command

New-CsClientPolicy -Identity VIP -AddressBookAvailability WebSearchOnly.

You can use this option for all users as well if we have less number of users where the user attribute changes happens very often and provided your network bandwidth is strong.

5) One last step that we can try is to run the below command.

The output of the command result should say there are no unindexed or abandoned objects.

Lync4

If you see any errors on them then you can try running Update-CSAddressBookConfiguration and see if it helps.

Hope this helps

Thanks

Sathish Veerapandian

MVP – Exchange Server 

Quick Tip – legacy log off mode for Exchange 2016 OWA logoff request

As we know the importance of securing the web applications which are published on the internet have been increased.
So usually these external url’s are published in a secure way via reverse proxy which will handle this job.

When a end user logs into the OWA URL the session proxies via the published reverse proxy.
From Exchange 2013 we can notice that clicking on logoff will not trigger GET/OWA/Logff.owa like it was till Exchange 2010 where it generates a logoff page owa/auth/logoff.aspx?Cmd=logoff&src=exch
This log off page in 2010 was used by few Reverse Proxy to terminate the connection. This value can be modified in Exchange 2013 web.config file to bring this same page like 2010.

On Exchange 2016 we need to perform the below operation :

Navigate only to the below location

%ExchangeInstallPath%\ClientAccess\OWA\web.config

Remove the following line and do iisreset(make sure you make a backup of web.config before you do this):
<!– Disable logout page temporarily until UX is updated –>
<add key=”LogonSettings.SignOutKind” value=”LegacyLogOff” />


After performing this action the cookie session can be terminated.


Thanks 
Sathish Veerapandian

MVP – Exchange Server

Create private key and certificates for load balancer ,firewalls through Certificate Authority

All of the Load balancer’s require an SSL certificate since they use HTTPS as a front end listener for all of the services that are handled by them.
So basically a certificate is very much mandatory here to terminate the incoming connections and then decrypt the requests from the clients and sending them to the appropriate instances.
In order to install the SSL certificate on your load balancer , you must create a certificate request , submit them to a CA , get them signed by your internal CA or a third party trusted CA and then installing them on your load balancers.

Before creating a CSR, the applicant first generates a key pair, keeping the private key secret.
The CSR has the public key chosen by the requester. So in most of the cases these CSR gets generated from a web application and the private key is not shared and is stored in the application itself.

In most of the cases SSL certificate for these load balancers can be either a self-signed certificate or a trusted Certificate Authority (CA) certificate.

A self-signed SSL certificate is a certificate that has been signed by its own private key

A trusted CA is an SSL certificate that is signed by a CA’s private key

Though there is an option to create a self signed certificate,most of the load balancers recommends using only a trusted CA certificates since it is more secure than using self-signed certificates.

In this article we will have a look at generating a certificate through CA for a load balancer.

First in order to create the CSR request we need to login to the certificate authority (certsrv) and submit the CSR request with your internal IP of the load balancer

usually it is https://yourinternalCAserver/certsrv

CA


Now select the 2nd option in the next page as below

CA1


Now select the 1st option as shown below

CA2

Next comes the main page where we need to provide the ip address of the load balancer as the common name for which it will generate the CSR from the CA server and submit to the CA.

In the name section we need to make sure that the IP address is specified

We need to make sure that we are selecting the option mark keys as exportable which will allow us to export the private and the public key (for giving the key pair) to the load balancer.

Also we need to make sure that we select the format as PKCS10

CA3


once the request is submitted you need to go to the home and click on  view request status

CA4

You will get the status of the pending requests as below

CA5

Once you click on this you can see this certificate will be issued to the CA for verification.

On a successful submission of this CSR this request will go to the CA in the pending queue and will show in the pending requests.

Then we need to go ahead and issue this certificate from the pending requests

Once the certificate is issued successfully you can go to the issued certificates and there we can see this certificate. When we double click on that certificate and in the general tab we will see an information that says you have a private key that corresponds to this certificate.


CA6

So this ideally means that the private key as well as the public for the load balancer is generated from the certificate authority in my example. And it was my CA who generated the private key and the CSR request.

Now  we need to export this certificate in the pfx format with the keypair (private & public) and then import them on the load balancer.

So now while exporting this certificate i need to export the certificate with the below option

CA7

Once exported we can install this certificate on the load balancer.

Disclaimer:

We need to be very careful while working with certificates .In the above method key-pair will be generated and this key pair should not be shared to any of the external parties. Sharing this key-pair to any of the third parties will easily compromise your whole network since they are load balancer certificates. Proper planning and understanding of the scenario according to your environment needs to be done before performing such kind of tasks.

Hope this helps !!

Thanks 

Sathish Veerapandian

MVP – Exchange Server

Exclaimer cloud signatures for office 365

As we all know exclaimer have been in the auto self signed signature market for a long period of time.

I have been working on the on premise version of this product for a quite period of time.

When we talk about the on premise solution based on my experience i would say its definitely a WOW factor. It is loaded with bundles of options by which you can customize the signature per department basis. Even you can give  granularity till each and every user .

If you are an HTML expert then you can play around with the signatures on your own  and make more customization. It gives you the flexibility to modify each and every signature from the source code which is amazing.

I thought to explore the cloud signature for office 365 .In this article we will have a detailed review of the installation and configuration of exclaimer for office 365 environment.

Prerequisites:

Office 365 subscription with Microsoft.

Admin account in the office 365

Ex-claimer  for office 365 subscription

After you are subscribed for office 365 for exclaimer you will get the below information

Ex1

Specify the domain name

Ex3

Then login with your office 365 admin account

Ex4


Then you will be prompted to read the directory data

eX5

Once granted it establishes a connection with the Azure directory

eX6

On a successful sync you will get the below information

eX7

After establishing synchronization ,now we need to set up a connector inorder to route the emails to exclaimer cloud so that they can apply email signatures to outgoing email.

In-order to achieve this we need to establish connectivity between office 365 and exclaimer cloud.

Inorder to set this up first login with your username and password

Ex8

Now we have an option to set up signatures for all users in your organization or only for specific users.

If you want to set signatures only for few users then create a group and add all those users in office 365. Since the azure directory is already synced when you type the group name it would be able to pick it up.

Ex9

Now we need to perform the below actions:

Create Send connector – from your office 365 to Exclaimer cloud

For doing that login with admin privilege on your office 365 portal – Go to mail flow – click connector and create new connector

o2

Make sure to  select only the first option else  your outbound emails will be affected.

O3

Proceed to the next step and smart host it to the below  exclaimer smtp server

smtp.us1.exclaimer.net 


In the similar way we need to create  a receive connector

o4

Now we need to enter ,By verifying that the subject name on the certificate that the sending server uses to authenticate with
Office 365 matches this domain name (recommended)’. In the field below, enter smtp.exclaimer.net then click ‘Next’:

O5

Now we need to create a rule exactly as below with same values

Ex55

As we can see the idea behind creating this rule is to forward only genuine emails to the exclaimer cloud and this is very mandatory. The rule is pretty simple and going through the rule will give a clear idea behind them.

On a successful configuration of the above things you can login successfully to your exclaimer for cloud

https://portal.exclaimer.com/

This is the place where we can create a new signature, Import a signature template designed by your development team or use the existing template which is very good.

ex33

Below are the available fields in the signature template provided . It has good default templates which is very good. It pulls all the information from the value eg: Telephone, organization, address on every users mailbox. So we need to make sure that the newly created mailboxes is populated with the values that are required in the template you have chosen.

Ex44

Below is the sample of signature applied from the exclaimer cloud.

EEEE


I’m always positive and will definitely recommend Exclaimer for any one based on my personal experience with the on premise version. If Microsoft releases any new version of Exchange i’m sure there will be a supported version of this product without any delay.

The Exclaimer cloud version is too  awesome and also it simplifies more by having the setup in the cloud and you just need to create the signature which is amazing. And the exclaimer support is always instantaneous without any delay based on my real time experience.

Thanks 

Sathish Veerapandian

MVP – Exchange Server


Configure New Store, storage , provisioning groups in Enterprise Vault in Exchange Environment

In this article we will have a look at the steps to provision the Enterprise Vault in the Storage, Policy and Group level.

If we talk about Enterprise Vault its again a big topic considering all the functionalities ,configuration , features , HA etc..,

So here we will focus only on how to provision archive only for end users in a new deployment

We will need to look at the steps to consider in creating a storage, Backup , creating policy based on the retention that end users are expecting.

So below things needs to be planned properly before the configuration:

a) Archive policy based on mailbox quota and number of months. eg: If the quota exceeds 80 percent and emails  greater than 5 months should be archived.

b) Archive retention period for end users. How long the archived emails will stay eg: like 5 years, 7 years etc

c) Retention of the shortcuts archived items in the mailbox after the archive.

Once planning on the above is done we need to configure Provisioning group, Archive policy and create a store group and a store for the archive process to happen.

Below things needs to be created :

a) Create a provisioning group to target the users who require the archive feature to be enabled.

b) Create a dedicated policy for this group based on the requirement.

c) Create a dedicated store-group and store to place all the archive .

d) Configure the backup for these stores.


We will look into the steps to create provisioning group first

Log in to the Vault Administration console and navigate to provisioning groups and select new provisioning group


PR

Give a name

Part15

Associate the targets for this group

Part16

Targets can be OU’s, Whole domain, Distribution Group. The best practice is to always target a Distribution group and add users who require EV since the OU’s will contain service accounts, vendor mailboxes which will unnecessarily consume licenses.

Part17

Then later you need to select the policy that you would need to apply for this group of users based on your requirement.

Part18

Set the retention category

Part19

Select the associated store and enable the option automatically provision the mailboxes for people who comes under this group

Part21


Now we will look in creating the Policy

It is better to have multiple policies since its always better to segregate users based on their quota, nature of job and the amount of emails they receive on daily basis.

To create a New Policy Open Vault Admin Console – Navigate to policies and create a new mailbox policy.


POlicy1


These are the default values once its created. Based on your requirement you can modify these values.

Part22


There is nothing much complexity involved in creating the policy but yes if the users retention is not understood properly then later you would be in trouble. So its better to set the clear expectations to the end users before setting the policy.


Now we should look in creating a store for the archived mailboxes.

Its better to create a store group first

SG1


Then create a Store under the Store group

SG2


You will get the below window

Part1

Give it a name and select the option whether open or closed. If you keep  this partition open then partition rollover can happen if any of the other partition are full. If you keep it closed then rollover to this partition will not happen.

Part2

Select the storage type by default it is NTFS

Part3

Then you need to specify the drives and drive path and finally you have to perform the run test which will indicate a success or failure of your config

Part6

This is the partition rollover which i was taking in earlier screenshots which is an amazing feature

You have an option to set the volume and time

Part7

Here you go for setting the backup for this partition. The beauty of the archive is when you create the store by specifying the SQL instance location the DB’s are automatically created.

So now these values needs to be chosen according to the type of backup you are using.

If you have a snap shot EV unaware backup then you need to select the option check for a trigger file.

If you have a EV aware backup most likely backup exec from Symantec then you can use the first option.

Note: Its very important that you need to keep in mind that these backups will never help you in restoring brick level for end users. These are meant only for system recovery scenarios.

So when a user permanently deletes an archive from EV its gone forever.

Part9

Then you need to use the file collection software if you are using the second option

Part11

And enter the time at which you need to place this file collection software.

Part12

After this once you click on finish the archive is configured to take place.So based on your Archiving Mailbox server Task schedule the archiving job would start happening.

There are few more backup configurations that needs to be done if you choose the 2nd option. We will look  that seperately in another write up since adding those information will definitely confuse and increase the length of reading this blog.

Thanks 

Sathish Veerapandian

MVP – Exchange Server

Configure Mapi/Http in Exchange 2016/2010 Coexistence

In this article we will have a look at the steps to configure MAPI/HTTP for all users in Exchange 2016 server.

We need to understand this point very clearly.

Since the MAPI/HTTP protocol is supported only from the Exchange 2013 with exchange 2016 & Exchange 2010 coexistence the behavior will be :

  1. Exchange 2010 users will be getting the RPC/HTTP connections on their outlook.
  2. Exchange 2016 users will be getting only MAPI/HTTP connections on their outlook.

Reason :

From Exchange 2013 we had an option to choose either RPC/HTTP or MAPI/HTTP .But from Exchange 2016 Microsoft has totally retired the legacy RPC protocol and wrapped them via MAPI/HTTP through which all the connections will be only via mapi/http.

In-order to accomplish this task you need to make few changes in exchange, firewall as well as DNS side.

So basically the connections will go like the below


For Exchange 2010 Users: 

From internet (RPC/HTTP) – Firewall receives/RPC requests – The request is forwarded to Exchange 2016 CAS services – Connections are proxied back to Exchange 2010 CAS server

For Exchange 2016 Users:

From Internet (MAPI/HTTP) – Firewall received /MAPI requests – The request is forwarded to Exchange 2016 CAS services – Connections are directed to Exchange 2016 Mailbox server.


Now lets see the steps that we need to do to accomplish this task:

On Exchange

  1. Run the Command Set-MapiVirtualDirectory and set the external URL of MAPI virtual directory

Example:

Set-MapiVirtualDirectory -Identity “mapi (Default Web Site)” -InternalUrl https://contoso.com/mapi -IISAuthenticationMethods Negotiate,NTLM,OAuth

Better to keep the authentication negotiate for the legacy clients till the migration gets completed from Exchange 2010

If we could recollect for Exchange 2013 users we need to run this command to enable MAPIHTTP for end users

Set-OrganizationConfig -MapiHttpEnabled $true

Since from exchange 2016 the default connections are mapi/http this command has been depreciated and hence can skip this step.

So all the outlook clients who are connecting via MAPI post autodiscover request exchange 2016 server accepts them and understands that its is coming from MAPI/HTTP
later it gives the required way to connect for the MAPI clients

2. Point your autodiscover DNS records to the Exchange 2016 server. So for the Exchange 2010 users the connections will be proxied to the Exchange 2010 CAS by the Exchange 2016 CAS service.

3. On your firewall allow connections for both /RPC and /MAPI for Exchange 2010 and 2016 connections. Once the Migration is completed you can remove the /RPC rules from the firewall since all the connections are going to be through MAPI/HTTP .


Few more important Tips:

Outlook 2013 and later all the connections will be established MAPI/HTTP by default and so the connections will be fast.

If the end users are using Outlook 2010 and would need to connect to Exchange 2016 mailboxes they need to have the latest Outlook service Packs installed on their PC.

If you have Outlook 2013 user and wants to connect to the legacy mailbox which resides on the exchange 2010 you can use the below registry key to disable the mapi/http attempt on their PC

HKEYCURRENTUSER- Software – MicrosoftExchange – create a new DWORD  “MapiHttpDisabled” with value 1.


Hope this helps

Thanks 

Sathish Veerapandian

MVP – Exchange