In this article we will have a look at the OAB configuration in Exchange 2016 in coexistence.
Outlook will trigger an OAB download every 24 hours right from the time it received the last fully updated OAB files.
A small background functionality of OAB from Exchange 2016:
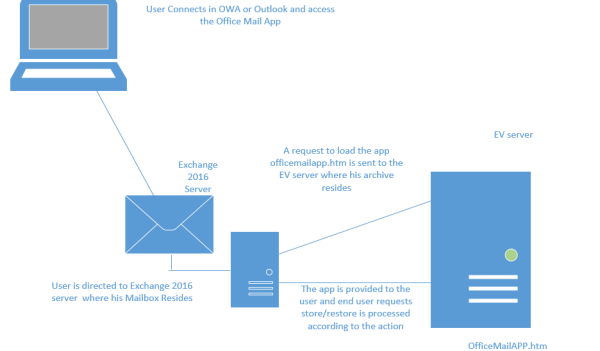
1)Outlook Queries OAB through Autodiscover URL.
2)Reaches the Exchange 2016 mailbox OAB Virtual Directory.
3)Exchange 2016 Mailbox Client access service queries Active Manager and finds out database hosting organization Arbitration mailbox.
4)Then OABGen Assistant from the Arbitration mailbox will provide the required information.
5)Like with Exchange Web Services, Autodiscover will provide the Offline Address Book URL.This request will then be proxies to OABGEN mailbox which had the OAB information and this information is served back to the client.
The OAB files are stored in the same place as we have in Exchange 2013 CAS server but now it will be on Exchange 2016 Mailbox server itself since we do not have the CAS role.
In Exchange 2016, the OAB files are generated and stored in the Organization arbitration Mailbox with persisted capability first and later copied to the location %ExchangeInstallPath%\ClientAccess\OAB\ folder in the Mailbox Server.
Below are the important things to perform:
1) When we introduce Exchange 2016 we need to create a new Offline Address Book
New-OfflineAddressBook –name “OAB NEW” –Addresslists “\Default Global Address List” -VirtualDirectories $null
2)Make sure 2016 OAB Virtual Directories URL’s are pointing to the Exchange 2016 Servers.
Run the below command to check the settings
Get-OabVirtualDirectory | ft identity,internalurl,externalurl -AutoSize
3)Change the default OAB on Exchange 2016 databases, to do so open Exchange 2016 Management Shell and run the following command:
Get-MailboxDatabase | Set-MailboxDatabase -OfflineAddressBook “\Default Offline Address Book (Ex2016)”
Enable GlobalWebDistribution
The recommendation is to enable global web distribution for all OABs hosted on Exchange 2016.
What is the benefit of doing this?
The main benefit is all Exchange 2016 Mailbox servers can take part only in web distribution.
The OAB generation still remains with the mailbox server which hosts the active copy of the DB which has the Arbitration Mailbox with Persisted capability.
How to check if GlobalWebDistributionEnabled is set to true
Run the below command.
Get-OfflineAddressBook Select | Identity,Name,GLobal* |Fl
If it is set to false set it to True by running the below command.
Set-OfflineAddressBook <E16OAB> -GlobalWebDistributionEnabled $true
What is this GlobalWebDistributionEnabled parameter?
This parameter is used by Autodiscover to determine which mailbox OAB virtual directories are eligible candidates for distributing the OAB to the clients.
By doing the above action we are making all Mailbox Servers to distribute the address book automatically.
Enable Shadow Distribution:
By enabling this we can have a shadow copy of an OAB instance generated by an Arbitration Mailbox to another Arbitration Mailbox.
Prior to enabling shadow distribution, we should deploy an OAB generation mailbox in each AD site where Exchange 2016 infrastructure is deployed.
Benefits of Shadow Distribution:
1)Prevents the OAB download across WAN if the user is connecting from different site.
2)If we don’t have this Shadow distribution enabled then it will trigger a full instance of OAB download if the user logs in from another site .
We can enable Shadow distribution by running the below command.
Set-OfflineAddressBook “Redmond OAB” -ShadowMailboxDistributionEnabled $True
Again we can enable this option if the end users are travelling and connecting in multiple sites randomly.
Point new Exchange 2016 On-Premises DBs to the new default Offline Address Book that was created.
And make sure current Ex 2010 DBs are pointing to Ex 2010 OAB until the migration is completed.
After installing the 1st Ex 2016 new Ex 2016 DBs should point to new default OAB.
Do we need to move the Exchange 2010 OAB’s ?
No we don’t have to move, all OAB’s . They have already been created and stored in OABGEN mailbox and are Updating 12 times a day.
From Exchange 2013 all OABs have gone into <Default Offline Address Book>.
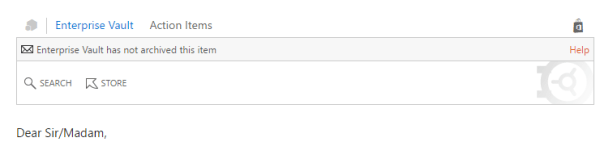
After the configuration try to browse the OAB end points and see if you are able to login
https://mail.domain.com/oab/07a8-6g35-7d30-36sh-84b5-15g4h/oab.xml
Below example of how it looks after successful authentication

OAB URL can be taken from Test Email AutoConfiguration Outlook results.
Download the OAB and see the results.
By default, a new OAB is generated every 8 hours in Exchange Server 2016, but we can change the interval by using the Exchange Management Shell by using a new-setting override.
New-SettingOverride -Name “OAB Generation Override” -Component MailboxAssistants -Section OABGeneratorAssistant -Parameters @(“WorkCycle=02:00:00”) -Reason “Generate OAB every 2 hours”
Note: It is better to leave the default work-cycle schedule and not modify them.
Thanks & Regards
Sathish Veerapandian
MVP – Office Servers & Services