SCOM requires Mutual Authentication to Trust and Communicate with the agents for Monitoring and reporting.Initially SCOM tries to establish kerberos authentication with the agents. This happens for all internal agents which is joined in the domain.
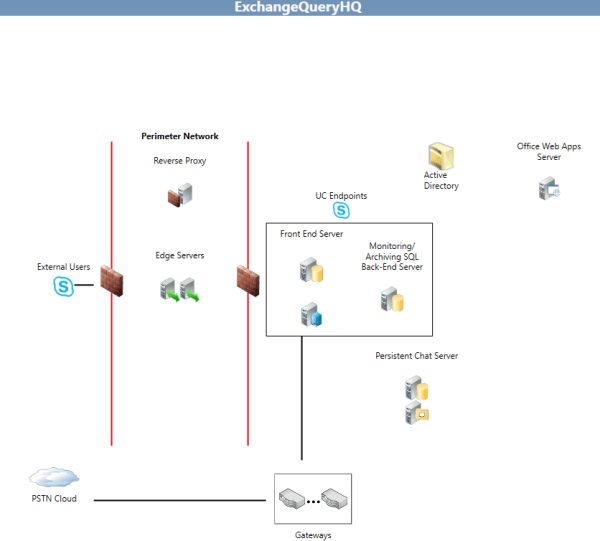
For the workgroup machines which are in the DMZ network SCOM use the certificate based authentication for secure communication and then it monitors them.
Below are the high level steps:
1)Configure your firewall to pass traffic from DMZ agents(DMZ servers) to SCOM management server’s port 5723 & 5724.
2)Request certificate from all DMZ machines(certificate type must be server authentication & Client Authentication)
3)Request certificate from SCOM machine (certificate type must be server authentication & Client Authentication)
4)Import the server authentication & Client Authentication certificates on the DMZ machines
5)Import the server authentication & Client Authentication certificates on the SCOM 2012
6)Run the MOMCERTIMPORT on all Machines and assign the certificate
7)Approve the DMZ agents in the SCOM Server.
For Publish Certificate request for SCOM there are 2 types based on the CA we have.
- Enterprise CA.
- StandAlone CA.
1) Enterprise CA
If we are going to request certificate from Enterprise CA then we need to use Publish a Certificate Template for SCOM through your enterprise CA.
To perform the task through enterprise CA do the below :
Open Certificate Authority – Navigate to Certificate Templates – And Select Manage

Right click the Computer Certificate and Click Duplicate
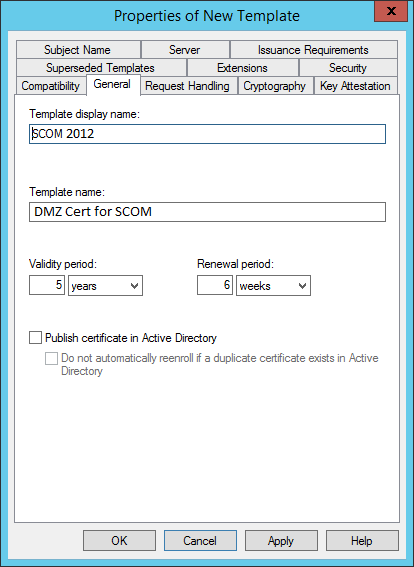
Make sure the option allow private keys to be exported is chosen.
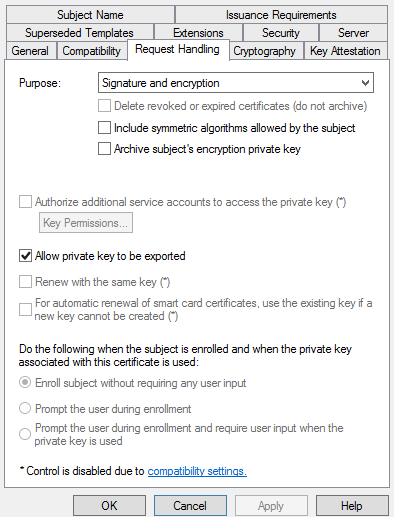
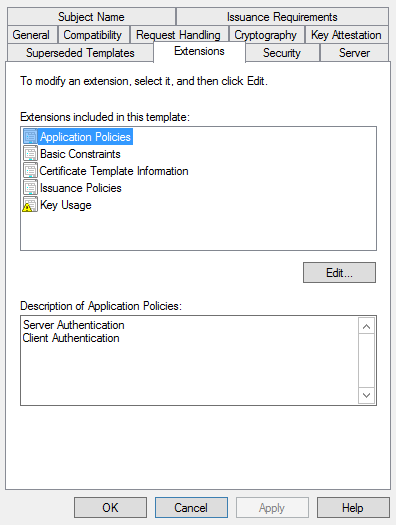
The most important thing that we need to note is that in the extensions it need to have both server and client authentication enabled. This is applicable for both the SCOM and the DMZ hosts throughout the configuration no matter we are requesting them either from Enterprise CA or Stand Alone CA.
Once the above is completed we can import this duplicate certificate to the SCOM.
2) StandAlone CA:
Below are the steps that needs to be carried over for Stand Alone CA SCOM Certificate Request:
Go to the SCOM 2012 Server
Connect to the computer hosting certificate services
https://ca.exchangequery.com/certsrv
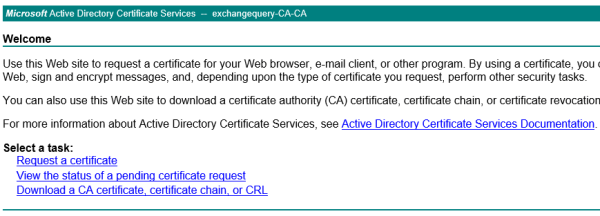
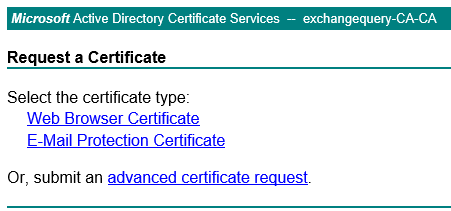
Click request a certificate and submit advance certificate request
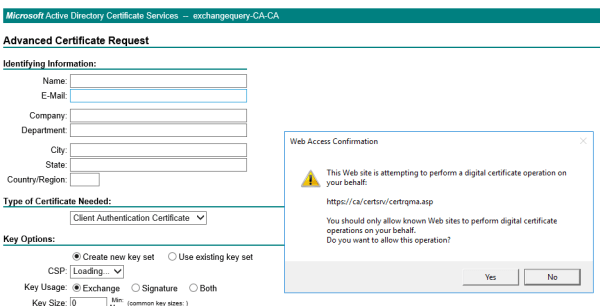
Click create and submit request to this CA
After that we will get confirmation on web access information as below and click yes
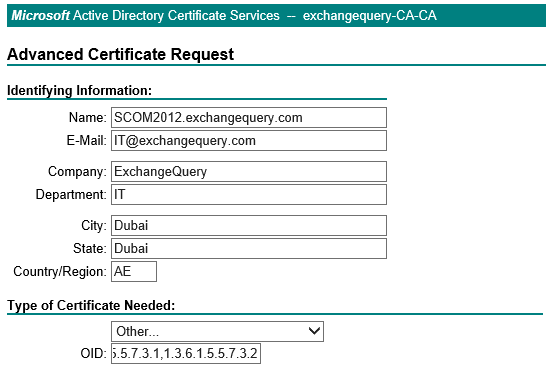
Below are the information that needs to be filled
Name – name of the server requesting the cert.
Type of Certificate – Choose Other
In OID enter – 1.3.6.1.5.5.7.3.1,1.3.6.1.5.5.7.3.2 (This plays a major role in enhanced key usage)
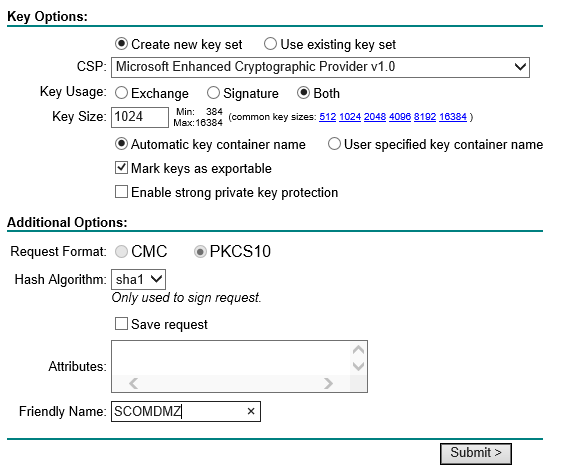
Keyoptions – Select Create new key set
CSP – Select Microsoft Enhanced Cryptographic Provider v1.0
Key Usage – Select Both
Key Size – 1024
Select – Mark Keys as exportable.
Request Format – CMC
Hash Algorithm – SHA1 and give friendly name and submit.
Once the CA request is completed from the CA we can go ahead and import them on the SCOM server.
Request certificate for DMZ Servers to be Monitored:
First and the foremost thing is that wecan request the Certificate from internal domain server since most of the times the DMZ servers will not have access to certificate web enrollment services on port 443 to the internal certificate authority server.
So what we can do is generate cert request from one machine in the domain nw and then import them to the DMZ servers.
Perform the same process of submitting the certificate request for all the DMZ servers
Below are the information that needs to be filled
Name – name of the DMZ server that requires the certificate.
Type of Certificate – Choose Other
In OID enter – 1.3.6.1.5.5.7.3.1,1.3.6.1.5.5.7.3.2 (This plays a major role in enhanced key usage)
Keyoptions – Select Create new key set
CSP – Select Microsoft Enhanced Cryptographic Provider v1.0
Key Usage – Select Both
Key Size – 1024
Select – Mark Keys as exportable.
Request Format – CMC
Hash Algorithm – SHA1 and give friendly name and submit.
Once the above is done we need to approve the request from the CA and then import them on the server from where we requested the certificate for those DMZ machines.
Now we need to export this certificate from this requested machine and them import them on all DMZ servers which needs to be monitored.
There are multiple ways of doing this. I prefer doing this via Digicert Windows Utility Tool.
Download the DigiCert Windows utility tool from the below url on the certificate requested machine
https://www.digicert.com/util/
On opening we can see all the issued SSL certificate which owns the private key on that machine.
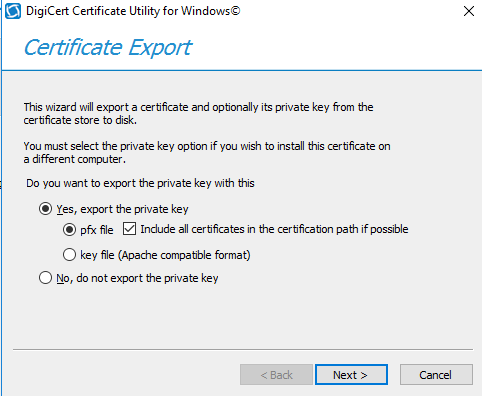
Select the DMZ servers requested certificate and click on export
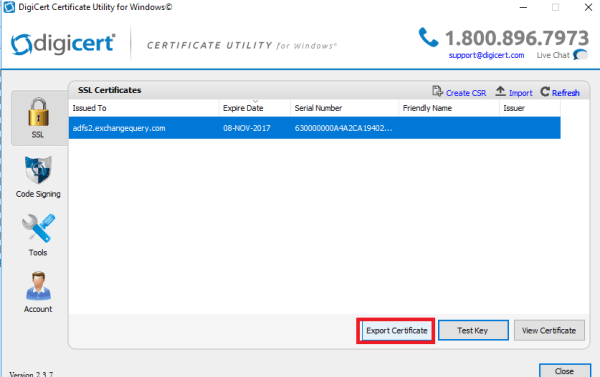
Select the option export the private key and export them with password.
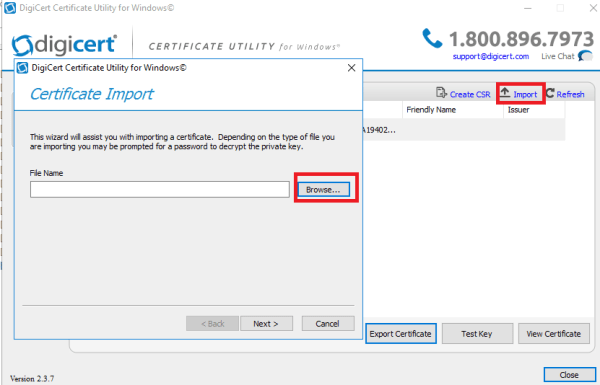
Once the above steps are completed we need to import these certificates on the DMZ servers computer personal store.
We can use the same certificate import wizard like below and import the above certificate on DMZ servers
Now the final step is to run the MOMCERTIMPORT on all Machines and select this certificate and we are done.
This tool MOMCERTIMPORT GUI can be found on SCOM 2012 Installation Media path in below directory
E:\supporttools\AMD64\MOMCERTIMPORT
Make sure the same version of the tool from the setup is copied to all machines
Just run this tool on all machines and we will get a pop up window to confirm the certificate. Please confirm by choosing our relevant requested certificate on all servers.
After the above is completed wait for some time and these DMZ servers will appear on the Administration – pending in the SCOM server and just we need to approve them and we are done.
Thanks & Regards
Sathish Veerapandian
MVP – Office Servers & Services