Author Archives: Sathish Veerapandian

Script to identify the users forwarding, redirecting and forward as attachment emails to external ids

It’s always difficult to protect sensitive emails being leaked out from any organization. In order to avoid this there are few things that can be blocked on the global settings from the server end.

If we have the auto forwarding and autoreply  option enabled on the default remote domain then any users can create an external contact in his local outlook profile and then he can forward all his emails to his external ids. Here is the possibility  again where sensitive data being leaked out from organization.

The default remote domain will have autoforward and autoreply disabled . That is the recommended configuration.

We need to disable the autoforwarding, autoreply  option in the default remote domain.  If in case if we are forwarding any emails to trusted partners or vendors through any application we can specifically create a custom remote domain for them and enable auto forwarding for that particular remote domain  alone. By doing this no end users will be able to redirect, forward or forwardas attachment their internal emails to their external ID’s.

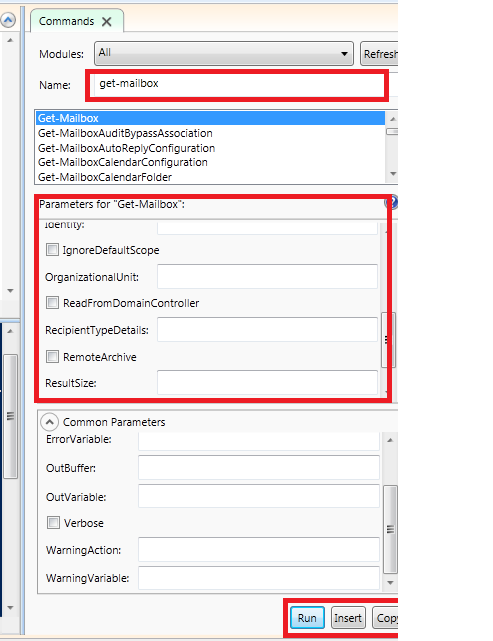
We can check that by running the below command

Get-RemoteDomain | ft Auto*

Autoreply

If it is enabled run the below commands to disable them

Set-RemoteDomain -Identity default -AutoForwardEnabled $false
Set-RemoteDomain -Identity default -Autoreplyenabled $false

Recently I was looking for a solution for this kind of issue and came up with an idea of a script that can be used to pull out users who have redirect, forward or forwardas attachment options enabled in their outlook rules.

I have created a script which can be used to pull out this kind of information. The below script will run on all mailboxes in entire organization and will pull out users who have external rules set, and then it will send an email to administrator in CSV format by which he can see who all has this option enabled.

***************************************************

Set-Adserversettings -viewentireforest $true

foreach ($mbx in (Get-Mailbox -ResultSize unlimited)) { Get-InboxRule -Mailbox $mbx.DistinguishedName | where {($_.ForwardTo -ne  $null) -or ($_.redirectto -ne $null) -or ($_.forwardasattachment -ne $null)} | select  MailboxOwnerID,Name,ForwardTo | export-csv d:\ForwardRule.csv} -Notypeinformation

Send-MailMessage -To alias@domain.com -cc alias@domain.com -From anyid@domain.com -Subject “Forward To” -Attachments d:\ForwardRule.csv -SmtpServer specifytransportserver

*******************************************************

Copy the above text in a notepad and then save them as ps1. Navigate to the location where you saved it and then you can execute the command

Things you need to modify in the above script

Set the drive location for the csv file in a place where you wish to save.

For sending email in the to and cc field give user for whom you need this report to be sent

From address specify the address from where it needs to be sent and give the mailbox server as smtp server if it’s 2013 or hub server if it is 2010 or 2007.

Here is the example

Just copy the code in text file and save it in ps1 format.

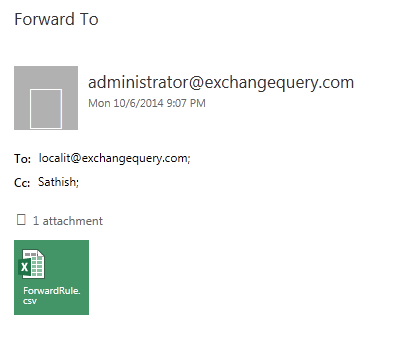
navigated to the location and ran.

Rules5


Received the email

rules4


When we open the csv file the output is displayed for users who have forwardto,redirectto and forwardasattachment option set in outlook rules for external id’s.

Rules3


Note:

This command pulls out rules from user’s mailbox only if they are enabled. If the user has a rule created and if he has disabled it temporarily then it won’t fetch that information.


Thanks

Sathish Veerapandian

MVP – Exchange Server

Product Review: SPAMfighter Exchange Module

Protecting the the IT infrastructure from Spam mails,Malicious codes ,Malwares is one of the important and challenging task and needs to be monitored always. There are different types of spam attack through which an user can try to crack the perimeter network of any organization and intrude to inject any kind of malicious codes or phishing emails. While the most widely used type of method for circulating SPAM is Email through which unwanted emails, more number of spam emails, reverse NDR attacks etc.,  are circulated by which the productivity of an organization will be adversely affected.

Its always better to have 2 step anti-spam filtering feature or even more in any organization to ensure that the spam never reaches our network especially the Messaging system.

Microsoft has built in Anti spam features which can be enabled from Exchange 2003 versions and they work perfectly fine and more accurate in filtering the spam emails. Its always recommended to have this feature enabled as a part of additional security along with additional spam configurations and settings  in an environment.

But we need to always ensure that we are aware of all the settings configured in the spam filtering in all levels in our organization as it can interrupt the end users in sending and receiving emails if this configuration is not correct.

I just happened to walk through one of the most recent version of additional  spam security feature from product SPAMfighter and was much impressed with all the Configurations, Options and user friendliness of the product r.

In this article lets walk through the installation and few functionalities of the product SPAMfighter Exchange Module.

What is SPAMfighter ?

It is an add-on to Exchange Server that fully integrates and offers anti spam protection.  It works with Exchange versions Exchange 200,2003,2007,2010 and 2013.

How Does it works ?

Spam Fighter administration is managed through web interface which is much user friendly and has more options to explore.

It works integrated fully with Microsoft Exchange Server. It creates its own security groups and user account in AD which integrates with Exchange servers. This will be easier for us to manage easier way in terms of policy management and having separate control over Spam Fighter. Also by using this we can designate an individual to take care of these tasks who has control only on this software.

Prerequisites 

There is no prerequisites required to install this software as i ran it from a member server ( Windows server 2008) . The only thing i noticed was it required install the Microsoft Visual C++ Run-time which it prompted for it and it found the software by its own and installed them which made my job simple.

Installation

The product can be downloaded from here

http://www.spamfighter.com/SPAMfighter/Product_SEM.asp

Its a 30 day trial version and should be downloaded on to Windows Servers.

The installation was pretty much standard as all the software does and it prompted me for the latest virus definition updates so i would not walk through the entire setup.

One interesting thing i found during the installation was it asked for user name and password for Spam Fighter administration and it automatically created respective AD account to integrate with the exchange modules.


s1


Once the installation is done you can open up the web console through add or remove programs and select spam fighter and opens web console as below

Give the user name and password given during installation.

S2


Was astonished to see more options

S3


In addition to the administration part from the server end spam fighter has outlook add in as well which users can install and further customize filtering on their own.

s4


It has good policies which can be filtered in various levels as shown below.

I can see policy defined for inbound,outbound and internal emails.

Also i could notice policy filter settings for user level too which is very good.

s5


All the users can be modified individually as well.

s6


Finally a statistics report can also be pulled over which shows up the graphical value of filtered emails as below.

s7


Cost Factor

Like most of the  apps which integrate with exchange makes licensing cost per user the spam fighter also have licensing structure  cost per user  basis for one year. However the cost factor reduces very well for organizations more than 2500 users.

You can view the pricing list here

http://www.spamfighter.com/SPAMfighter/Payment_Choose_Product_SEM.asp

Conclusion 

Overall SPAMfighter product is much user friendly and latest version  has much effective cool new features which can be integrated with Exchange Servers  for better spam filtering.

Thanks 

Sathish Veerapandian 

MVP – Exchange Server

OWA,EWS configuration in Exchange 2013/2007 coexistence

We need to consider few factors while planning for coexistence between Exchange 2013 and legacy exchange servers especially exchange 2007 .We might run into few confusions. In this article i will mention few key points which needs to be considered while planning Exchange 2007 and 2013 coexistence for owa,ews setup.

In coexistence with exchange 2013 and legacy version the request happens in 2 types.
For Exchange 2010 – Exchange 2013 does a Proxy for owa and ews requests for users in exchange 2010.
For Exchange 2007 – Exchange 2013 does redirection for owa and ews requests for users in Exchange 2007.

When a user with an Exchange 2007 mailbox logins externally from OWA the requests goes to Exchange 2013. Now the Exchange 2013 needs this connection to be redirected to exchange
2007 server.

In Order to do this Exchange 2013 requires a dedicated external host name configured on exchange
2007 server’s for the required services accessed from externally. So the external and internal hostnames of the Exchange 2007 server need to be different from the hostnames of the Exchange 2013 server and need to be pointed to the Exchange 2007 server.

Better use the Exchange Server Deployment Assistant which will give much clear information.If
you are still confused then you can remember the following key points.

First all the services URL’s needs to be pointed to Exchange 2013 CAS server from exchange
2007.Exchange 2013 CAS server will redirect the connections to Exchange 2007 server.

Legacy Names:
Configure following Legacy host names for the below services in exchange 2007

OwaVirtualDirectory – Create https://ExternalLegacyHostName/owa
WebServicesVirtualDirectory – Create https://ExternalLegacyHostName/EWS/Exchange.asmx
UMVirtualDirectory – Create https://ExternalLegacyHostName/UnifiedMessaging/Service.asmx
OABVirtualDirectory – Create  https://ExternalLegacyHostName/OAB
ActiveSyncVirtualDirectory – Create  https://InternalLegacyHostName/Microsoft-Server-ActiveSync


Planning Internal and External owa URL’s

For Exchange 2013 OWA URL: Use same old URL for OWA access to Exchange 2013 and change the IP address from exchange 2007 to E15 internally.
Change the external owa url and redirect the connections to exchange 2013 CAS.

For Exchange 2007 OWA URL:

Create Legacy. Domain.com for external owa users.
Create Legacy.Domain.com for internal owa users.

Below is an example to Modify the OWA url :

On Exchange 2013 point the ExternalUrl  ‘mail.contoso.com’ to Exchange internet facing CAS server.
On Exchange 2007 create the ExternalUrl as ‘legacy.contoso.com’


Certificates:

All the required SAN entries for UM,webservices and activesync should be created.
Add external owa legacy URL to the public certificate and install it on both Exchange 2007 and
Exchange 2013 only then owa redirection will work.
You need to Include internal Legacy. Domain.com on Exchange 2007 Certificate for OWA co-
Existence.
Following change needs to be done in Firewall

External OWA URL should be directed to exchange 2013 Internet Facing CAS.

External EWS URL should be directed to  exchange 2013 Internet Facing CAS.

External Autodiscover URL should should be directed to  Exchange 2013 CAS.
External ActivesyncVirtualDirectory should be directed to Exchange 2013 CAS.

External UMvirtualDirectory should be directed to  Exchange 2013 CAS.

Create new NAT rule on firewall for Legacy.domain.com to Exchange 2007 CAS. You can do this as well.By doing this users will be able to log on directly using the URL https://legacy.domain.com/owa with a mailbox on Exchange 2007.


External and Internal DNS settings

Public DNS – Map all of your external public DNS records (ews,owa,activesync etc.,) to your
exchange 2013 public IP if you have dedicated one for 2013 or FQDN of your internet facing CAS server.
Example:
Current external owa URL (contoso.domain.com) – point it to dedicated exchange 2013 public ip or internet facing exchange 2013 CAS FQDN.
Current External Autodiscover – point it to dedicated exchange 2013 public ip or internet
facing exchange 2013 CAS FQDN

Internal DNS – Configure the Exchange 2007 to point SCP AutoDiscoverURI to Exchange 2013 Client
Access FQDN by changing DNS entry for Autodiscover.domain.com to exchange 2013 CAS sever Ip
address

The internal DNS records should point to the internal host name and IP address of your Exchange
2013 Client Access server
Make sure that legacy.contoso.com resolves to CAS2007 in internal and external DNS.

Authentication Settings:

This part is little bit tricky. You need to plan according to your organization. If you have FBA configured in TMG or ISA server then you need to configure accordingly.
Set the owa virtual directory authentication only to  Basic in exchange 2007.
In exchange 2013 set owa virtual directory to only (Windows Authentication) or only (form-based authentication) or only (Basic, No redirection, SSL Enabled) depends according to your setup.

Things to check:

If you have redirection configured in IIS on the Exchange 2007 Server Make sure that the above
Virtual Directories doesn’t have it configured.

If you have FBA enabled on ISA or TMG then disable FBA on Exchange 2013 CAS else users will be prompted twice for authentication.

References:

http://technet.microsoft.com/en-us/library/jj898581(v=exchg.150).aspx

Checklist: Upgrade from Exchange 2007
http://technet.microsoft.com/en-us/library/ff805032(v=exchg.150).aspx

Install Exchange 2013 in an Existing Exchange 2007 Organization
http://technet.microsoft.com/en-us/library/jj898582(v=exchg.150).aspx

http://blogs.technet.com/b/meamcs/archive/2013/07/25/part-2-step-by-step-exchange-2007-to-2013-migration.aspx

Thanks

Sathish Veerapandian

Configure new UM Dial Plan and UM IP Gateway in Exchange 2013

UM server is the one  that provides Voice Mail, Outlook Voice Access and other Exchange voice features. Integrating the UM functionality along with the existing telephony system or lync is one of the challenging role that admin would face. Planning should be done properly according to the enterprise voice plan which is used in the organization.

As we know from Exchange 2013 there is no separate role for UM. Their services are running in CAS server and Mailbox server and below are the list of services that are handling  UM processes.

Microsoft Exchange Unified Messaging Call Router service

Routes the incoming SIP traffic from Lync server or any other IP-PBX or SBC which sends only SIP traffic. This traffic can come from a VoIP gateway, Session Border Controller (SBC), PBX or IP PBX. . Any media traffic sent to the Client Access servers would be redirected to a Mailbox server since the Client access servers are not capable of handling RTP and SRTP media traffics.

Microsoft Exchange Unified Messaging service

These servers will handle the initiating Session Initiation Protocol (SIP) traffic from the Lync server for voicemails are left over the Unified Messaging service. It accepts the connection either in port 5061  or 5060 (depends on your config secure or unsecure) and then redirects to Worker process in port 5065 or 5066 . This service does not do any media conversion.

Microsoft Exchange Unified Messaging Worker Process

Worker process receives the SIP requests only on port 5065 or 5066. Which means the actual media conversion takes place in this port. It does the following below thing

1) Does Registration of the process with Unified Communications Managed API 4.0 and converts all the required information for media processing for SRTP and RTP protocols.

2) Does the Initialization of Simple Mail Transfer Protocol (SMTP) message Submission and submits the voice message to the user’s mailbox who has UM enabled.

In this article we will have a look at the steps to configure UM and steps to integrating with Lync or existing telephone system in Exchange 2013.


Open EAC  Click on Unified Messaging and select UM dial plans as shown below


1


Give it a name and provide the extension length that the users need for the subscriber access number to be used by Enterprise Voice users.

Select the Dial Plan type according to your Lync / IP-PBX or SBC settings you have.


2


Select the VoIP Security mode according to your enterprise voice plan settings that you have.

3


Select the  appropriate country region and click save

4


Once finish click save and select configure the dial codes

Specify the codes according to your requirement.

5


Configure Outlook Voice Access as per requirement

6


Select settings and configure the options about searching the names when users are directed to the voice mailbox .

7


Configure the transfer and search options

8


Configure the transfer and search option according to the requirement and click save we are done.

Now we need to create a New UM IP gateway.

Things to consider before we create a new UM IP gateway

Run ExchUcUtil.ps1 and OcsUmUtil.exe only if you do not have any IP-PBX or SBC and if your are going to  integrate your UM functionality with Lync or OCS pool. If you have multiple dial plans associated with different enterprise voice plan then you need to plan accordingly.

If you plan to integrate with  Lync pool then run ExchUcUtil.ps1 on all Exchange Mailbox servers

Note : The ExchUcUtil.ps1 script creates one or more UM IP gateways for Lync integration. You must disable outgoing calls on all UM IP gateways except one gateway that the script created. This includes disabling outgoing calls on UM IP gateways that were created before you ran the script

Run OcsUmUtil.exe script on the Lync server

OcsUmUtil.exe Creates contact objects for each auto-attendant and subscriber access number to be used by Enterprise Voice users.

Verifies that the name of each Enterprise Voice dial plan matches its corresponding unified messaging (UM) dial plan phone context. This matching is necessary only if the UM dial plan is running on a version of Exchange earlier than Exchange 2010 Service Pack 1 (SP1).

If you are going to integrate UM with any IP-PBX or SBC directly then you can skip the above step.

Now we need to create a new UM IP gateway.

Open EAC click Unified Messaging and select New UM IP gateways


9


Give a name for the IP gateway

In the address tab give the FQDN or the IP address of the SBC or the IP-PBX that you have

Note: When you specify the FQDN on the IP-PBX or SBC then you need to create a Host A record for the same on DNS and map it to its IP.

Now select the associated dial plan that you need

10


Now enable the option the allow outgoing calls and allow message waiting indicator. Also set forwarding address if you wish to set forwarding address.

11

Click on save and we are done configuring UM dial plan and UM IP gateway  in Exchange 2013.

Note: Unified Messaging requires enterprise CAL licensing.

There is no mandatory requirement for Public UM certificate.UM cert can be internal as you do not need to publish this service to the outside world, since you’ll connect via Lync to it and therefore the communicationss are all internal in that respect.

References :

http://technet.microsoft.com/en-us/library/gg398193.aspx

http://technet.microsoft.com/en-us/library/bb125151(v=exchg.150).aspx

http://technet.microsoft.com/en-us/library/jj966276(v=exchg.150).aspx

Cheers

Sathish Veerapandian

Configure Text Messaging Delivery in Exchange 2013

By using the text messaging delivery option we would be able to route text messages to user’s mobile phones and notify them whenever a new email, Meeting request reaches the user mailbox.

In this article we will have a look at steps to configure Text Messaging in Exchange 2013

First let’s have a look at the functionality and the components involved in the text messaging delivery option

Exchange first stamps the Text messages with the local email address phonenumber@domain.com in the categorizer for the user whom we have this option enabled.

Basically this Text Messaging Delivery works on two types of Transport Agents working on the message categorization part.

  • Text Messaging Routing Agent
  • Text Messaging Delivery Agent

These 2 agents’ works with a help of dedicated connector DeliveryAgentConnector for this functionality which is enabled by default from Exchange 2010

We can see this connector by running the below command

Get-DeliveryAgentConnector | fl

Once the emails is processed for any user for whom the email needs to reach his mobile device by these 2 transport agents  it then hand overs the job to the EWS. In EWS there is a component called textmessagingenabled. It verifies if  this parameter enabled in OWA Virtual Directory. If this option is enabled then the text message is transferred to the user via ews to the public ip address. It reaches user telephone service provider and then message is delivered to user as message notification.


Below are the steps to configure the text messaging delivery option

First step is to check if the text messaging option is enabled on the CAS server OWA Virtual Directory.

Run the below command to check if its enabled

Get-OwaVirtualDirectory |Ft Servername,textmessagingenabled


1

To enable text messaging in all CAS servers  run the below command

Get-OwaVirtualDirectory | Set-OwaVirtualDirectory –TextMessagingEnabled $True

To disable text messaging in CAS  servers run the below command

Get-OwaVirtualDirectory | Set-OwaVirtualDirectory –TextMessagingEnabled $False


2


Now we need to ensure the transport agents are enabled only then textmessaging option will work.

Run the below command to check if the both the agents are enabled

Get-TransportAgent

If you find it disabled you can run below command to enable them

Enable-TransportAgent   -Identity “Text Messaging Routing Agent”

Enable-TransportAgent   -Identity “Text Messaging Delivery Agent”

3


Now run the below command to check if the delivery agent connector is enabled  and ensure that deliveryprotocol  to mobile is enabled.

Get-DeliveryAgentConnector | fl

4

We are done with the config on the server side . We need to enable this option for end user through OWA .Follow the below steps


Log on to outlook web app for user whom we need to enable this functionality  and click on options

5


Now Click on phone and click on text messaging

6


Select Turn on Notifications option

7


Choose the mobile operator locale

8


Choose the mobile operator

9


Enter the phone number

10


Enter the Passcode sent to your mobile

11


Click on finish and we are done configuring text messaging notifications for user.

Note:

End user will be charged from his mobile operator for each and every notification that he receives in his mobile device.

Thanks
Sathish Veerapandian

Migrate from Lotus notes to Office 365 with Quest Co-Existence Manager

With Microsoft Office 365 becoming the most successful product most of the organizations prefer to move their messaging systems to Office 365 or they prefer to have a coexistence kind of hybrid setup with their on premise.

In this article we will have a look at readiness to prepare  the Lotus Notes environment  for successful migration from lotus notes to Microsoft Office 365.

First we need to prepare the readiness before we move all users to Office 365 cloud since 2 messaging systems are entirely different (Eg: notes uses mailin database ,routing mailboxes and exchange has mailboxes and connectors) and we need to achieve a way so that these 2 different systems can interact until the migration is complete.

We need to have a mediator which will be able to interact with both of these messaging systems. In order to accomplish this we have multiple third party solutions through which we can integrate.

There is Microsoft tool called Microsoft Notes Online Inspector. There is an article written for the same which you can refer below

http://www.v-and-m.com/vmhomepage.nsf/Content/Microsoft’s+%22Secret%22+Mail+Migration+Tool+?OpenDocument

You can do it from below Microsoft recommended  third party migration partners as well

1) Quest Coexistence Manager.

2) Full Armor

3) Binary Tree Co-Existence

4) CASAHL Technology

In this article we will look at the Components, functionality and readiness to migrate with Quest coexistence manager

Overview of Quest Coexistence Manager

Quest Coexistence manager is a product of Quest software used for migrating from lotus notes to Microsoft Messaging platforms and Office 365

What this software does?

This software integrates and creates a pipeline between notes and Microsoft Exchange platform.

By doing the above

  • We can have an effective coexistence between the lotus notes and Exchange platforms
  • We can transfer the messaging system smoothly from lotus notes to Microsoft Messaging Platform without any hassle.

Basically this software consists of 3 roles or we can call it as components as well.

  • Directory Co-Existence.
  • Mail Co-Existence.
  • Free/Busy Co-Existence.

These above components are same as we had these 3 components in Microsoft Exchange Transport Suite which was legacy  tool of Microsoft used to migrate from notes to Exchange 2007.

Below are the functionality of these 3 roles

Directory Coexistence Role:

Updates the directory data between the domino directory and Microsoft Active Directory or Microsoft Azure directory if it’s Office 365 .

This role is used to keep the data in users, Groups located in 2 different directories i.e, Domino directory and Microsoft Active Directory if it’s on premise or Microsoft Azure if its office 365 to be intact. Since in   a organization new people can come and people can resign so these information should be reflected in office 365 Azure directory. So this Directory coexistence role gives a bidirectional update vice versa and keeps the directory information intact.

Mail Co-Existence Role:

This role is used to communicate users between the 2 different messaging platforms.It is used for communication and routing emails between non migrated users mailin database residing in notes database to the mailboxes which are present in the Microsoft Exchange server or office 365 environments.

Free/Busy Co-Existence Role:

This role is used to share the free busy information between notes and Exchange on premise/ Office 365 environment.

QcalCON

There is a separate component called QcalCON component of free/busy co-existence which needs to be installed on any one of the notes server. By using  this component the notes server will route the calendar request that needs to goes to exchange server and vice versa.

Prerequisites:

We need to install these roles separately on hardware’s according to the number of users  and size of environment we have.

If the organization has less number of users we can install all these 3 roles together on a single server.

If the organization has more number of users and domino servers  then we need to install all these roles on separate servers for better synchronization.

These servers(Domino, Mail and Free/Busy) can be installed on minimum Windows server 2003 to Windows server 2008 R2Sp1

Hardware can be planned according to the size of the environment

Minimum Powershell version 2.0 is required on F/B connector


Source Servers should be the following:

Supported Domino Server versions

Versions – Minimum 6.5.1 to  to maximum 8.5.3

Supported Notes Server Versions

Versions – Minimum 6.5.1 to  to maximum 8.5.3


Target servers should be the following:

Exchange Servers version – Minimum Exchange 2007 RTM to Microsoft Office 365

SQL Servers Required

We need to have SQL server to store all these information as Co-Existence Manager uses SQL server to store the config information.

Licensing Quest Software:

Quest software sells licensing based on number of users present in the environment. They provide a single licensing by which we will be able to put this license on all these roles.

Coexistence between Notes and Office 365

Direct Coexistence between notes and office 365 practically is not possible. In these scenario we need to create a 2 step coexistence for both migration as well as hybrid scenarios

In order to achieve perform the following

  • Create a local AD server to sync the data between domino directory and Microsoft AD locally.
  • At least one local Exchange 2010 server with 3 roles installed which then synchronizes the data to office 365 through ADFS.
  • Create ADFS and Directory Synchronization between local AD server and Microsoft Azure Directory.
  • Configure Hybrid Deployment Wizard on the on premise Exchange server.
  • We need to choose the migration type as IMAP in the Hybrid Configuration Wizard as non Microsoft -Messaging platforms should be done only in IMAP Migration.

Note: Migration from notes to Office 365 will take time more than migration done from on prem exchange to office 365. The reason because since multiple components are involved and the MAPI throttling might take place.

Once we have met the above prerequisites we can  migrate all the users from notes to office 365 with quest software without any issues.

Thanks

Sathish Veerapandian

Script to Start, Stop and query exchange counters on all Exchange servers

I have developed a script which can be used to Query, Start and Stop Exchange counters on all servers in Exchange environment.

This script can be executed in scenarios where we need to enable Perfmon counters for Exchange on all Exchange servers during troubleshooting scenarios.

Copy the list of Exchange servers for which we need to run Perfmon and save them in a notepad in the below format in the server where you are going to execute this command.

Scrip1


Probably if you have difficulty in collecting the list of servers manually we can run the below command and take the output by running the below command.

Get-ExchangeServer | select name  >c:\servers.txt

Once you get the output just format the text file and ensure no spaces and other characters are present apart from servers as above screenshot.


Copy the below text and save it in ps1 file. Ensure you change the server path alone in this script which has the server list.


***************************************************************************

write-host ”

1.List Available Counters for Exchange_All

2.Start Counter for  Exchange_All

3.Stop Counter for Exchange_All

$option = Read-host

$server = get-content “Example- d:\exserver.txt”

switch ($option)


{


1


{


$server | foreach {logman query Exchange_All -s $_}


}


2

{


$server | foreach {logman start Exchange_All -s $_}


}


3


{


$server | foreach {logman stop Exchange_All -s $_}

}


4


{

}


}

********************************************************************************

Navigate to the location where we have this file saved and run.

We will get 3 available options as below.

Option 1 –  To List Available Counters for Exchange_All

Option 2 – To Start Counter for Exchange_All

Option 3 – To Stop Counter for Exchange_All


scrip2


Choose the required option and the command will be executed accordingly.

Below is example for querying the Perfmon counters for Exchange_All in all exchange servers.

script3


Below is example for starting the Perfmon counters for Exchange_All in all exchange servers.

scrip4

Below is example for stopping the Perfmon counters for Exchange_All in all exchange servers

scrip5

This command can be useful when we might need to enable Perfmon on multiple exchange servers at one time in troubleshooting scenarios.

Thanks

Sathish Veerapandian

Details Template Editor Exchange 2013

Details Template Editor is used to modify or add extra information in the objects properties which are accessed through GAL.

For Example if company demands to have a column called Block or Cabin number to be added in each and every user’s mailbox to be displayed via GAL .We can use the details template editor and create new columns for the same. So by doing this when a user resolves any mailbox from the GAL and access their properties then he/she would be able to see the created object entries (Eg: Cabin number or Block).

In this example we will see how to create an additional column for Building Block which needs to be populated and visible in the user properties when end users accessed from GAL.


Details Template Editor can be modified by using Exchange toolbox as well as Exchange Management Shell. We will look through how to modify them with Exchange Toolbox.

Go to start all programs and Open Exchange Toolbox.

Unlike in Exchange 2010 we have only three configuration management tools as below and open Details Template Editor

D1


Select preferred language and the preferred template type for which we need to add the new columns

There are multiple template types (Contact, User, Group, Public Folder, Mailbox Agent etc..,)

So ensure that you choose the correct Template Type.

D2


And then it opens up the editor page as below

D3


Here we have 2 options over the left

Group Box – When we double click on this option it creates an empty new box where the specified value is entered.

Label – A unique name defined for the newly created group box like (department, Alias as shown in above picture)

Now double click on the group box over the left and it creates a new empty column where the value needs to be displayed.

Over the right editor pane we have the layout height width adjustment option by which we can alter the values and bring it to look uniform with the other group boxes.

D4


Now create a new label box by double clicking on the label icon and drag it to the newly created group box.

D5


Now im entering the value Block in my example in the text. You can enter the desired value to appear in the GAL object.

D6


D7


We are done with creating the template. Now we need to assign a attribute to this newly created group box since no attributes will be linked with newly created group box.

Do the below steps to link a unassigned attribute to the newly created Group box.

In the right editor pane select any one of the unassigned attribute.

D8


Once done click on file and we have an option called save

D9


Run the below command to populate this value to any user via GAL

Set-Mailbox Usermailbox -CustomAttribute “specify the value”

In my example im setting this value for Exchangequery Mailbox

Set-Mailbox Exchangequery -CustomAttribute10 “B”

D10


Note: By default this new value will not be created for any user and displayed in the GAL. We need to run the above command for the users to display this value in the GAL.

Now we can see this value is populated for the user we have set. This value will be displayed in Outlook when we see the properties of this user and new value Block with the value B will be displayed.

D11


We can edit details template using exchange management shell as well

We can use below command to see the accepted property types in details template.

Get-DetailsTemplate | Get-Member

D12


We can run the below commands to see the examples

Get-DetailsTemplate     – Examples

D13


To get the detailed information we can use the below parameter as well.

Get-Help Get-DetailsTemplate –Detailed

D14

It’s better to use the Exchange Toolbox for creating new details template since there are multiple attributes involved and Details Template Editor is much user friendly. We can use Exchange Management Shell to modify or add any entries for users in the custom attributes assigned.

We are done with creating custom entries for objects using details template editor.

Sathish Veerapandian

Configure PowerShell in client PC to remotely manage Exchange server 2010/2013

Sometimes we might run into a situation where we need to perform admin tasks from a client PC where we do not have management tools installed in office location.

In those scenarios we can always connect to the Exchange Management shell and import all the modules from exchange through windows PowerShell.

By using this we can grant access  to the help desk team with only view only admin rights or recipient management rights on their PC without having the Exchange management tools installed so that they can view user mailbox settings and perform basic troubleshooting from their power shell.

Prerequisites

The client PC must be a member of the domain Windows 7 or Windows 8 or minimum windows server 2008.

The client PC must have minimum Windows PowerShell 2.0 and no exchange management tools is required

The user for whom we are going to grant this access should be having local admin rights on his PC as well as  Admin rights on the Exchange Servers( You can give the user administrative roles , end user roles ,organizational management or recipient management according to your criteria)

Applies for Exchange 2010 and 2013

Go to start – Right click on windows power shell and click run as administrator.


powershell0

Now we need to check if the PowerShell profile is created for the user who has logged into the PC  by running  $profile in powershell

Though it will display the below default path we need to check if the file actually resides.

powershell2


Run the below command to check if the file exists in the location.

Test-Path $profile

powershell3

By default the ps1 profile will not be created and that’s the reason it shows as false.

We need to create it by running the below command

New-Item -path $profile –Type File -Force

powershell4

Now we can see the file is created.

Now open the file through PowerShell

Notepad.exe $profile

powershell5


Now we need to establish a remote session to connect to Exchange server to import the commands. In order to do those add the following command

The first line of below command will help us to authenticate with the exchange server.

The second line to create a new session with specified exchange server

The third line to import all the pss session from that particular  server.

The last fourth and fifth are optional since I have set directory location in this client PC and command to view all value from all the Exchange Servers in entire forest.

Below is the command. Just copy ,paste the value in the powershell file and save .

************************************************************************

$Credential = Get-credential

$session = New-PSSession -ConfigurationName Microsoft.Exchange -ConnectionUri http://casservername/powershell -credential $credential

import-pssession $session

set-location c:\

set-adserversettings -viewentireforest $true

***********************************************************************

powershell6


Now open the PowerShell with run as admin and will prompt you for credentials.

powershell7


Once you have authenticated you will see the below screen which says you have successfully connected remotely with Exchange server.


powershell8


We can create PowerShell ISE profile for this user as well which will be very useful and provide additional informational while typing any commands since  the help desk team might not be aware of Exchange commands.

Do the same procedure for creating PowerShell ISE profile

Go to start and run windows PowerShell ISE.

powershell9


Opens the below window.

powershell10


Type the same command to create profile for ise and click on Run Script Icon or press F5 button to execute.

New-Item -path $profile –Type File -Force

powershell11


Now copy ,paste the same command as we did for PowerShell   file in the below location.

powershell12


Now open Windows PowerShell.ISE and it will prompt for credentials and get connected to Exchange modules.

Below is an example of executing from PowerShell ISE which gives us suggestions while executing the commands in the command pane.

We have an option to choose our command and either Run, Insert or Copy the file in the script pane.

Note : The below option is available only from Windows PowerShell 3.0

final2

Final


We are done with connecting to Exchange through Client PC windows power shell.

Cheers

Sathish Veerapandian


Install and Configure Lync 2013 server standard edition

In this article we will look at steps to install Lync 2013 server standard edition.

Before we deploy Lync server in environment it’s always mandatory to do a proper planning for the enterprise voice features as there are more factors involved in connecting to the mediation server and need to be designed and planned accordingly.

To install Standard edition front end server we need to plan the below things mandatory

Readiness for Enterprise voice

If we are planning for enterprise voice it’s better to check few things before we install front end server.

By default the mediation server is collocated with the front end server in standard edition. But this needs to be considered and deployed separately or collocated according to our enterprise voice plan.

In Lync 2013 standard edition we can choose to deploy mediation servers separately based on our requirements.

Below are the types of enterprise plan that are available and we need to plan accordingly


SIP trunking – For SIP trunk there is separate Standalone mediation servers required because the mediation servers acts as a proxy for all the Lync 2013 clients and transcodes media whenever required. So a dedicated server is required to handle this traffic as we do not have a dedicated pstn or a pbx.

Direct SIP trunk with PSTN – If you have Direct SIP trunk with PSTN gateway then separate mediation servers is not required since they are capable of receiving traffic from any pool and capable of DNS load balancing across the pools.


Ip-PBX or SBC – We don’t need to have a separate mediation server as long as the below conditions are met for IP-PBX or SBC

If IP-PBX or SBC is intelligent and can receive traffic from mediation server and route the traffic to the mediation server.

IP-PBX should not support media bypass and it should be able to do the media processing by its own by relieving the mediation server from media processing.

Also it’s always better to run the Microsoft Lync server 2013 planning tool to see if the front end server along with the mediation server can handle the load. If it does not then it is best recommended deploying a separate pool and separate mediation server.

Readiness for SQL

By default, the SQL Server Express back-end database is collocated on the Standard Edition server. You cannot move it to a separate computer.

SQL Standard/Enterprise is not supported with Lync 2013 Standard Edition pools. If you use a separate SQL Standard/Enterprise instance, you can deploy only Lync Enterprise edition.


Readiness for Active Directory Services

Domain Functional Level – Minimum should be at least Windows server 2003.

Forest Functional level – Minimum should be at least windows server 2003.


Install prerequisites on the front end server

In this article we will look at how to install Lync 2013 on Windows server 2008 R2 server.

Following prerequisites must be installed on the FE server


Microsoft .NET Framework 4.5

Remote Server Administration Tools (RSAT)

Microsoft Visual C++ 11 Redistributable

Windows powershell 3.0

HTTP Activation

WCF Activation

Windows Installler 4.5

Microsoft Silver light 5

Run the below commands for installing the below features

Import-Module ServerManager

Add-WindowsFeature Web-Server, Web-Static-Content, Web-Default-Doc, Web-Scripting-Tools, Web-Windows-Auth, Web-Asp-Net, Web-Log-Libraries, Web-Http-Tracing, Web-Stat-Compression, Web-Default-Doc, Web-ISAPI-Ext, Web-ISAPI-Filter, Web-Http-Errors, Web-Http-Logging, Web-Net-Ext, Web-Client-Auth, Web-Filtering, Web-Mgmt-Console, Web-Asp-Net45, Web-Net-Ext45, Web-Dyn-Compression, Web-Mgmt-Console, Desktop-Experience

Once the above installation is done ensure that you have joined this server in the domain and  logged in as domain admin.

Note : Admin User account must be a member of domain, enterprise and schema admins for the installation.

Run the setup from the CD

You will be prompted to install the Microsoft visual C++ as sql is installed on front end standard  server by default


Lync11


Choose the installation location and click install.

lync1


Click accept on the license agreement to proceed with the installation.

lync2


Once the installation is completed we will have 2 new programs installed in the task bar.

  • Lync server management shell.
  • Lync server deployment wizard.


Now open Lync deployment wizard. It determines the deployment state once we open.


lync3


Click on prepare schema

lync4


Click on finish once completed.

Click on Prepare forest and click on finish once done

lync5


Click on Prepare domain and click on finish once done

lync6


Once prepare domain done open lync deployment wizard again and click on prepare standard edition server.

Once we have done the above things we can see the below groups created

lync7


Now we need to add users to provide administrative access to the Lync Server Control Panel.

Add users in CS Administrator group who requires access to Lync Server Control Panel.

lync8


Now create SRV record for automatic sign on for the Lync clients.

Create Record: (screenshot below)

  • Service should be :  _sipinternaltls
  • Protocol should be :  _tcp
  • Port number:  5061
  • Host: point to your FQDN to your Front-End Server or Pool

lync9


Now go back to the deployment wizard and install Lync administrative tools. Once after you install  you will see a new option called Lync server topology builder.

Open Lync   Server topology builder and select new topology.

lync10


Now define the SIP domain for the users to log in

lync14


Every Lync server front end pool must be deployed in a site. So specify the site and you can also mention multiple sites later..

lync16


Now define the front end pool fqdn

lync14


Now select the features that we need to enable. IM and presence is enabled by default. Select the additional features according to your design. Select collocate mediation server if you need to install mediation server along with FE pool.

lync15


Just click default settings on the sql server store as we are installing standard edition.

For define file store alone we need to manually specify the installation path as it wont create the path automatically. We need to create a share folder and grant access to users

RTCHS Universal Services

RTC Component Universal Services

RTC Universal Server Admins

RTC Universal Config Replicato

Now click on Finish

Now open Topology builder and click on publish to publish the topology


lync17


Once the publishing wizard is completed click install or update lync server system to complete the installation successfully.

We are done with installing the Front end server collocated along with mediation server.

You can later install monitoring and archiving server separately.

Cheers

Sathish Veerapandian