Tag Archives: LLM

Deploy Phi 4 mini on Azure Kubernetes Service with the AI Toolchain Operator (KAITO): Step by Step Guide

Running large language models on Kubernetes usually means dealing with GPU infrastructure, model serving, scheduling, networking, and operational complexity.

Instead of calling a hosted LLM API, we will deploy an open source model directly on Azure Kubernetes Service (AKS), let KAITO provision the required GPU infrastructure, expose the model through an inference service, and send a real prompt to it.

Azure Kubernetes Service provides another approach through the AI Toolchain Operator add on, based on the open source Kubernetes AI Toolchain Operator (KAITO) project.

KAITO allows us to describe an AI workload through a Kubernetes Workspace resource. From there, the operator can coordinate the GPU compute, model deployment, inference runtime, and Kubernetes resources required to serve the model.

In this guide, we will walk through the steps required to deploy Microsoft Phi 4 mini-instruct on AKS using:

  • Azure Kubernetes Service
  • AI Toolchain Operator / KAITO
  • NVIDIA A100 GPU compute
  • Phi 4 mini instruct
  • vLLM
  • An OpenAI compatible inference API

Microsoft’s AKS documentation describes KAITO as a managed add on for deploying and operating open source LLM workloads on Kubernetes, with capabilities including vLLM integration, prompt formatting, streaming responses, and OpenAI compatible APIs.

The target architecture is:

Azure Subscription → AKS → KAITO → Workspace → GPU Node Pool → Phi-4-mini + vLLM → OpenAI-compatible API → Application

Why Use KAITO on AKS?

Without an AI operator, running an LLM on Kubernetes can require manually coordinating several components:

  • GPU node pools
  • GPU scheduling
  • NVIDIA configuration
  • Model containers
  • Model downloads
  • Inference servers
  • Kubernetes Services
  • Scaling
  • Resource scheduling
Continue reading

Your First AI Computer: Complete Jetson Nano Setup for Deep Learning , Edge Inference & AI Models

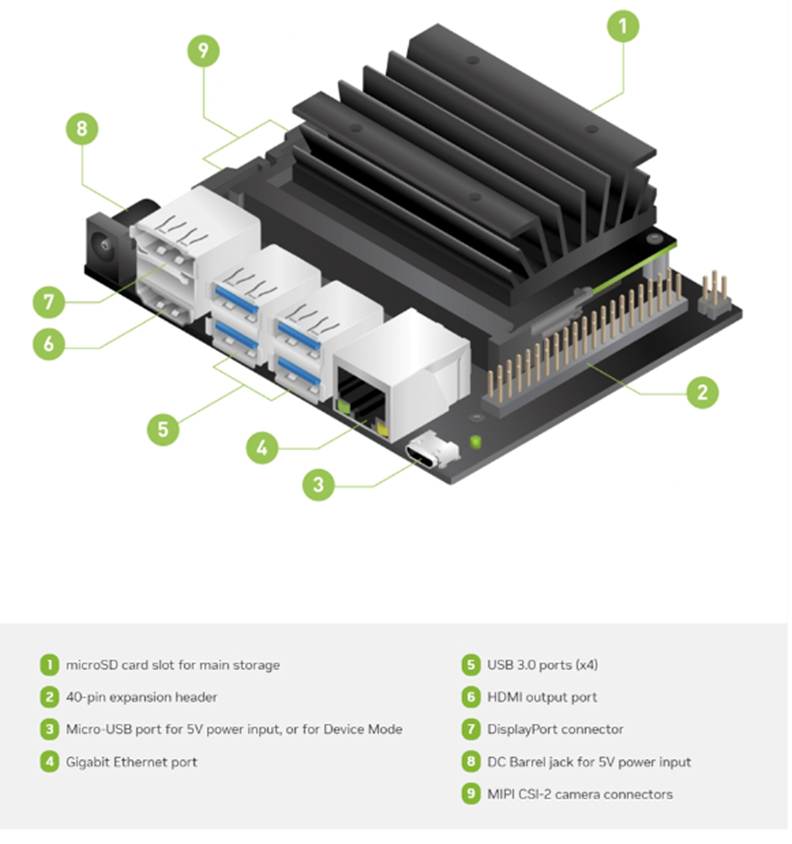
The NVIDIA Jetson Nano Developer Kit is one of the most powerful and affordable edge AI platforms available today. It enables developers, students, and hobbyists to build and deploy real time AI applications such as object detection, voice processing, robotics navigation, smart surveillance, and IoT automation  all on a compact GPU accelerated device.

This guide walks you through the entire setup process end to end, starting from preparing the microSD card, flashing JetPack OS, configuring networking, enabling SSH, scanning the device on your LAN, and completing the desktop onboarding steps.
Every stage is illustrated with images, so even first time users can follow along easily.

By the end of this setup, your Jetson Nano will be fully ready to deploy deep learning models, run TensorRT optimized inference, manage Docker containers, and integrate with larger AI/IoT pipelines.

1. Preparing Your Jetson Development Kit

Before getting started, ensure you have a Jetson device, a computer with internet access, a microSD card (32GB recommended), and an SD card reader. You will download JetPack OS and use Balena Etcher to flash the system image onto the SD card.

Setting up the Jetson Nano correctly from the beginning is crucial because the device relies heavily on optimized system components that come bundled with JetPack OS. This OS includes CUDA, cuDNN, TensorRT, and essential GPU drivers all of which are required for running modern AI workloads. A clean and properly flashed SD card ensures that the Jetson boots smoothly, recognizes all onboard hardware, and operates with full GPU acceleration.

During the SD preparation stage, tools like SD Card Formatter and Balena Etcher ensure the card is formatted correctly and the JetPack image is written without corruption. Windows cannot interpret Linux EXT4 partitions, so seeing “unallocated space” in Disk Management is completely normal and confirms that the flash was successful.

Download the SD card Formatter and install them.

Continue reading

Designing Safe and Actionable Agents in the New Azure Foundry Portal

In this blog we will go through the Azure AI foundry Portal and its capabilities .The new Azure AI Foundry portal brings model experimentation, agent building, data grounding, and safety controls into a single, coherent workspace. It’s designed so builders can move from idea to prototype to hardened agent without context switching.

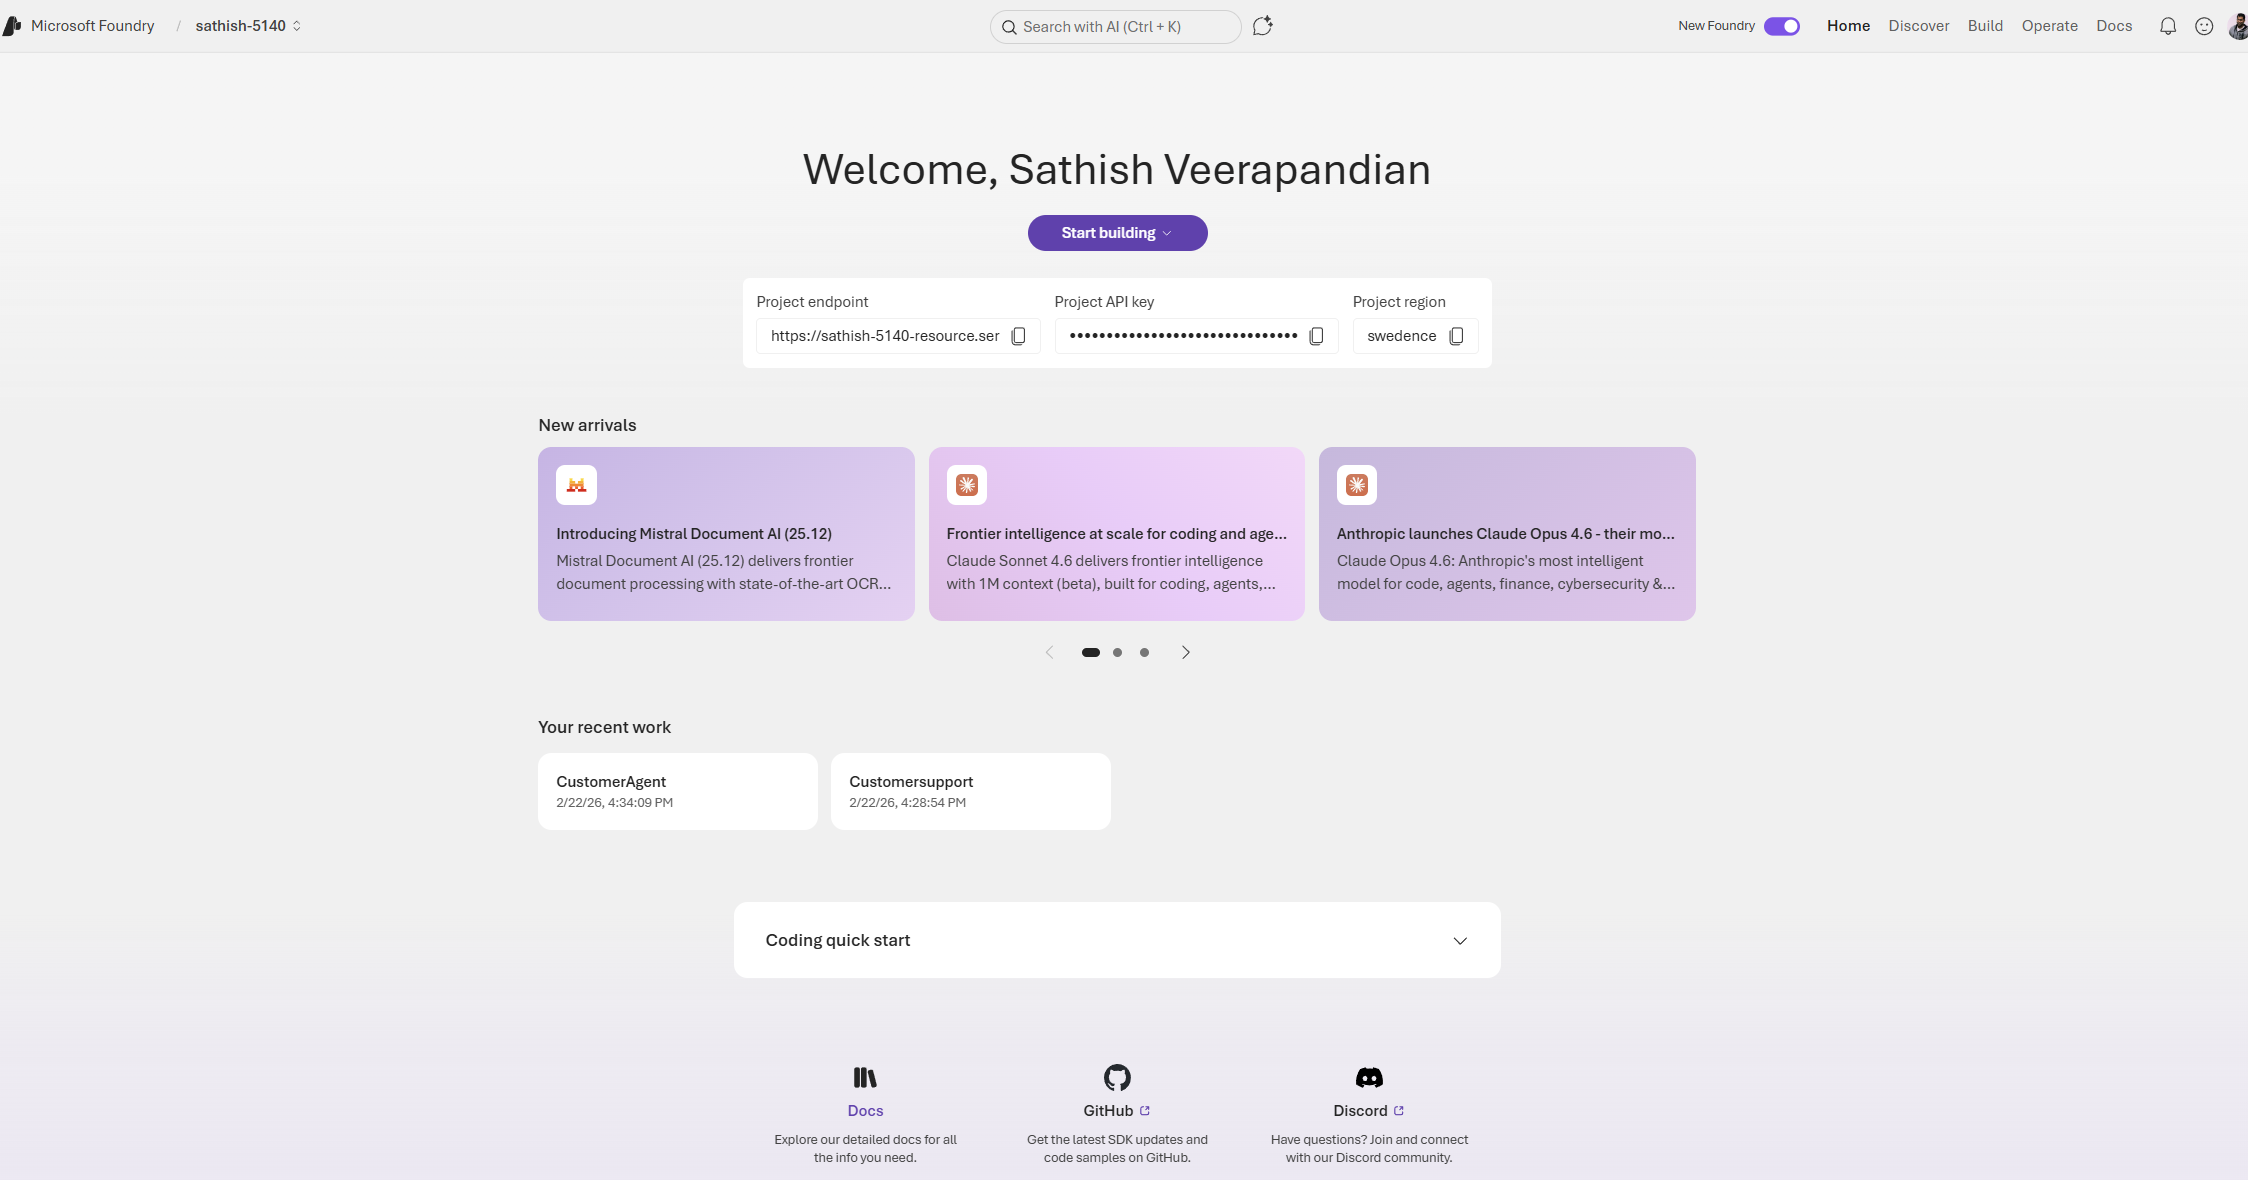
The first thing when we login is we need to switch on the toggle new foundry and it totally brings altogether a new interface and lands us to the dashboard.

This dashboard is the Foundry project home for a developer or team building AI agents. It surfaces the project endpoint and API key for integration, shows the project region, and highlights recent model and tooling updates so teams can stay current. The page also lists recent projects and provides quick links to documentation and community resources, making it a practical launchpad for both prototyping and production work.

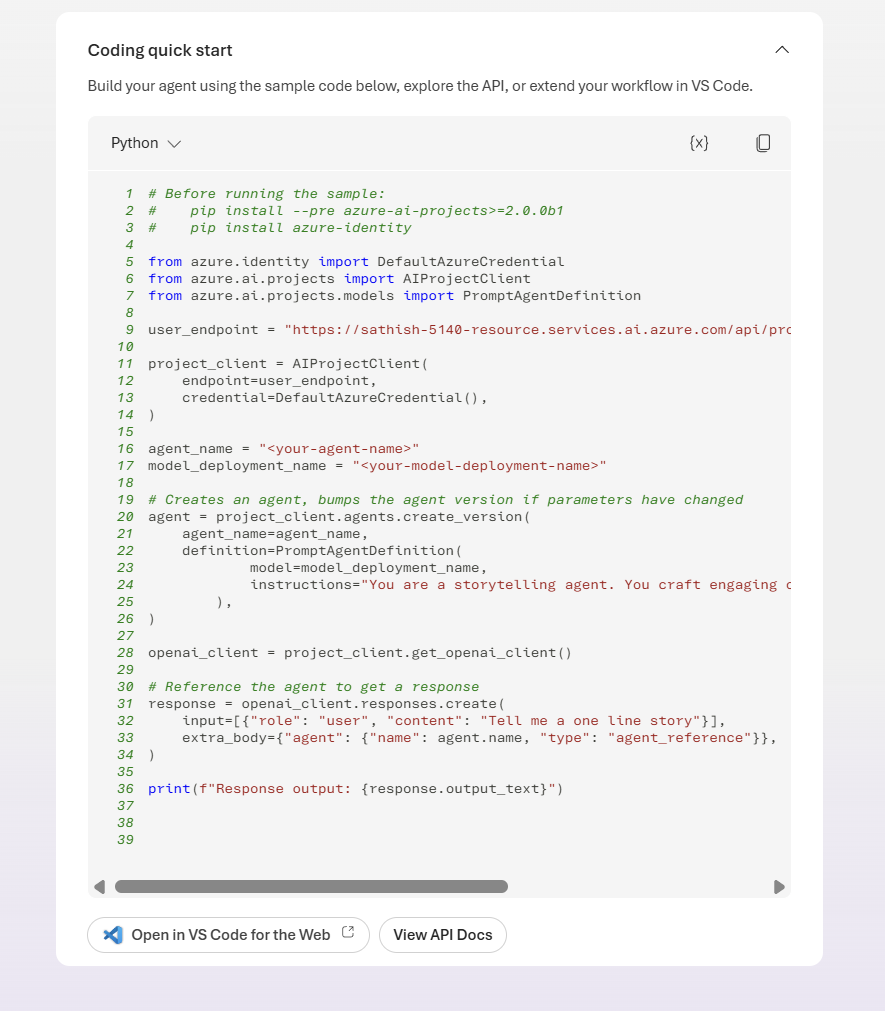
In the coding quick start we have the option coding quick start. We can open in vs code for the web.

Continue reading

Build Trusted AI with Guardrails and Controls in Azure Foundry

As AI systems move from proof of concepts to production, organizations must ensure their applications are safe, secure, and compliant without slowing teams down. Microsoft Azure Foundry brings these capabilities together under Guardrails & Controls, giving builders a central place to filter harmful content, govern agent behavior, block sensitive terms, and receive security insights.

In this walkthrough, We’ll learn how to use the Guardrails & Controls workspace in Azure Foundry with a focus on four areas:

  1. Try it out : experiment with safety checks (text, images, prompts, groundedness)
  2. Content filters : create and assign policy to deployments
  3. Blocklists :ban specific words/phrases from inputs and outputs
  4. Security recommendations : get posture guidance via Defender for Cloud

Why Guardrails Matter ?

Production AI faces unpredictable inputs, sensitive data, and regulatory requirements. Without guardrails, systems can hallucinate, leak private information, or produce unsafe content. Azure Foundry’s Guardrails & Controls reduce those risks by combining content moderation, agent behavior governance, blocked terms, and security posture insights in one place.

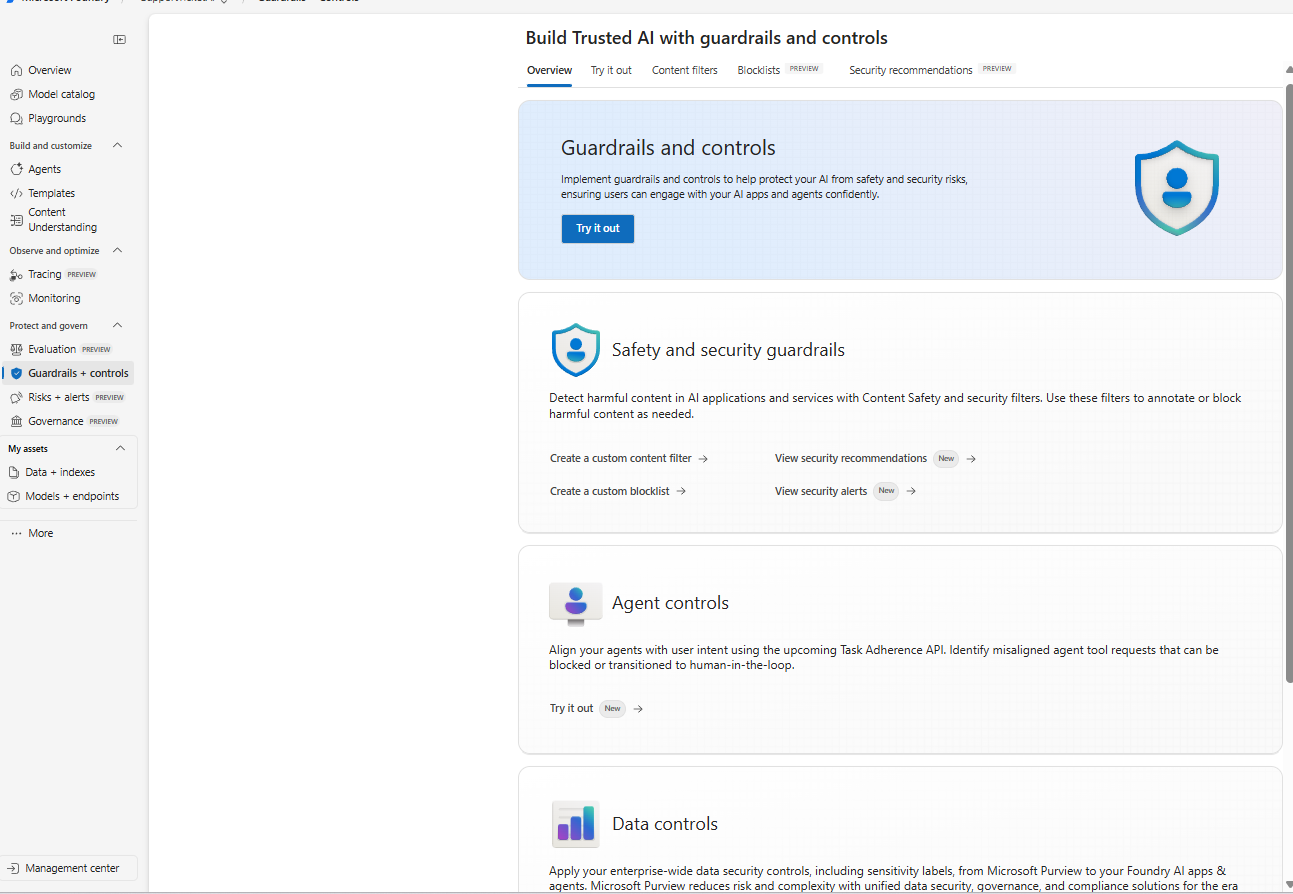
Navigate to Guardrails & Controls.

From your Foundry project:

Foundry → (Your Project) → Guardrails & controls

Guardrails & Controls Overview

The Guardrails & Controls landing page in Azure Foundry with tabs for Try it out, Content filters, Blocklists, and Security recommendations.

What you’re seeing:
The overview introduces the guardrails surface with quick entry points for Safety & security guardrails (content filters, blocklists, alerts) and Agent controls (behavior and tool use governance). Use this page as your starting point to design and test safety policies.

Continue reading