It’s been a long time since I’ve written a blog article about RBAC roles, especially in relation to Exchange. Because working in Exchange areas was my first job, I had the opportunity to have a sneak peek at this topic when a colleague suggested that we consider providing a scaled down permission level for EXO operations search and remove suspicious emails.
It’s always advisable to give the least amount of authorization for daily operational tasks, such as when an end user reports a suspicious spam email to the security team and helpdesk. There are circumstances when global admin is granted for this operation in this case, because by default there is no direct Azure AD built in roles for instance search & purge roles that is present in the compliance center.
Though there is no direct way to assign the permission via Azure AD roles we have the option to connect it to office 365 security and compliance and add this group to search & purge role. We are going to look out for providing such access via this blog.
We will use PIM to grant just-in-time access to Defender for Office 365 related tasks
In our case in this demo we are going to run this example with a user called Selvam who does not have any access apart from a regular user privilege’s. In our example Selvam will be a SOC Admin who is responsible for searching and deleting suspicious emails when an incident is reported.
The first task is to customize and add some permission entry for Selvam .
Navigate to security reader role in roles and administrator.
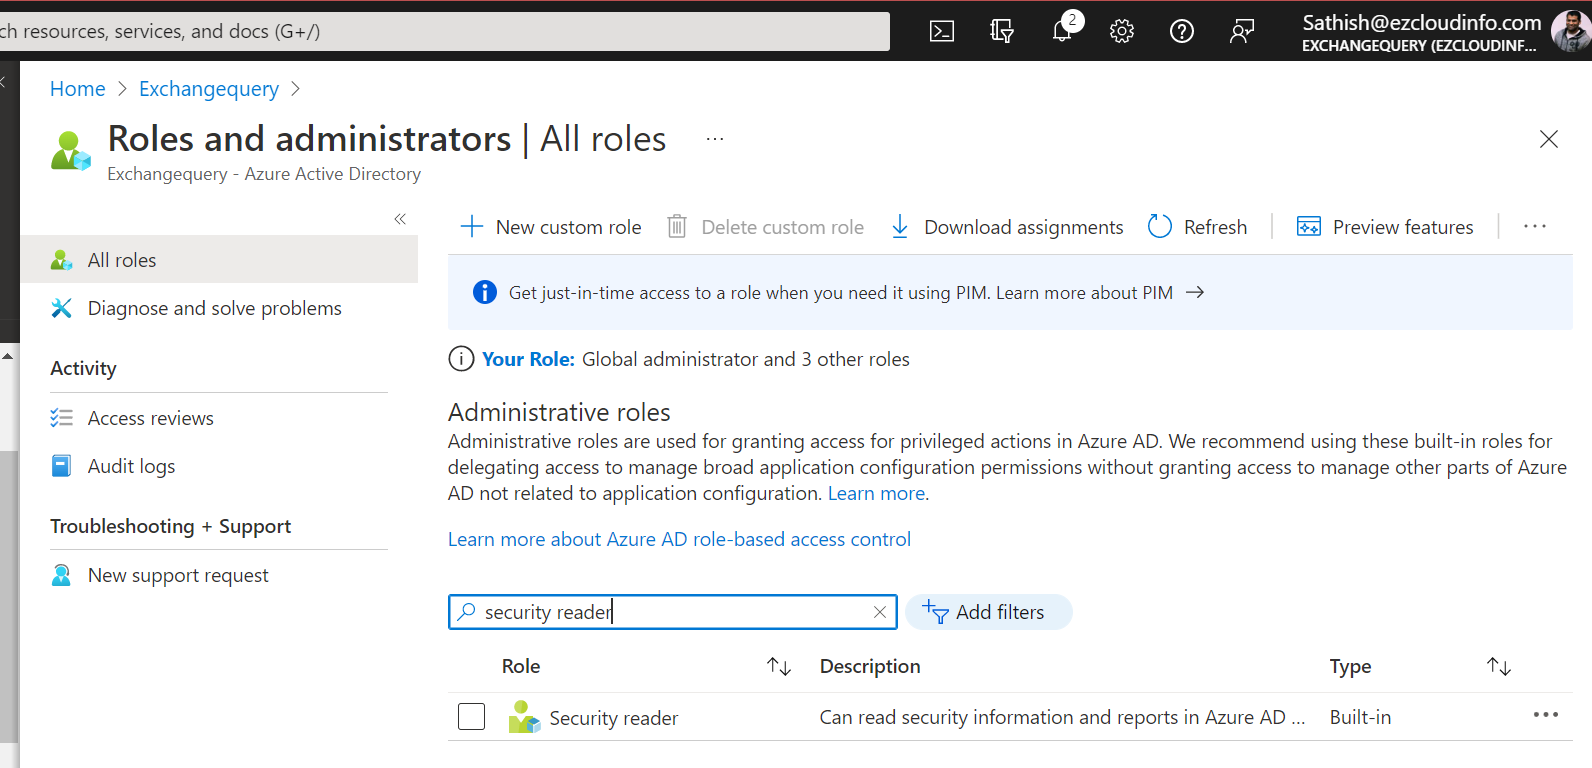
And go to role settings and here we need to tweak the activate maximum duration hours settings

In the next pane we can choose the role settings for example the duration hours to be 24 hours.
Continue reading